Khipu/QuickStartGuide/HowToPlotFunctionsInKhipu ?: Difference between revisions
| Line 10: | Line 10: | ||
==== Plots represented in 2-Dimension ==== | ==== Plots represented in 2-Dimension ==== | ||
When the user clicks on Add Space 2D , it will redirect to the 2D space UI. Then , he/she needs to click on the '''green + button''' which will let the user to add a plot. Then , user needs to select a plot's type ( for example , click on '''Graph''' in Cartesian section if you want to plot a sin curve ! ) You can add a plot's name by checking the plot name's check box. Then , user has to '''add an appropriate equation''' (Analitza type Equation) to see it's plot. If you don't want anything else , '''just hit Enter'''. You can even set the color of the plot by changing the option from the list of colors given below. | When the user clicks on Add Space 2D , it will redirect to the 2D space UI. Then , he/she needs to click on the '''green + button''' which will let the user to add a plot. Then , user needs to select a plot's type ( for example , click on '''Graph''' in Cartesian section if you want to plot a sin curve ! ) You can add a plot's name by checking the plot name's check box. Then , user has to '''add an appropriate equation''' (Analitza type Equation) to see it's plot. If you don't want anything else , '''just hit Enter'''. You can even set the color of the plot by changing the option from the list of colors given below and set an appropriate interval for the arguments of the function. | ||
==== Plots represented in 3-Dimension ==== | ==== Plots represented in 3-Dimension ==== | ||
Revision as of 16:46, 2 September 2013
Idea of Space
Khipu uses an abstraction of space in order to save the plots requested by user. A space will have its name and corresponding description from which it can be identified by the user later in time. Khipu has two types of spaces ( 2D and 3D ). User can save the plot in either of the spaces depending on his/her wish. Every space will contain multiple plots of different colors, intervals and types.
How to plot functions in Khipu ?
As mentioned above , Khipu draws functions in Space. So, there are two ways of adding a Space in Khipu based on the plot's dimension. When you are on the main window of Khipu (Dashboard in terms of Khipu's terminology), you will see a Main Toolbar which contains buttons of Add Space 2D and Add Space 3D. User can select either of them depending on the function he/she wants to plot.
Plots represented in 2-Dimension
When the user clicks on Add Space 2D , it will redirect to the 2D space UI. Then , he/she needs to click on the green + button which will let the user to add a plot. Then , user needs to select a plot's type ( for example , click on Graph in Cartesian section if you want to plot a sin curve ! ) You can add a plot's name by checking the plot name's check box. Then , user has to add an appropriate equation (Analitza type Equation) to see it's plot. If you don't want anything else , just hit Enter. You can even set the color of the plot by changing the option from the list of colors given below and set an appropriate interval for the arguments of the function.
Plots represented in 3-Dimension
How to edit/remove functions from Khipu ?
Editing an already added plot
Removing a plot
If you already know your way around your operating system, you probably also know how to start Amarok, and you can continue. Else, continue reading.
If you are running the Plasma Workspace, you can start Amarok by either:
- pressing on Kickoff and then .
- invoking KRunner (Alt + F2 by default), entering
amarokand then pressing Enter.
From the file manager
Open a multimedia file that Amarok is known to play.
First Time
The first time you use Amarok, a dialog box will come up asking you to specify your locale:

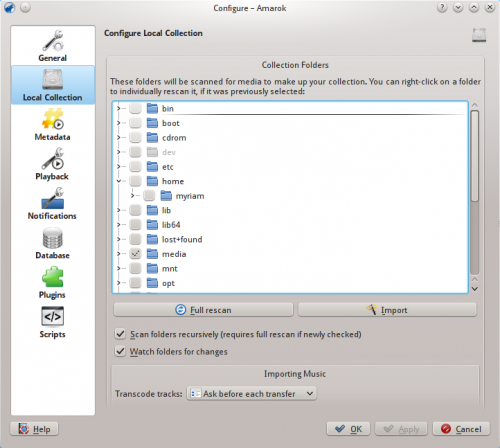
Next, a First Start dialog box will come up asking you to specify where your music is located. If you have a music directory already configured in your system, Amarok should detect it and ask you to use it:

If you select in this dialog, you will be presented with another one which allows you to select your music folder:

Once you have selected the folder where your music is, Amarok will scan the folder and sub-folders, creating the collection. This can take some time, depending on the number of tracks and the speed of the location.
Closing Amarok
If you want to close Amarok:
- Type Ctrl + Q when you are in the Amarok window, or
- Select the option in the menu, or
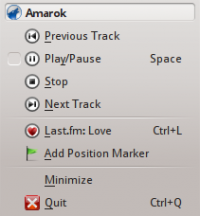
- Right-click on the blue wolf icon in the System Tray at the bottom of your screen. You will be presented with the following:

If you close the Amarok window by clicking on the window border, Amarok will continue to run in the background and only show the blue wolf icon in the System Tray:

If you log out of your session or shut down your computer without quitting Amarok, some of your settings will not be saved.
