Digikam: Difference between revisions
| Line 98: | Line 98: | ||
== Useful digiKam Tricks == <!--T:21--> | == Useful digiKam Tricks == <!--T:21--> | ||
Transcribed from Dmitri | Transcribed from Dmitri Popov's blog, 26 September 2011 | ||
<!--T:22--> | <!--T:22--> | ||
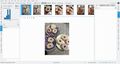
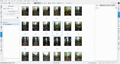
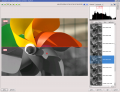
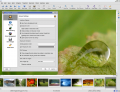
# To quickly adjust thumbnail size in the Album view, press and hold the Ctrl key, then use the mouse scroll wheel to make the thumbnails larger or smaller. | # To quickly adjust thumbnail size in the Album view, press and hold the <keycap>Ctrl</keycap> key, then use the mouse scroll wheel to make the thumbnails larger or smaller. | ||
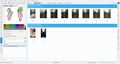
# With the <menuchoice>Non-Destructive editing and Versioning</menuchoice> feature enabled, '''digiKam''' automatically hides originals and displays the latest modified versions of the photos. For example, if you process a NEF file and save it in the JPEG format, '''digiKam''' hides the original RAW file and shows only the JPEG photo. To disable this feature, choose <menuchoice>Settings -> Configure digiKam -> Editing Images</menuchoice> and make sure that the <menuchoice>Always show original images</menuchoice> option in the In main view section is enabled. To keep things tidy, you can then group the original and all its versions. To do this, select the photos you want to group, right-click on the selection, and choose <menuchoice>Group -> Group Selected Here</menuchoice>. | # With the <menuchoice>Non-Destructive editing and Versioning</menuchoice> feature enabled, '''digiKam''' automatically hides originals and displays the latest modified versions of the photos. For example, if you process a NEF file and save it in the JPEG format, '''digiKam''' hides the original RAW file and shows only the JPEG photo. To disable this feature, choose <menuchoice>Settings -> Configure digiKam -> Editing Images</menuchoice> and make sure that the <menuchoice>Always show original images</menuchoice> option in the In main view section is enabled. To keep things tidy, you can then group the original and all its versions. To do this, select the photos you want to group, right-click on the selection, and choose <menuchoice>Group -> Group Selected Here</menuchoice>. | ||
# {{Output|1=The trash has reached its maximum size! Cleanup the trash manually}} If you receive this error message and emptying the Trash doesn’t help, then the following command may solve the problem: {{Input|1=rm ~/.local/share/Trash/metadata}} | # {{Output|1=The trash has reached its maximum size! Cleanup the trash manually}} If you receive this error message and emptying the Trash doesn’t help, then the following command may solve the problem: {{Input|1=rm ~/.local/share/Trash/metadata}} | ||
Revision as of 18:49, 29 September 2011
 |
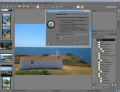
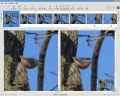
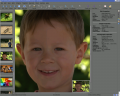
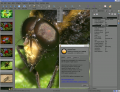
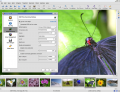
View, manage, edit, enhance, organize, tag, and share photographs. |
DigiKam supports import of photos from cameras, creation of albums, tagging with dates, subjects and other properties, and excellent search facilities. Please consult the manual for full details, including picture formats supported.
Managing your Photos
-
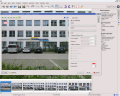
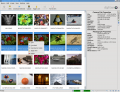
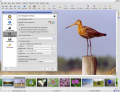
Album View
-
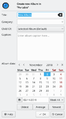
Timeline View
-
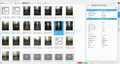
View Exif information
-
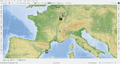
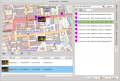
Geolocation
-
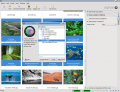
Search View
-
Detailed Search
-
Identify duplicates
-
Fuzzy Search


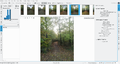
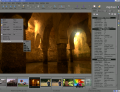
The Image Editor
-
Tagging
-
Assigning a Rating
-
Adjust Colour Levels
-
White Balance Adjustment
-
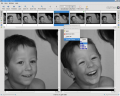
Convert to Black and White
-
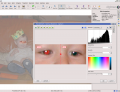
Red-eye correction
-
Auto Colour Correction
-
Lens Auto Correction


The Camera Interface
-
Read from Removable Media
-
or from Camera
-
Save direct to Albums
-
Add Geolocation to Individual Photos


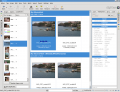
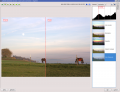
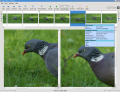
The Light Table
-
Compare from a range of photos
-
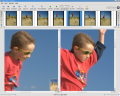
Examine Details
-
Rating makes choice easier
-
See the camera settings


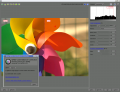
ShowFoto
For those who find the DigiKam interface a tad too technical, ShowFoto gives access to the same tools, with a popular interface.
-
Browsing
-
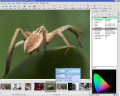
Image Properties
-
See image properties
-
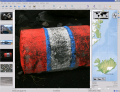
Geolocation again
-
Preset zooms
-
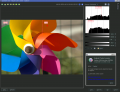
Histogram
-
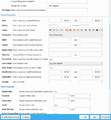
General Settings
-
Tooltip Options
-
Raw Image Settings
-
Colour Management Settings
-

File Saving Options
-
Configure a Slideshow


The support page of the project has links to Frequently Asked Questions (FAQs) and to Mailing List subscription details.
There is a short video tour here.
The section on Digital Asset Management is no longer on the web pages, but in the manual, which may be present on your installation as digikam-doc, or you can download a set of .pdf files, digikam.pdf, showfoto.pdf and kipi-plugins.pdf
The blog Open Source Photo Processing Comes of Age by rm42 highlights developments since the KDE 3 version, and provides a useful tour.
We have a growing collection of tutorials that will help you get more enjoyment and productivity from digikam. The Digikam tutorials page lists them with a brief comment on content.

Useful digiKam Tricks
Transcribed from Dmitri Popov's blog, 26 September 2011
- To quickly adjust thumbnail size in the Album view, press and hold the Ctrl key, then use the mouse scroll wheel to make the thumbnails larger or smaller.
- With the feature enabled, digiKam automatically hides originals and displays the latest modified versions of the photos. For example, if you process a NEF file and save it in the JPEG format, digiKam hides the original RAW file and shows only the JPEG photo. To disable this feature, choose and make sure that the option in the In main view section is enabled. To keep things tidy, you can then group the original and all its versions. To do this, select the photos you want to group, right-click on the selection, and choose .
The trash has reached its maximum size! Cleanup the trash manually
If you receive this error message and emptying the Trash doesn’t help, then the following command may solve the problem:rm ~/.local/share/Trash/metadata
- Need to quickly locate all untagged photos? In digiKam, expand the left sidebar, and press the button. In the window, tick the check box and press to run the search.
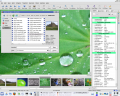
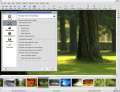
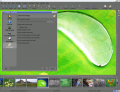
- Instead of the conventional thumbnail view, digiKam lets you map your photos on a globe. Choose , and you should see photos from the current album mapped on the 3-D globe. You can then use the mouse to rotate the globe and the mouse wheel to zoom in and out. Obviously, the Map view displays only geotagged photos.
