Digikam/Calendars/fr: Difference between revisions
(Created page with "Quand vous faites ça, une fenêtre va apparaître.") |
(Created page with "Ici vous pouvez changer quelques paramètres. ;Taille du papier: :Vous avez le choix entre 2 tailles standards <menuchoice>A4</menuchoice> et <menuchoice>US Letter</menuchoic...") |
||
| Line 23: | Line 23: | ||
Ici vous pouvez changer quelques paramètres. | |||
; | ;Taille du papier: | ||
: | :Vous avez le choix entre 2 tailles standards <menuchoice>A4</menuchoice> et <menuchoice>US Letter</menuchoice>. | ||
; | ;Résolution: | ||
: | :Vous avez le choix entre <menuchoice>Haute</menuchoice> or <menuchoice>Basse</menuchoice> | ||
Position de l'image: | |||
: | :Définir la position où apparait l'image dans le calendrier. | ||
; | ;Tracer des lignes sur le calendrier: | ||
: | :Vous pouvez soit faire apparaître ou disparaître les lignes qui apparaissent. | ||
; | ;Proportion de l'image par rapport au texte: | ||
: | :Augmente la taille de l'image ou réduire accordement au ratio définie. En bougeant le curseur, la prévisualisation change en même temps que vous ajustez le ratio. | ||
; | ;Police: | ||
: | :Sélectionner la police de caractère qui va être utilisée. | ||
; | ;Année: | ||
: | :Sélectionner l'année qui va être utilisée. | ||
When you have completed this click <menuchoice>Next</menuchoice> in the wizard and you will be greeted with this window: | When you have completed this click <menuchoice>Next</menuchoice> in the wizard and you will be greeted with this window: | ||
Revision as of 15:15, 24 January 2019
Créer un calendrier avec DigiKam
Saviez-vous que vous pouvez créer un calendrier avec DigiKam ? C'est très simple à faire. Vous avez juste besoin de sélectionner quelques photos, de préférence 12, de cette manière les 12 photos correspondent au 12 mois de d'années.
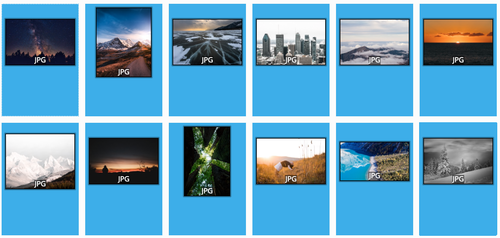
Après avoir sélectionné une image, cliquer sur .
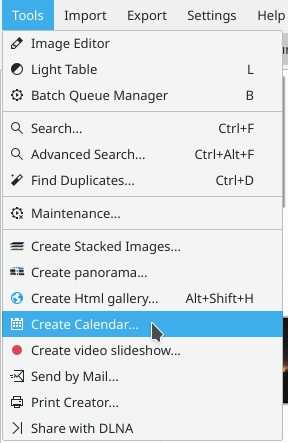
Quand vous faites ça, une fenêtre va apparaître.
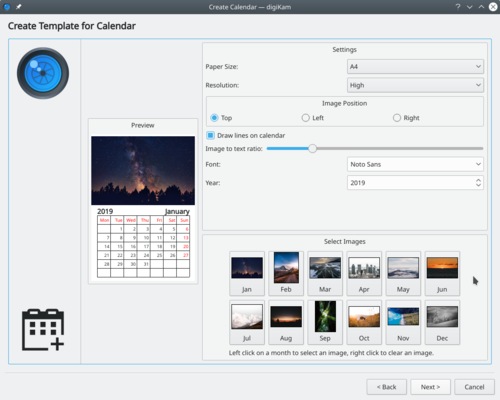
Ici vous pouvez changer quelques paramètres.
- Taille du papier
- Vous avez le choix entre 2 tailles standards et .
- Résolution
- Vous avez le choix entre or
Position de l'image:
- Définir la position où apparait l'image dans le calendrier.
- Tracer des lignes sur le calendrier
- Vous pouvez soit faire apparaître ou disparaître les lignes qui apparaissent.
- Proportion de l'image par rapport au texte
- Augmente la taille de l'image ou réduire accordement au ratio définie. En bougeant le curseur, la prévisualisation change en même temps que vous ajustez le ratio.
- Police
- Sélectionner la police de caractère qui va être utilisée.
- Année
- Sélectionner l'année qui va être utilisée.
When you have completed this click in the wizard and you will be greeted with this window:
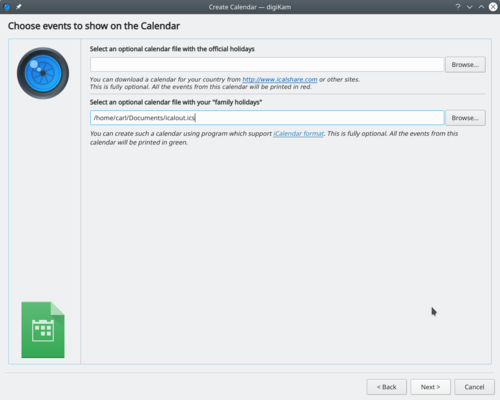
The website iCalshare has many great templates that can be used. They are free to use and download. All you need to do is register an account with them. It includes templates which contain much information on public holidays and events of many countries. I searched this website for Maldives, however I didn’t find anything about my country here, so I skipped this.
If you are using KOrganizer to organize your daily work and if you have marked special days like birthdays of friends and relatives you could really use this feature. And it is a very simple process. Open up KOrganizer, go to and save the calendar file on to your computer. Then select the folder button on the window from the current screenshot and show it to the file manager and select . This will add that to your calendar. Then press in the wizard. And you will see this window.
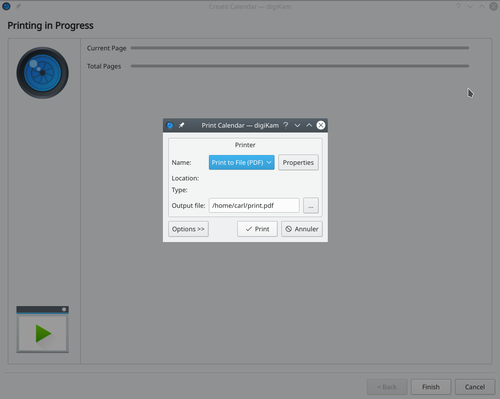
When you are done press and it will generate a 12 page PDF file exactly like a calendar.
You can either send it directly to your printer or print to a PDF file. However according to my personal opinion it will be a wise decision to print to PDF first so that you can see what you have created. If you need to change the printer properties, press . You will be able to change the page layout (portrait, landscape) and the units of measurements (cm, inches, px, etc.). By default, the output file will be made in your home folder. If you need to change the location press the button on the right and specify manually.

