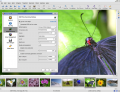
Digikam
 |
Visualitza, gestiona, edita, millora, organitza, etiqueta i comparteix fotografies. |
DigiKam permet la importació de fotografies des de càmeres, la creació d'àlbums, l'etiquetat amb dates, peus de foto i altres propietats, i facilitats de cerca excel·lents. Si us plau, consulteu el manual per veure tots els detalls, inclosos els formats d'imatge compatibles.
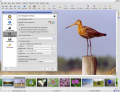
Gestionar les vostres fotos
-
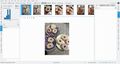
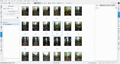
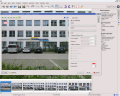
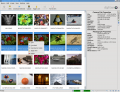
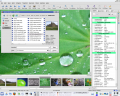
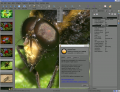
Vista d'àlbum
-
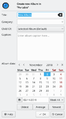
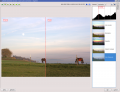
La línia de temps
-
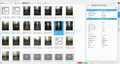
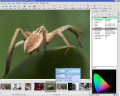
Visualitza la informació EXIF
-
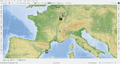
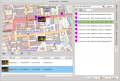
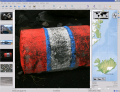
Geolocalització
-
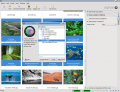
La cerca
-
La cerca detallada
-
Identifica els duplicats
-
Cerca aproximada


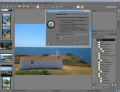
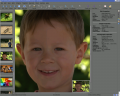
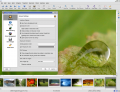
L'editor d'imatges
-
Etiqueta
-
Assigna una valoració
-
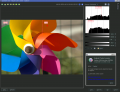
Ajusta els nivells de color
-
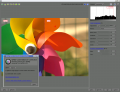
Ajusta de balanç de blancs
-
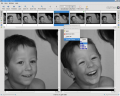
Converteix a blanc i negre
-
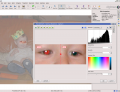
Corregeix els ulls vermells
-
Correcció automàtica del color
-
Correcció automàtica de les lents


La interfície per a càmeres
-
Lectura de suports extraïbles
-
o des de la càmera
-
Desa directament als àlbums
-
Afegeix geolocalització a les fotos individualment


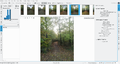
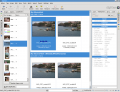
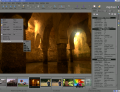
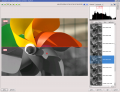
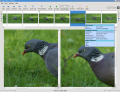
La taula de llum
-
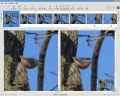
Compara una sèrie de fotos
-
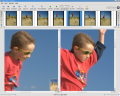
Examina els detalls
-
Les valoracions fan que triar sigui més fàcil
-
Visualitza la configuració de la càmera


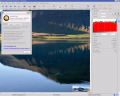
ShowFoto
Pels que trobin la interfície de DigiKam massa tècnica, ShowFoto dóna accés a les mateixes eines, amb una interfície popular.
-
Navegació
-
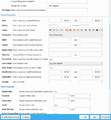
Propietats de la imatge
-
Visualitza les propietats de la imatge
-
Altra vegada la geolocalització
-
Zooms predefinits
-
Histograma
-
Arranjament general
-
Opcions de la informació emergent
-
Ajustament de la imatge RAW
-
Ajustament de la gestió del color
-

Opcions del desat de fitxers
-
Configuració d'un passi de diapositives


La pàgina de suport del projecte té enllaços a les Frequently Asked Questions (FAQs) i als detalls per a la subscripció a la Llista de correu.
Hi ha un curt vídeo d'introducció aquí.
The section on Digital Asset Management is no longer on the web pages, but in the manual, which may be present on your installation as digikam-doc, or you can download a set of .pdf files, digikam.pdf, showfoto.pdf and kipi-plugins.pdf
The blog Open Source Photo Processing Comes of Age by rm42 highlights developments since the KDE 3 version, and provides a useful tour.
We have a growing collection of tutorials that will help you get more enjoyment and productivity from digikam. The Digikam tutorials page lists them with a brief comment on content.

Useful digiKam Tricks
Transcribed from Dmitri Popov's blog, 26 September 2011
- To quickly adjust thumbnail size in the Album view, press and hold the Ctrl key, then use the mouse scroll wheel to make the thumbnails larger or smaller.
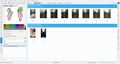
- With the feature enabled, digiKam automatically hides originals and displays the latest modified versions of the photos. For example, if you process a NEF file and save it in the JPEG format, digiKam hides the original RAW file and shows only the JPEG photo. To disable this feature, choose and make sure that the option in the In main view section is enabled. To keep things tidy, you can then group the original and all its versions. To do this, select the photos you want to group, right-click on the selection, and choose .
The trash has reached its maximum size! Cleanup the trash manually
If you receive this error message and emptying the Trash doesn’t help, then the following command may solve the problem:rm ~/.local/share/Trash/metadata
- Need to quickly locate all untagged photos? In digiKam, expand the left sidebar, and press the button. In the window, tick the check box and press to run the search.
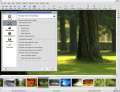
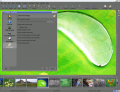
- Instead of the conventional thumbnail view, digiKam lets you map your photos on a globe. Choose , and you should see photos from the current album mapped on the 3-D globe. You can then use the mouse to rotate the globe and the mouse wheel to zoom in and out. Obviously, the Map view displays only geotagged photos.

digiKam 2.2.0 Installer for Windows
In his blog of 22 October, 2011, Dmitri Popov writes:
"Good news for those who want to run the latest version of digiKam on Windows. The SourceForge repository now has a Windows installer of the latest digiKam version courtesy of Ananta Palani.

I tested the installer with a Windows 7 machine, it worked like a charm. While the installer makes it supremely easy to deploy digiKam on Windows, the application does have a few quirks. Most notably, the Windows version of digiKam cannot import photos directly from storage media or cameras, so you need to copy them to the hard disk using Windows’ own built-in image transfer tool, and then add the transferred photos to digiKam. The Trash feature doesn’t work either, but you can work around this issue by deleting photos instead of sending them to the trash. To be fair, though, these issues are not caused by digiKam itself, but are due to bugs in the underlying KDE libraries which the application relies on."