K3b/ja: Difference between revisions
Masahiroyam (talk | contribs) (Created page with "新たにプロジェクトを開始するとき、CDまたはDVDのように'''K3b'''が正しく光学メディアを検出していることを確認するべきです。画...") |
Masahiroyam (talk | contribs) (Created page with "これから作成するファイルを選択します。") |
||
| Line 52: | Line 52: | ||
これから作成するファイルを選択します。 | |||
The top half of the screen is the ''source pane''; it functions like a file manager. You can choose ordinary files from mounted data volumes or audio tracks from inserted audio discs. Names of audio tracks are automatically read from CD-TEXT data, if your CD drive supports reading it, or generated using [http://libcddb.sourceforge.net/ CDDB]; the exact format is controlled by a button in the bottom pane. If the names are incorrect or simply do not match the description of the disc, you can edit them using the toolbar button. Your changes will be cached locally and submitted to the master registry at [http://www.freedb.org/ FreeDB]. <small>Internet connection fees apply.</small> | The top half of the screen is the ''source pane''; it functions like a file manager. You can choose ordinary files from mounted data volumes or audio tracks from inserted audio discs. Names of audio tracks are automatically read from CD-TEXT data, if your CD drive supports reading it, or generated using [http://libcddb.sourceforge.net/ CDDB]; the exact format is controlled by a button in the bottom pane. If the names are incorrect or simply do not match the description of the disc, you can edit them using the toolbar button. Your changes will be cached locally and submitted to the master registry at [http://www.freedb.org/ FreeDB]. <small>Internet connection fees apply.</small> | ||
Revision as of 09:35, 9 February 2011
 |
はじめに
WindowsでNeroのようなCD作成プログラムを使ったことがある場合、K3bは非常になじみがあるように感じるでしょう。
簡単ではあるが強力なグラフィカルインターフェイスであるという特長を持つK3bはCD、DVDまたはBD(ブルーレイディスク)を作成する上で様々な機能を提供します。光学ディスクの様々な形式に対応しています。その中にはオーディオとデータ、DVDとビデオCDへの映像の書き込み、それだけでなくマルチセッションや複合形式のディスク(これらに限定されない)があります。K3bはまた再書き込み可能なメディアを消去する機能やオーディオ、映像のエンコードやデコードのようなより複雑な処理を行うことができます。
設定の前に
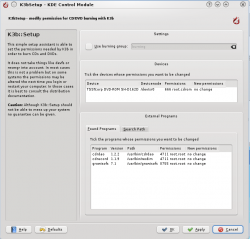
K3bを初めて実行したとき、K3bが光学ドライブの書き込みドライバを見つけられないということを知らせるでしょう。このことは光学ディスクを書き込むことができないということを意味します。K3bがK3bにより用いられ動作する様々なツールを得る設定のウィンドウを開くので慌てる必要はありません。この動作にはこれらのアプリケーションが所有するユーザーグループへの参照が含まれています。K3bがそれら外部のプログラムそのものに適切なアクセス権を適用するのでこの設定を変更する必要はありません。これらのプログラムは通常cdrecord、growisofs、そしてcdrdaoです。お好みで、K3bへburningというユーザーグループを用い光学ドライブを指定することができます。以下にあるのはこれらの設定により行われた設定ウィンドウの画像です。
ユーザーインターフェイスの設定
K3bの起動時3つの最もよく知られている処理のクイックスタートを提示されます。
- 新しいデータプロジェクト
- 新しいオーディオCDプロジェクト
- メディアからコピー
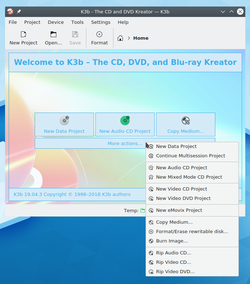
K3bはこれらの作業よりも多くのことを実行できます。そしてその他の候補のいくつかはあなたにとってぴったりと使いやすいでしょう。他の利用できる機能を経験するためにこの一覧を見て下さい(画像をクリックして拡大して下さい):
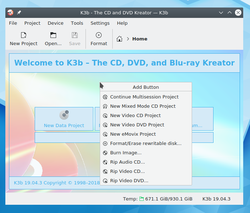
おそらくこれらの作業のうちの一つまたはそれ以上のクイックスタートが有用であり、それでK3bもまたそれを提供しています。単純にデスクトップのアプリケーションを右クリックすると、こちらのように追加ボタンのメニューを見ることになるでしょう:
内部の設定
既定の設定のほとんどは単純にそのままにしておくことができます。しかしながら、詳細設定のページを参照することをお勧めします。こちらには様々な重要な設定を、必要であれば、行うことができます。
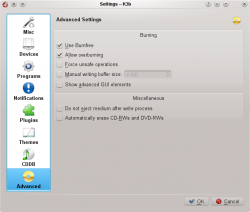
- Burnfreeを使うは設定されているべきです—これはディスクの作成をコントロールし、バッファが絶対に危険なほど低くならない(ディスク作成の失敗の量を減らす)ということを保証します。
- 再書き込み可能なディスクを自動的に消去することもできます。
- 書き込み完了後にメディアをイジェクトしないという選択肢はもしお使いのドライブが検証をするために十分な早さで閉じることができないときに非常に有用です。
ディスク作成の準備
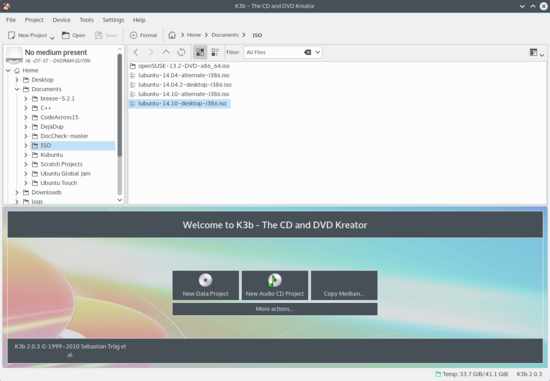
新たにプロジェクトを開始するとき、CDまたはDVDのようにK3bが正しく光学メディアを検出していることを確認するべきです。画面の下にある状況を示す行に現在入れられているディスクのサイズを見ることができるでしょう。これが正しくない場合、または異なったサイズが必要な場合、単にその上を右クリックし提供された一覧からお好みのサイズを設定して下さい:
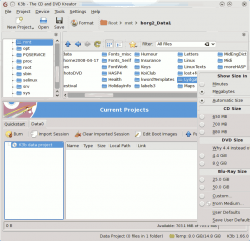
これから作成するファイルを選択します。
The top half of the screen is the source pane; it functions like a file manager. You can choose ordinary files from mounted data volumes or audio tracks from inserted audio discs. Names of audio tracks are automatically read from CD-TEXT data, if your CD drive supports reading it, or generated using CDDB; the exact format is controlled by a button in the bottom pane. If the names are incorrect or simply do not match the description of the disc, you can edit them using the toolbar button. Your changes will be cached locally and submitted to the master registry at FreeDB. Internet connection fees apply.
Now that you have your sources at hand, simply drag and drop the files and directories you wish to burn onto the large pane to the right at the bottom; this is the model pane. Behold a tree of your chosen files forming to the left. Should there be some files or directories which you do not want to burn, these can be easily removed from the project by simply removing them from the panel at the bottom. Select the file to be removed (you can control-click to select multiple ones), then choose from the context menu.
The top line will be the title of the disk. In many cases this will be fine, but if you would like to change this to something else, simply rename it using the context menu.
Final Steps
You are now ready to hit the Burn button.
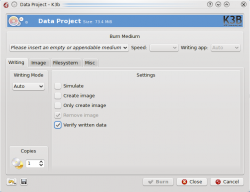
You will see on my screenshot that no disk was present. When you have inserted the appropriate disk you will see a description of it on that line.
There are still one or two choices to be made. I would recommend that you set Verify written data, then hit the Save icon at the bottom of the screen, ensuring that it becomes your personal default. For most modern drives it's safe to leave mode and speed to Auto. If you may wish to burn another copy of the disk at a later date, select Create image, which will save having to set up the burn again. Set the number of copies you want to burn, then, when you are satisfied, hit Burn.
Burning an Audio CD
This page tells you how to burn an audio CD from your stored files.

