Archive:Kdenlive/Manual/Monitors: Difference between revisions
(added: multiple guide overlays, drag audio or video only) |
m (Claus chr moved page Kdenlive/Manual/Monitors to Archive:Kdenlive/Manual/Monitors without leaving a redirect: Part of translatable page "Kdenlive/Manual/Monitors") |
||
| (12 intermediate revisions by 5 users not shown) | |||
| Line 8: | Line 8: | ||
'''Kdenlive''' uses 2 monitor widgets to display your videos: '''Clip Monitor''' and '''Project Monitor'''. A third monitor - the '''Record Monitor''' - previews video capture. These monitors can be selected by clicking the corresponding tabs which appear at the bottom of the monitor window. | '''Kdenlive''' uses 2 monitor widgets to display your videos: '''Clip Monitor''' and '''Project Monitor'''. A third monitor - the '''Record Monitor''' - previews video capture. These monitors can be selected by clicking the corresponding tabs which appear at the bottom of the monitor window. | ||
===Resizing the Monitors === <!--T:32--> | ==== Resizing the Monitors ==== <!--T:32--> | ||
You can resize the monitors by dragging the sizing widget. It is a bit tricky to find the bottom widget. You need to hover just between the bottom of the monitor tab and the timeline | You can resize the monitors by dragging the sizing widget. It is a bit tricky to find the bottom widget. You need to hover just between the bottom of the monitor tab and the timeline | ||
[[File:Kdenlive Scale project monitor.png]] | [[File:Kdenlive Scale project monitor.png]] | ||
</translate><span id="Clip Monitor"><translate> | </translate><span id="Clip Monitor"><translate> | ||
====Monitor zoombar==== <!--T:60--> | |||
Since Version 20.08.0 | |||
<!--T:61--> | |||
The Monitors get zoom bars. To activate: hover over the timeline ruler and <keycap>CTRL + Mouse wheel</keycap>. | |||
<!--T:62--> | |||
[[File: clip-monitor-zoombar.mp4]] | |||
<!--T:43--> | |||
Since version 19.04.0 | Since version 19.04.0 | ||
<!--T:44--> | |||
Support for external monitor display using Blackmagic Design decklink cards. | Support for external monitor display using Blackmagic Design decklink cards. | ||
=== Monitor toolbar === | ==== Monitor toolbar ==== <!--T:45--> | ||
<!--T:46--> | |||
Since version 19.04.0 | Since version 19.04.0 | ||
<!--T:47--> | |||
[[File:monitors.gif]] | [[File:monitors.gif]] | ||
Support multiple guide overlays. Move with the mouse to the upper right corner of the monitor to access the toolbar. | <!--T:48--> | ||
Support multiple guide overlays. Move with the mouse to the upper-right corner of the monitor to access the toolbar. | |||
====Preview resolution==== <!--T:53--> | |||
<!--T:54--> | |||
Since version 20.04.0 | |||
[[File:preview.gif]] | |||
<!--T:55--> | |||
Preview resolution speeds up the editing experience by scaling the video resolution of the monitors. It can be used of proxies instead. | |||
| Line 33: | Line 59: | ||
==== Widgets on the Clip Monitor ==== <!--T:26--> | ==== Widgets on the Clip Monitor ==== <!--T:26--> | ||
<!--T:67--> | |||
<!--(-->0) '''Insert Zone In Project Bin''' button - click this to add the current zone to the project bin. The selected zone will appear as child clip in the project bin - like the clip shown as Zone1 in the screen shot. | |||
<!--T:8--> | <!--T:8--> | ||
| Line 55: | Line 84: | ||
<!--T:27--> | <!--T:27--> | ||
Zones are defined regions of clips that are | Zones are defined regions of clips that are indicated by a colored section in the clip monitor's timeline - see item 3 above. The beginning of a zone is set by clicking '''[''' (item 1 in the pic above). The end of a zone is set by clicking ''']''' (item 2 in the pic above) | ||
==== Clip Monitor Right-click menu ==== <!--T:21--> | ==== Clip Monitor Right-click menu ==== <!--T:21--> | ||
| Line 64: | Line 93: | ||
</translate><span id="Project Monitor"></span><translate> | </translate><span id="Project Monitor"></span><translate> | ||
=== | ====Seeking==== <!--T:63--> | ||
<!--T:64--> | |||
Since Version 20.08.0 | |||
<!--T:65--> | |||
Inside the clip monitor: hold down <keycap>shift</keycap> and move the mouse left/right. | |||
====Drag audio or video only of a clip in timeline==== <!--T:49--> | |||
<!--T:50--> | |||
[[File:Clip_monitors_AV-selection.gif]] | [[File:Clip_monitors_AV-selection.gif]] | ||
<!--T:51--> | |||
Since version 19.04.0 | Since version 19.04.0 | ||
Move with the mouse to lower left corner of the clip monitor to access the Video/Audio icons. Hover with the mouse either over the audio or video icon left click to drag either video or audio part into the timeline. | <!--T:52--> | ||
Move with the mouse to the lower-left corner of the clip monitor to access the Video/Audio icons. Hover with the mouse either over the audio or video icon left click to drag either video or audio part into the timeline. | |||
=== Project Monitor === <!--T:14--> | === Project Monitor === <!--T:14--> | ||
| Line 111: | Line 151: | ||
</translate><span id="Record Monitor"></span><translate> | </translate><span id="Record Monitor"></span><translate> | ||
====Multicam Editing==== <!--T:56--> | |||
<!--T:57--> | |||
Since version 20.04.0 | |||
<!--T:66--> | |||
Enable the multirack view via menu <menuchoice>Monitor</menuchoice>→<menuchoice>Multitrack view</menuchoice> | |||
<!--T:58--> | |||
[[File: multicam.gif]] | |||
<!--T:59--> | |||
New multicam editing interface allows you to select a track in the timeline by clicking on the project monitor. | |||
=== Record Monitor === <!--T:19--> | === Record Monitor === <!--T:19--> | ||
| Line 142: | Line 196: | ||
<!--T:35--> | <!--T:35--> | ||
To put the monitors back into the Tabbed | To put the monitors back into the Tabbed view - click on the monitor's title bar and drag the window on top of the other monitor window. | ||
<!--T:36--> | <!--T:36--> | ||
Latest revision as of 14:51, 11 August 2023
Monitors
Kdenlive uses 2 monitor widgets to display your videos: Clip Monitor and Project Monitor. A third monitor - the Record Monitor - previews video capture. These monitors can be selected by clicking the corresponding tabs which appear at the bottom of the monitor window.
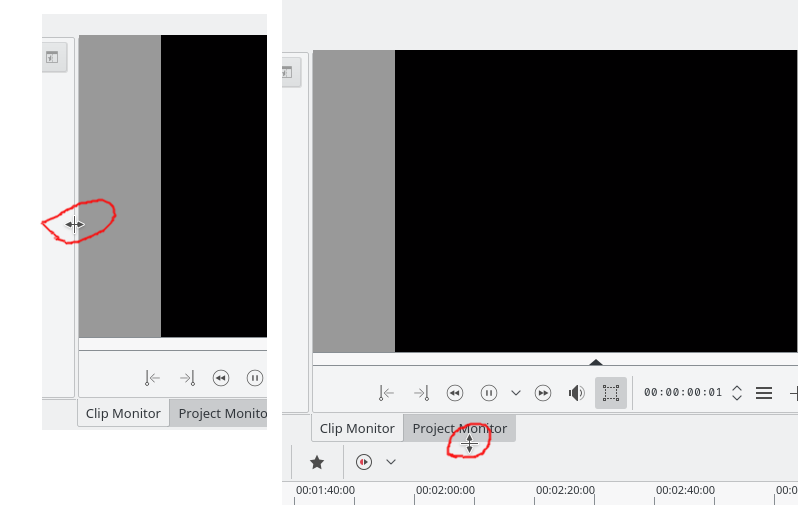
Resizing the Monitors
You can resize the monitors by dragging the sizing widget. It is a bit tricky to find the bottom widget. You need to hover just between the bottom of the monitor tab and the timeline
Monitor zoombar
Since Version 20.08.0
The Monitors get zoom bars. To activate: hover over the timeline ruler and CTRL + Mouse wheel.
Since version 19.04.0
Support for external monitor display using Blackmagic Design decklink cards.
Monitor toolbar
Since version 19.04.0
Support multiple guide overlays. Move with the mouse to the upper-right corner of the monitor to access the toolbar.
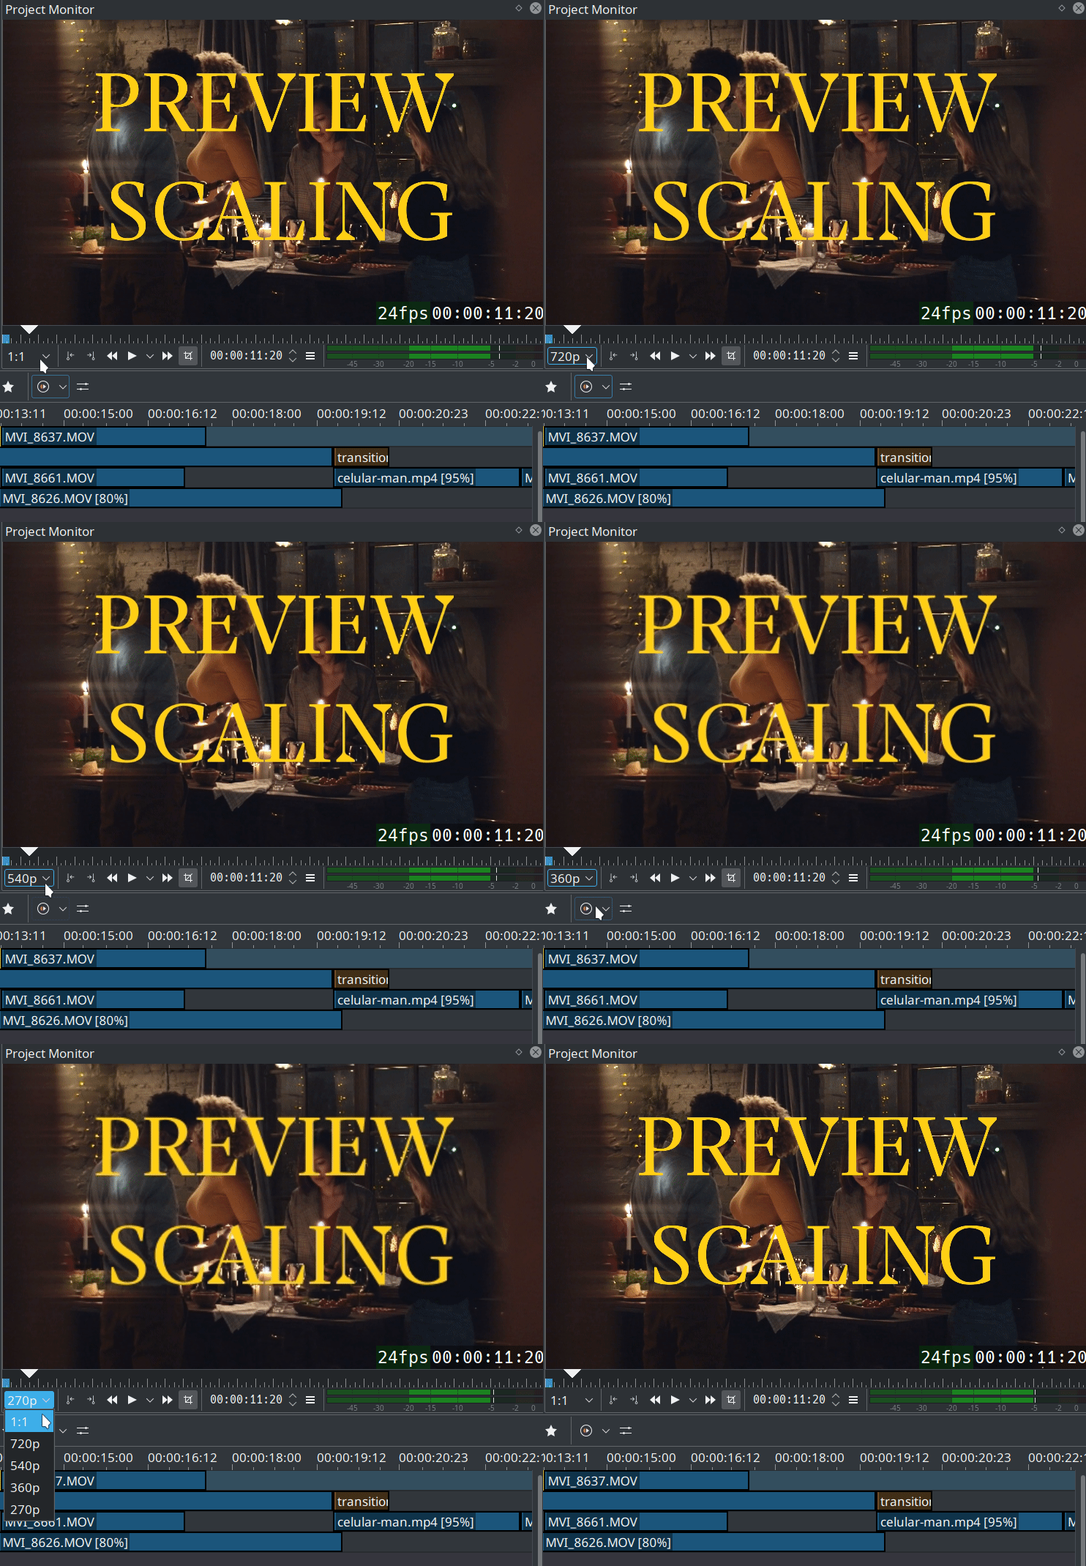
Preview resolution
Since version 20.04.0
Preview resolution speeds up the editing experience by scaling the video resolution of the monitors. It can be used of proxies instead.
Clip Monitor
The Clip monitor displays the unedited clip that is currently selected in the Project Tree.
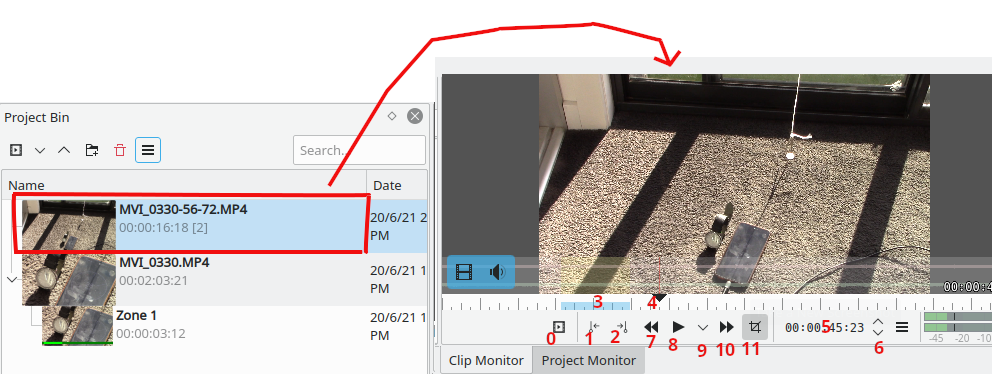
Widgets on the Clip Monitor
0) Insert Zone In Project Bin button - click this to add the current zone to the project bin. The selected zone will appear as child clip in the project bin - like the clip shown as Zone1 in the screen shot.
1) Set zone start button - click this to set an 'in' point.
2) Set zone end button - click this to set an 'out' point.
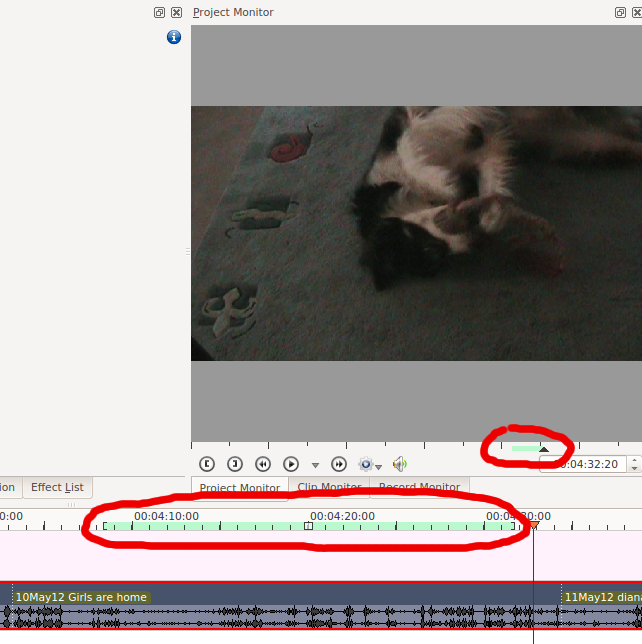
3) Zone duration indicator - selected by setting in and out points. Dragging the clip from the clip monitor to the timeline when there is a selected zone causes the selected zone, not the entire clip, to be copied to the timeline.
4) Position Caret - can be dragged in the clip. (In ver >=0.9.4 and with OpenGL turned on in Settings -> Configure Kdenlive -> Playback, audio will play as you drag this.)
5) Timecode widget - type a timecode here and hit Enter to go to an exact location in the clip. Timecode is in the format hours:minutes:seconds:frames (where frames will correspond to the number of frames per second in your project profile).
6) Timecode arrows - can be used to change the current position of the clip in the clip monitor.
Creating Zones in Clip Monitor
Zones are defined regions of clips that are indicated by a colored section in the clip monitor's timeline - see item 3 above. The beginning of a zone is set by clicking [ (item 1 in the pic above). The end of a zone is set by clicking ] (item 2 in the pic above)
The Clip Monitor has a right-click (context) menu as described here.
Seeking
Since Version 20.08.0
Inside the clip monitor: hold down shift and move the mouse left/right.
Drag audio or video only of a clip in timeline
Since version 19.04.0
Move with the mouse to the lower-left corner of the clip monitor to access the Video/Audio icons. Hover with the mouse either over the audio or video icon left click to drag either video or audio part into the timeline.
Project Monitor
The Project Monitor displays your project's timeline - i.e. the edited version of your video.
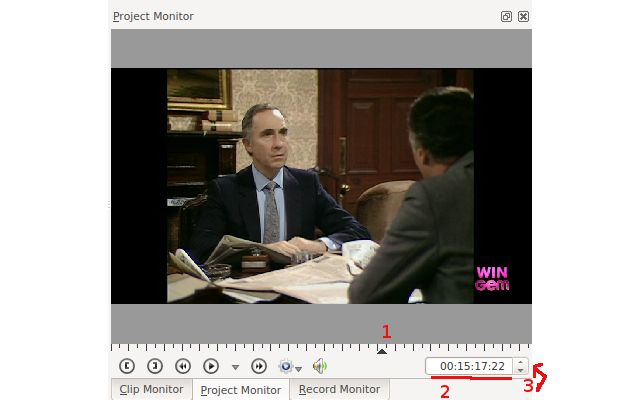
Project Monitor Widgets
1) The position caret. Shows the current location in the project relative to the whole project. You can click and drag this to move the position in the project.
2) The timecode widget. You can type a timecode here and press Enter to bring the Project Monitor to an exact location.
3) Timecode widget control arrows. You can move the Project Monitor one frame at a time with these.
Creating Zones in Project Monitor
You can use the [ and ] buttons to create a zone in the Project Monitor the same way you make zones in the clip monitor. The zone will be indicated by a colored bar both on the timeline and underneath the Project Monitor.
You can get Kdenlive to only render the selected zone - see Rendering Using the Selected Zone Option.
The project monitor has a right-click (context menu) as described here.
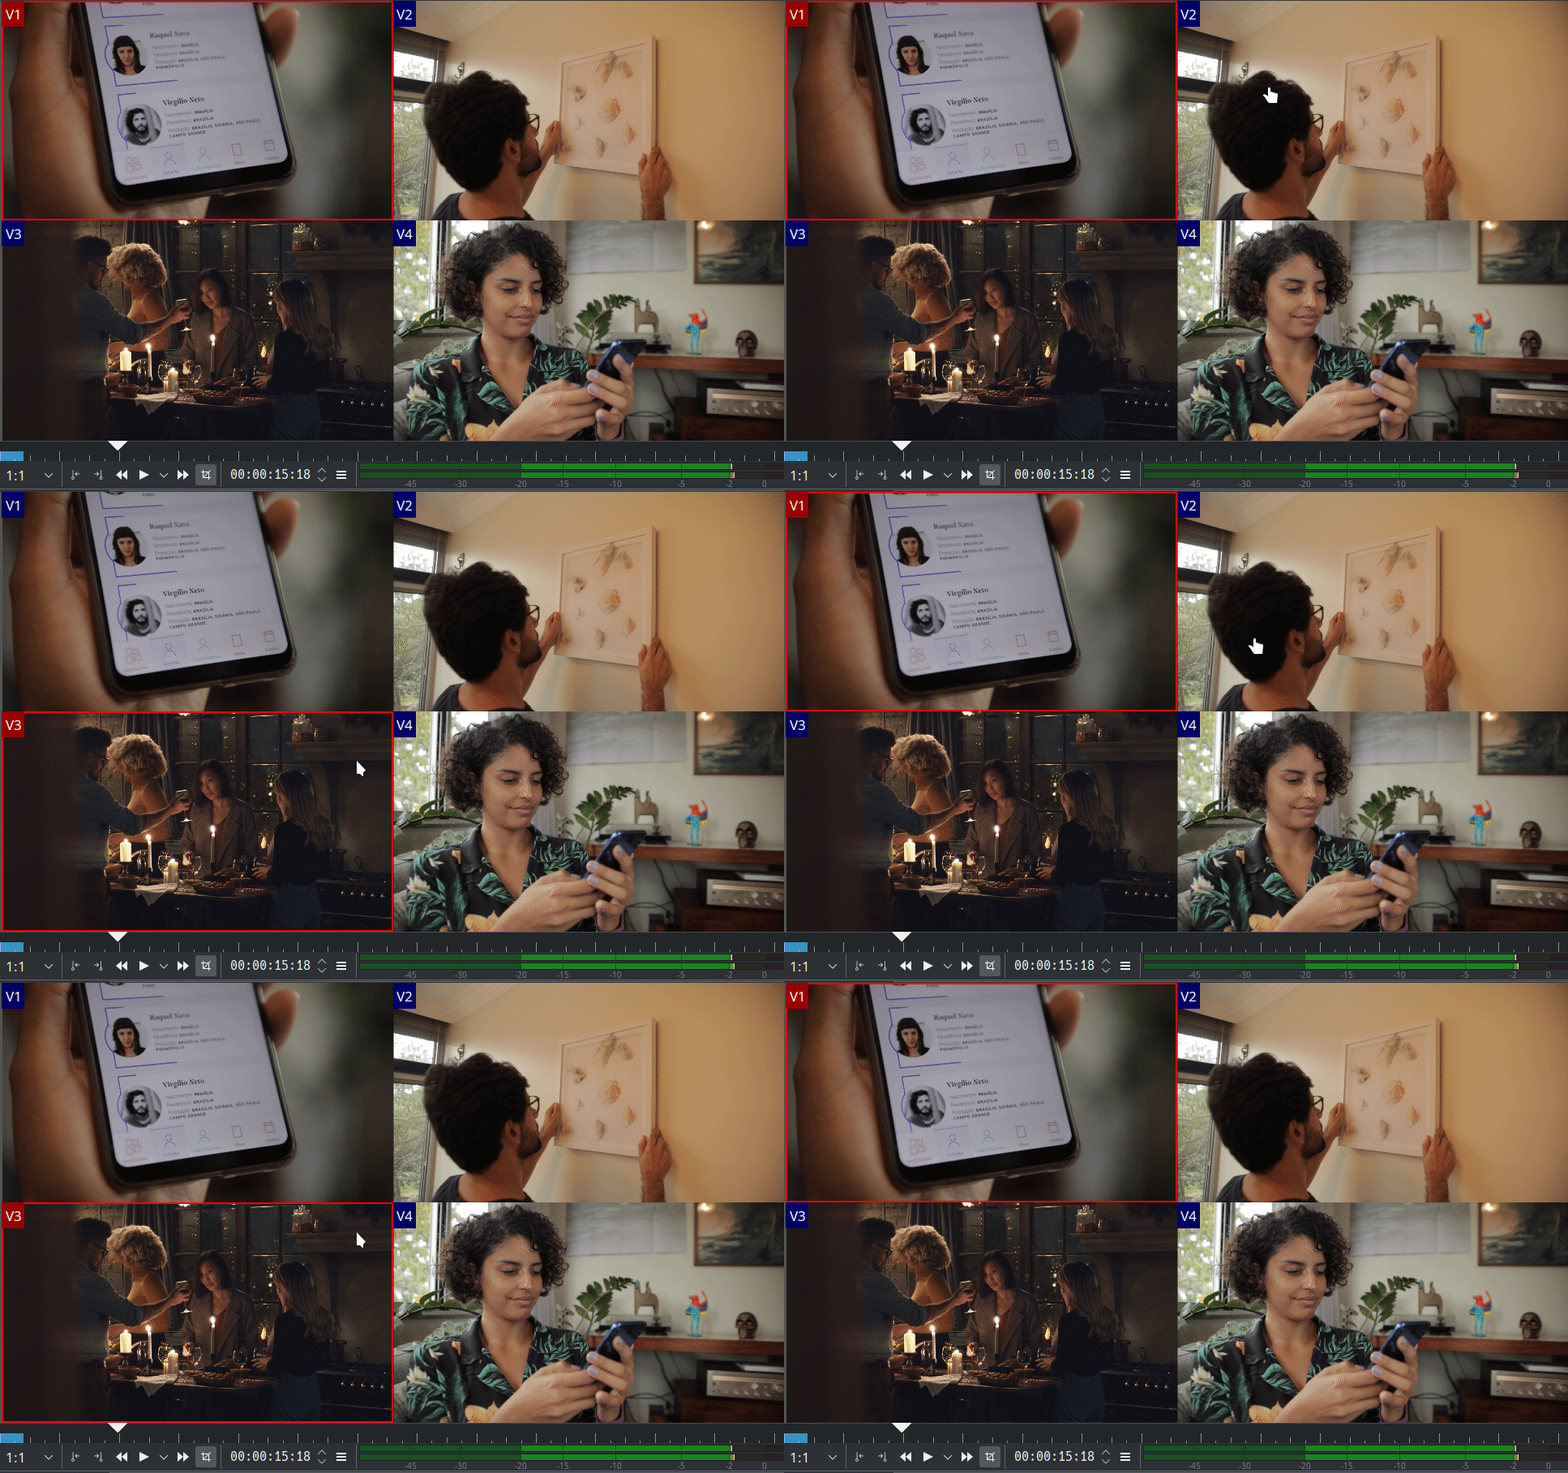
Multicam Editing
Since version 20.04.0
Enable the multirack view via menu →
New multicam editing interface allows you to select a track in the timeline by clicking on the project monitor.
Record Monitor
There is also a Record monitor that can be used to preview capture from Firewire, Blackmagic cards or through FFmpeg / video4linux.
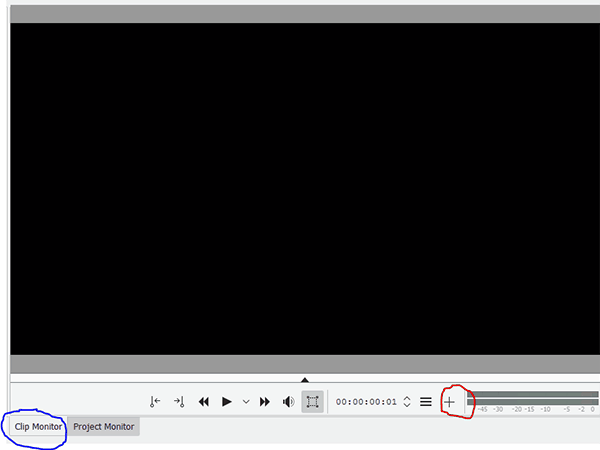
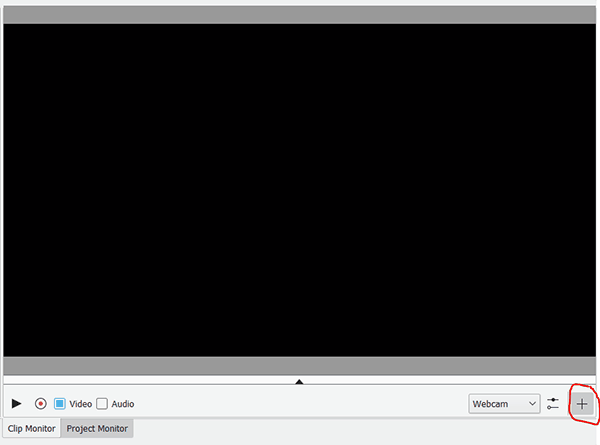
Until version 18.12: To switch to the record monitor click in the clip monitor on the “+” sign.
Until version 18.12: To switch back to the clip monitor click in the record monitor the “+” sign.
Version 19.04 and newer
Screen record is moved to → Screen Grab
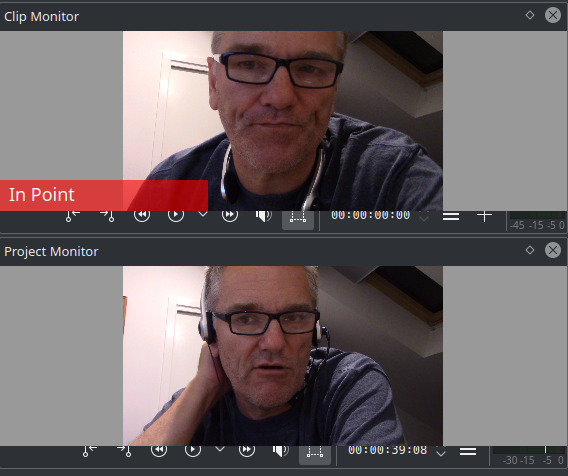
Separate Clip and Project Monitors
You can click on the Tab names that label the Monitors and drag the monitor out into its own window.
To put the monitors back into the Tabbed view - click on the monitor's title bar and drag the window on top of the other monitor window.
If the monitor has no title bar (intermittent defect) then you can not do this and you will need to reset kdenlive settings by deleting ~/.config/kdenliverc


