Showfoto/Perspective/uk: Difference between revisions
(Created page with 'У цьому посібнику ми навчимося виправляти ваду, про яку більшість з нас забуває, коли йдеться про ...') |
(Created page with 'На перший погляд здається, що все гаразд… але, якщо поглянути уважніше… чи не виглядає все так, н...') |
||
| Line 15: | Line 15: | ||
|} | |} | ||
На перший погляд здається, що все гаразд… але, якщо поглянути уважніше… чи не виглядає все так, наче будинок похилився? Чи можна сказати, що його стіни стоять прямо? Так, саме про це ми і говоритимемо. Це може виглядати природнім на фотографіях, оскільки ми до цього звикли, але… насправді ж, будинок виглядає зовсім не так! | |||
Вступ: | Вступ: | ||
Revision as of 16:15, 20 September 2010
Посібник з обробки фотографій у KDE 1-5: Виправлення перспективи
Unai Garro (uga) — літо 2008 року
Привіт. Так, для тих, хто думав, що я зник, вибачте, я нікуди не подівся ![]() . У мене не було інтернет-з’єднання декілька місяців, а додаткова робота, яку я мав виконувати, не давала мені змоги створювати будь-які посібники, але все це позаду, і я знову можу повернутися до них.
. У мене не було інтернет-з’єднання декілька місяців, а додаткова робота, яку я мав виконувати, не давала мені змоги створювати будь-які посібники, але все це позаду, і я знову можу повернутися до них.
Для тих, хто не знайомий з попередніми посібниками, метою цієї серії посібників є демонстрація належного використання програм з відкритим кодом KDE для покращення ваших і без того чудових фотографій так, щоб ними можна було пишатися. У попередньому посібнику ми вже познайомилися з більшістю інструментів коригування освітлення на фотографії, зокрема інструментами виправлення кривих, рівнів, яскравості, контрастності та гами.
У цьому посібнику ми навчимося виправляти ваду, про яку більшість з нас забуває, коли йдеться про фотографії. Ваду, яка настільки ж прикра, наскільки і проста у виправленні: викривлення перспективи. Так, повірте мені, оволодіти інструментами, описаними у цьому посібнику, набагато простіше, ніж інструментами попередніх посібників.
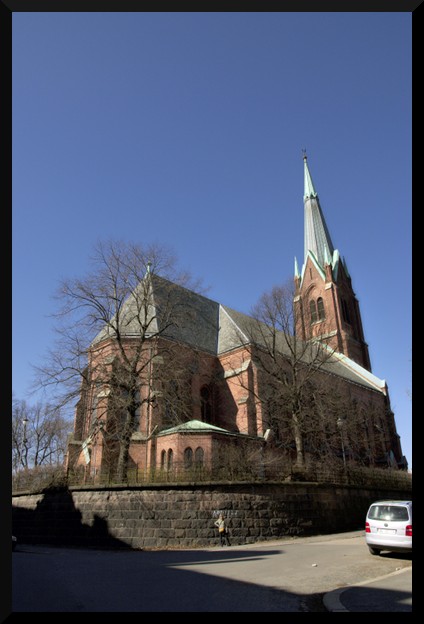
Зразком описаної вади є наведена нижче фотографія:
|
На перший погляд здається, що все гаразд… але, якщо поглянути уважніше… чи не виглядає все так, наче будинок похилився? Чи можна сказати, що його стіни стоять прямо? Так, саме про це ми і говоритимемо. Це може виглядати природнім на фотографіях, оскільки ми до цього звикли, але… насправді ж, будинок виглядає зовсім не так!
Вступ:
So who's faulty here? Some will claim that the lens in the camera was crap. Well, I'd say the photographer was crap, instead (that was me) ![]()
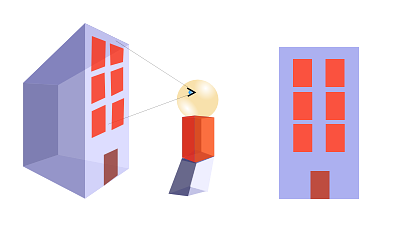
The problem isn't the camera and neither is it the lens. This effect is pretty obvious if you think what happens when you approach a building and look at it with a camera:
|
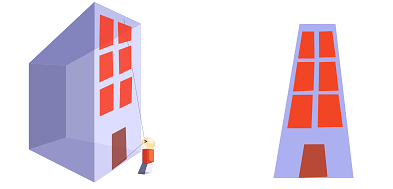
It looks correct right? Now lets approach the building more, look at it from the bottom part rather than front, and lets make the building much larger than us:
|
The further the building parts are, the smaller they look. So the top part looks smaller than the bottom part.
That's exactly what happens in our original photo too. In that photo, I was very close to the building, at the bottom of it. It may not look like that, but that's because I was using a wideangle lens.. Then, the closer you are to the building, and the larger being it, the more pronounced the effect is.
What would you have to do? Well, if at all possible, try avoiding this effect when taking the photograph. Position yourself further away from the building when taking the pic, and try looking perpendicular to the building, not looking up.
If everything fails, ... tadaaaah! yes, Showfoto comes to the rescue here!
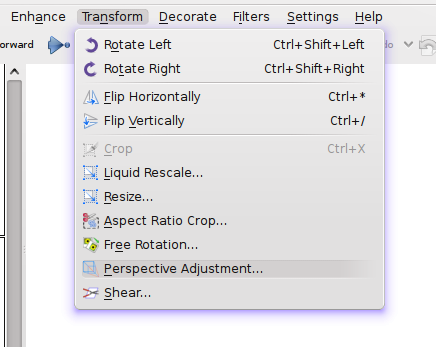
Let's open the picture in Showfoto, and look in the menu for
|
Once selected, you should see a dialog similar to the following:
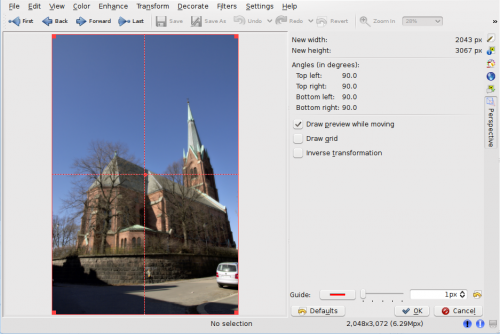
|
In this dialog, you can move around the corners and stretch the picture in any shape you want (it applies a transformation matrix). You can use the dotted guide in the picture to make sure that the parts you want straight are vertical or horizontal. In this photo, I took building walls and trees as reference, and tried straightening them:
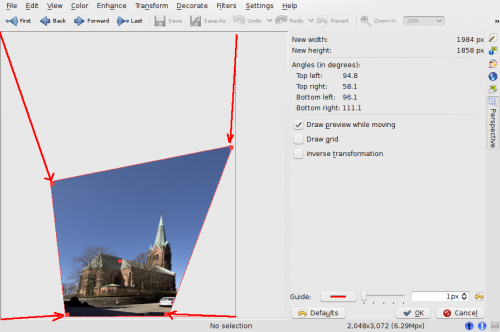
|
And there you go, press , and I got the following result:
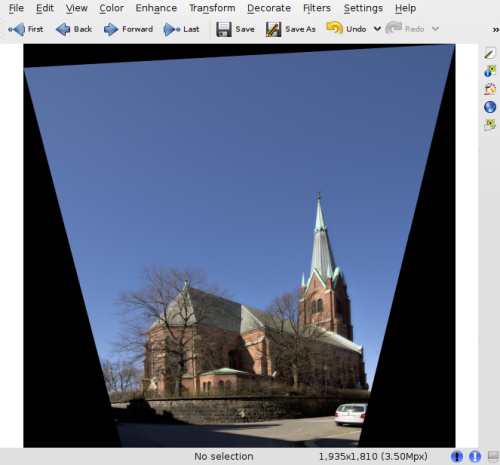
|
Obviously, after reshaping the image, the borders are no more square, and Showfoto has filled the missing parts with black. Now, we'll have to crop this ugly border off (take care when undistorting, because you may leave some image parts off for cropping!)
And yes, we are done. Doesn't it look more natural this way ![]()
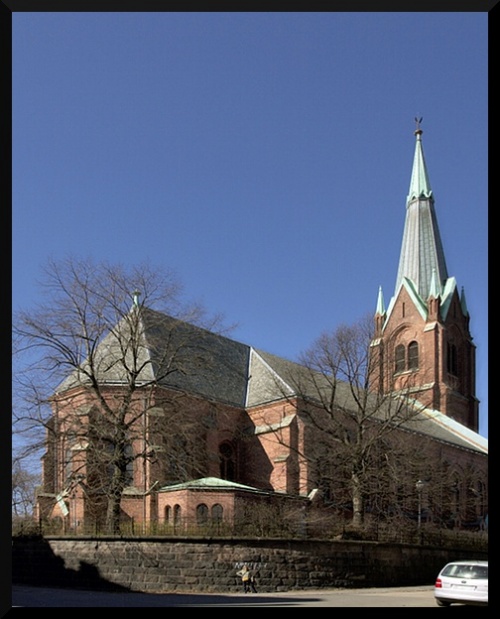
|
Well, I hope you enjoyed this tutorial. I know... you guys that followed the tutorials so far, thought that this tutorial would end up being much harder... that's life. As far as you got a bit of taste for photos, KDE and photography is damn easy. See ya all next time! ![]()
