User:Claus chr/DPL/Test
Testing DPL
<DPL>
  namespace=Main |User
  nottitleregexp = .*(/..(-..)?|_[(].*[)])$
  titlematch = A%|B%|C%|D%|E%|F%|G%|H%|I%|J%
  include = *
  includematch = #\[[Cc]ategory:#
  includemaxlength = 0
  resultsheader = The pages in the translation containing a category statement (A-J):\n
  format = ,\n* [[%PAGE%|%TITLE%]],,
</DPL>
The pages in the translation containing a category statement (A-J):
- Extjs ondiscussionpage:User talk:Heny
- ChoqoK
- Draft/MetaInfo
- Build your first KDE application on Kubuntu
- Create your own mouse cursor theme
- Artikulate
- Compile KPhotoAlbum
- Heaptrack/Build/Ubuntu 16.04
- Building KPhotoAlbum
- Artikulate/PhonemeTrainingUnits
- Category TranslationTranslation team - please read and comment on the attached Discussion page
Current Category Translation rule is listed in Translation Help Needed.
- Artikulate/ScenarioTrainingUnits
- Elisa
- Amarok/Manual/DraftThis Draft page will contain pages to be prepared for the next release.
Currently the following pages are in Draft:
- Scrobbling to Libre.fm
- Scrobbling to Libre.fm/en <- this is a translation page
- Hidden features
- IMAP Resource offline: Precise Pangolin ondiscussionpage:Talk:Akonadi 4.4/Troubleshooting/de
- Beginner's Guide
- Accessibility/fa
دسترسی KDE
زبان من برنامه ها دسترسی برنامه های راهنما
- Getting started with screen readers
- Gives an overview how to setup KDE applications with a screen reader.
- Application Overview
- A list of KDE applications and how accessible they are when used with a screen reader.
- Accessibility in Plasma
- How to use assistive applications in Plasma.
辅助功能
- 辅助应用
- KDE提供的辅助性应用程序的列表。这包括放大、文字转语音和语音控制。
- 开始使用屏幕阅读程序
- 概述了如何设置KDE应用程序用屏幕阅读器。
- 应用概述
- 一个KDE应用程序的列表,以及它们在使用屏幕阅读器时的无障碍程度。
- Plasma的无障碍
- 如何在Plasma中使用辅助性应用。
KDE Accessibility
- Assistive Applications
- The list of assistive applications that KDE provides. This includes magnification, text-to-speech or voice control.
- Getting started with screen readers
- Gives an overview how to setup KDE applications with a screen reader.
- Application Overview
- A list of KDE applications and how accessible they are when used with a screen reader.
- Accessibility in Plasma
- How to use assistive applications in Plasma.
Acessibilidade KDE
- Assistive Applications
- The list of assistive applications that KDE provides. This includes magnification, text-to-speech or voice control.
- Getting started with screen readers
- Gives an overview how to setup KDE applications with a screen reader.
- Application Overview
- A list of KDE applications and how accessible they are when used with a screen reader.
- Accessibility in Plasma
- How to use assistive applications in Plasma.
Accesibilidade de KDE
- Programas de asistencia
- A lista de programas de asistencia fornecidos por KDE. Inclúe
lupas, texto para fala ou control por voz.
- Getting started with screen readers
- Dá un resumo de como configurar os programas de KDE cun lector de pantalla.
- Resumo dos programas
- Unha lista de programas de KDE e do accesibles que son cando se usan cun lector de pantalla.
- Accesibilidade en Plasma
- Como usar programas de asistencia en Plasma.
KDE Tilgængelighed
- Støtteprogrammer
- Listen med de støtteprogrammer, som KDE leverer. Det inkluderer forstørrelse, tekst-til-tale og stemmekontrol.
- Kom i gang med skærmoplæsere
- Giver et overblik over, hvordan man opsætter KDE's programmer med en skærmoplæser.
- Programoversigt
- En liste af programmer fra KDE og hvor tilgængelige de er, når de bruges med en skærmoplæser.
- Tilgængelighed i Plasma
- Hvordan man bruger støtteprogrammer i Plasma.
Acessibilidade KDE
- Aplicações Auxiliares
- A lista das aplicações assistades que o KDE fornece. Nelas incluem ampliação, conversão de texto em fala ou controle de voz.
- Getting started with screen readers
- Gives an overview how to setup KDE applications with a screen reader.
- Application Overview
- A list of KDE applications and how accessible they are when used with a screen reader.
- Accessibility in Plasma
- How to use assistive applications in Plasma.
 |
Create diagrams and flowcharts with Flow |
Flow is an easy to use diagramming and flowcharting application with tight integration to the other Calligra applications. It enables you to create network diagrams, organisation charts, flowcharts and more.
Features
- Create network diagrams, organisation charts, flowcharts and more
- Imported Dia stencils.
- Plugin framework for adding more functionality.
Links
Template:总结 KDE应用程序的无障碍
应用程序的列表及其对屏幕阅读器的无障碍支持状态:
请提及所测试的版本并添加信息。
Plasma桌面
为了得到一个更方便的菜单,请切换到经典菜单并给它指定一个键盘快捷键。
这个页面 解释了如何完成这个任务。
KMail
- 在KDE 4.8中得到改进,状态不明。
Konsole
KDE的终端应用程序。
- 目前,shell并没有实现一个无障碍的的文本接口。
KCalc
- 一些没有标注的按钮。
- 主窗口不支持无障碍。
- Accessibility/Application Overview/en
Accessibility in KDE Applications
Lists of applications and their accessibility status for screen readers:
Please mention the version tested and add information.
Plasma Desktop
To get a more accessible menu switch to the classic menu and assign it a keyboard shortcut.
This page explains how to accomplish this.
KMail
- Improved in KDE 4.8, status unknown.
Konsole
KDE's terminal application.
- Currently the shell does not implement an accessible text interface.
KCalc
- Some unlabeled buttons.
- The main display is not accessible.
- Braindump/en
| Braindump is an open source tool to dump and organize the content of your brain (ideas, drawings, images, texts…) to your computer.
|
Features
- whiteboards where you can write text, add images, music sheet, chart, formula...
- vectorial drawing
- copy/paste support with ODF able applications
More information
| Braindump is an open source tool to dump and organize the content of your brain (ideas, drawings, images, texts…) to your computer.
|
Prestaciones
- whiteboards where you can write text, add images, music sheet, chart, formula...
- vectorial drawing
- copy/paste support with ODF able applications
Más información
|
Lav rutediagrammer og andre slags diagrammer med Flow |
Flow er et let anvendeligt program til at lave rutediagrammer og andre slags diagrammer, som er tæt integreret med de andre Calligra programmer. Du kan lave netværksdiagrammer, organisationskort og meget mere.
Hovedtræk
- Lav netværksdiagrammer, organisationskort, rutediagrammer mm.
- Importerede af Dia-stencils
- Plugin-fundament for tilføjelse af yderligere funktioner
Links
KDE-Zugänglichkeit
- Assistive Applications
- Die Liste der unterstützenden Anwendungen, die KDE bereitstellt. Dazu gehören Vergrößerung, Text-to-Speech oder Sprachsteuerung.
- Erste Schritte mit Screenreadern
- Gibt einen Überblick, wie man KDE-Anwendungen mit einem Screenreader einrichtet.
- Anwendungsübersicht
- Eine Liste von KDE-Anwendungen und wie zugänglich sie sind, wenn sie mit einem Screenreader verwendet werden.
- Barrierefreiheit in Plasma
- So verwenden Sie Hilfsanwendungen in Plasma.
KDE 접근성
- 보조 프로그램
- KDE에서 제공하는 보조 프로그램 목록입니다. 화면 확대, 텍스트 음성 변환, 음성 제어가 있습니다.
- 스크린 리더 사용 시작하기
- KDE 프로그램에서 스크린 리더를 사용하도록 설정하는 방법을 안내합니다.
- 프로그램 개요
- KDE 프로그램 목록과 스크린 리더를 사용했을 때의 접근성 기능입니다.
- Plasma의 접근성
- Plasma에서 보조 프로그램을 사용하는 방법입니다.
Dolphin 可以通过给文件编号来批量重命名多个文件,虽然目前这功能有限,只在某些情况下有用。比如说应用在重命名一套照片。
选择想要重命名的文件,然后右击其一,选择 (键盘快捷键)。Dolphin 会弹出一个对话框,你可以指定重命名的文件名。

文件名中的'#'符号会被数字替换掉,从第一个文件的'1'开始,后续文件累加数字。添加多个#号会在数字前置0。
- # 会被替换成 1, 2, 3, 30, 150 等
- #### 会被替换成 0001, 0002, 0003, 0030, 0150 等。
Dolphin 可以通過給檔案編號來批量重命名多個檔案,雖然目前這功能有限,只在某些情況下有用。比如說應用在重命名一套照片。
選擇想要重命名的檔案,然後右擊其一,選擇 (鍵盤快捷鍵)。 Dolphin 會彈出一個對話框,你可以指定重命名的檔案名。
檔案名中的'#'符號會被數字替換掉,從第一個檔案的'1'開始,後續檔案累加數字。寫多個#符號會在數字前置0。
- # 會被替換成 1, 2, 3, 30, 150 等
- #### 會被替換成 0001, 0002, 0003, 0030, 0150 等。
| Braindump er et open source-værktøj til at nedhente og organisere indholdet af din hjerne (ideer, tegninger, billeder, tekster...) til din computer
|
Hovedtræk
- whiteboards, hvor du kan skrive tekst, tilføje billeder, noder, diagrammer, formler...
- vektortegning
- understøtter af kopiér/indsæt med ODF-kyndige programmer
Mere information
KDE xüsusi imkanları
- Köməkçi tətbiqlər
- KDE-nin təqdim etdiyi köməkçi tətbiqlərin siyahısı. Buraya lupa, mətni səsləndirmə, və ya səs ilə idarəetmə daxildir.
- Ekran oxuyucusu haqqında ilkin qeydlər
- Ekrandakıları səsləndirməklə KDE tətbiqlərinin necə ayarlanmasının icmalını verir.
- Application Overview
- KDE tətbiqlərinin siyahısı və onları ekran oxuyucusu ilə istifadə edilə bilməsi imkanları.
- Accessibility in Plasma
- Plasma'da köməkçi tətbiqlərdən necə istifadə olunması.
KDE Accessibility
- Assistive Applications
- The list of assistive applications that KDE provides. This includes magnification, text-to-speech or voice control.
- Getting started with screen readers
- Gives an overview how to setup KDE applications with a screen reader.
- Application Overview
- A list of KDE applications and how accessible they are when used with a screen reader.
- Accessibility in Plasma
- How to use assistive applications in Plasma.
L'accessibilité dans KDE
- Applications assistées
- La liste des applications assistées que fournit KDE. Cela inclut la loupe, la lecture du texte à haute voix ou le contrôle par la voix.
- Débuter avec les lecteurs d'écrans
- Fournit un aperçu sur la manière de configurer les applications KDE avec un lecteur d'écran.
- Synthèse des applications
- Une liste d'applications de KDE et comment elles sont accessibles par un lecteur d'écran.
- Accessibilité dans Plasma
- Comment utiliser les applications d'assistance dans Plasma.
Tilgængelighed i KDE's programmer
Liste af programmer og deres status med hensyn til skærmoplæsere:
Husk at nævne, hvilken version der blev testet og tilføj information.
Plasma skrivebordet
For at få en mere tilgængelig startmenu kan du skifte til den klassiske menu og tildele den en tastaturgenvej.
Denne side forklarer hvordan man gør dette.
KMail
- Forbedret i KDE 4.8 - status ukendt.
Konsole
KDE's terminalprogram.
- I øjeblikket implementerer skallen ikke et tilgængeligt tekstinterface.
KCalc
- Nogle knapper mangler etiket.
- Hovedvisningen er ikke tilgængelig.
- Browser Configuration/en

The following articles help you to configure your browser
Firefox
- Tell Firefox to use KMail when it sees a mailto: form.
- export your web passwords in firefox to a plain text file using python sourcecode.
- Using the Plasma Open and Save dialogs in Firefox.
- Use a Breeze inspired theme in Firefox.
- Accessibility/he
נגישות ב־KDE
- יישומים מסייעים
- רשימת היישומים המסייעים שמספק מיזם KDE. לרבות הגדלה, הקראה או שליטה קולית.
- התחלת שימוש במקריאי מסך
- סקירה על הגדרת יישומי KDE עם מקריא מסך.
- סקירת יישומים
- רשימת יישומי KDE ועד כמה הם נגישים בשימוש עם מקריא מסך.
- נגישות בפלזמה
- איך להשתמש ביישומים מסייעים בפלזמה.
Accessibilité chez les applications de KDE
Listes des applications et leur état d'accessibilité pour les lecteurs d'écran:
Merci d'indiquer la version testée et d'ajouter des informations.
Bureau Plasma
Pour obtenir un menu plus accessible, passez au menu classique et assignez lui un raccourci clavier.
Cette page explique comment le faire.
KMail
- Amélioré dans KDE 4.8, état inconnu.
Konsole
Application terminale de KDE.
- Actuellement le shell n'implémente pas une interface textuelle accessible.
KCalc
- Certains boutons sans étiquettes.
- L'affichage principal n'est pas accessible.
- Braindump/pt-br
| Braindump é uma ferramenta de código aberto para organizar o conteúdo do seu cérebro (idéias, desenhos, imagens, textos…) no seu computador.
|
Funcionalidades
- Quadro branco onde você pode escrever, adicionar imagens, partituras, gráficos, formulas...
- desenho vetorial
- suporte para copiar/colar com aplicativos compatíveis com ODF
Mais informações
|
Crea grafici e diagrammi di flusso con Flow |
Flow è un'applicazione facile da utilizzare per creare grafici e diagrammi di flusso. Offre una stretta integrazione con le altre applicazioni di Calligra. Ti permette di creare diagrammi di rete, organigrammi, diagrammi di flusso ed altro ancora.
Funzionalità
- Crea diagrammi di rete, organigrammi, diagrammi di flusso ed altro ancora.
- Forme di Dia importate.
- Infrastruttura a plugin per aggiungere ulteriori funzionalità.
Collegamenti
Amarok: Rediscover your music!

|
| Amarok 2.8 default layout |
Amarok is the premier Free, Open Source Music application. More than simply a music player, Amarok helps you rediscover your music. The innovative interface gives you unprecedented control over your collection, and extends your reach to music everywhere. Use our Quick Start Guide to get going quickly, or search out more in-depth information in the Manual.
Blogilo is an fully-featured blogging client. It allows local creation and editing of blog posts. Various blogging APIs are supported for publishing.
Features
- Fully-featured WYSIWYG or html editing
- Allows you to preview with your style-sheet, see it as your visitors do.
- You can create, modify and delete posts, create drafts, and schedule posting
- Supports Blogger1.0, MetaWeblog, MovableType and Google GData APIs
- Supports adding media files if your API supports them.
- You can add images to post from your system, if your API supports it.
- Can save a local copy before publishing the post
- Save your writing copy to prevent data loss, at configurable intervals.
- Check spelling, using KDE's spell-checker (most languages available)
- Can fetch your recent blog posts
- Digikam/AddTextures/da
Tilføj teksturer til dine billeder med digiKam
Fra Mohammed Maliks blog, 21. februar 2011
Mange mennesker føjer teksturer til deres billeder, hvilket giver vældig gode resultater for det meste. Hvis du ønsker at anvende teksturer på dit billede, så er det ganske enkelt. Vælg billedet, som du vil føje teksturer til og tast F4. Dette fører dig til editoren.
I editoren vælger du menuen

I højre side af editoren kan du se, hvilke typer tekstur du kan vælge imellem og en indstilling kaldet , som du kan bruge til at kontrollere hvor meget tekstur, der skal anvendes på billedet.
KDE tətbiqlərində xüsusi imkanlar
Tətbiqlərin siyahısı və Ekran oxuyucusu üçün onların xüsusi imkanlarının vəziyyəti:
Sınaqdan keçirilən versiyanı göstərin və məlumat əlavə edin.
Plasma Desktop
Daha çox xüsusi omkanlara malik menyu əldə etmək üçün n klassik menyu açın və ona bir klaviatura qısayolu təyin edin.
Bu səhifə bunu necə etməyi başa salır.
KMail
KDE 4.8 təkmilləşdirilməsi, vəziyyət naməlumdur.
Konsole
KDE-nin terminal tətbiqi.
Hal-hazırda əmr ötrüyündə heç bir əlaçatan mətn interfeysi yaradılmayıb.
KCalc
- Bəzi yarlıqsız düymələr.
- Əsas pəncərə əlçatan deyil.
- Digikam/AddTextures/it
Aggiungere trame alle tue immagini utilizzando DigiKam
Trascritto dal blog di Mohammed Malik, 21 febbraio 2011
Molte persone aggiungono trame alle loro immagini ottenendo risultati molto buoni il più delle volte. Se vuoi applicare trame alle tue immagini, non c'è problema, è semplice e facile. Seleziona l'immagine a cui vuoi aggiungere una trama e premi F4 sulla tastiera. Si aprirà la finestra dell'editor.
Da questa vai su
Sulla destra vedrai le opzioni disponibili per la trama e un ulteriore opzione chiamata , puoi utilizzarla per controllare la quantità di trama scelta che vai ad applicare.
| Braindump est un outil open source pour transférer et organiser le contenu de votre cerveau (idées, dessins, images, textes …) sur votre ordinateur.
|
Fonctionalités
- tableaux blancs où vous pouvez écrire du texte, ajouter des images, des partitions de musique, des graphiques, des formules ...
- dessin vectoriel
- supporte le copier/coller avec des applications compatibles ODF
Plus d'information
Amarok: Odkryj muzykę na nowo!
|
|
| Amarok 2.8 - Domyślny układ |
Amarok jest wiodącą darmową aplikacją muzyczną o otwartym źródle. Więcej niż tylko odtwarzacz muzyki, Amarok pozwala ci odkryć muzykę na nowo. Innowacyjny interfejs daje ci niespotykaną dotąd kontrolę nas twoją kolekcją i pozwala ci wszędzie mieć do niej dostęp. Odwiedź sekcję Szybki start lub zasięgnij bardziej szczegółowych informacji w Podręczniku.
- Krita Handbook: Wiki (draft)
- Plan Handbook: Wiki (draft)
Other Handbooks are work in progress.
|
Créer des diagrammes et des organigrammes avec Flow |
Flow est une application facile à utiliser, qui permet de créer diagrammes et organigrammes, et qui s'intègre parfaitement avec les autres applications Calligra. Elle vous permet de créer des diagrammes de réseau, des graphiques d'organisations, des organigrammes et bien plus.
Fonctionnalités
- Créer des diagrammes de réseau, des graphes d'organisations, des organigrammes et bien plus
- Import des pochoirs Dia.
- Modules complémentaires pour ajouter plus de fonctionnalités.
Liens
Afegir textures a les imatges amb digiKam
Transcrit des d'un article al blog d'en Mohamed Malik, el 21 de febrer de 2011
Molta gent afegeix textures a les seves imatges produint resultats molt bons la majoria de les vegades. Si voleu aplicar textures a la imatge és molt simple i fàcil. Seleccioneu la imatge a la que voleu afegir una textura i premeu la tecla F4. D'aquesta manera tornareu a la vista de l'editor.
Des de l'editor aneu a .
A mà dreta veureu les opcions de textura disponibles, i una altra opció anomenada , podeu utilitzar aquesta opció per controlar la quantitat de textura que esteu aplicant.
The following articles help you to configure your browser
Firefox
- Tell Firefox to use KMail when it sees a mailto: form.
- export your web passwords in firefox to a plain text file using python sourcecode.
- Using the Plasma Open and Save dialogs in Firefox.
- Use a Breeze inspired theme in Firefox.
- Calligra/Handbooks/ko
- Krita 도움말: 위키(초안)
- Plan 도움말: 위키(초안)
다른 도움말은 작업 중입니다.
Amarok: Genopdag din musik!
|
|
| Amarok 2.8 default layout |
Amarok er det førende frie opensource-musikprogram. Amarok er ikke blot en musikafspiller, den hjælper dig til at genopdage din musik. Den innovative brugerflade giver dig en aldrig før set grad af kontrol med din musiksamling og giver dig adgang til musik fra hele verden. Brug vores guide Kom godt i gang til komme i gang med det samme eller søg efter mere dybtgående information i manualen.
- Manuale di Krita: wiki (bozza)
- Manuale di Plan: wiki (bozza)
Altri manuali sono oggetto di lavoro.
Dës Artikelen hëllefen Iech Äre Browser ze konfiguréieren
Firefox
- Tell Firefox to use KMail when it sees a mailto: form.
- export your web passwords in firefox to a plain text file using python sourcecode.
- Using the Plasma Open and Save dialogs in Firefox.
- Use a Breeze inspired theme in Firefox.
- Calligra/Handbooks/da
- Krita-håndbogen: Wiki (udkast)
- Plan-håndbogen: Wiki (udkast)
Andre håndbøger er under udarbejkdelse.
"Blogilo"是一个全功能的blog客户端。它允许你在本地创建和编辑博客文章。它支持多种博客系统的API。
功能
- 功能齐全的“所见即所得”编辑方式,或者直接进行HTML编辑
- 预览样式表,按照访客所见呈现。
- 创建、修改以及删除文章,创建草稿以及定时发布
- 支持的 API 包括 Blogger1.0, MetaWeblog, MoveableType 以及 Google GData
- 支持添加媒体文件,前提是所用的API支持
- 添加图像到文章中(只要API支持)
- 能够在发表博客文章前保存一份本地的拷贝
- 自动保存你的文章,并且能够设置自动保存的间隔
- 提供拼写检查,使用KDE的拼写检查器(支持大部分语言)
- 能读取你最近发表的博客文章
- Flow
|
Create diagrams and flowcharts with Flow |
Flow is an easy to use diagramming and flowcharting application with tight integration to the other Calligra applications. It enables you to create network diagrams, organisation charts, flowcharts and more.
Features
- Create network diagrams, organisation charts, flowcharts and more
- Imported Dia stencils.
- Plugin framework for adding more functionality.
Links
Playlist
The Playlist is a powerful part of Amarok. One can drag in some tracks, but there is a lot more available.
| Braindumb è uno strumento open source per scaricare e organizzare nel computer il contenuto della tua mente (idee, disegni, immagini, testi…).
|
Caratteristiche
- Lavagne in cui puoi scrivere testi, aggiungere immagini, spartiti musicali, grafici, formule, ...
- Disegno vettoriale.
- Supporto per le operazioni di copia/incolla con le applicazioni compatibili con ODF.
Maggiori informazioni
- Manual do Krita: Wiki (rascunho)
- Manual do Plan: Wiki (rascunho)
Outros manuais estão sendo preparados.
| Braindump is an open source tool to dump and organize the content of your brain (ideas, drawings, images, texts…) to your computer.
|
Features
- whiteboards where you can write text, add images, music sheet, chart, formula...
- vectorial drawing
- copy/paste support with ODF able applications
More information
- Manual de Krita: wiki (esborrany)
- Manual de Plan: wiki (esborrany)
Els altres manuals són treballs en curs.
Amarok: Rediscover your music!
|
|
| Amarok 2.8 default layout |
Amarok is the premier Free, Open Source Music application. More than simply a music player, Amarok helps you rediscover your music. The innovative interface gives you unprecedented control over your collection, and extends your reach to music everywhere. Use our Quick Start Guide to get going quickly, or search out more in-depth information in the Manual.
- Manuel de Krita: Wiki (brouillon)
- Manuel de Plan Handbook: Wiki (brouillon)
Les autres manuels sont encore en préparation.
Amarok: Redescubra sua música!
|
|
| Laiaute padrão do Amarok 2.8 |
Amarok é um aplicativo de música de primeira linha, Livre e de Código Aberto. Mais do que simplesmente um reprodutor, o Amarok o ajuda a redescobrir suas músicas. A interface inovadora fornece-lhe um controle sem precedentes sobre toda a sua coleção, e permite encontrar suas músicas em qualquer lugar. Use nosso Guia de Inicialização Rápida para se familiarizar rapidamente, ou pesquise informações mais detalhadas neste manual.
Amarok: Objevte znovu svoji hudbu!
|
|
| Výchozí rozvržení Amaroku 2.8 |
Amarok přední svobodný hudební program s otevřeným zdrojovým kódem. Je více než přehrávačem hudby, Amarok vám pomůže objevit znovu vaši hudbu. Novátorské rozhraní vám dává nebývalou kontrolu nad vaší sbírkou, a rozšiřuje váš dosah na hudbu všude. Použijte našeho průvodce rychlým spuštěním, abyste se do toho dali rychle, anebo hledejte hlouběji podané informace v příručce.
Accessibility in KDE Applications
Lists of applications and their accessibility status for screen readers:
Please mention the version tested and add information.
Plasma Desktop
To get a more accessible menu switch to the classic menu and assign it a keyboard shortcut.
This page explains how to accomplish this.
KMail
- Improved in KDE 4.8, status unknown.
Konsole
KDE's terminal application.
- Currently the shell does not implement an accessible text interface.
KCalc
- Some unlabeled buttons.
- The main display is not accessible.
- Digikam/Faded Effect/en
Simulate a Faded Effect in digiKam
Transcribed from Dmitri Popov's blog, 18th April, 2012
Sometimes the best way to spice up a photo is to make it look faded, and digiKam makes it supremely easy to achieve this effect.

Open the photo for editing and choose . Adjust exposure compensation to slightly overexpose the photo and set the color temperature to 12000 to add a strong golden tint to the photo. Press to apply the modifications. Choose then and set to -50. Press , and you are done. The described technique works particularly well with skin tones, so it’s suitable for use with portrait photos.
Simulér en falmet effekt i digiKam
Fra Dmitri Popov's blog, 18 april, 2012
Nogle gange er den bedste måde at pifte er foto op at få det til at se falmet ud, og digiKam gør det meget let at opnå denne effekt.
Åbn fotoet til redigering og vælg . Justér eksponeringskompensationen til at overeksponere fotoet en smult og sæt farvetemperaturen til 12000 for at tilføje en stærk gylden toning til fotoet. Klik for at anvende ændringerne. Vælg så og sæt til -50. Klik på , så er du færdig. Den beskrevne teknik virker særligt godt på hudtoner, så den er egnet til brug på protrætfotos.
Adding Textures To Your Images Using DigiKam
Transcribed from Mohammed Malik's blog, 21 February 2011
Many people add textures to their images which produces very good results most of the time. If you want to apply textures to your image it is simple and easy. Select the image you want to add texture to and press F4 on the keyboard. This will take you to editor view.
From the editor view go to
On the right hand side you will see the texture options available, and another option called , you can using that option to control the amount of texture that you are applying for the texture that you choose.
Dolphin kan omdøbe mange filer ved at nummerere dem, omend denne funktionalitet i øjeblikket er begrænset og kun brugbar i visse situationer. En nyttig anvendelse kunne være omdøbning af et sæt af fotos.
Vælg de filer, som du ønsker at omdøbe, højreklik på en af dem og vælg (tastaturgenvej F2). Du bliver så præsenteret for en dialog, hvor du kan angive, hvad filernes navne skal være.
Symbolet '#' bliver erstattet med et tal, hvor det end optrædet i filnavnet, startende med '1' for den første fil og voksende for hver efterfølgende fil. Skriver du flere "havelåger" i træk, så bliver der føjet foranstillede nuller til tallet.
- # Vil blive erstattet med 1, 2, 3, 30, 150 osv
- #### Vil blive erstattet med 0001, 0002, 0003, 0030, 0150 osv
Simple Toning in digiKam
Transcribed from Dmitri Popov's blog, 4th April, 2012
Adding a dash of color tint to a black and white photo can often produce a dramatic effect, and digiKam does have a handful of toning filters for you to try.

But you are not limited to the built-in filters: using digiKam’s editing tools, you can easily tint photos using whatever color you like. To do this, open a photo for editing, choose and set to -100. This effectively turns the image into a black and white photo. Press to save the changes, then choose . Use the sliders to create the toning color you want. Press , and you are done.
All WordPress blog support RSS, even though some aren't explicitly displaying an RSS button.
For the blogs that have RSS buttons, just click on the buttons and your browser should open a popup where you can select the RSS app you want to open the link, select .

If there isn't any RSS buttons or link, you can also modify the URL to get an RSS feed. Just add , at the end of a WordPress category to get a feed for the category or from the blog homepage to get a feed for all posts.

You will now see the opened feed window, where you can choose Akregator.
Spilleliste
Spillelisten er en stærk del af Amarok. Man kan trække spor ind i den, men der er mange flere muligheder.
- Gemte spillelister
- Filtrering af spillelister
- Håndtering af kø
- Dynamiske spillelister
- Automatisk generering af spillelister
Blogilo 是多功能的寫部落格程式,可以離線編輯文章。支援多種不同的部落格平台 API 接口。
特性
- 支援全功能的所見即所得(WYSIWYG)或 html 編輯
- 允許你按照你的部落格樣式預覽,就像你的訪客看到的一樣。
- 你能建立、修改和刪除文章,建立草稿以及計劃時間發布。
- 支援 Blogger1.0、MetaWeblog、MovableType 和 Google GData APIs
- 支援加入多媒體檔案(如果你的 API 支持他們的話)
- 你能添加你係統中的圖片到文章中(需要 API 支援)。
- 在發布文章前保存一份本地副本。
- 按照設定的間隙自動保存你的文章副本,以免意外的資料丟失。
- 拼寫檢查,試用的是 KDE 拼寫檢查(支持絕大多數的語言)。
- 能抓取你最近發布的 blog 文章。
- Browser Configuration/zh-tw
下列文章幫你設置瀏覽器
Firefox
- 設定 Firefox 點擊 mailto: 表格使用 KMail
- 這個論壇帖子幫你設定 Firefox 的外觀,並設定 KGet 作為其下載工具。
- 這份 Gentoo wiki 的存檔有整合 Firefox KDE4 的 HOWTO 教學
- 這篇 blog 文章講述普通用戶設定 Firefox 3.x 的經驗。
Playlist
The Playlist is a powerful part of Amarok. One can drag in some tracks, but there is a lot more available.
Blogilo biedt alle mogelijkheden voor het werken met blogs. U kunt lokaal blogposts schrijven en bewerken. API's van verschillende blogdiensten worden ondersteund om uw posts te publiceren.
Mogelijkheden
- Volledige ondersteuning voor bewerken via WYSIWYG of HTML
- Voorbeelden van uw blogposts met uw stylesheet bekijken
- Blogposts schrijven, bewerken en verwijderen. Concepten schrijven. Publicaties inplannen
- Ondersteunt Blogger1.0, MetaWeblog, MovableType en Google GData API's
- Mediabestanden toevoegen (als uw API dat ondersteunt)
- Foto's en andere afbeeldingen toevoegen (als uw API dat ondersteunt)
- Lokale kopieën van uw post opslaan, voor u uw post publiceert
- Laat uw concepten automatisch opslaan tijdens het schrijven
- Spelling controleren, met behulp van KDE's spellingcontrole
- De laatste posts van uw blog downloaden
- Amarok/Manual/Organization/ScriptManager/en
Script Manager
The Script Manager contains the options required to extend the functionality of Amarok through custom scripts. It is reached from the menu, . Scripts can be installed from downloaded script packages, or from the button which can fetch and install the latest user-contributed scripts from the Internet.

Please refer to Configuring Amarok -> Scripts for more information.
Enkel toning i digiKam
Fra Dmitri Popovs blog, 4. april, 2012
At føje en smule farve til et sort hvid-foto kan ofte give en dramatisk effekt, og digiKam har en håndfuld filtre til toning, som du kan prøve.
Men du er ikke begrænset til de indbyggede filtre: ved brug af digiKams redigeringsværktøjer kan du let tinte fotos med en hvilken som helst farve du ønsker. For at gøre dette åbner du et foto til redigering, vælger og sætter til -100. Dette gør effektivt billedet til et sort hvid-foto. Klik for at gemme ændringen, og vælg så . Brug skyderne til at lave den toningsfarve du ønsker. Klik på , så er du færdig.
- Krita Handbook: Wiki (draft)
- Plan Handbook: Wiki (draft)
Other Handbooks are work in progress.
Amarok: redécouvrez votre musique !
|
|
| Mise en page par défaut d'Amarok 2.8 |
Amarok est l'application musicale libre et gratuite prédominante. Davantage qu'une simple application servant à faire jouer de la musique, Amarok vous aide à redécouvrir votre musique. Son interface innovatrice vous donne un contrôle sans précédent sur votre bibliothèque musicale et étend votre accessibilité à de la musique où qu'elle se trouve. Consultez notre Guide de Démarrage Rapide pour débuter rapidement, ou consultez plus en profondeur notre Manuel.
Dolphin has a ability to rename multiple files by numbering them, though the functionality is currently limited and only useful in certain situations. One useful application would be renaming a set of photos.
Select the files you wish to rename, then right-click on one of them and select (keyboard shortcut F2). You will be presented with a dialogue where you may specify what you want the files to be named.
The '#' symbol anywhere within the file name will be replaced with a number, starting with '1' for the first file and continuing up for each file after that. Placing multiple hashes will add leading zeroes to the numbers.
- # will be replaced by 1, 2, 3, 30, 150, etc
- #### will be replaced by 0001, 0002, 0003, 0030, 0150, etc
Dolphin é capaz de renomear vários arquivos através de numeração, ainda que esta funcionalidade atualmente é limitada e útil apenas em situações específicas. Um exemplo de utilidade seria renomear um conjunto de fotos.
Selecione os arquivos que você deseja renomear, clique com o botão direito em um deles e selecione (atalho do teclado F2). Aparecerá uma janela onde você pode especificar o nome que os arquivos receberão.
O símbolo '#' em qualquer lugar do nome do arquivo será substituído por um número, começando com '1' no primeiro arquivo e continuando de forma crescente para os seguintes. Colocar vários destes símbolos adicionará zeros precedendo os números.
- # será substituído por 1, 2, 3, 30, 150, etc
- #### será substituído por 0001, 0002, 0003, 0030, 0150, etc
Blogilo er en bloggingklient med alle de gængse funktioner. Den lader dig oprette og redigere blogartikler lokalt. Til udgivelse understøttes flere blogging-API'er.
Hovedpunkter
- WYSIWYG- og HTML-redigering med alle gængse funktioner.
- Giver dig forhåndsvisninger med dit stilark, så du ser hvad dine besøgende ser.
- Du kan skrive, ændre og slette indlæg, lave udkast og planlægge offentliggørelse.
- Understøtter Blogger1.0, MetaWeblog, MovableType og Google GData API'er
- Understøtter tilføjelse af media-filer, hvis din API understøtter dem.
- Du kan tilføje billeder til dit indlæg fra din maskine, hvis din API understøtter det.
- Du kan gemme en lokal kopi før du udgiver dit indlæg.
- Du kan gemme, hvad du har skrevet med regelmæssige mellemrum for at undgå at miste data.
- Du kan bruge KDEs stavekontrol (de fleste sprog er tilgængelige).
- Du kan hente dine nyeste blogindlæg.
- Amarok/Manual/Playlist/cs
Seznam skladeb
Seznam skladeb je silnou součástí Amaroku. Lze do něj přetažením přidat skladby, ale je toho v něm mnohem víc, co lze s úspěchem využít.
- Uložené seznamy skladeb
- Filtrování seznamu skladeb
- Správce řady
- Dynamické seznamy skladeb
- Automatický tvůrce seznamu skladeb
Dolphin è in grado di rinominare più file numerandoli in modo progressivo, anche se la funzionalità è attualmente limitata ed utile solo in certe situazioni. Un ambito d'utilizzo utile potrebbe essere la rinominazione di una serie di foto.
Seleziona i file che desideri rinominare, quindi fai un clic destro su uno di essi e seleziona (scorciatoia da tastiera F2). Ti verrà presentata una finestra di dialogo dove potrai specificare come vuoi che i file vengano chiamati.
Il simbolo '#' posto ovunque nel nome del file verrà sostituito con un numero a partire da '1' per il primo file e continuando progressivamente per ogni file successivo. Inserendo più cancelletti verranno aggiunti più zeri ai numeri.
- # verrà sostituito da 1, 2, 3, 30, 150, ecc.
- #### verrà sostituito da 0001, 0002, 0003, 0030, 0150, ecc.
Amarok on other platforms
Amarok is intended for the KDE desktop, but it works on other platforms as well. Although it takes some effort, Amarok can run on these configurations:
| Non-KDE Desktops | |

|
Windows |

|
OS X |
Dolphin besitzt die Fähigkeit mehrere Dateien umzubenennen indem sie durchnummeriert werden. Die Funktion ist derzeit noch nur für einige wenige Situationen nützlich, jedoch wäre ein praktischer Anwendungsfall das Umbenennen einer Sammlung von Bildern.
Wählen Sie die Dateien aus, die Sie umbenennen, dann klicken Sie mit der rechten Maustaste auf eine dieser und wählen Sie (Tastenkürzel F2). Es wird ein Dialog erscheinen, in dem Sie angeben können, wie die Dateien benannt werden sollen.
Das Rautensymbol an einer beliebigen Stelle des Dateinamens wird durch eine aufsteigende Nummer, beginnend mit 1 für die erste Datei und so weiter, ersetzt. Mehrere Rauten hintereinander fügt führende Nullen ein.
- # wird ersetzt durch 1, 2, 3, 30, 50, …
- #### wird ersetzt durch 0001, 0002, 0003, 0030, 0150, …
Lista odtwarzania
Listy odtwarzania są ogromną częścią programu Amarok. Można przeciągać do nich piosenki, ale opcji jest o wiele więcej.
- Zapisane listy odtwarzania
- Filtrowanie list odtwarzania
- Menedżer kolejki
- Dynamiczne listy odtwarzania
- Automatyczne generowanie listy odtwarzania
Dolphin és capaç de canviar el nom de diversos fitxers per mitjà de numeració, encara que aquesta funcionalitat actualment està limitada i només és útil en certes situacions. Una aplicació útil seria per reanomenar un conjunt de fotografies.
Selecciona els fitxers que desitgeu reanomenar, després feu clic dret sobre un d'ells i seleccioneu (drecera de teclat F2). Apareixerà un diàleg on podreu especificar el nom que voleu que tinguin els fitxers.
El símbol '#' en qualsevol lloc del nom de fitxer serà substituït per un número, començant per '1' al primer fitxer i incrementant-lo per a cadascun fins a l'últim. En col·locar diversos coixinets s'afegiran zeros als nombres.
- # serà substituït per 1, 2, 3, 30, 150, etc.
- #### serà substituït per 0001, 0002, 0003, 0030, 0150, etc.
Menadżer Skryptów
Menadżer Skryptów zawiera opcje pozwalające rozszerzyć funkcjonalność Amarok poprzez niestandardowe skrypty. Uruchomić go można z menu . Skrypty mogą być instalowane z pobranych paczek lub z , gdzie można pobrać i zainstalować najnowsze skrypty stworzone przez użytkowników.
Więcej informacji znajdziesz tutaj Konfiguracja Amarok -> Skrypty
Simulate a Faded Effect in digiKam
Transcribed from Dmitri Popov's blog, 18th April, 2012
Sometimes the best way to spice up a photo is to make it look faded, and digiKam makes it supremely easy to achieve this effect.
Open the photo for editing and choose . Adjust exposure compensation to slightly overexpose the photo and set the color temperature to 12000 to add a strong golden tint to the photo. Press to apply the modifications. Choose then and set to -50. Press , and you are done. The described technique works particularly well with skin tones, so it’s suitable for use with portrait photos.
Dolphin ma możliwość zmiany nazwy wielu plikom równocześnie, numerując je. Obecnie ta funkcjonalność jest ograniczona i użyteczna w określonych przypadkach. Jednym z zastosowań może być zmiana nazw dla zestawu zdjęć.
Zaznacz pliki, którym chcesz zmienić nazwę, następnie kliknij prawym przyciskiem myszy na jednym z nich i wybierz opcję (klawisz F2). Powinieneś zobaczyć okno, w którym możesz wybrać w jaki sposób wybrane pliki powinny być nazwane.
Znak '#' wszędzie oprócz nazwy pliku zostanie zamieniony numerem zaczynając od '1' dla pierwszego pliku i coraz wyższym dla każdego kolejnego pliku. Jeżeli wpiszemy więcej niż jeden hash to z przodu liczby będą dopisywane liczby.
- # zostanie zastąpiony przez 1, 2, 3, 30, 150, itd
- #### zostanie zmienione na 0001, 0002, 0003, 0030, 0150, itd
- Krita Handbuch: Krita Wiki (engl. - grunds. mehrsprachig, mit Stand Mai 2020 jedoch keine deutsche Version verfügbar)
- Plan Handbuch: Wiki (Entwurf) (engl. - mit Stand Mai 2020 keine Übersetzung möglich)
Weiter Handbücher sind in Vorbereitung.
Blogilo is an fully-featured blogging client. It allows local creation and editing of blog posts. Various blogging APIs are supported for publishing.
Features
- Fully-featured WYSIWYG or html editing
- Allows you to preview with your style-sheet, see it as your visitors do.
- You can create, modify and delete posts, create drafts, and schedule posting
- Supports Blogger1.0, MetaWeblog, MovableType and Google GData APIs
- Supports adding media files if your API supports them.
- You can add images to post from your system, if your API supports it.
- Can save a local copy before publishing the post
- Save your writing copy to prevent data loss, at configurable intervals.
- Check spelling, using KDE's spell-checker (most languages available)
- Can fetch your recent blog posts
- Amarok/Manual/Organization/ScriptManager/da
Håndtering af Scripts
Håndtering af Scripts rummer mulighederne for at udvide Amaroks funktionalitet med tilpassede scripts. Den nås den igennem menuen ved at vælge . Scripts kan installeres fra downloadede script-pakker eller ved at klikke på knappen , som kan hente og installere de seneste scripts bidraget af andre brugere fra internettet.
Se Indstilling af Amarok -> Scripts for mere information.
Správce skriptů
Správce skriptů obsahuje volby požadované pro rozšíření funkcionality Amaroku prostřednictvím vlastních skriptů. Dostanete se k němu v nabídce pro , . Skripty lze instalovat ze stažených balíčků se skripty, nebo pomocí tlačítka , které umí z internetu stáhnout a nainstalovat nejnovější uživateli poskytnuté skripty.
Další informace hledejte v Nastavit Amarok -> Skripty.
Tastaturkürzel für Stichwörter erstellen mit digiKam
Beschrieben in Dmitri Popov's Blog, 25 Mai, 2011
digiKam makes it relatively easy to tag photos. Select one or several photos, expand the right sidebar, tick the tags you want, and press the button. You can also assign keyboard shortcuts to the often-used tags to speed up the tagging process. To assign a keyboard shortcut, right-click on the tag you want in the right sidebar and choose .

Press the button, and hit the key combination of your choice to register the shortcut. Press the button, and you are done. Select now a photo, press the specified keyboard shortcut, and digiKam assigns the appropriate tag to the photo.
Keybinding Reference
Keyboard Shortcuts
Keyboard shortcuts let you quickly access Amarok's power. Change the shortcuts using .

Shortcuts are divided into two groups:
Control from Console
To control Amarok from the console, type
amarok --help-all
for a current complete list of available commands.
Simple Toning in digiKam
Transcribed from Dmitri Popov's blog, 4th April, 2012
Adding a dash of color tint to a black and white photo can often produce a dramatic effect, and digiKam does have a handful of toning filters for you to try.
But you are not limited to the built-in filters: using digiKam’s editing tools, you can easily tint photos using whatever color you like. To do this, open a photo for editing, choose and set to -100. This effectively turns the image into a black and white photo. Press to save the changes, then choose . Use the sliders to create the toning color you want. Press , and you are done.
Amarok na jiných systémech
Amarok je zamýšlen pro prostředí KDE, ale pracuje stejně tak i na jiných systémech. I když to chce nějaké úsilí, Amarok může běžet na těchto systémech:
| Ne-KDE pracovní prostředí | |
|
|
Windows |
|
|
OS X |
Kolekcje Zdalne
Często wygodnym jest dzielić swoje media w sieci, zwłaszcza jeśli chcesz ich używać na wielu komputerach. Może być to wykonane na wiele sposobów:
Vzdálené sbírky
Často je velice užitečné sdílet soubory po síti, zvlášť když je chcete použít na různých počítačích. Dá se to provést různými způsoby:
Tildel tastaturgenveje til mærker i digiKam
Fra Dmitri Popovs blog, 25. maj, 2011
digiKam gør det ret let at mærke fotos. Vælg et eller flere fotos, åbn i det højre sidepanel, sæt flueben ved de mærker, som du ønsker at bruge og klik på knappen . Du kan også tildele tastaturgenveje til de oftest brugte mærker for at lette mærkningen. For at tildele en tastaturgenvej skal du højreklikke på det mærke, du vil bruge i i højre sidepanel og vælge .
Klik på knappen og indtast den kombination, som du vil bruge for at registrere genvejen. Klik , og du er færdig. Vælg nu et foto og tast den nye genvej, så vil digiKam tildele det ønskede mærke til fotoet.
Amarok sur les autres plateformes
Amarok est conçu pour le bureau KDE, mais il fonctionne aussi bien sur d'autres plateformes. Bien qu'il demande un peu d'effort, Amarok peut s'exécuter dans ces configurations:
| Bureaux non KDE | |
|
|
Windows |
|
|
OS X |
Lista de músicas
A Lista de músicas é um componente poderoso do Amarok. Uma pessoa pode arrastar para ela algumas faixas, mas existem muito mais funcionalidades disponíveis.
- Listas de músicas salvas
- Filtragem da lista de músicas
- Gerenciador de fila
- Listas de músicas dinâmicas
- Gerador de listas de músicas automático
Následující odstavce Vám pomohou nastavit Váš prohlížeč
Firefox
- Nastavení KMailu jako výchozího emailového klienta pro Firefox
- Tato stránka na fóru Vám pomůže integrovat vzhled Firefoxu s KDE a nastavit KGet jako výchozího správce stahování
- Wiki archivy Gentoo obsahují návod jak integrovat Firefox do KDE
- Tento blog popisuje zkušenosti s konfigurací Firefoxu 3.x.
Eksterne samlinger
Ofte er det meget nyttigt at dele dine mediefiler over et netværk, særligt hvis du bruger den på forskellige computere. Dette kan gøres på forskellige måder:
All WordPress blog support RSS, even though some aren't explicitly displaying an RSS button.
For the blogs that have RSS buttons, just click on the buttons and your browser should open a popup where you can select the RSS app you want to open the link, select .
If there isn't any RSS buttons or link, you can also modify the URL to get an RSS feed. Just add , at the end of a WordPress category to get a feed for the category or from the blog homepage to get a feed for all posts.
You will now see the opened feed window, where you can choose Akregator.
Amarok na innych platformach
Amarok był tworzony z myślą o KDE, ale działa też na innych platformach. Chociaż wymaga to trochę starań, program Amarok można uruchomić na następujących platformach:
| Dystrybucje systemu Linux bez KDE | |
|
|
Windows |
|
|
OS X |
Quick Tip: Disable Certain File Types in digiKam
Transcribed from Dmitri Popov's blog, 3 August, 2011
digiKam supports an impressive range of file formats, so you can use the application to handle RAW files, movies and everything in between. But what if you want to explicitly exclude a specific type of files? digiKam offers a simple solution for that.

Choose and switch to the section. To exclude, for example, the PPM format, enter -ppm in the field. You can add multiple formats using a space as separator. Excluding specific formats from digiKam doesn’t actually delete them, but simply hides them from digiKam and removes all metadata from the digiKam databases. So be careful when using exclusion filters if you don’t want to lose tags, ratings, and other metadata.
Remote Collections
Often it is very useful to share your media files across the network, especially if you want to use it on different computers. This can be done in different ways:
Dolphin tiene la capacidad de cambiar el nombre de varios archivos por medio de numeración, aunque esta funcionalidad actualmente está limitada y es útil solo en ciertas situaciones. Una aplicación útil sería para renombrar un conjunto de fotos.
Selecciona los archivos que desees renombrar, luego haz clic con el botón derecho en uno de ellos y selecciona (atajo del teclado F2). Aparecerá un diálogo donde puedes especificar el nombre que quieras que tengan los archivos.
El símbolo '#' en cualquier lugar del nombre de archivo será reemplazado por un número, empezando por '1' para el primer archivo y continuando de forma ascendente para cada uno hasta el último. Al colocar varias almohadillas se añadirán ceros a los números.
- # será reemplazado por 1, 2, 3, 30, 150, etc
- #### será reemplazado por 0001, 0002, 0003, 0030, 0150, etc
Digital Audio Access Protocol (DAAP)
DAAP jest to protokół udostępniania mediów w sieci. Na początku używany przez iTunes, teraz szeroko rozpowszechniony.
Klient DAAP
Amarok automatycznie pokazuje utwory z serwera w panelu i nie jest wymagana dalsza konfiguracja. Jeśli kolekcja nie pokazuje się kliknij ikonę by upewnić się czy nie jesteś w widoku połączonym.

Script Manager
The Script Manager contains the options required to extend the functionality of Amarok through custom scripts. It is reached from the menu, . Scripts can be installed from downloaded script packages, or from the button which can fetch and install the latest user-contributed scripts from the Internet.
Please refer to Configuring Amarok -> Scripts for more information.
Dolphin a la possibilité de renommer plusieurs fichiers en les numérotant, bien que la fonctionnalité soit actuellement limitée et utile uniquement dans certaines situations. Une application utile serait de renommer une série de photos.
Sélectionnez les fichiers que vous souhaitez renommer, puis faites un clic droit sur l'un d'entre eux et sélectionnez (raccourci clavier F2). Il vous sera présenté un dialogue où vous pouvez spécifier comment vous voulez que les fichiers soient nommés.
Le symbole «#» n'importe où dans le nom du fichier sera remplacé par un numéro, commençant par «1» pour le premier fichier et s'incrémentant pour chaque nouveau fichier. Si vous ajouter plusieurs fois le symbole «#», le chiffre zéro sera ajouté au devant des nombres.
- # sera remplacé par by 1, 2, 3, 30, 150, etc
- #### sera remplacé par 0001, 0002, 0003, 0030, 0150, etc
Te artykuły pomogą Ci skonfigurować swoją przeglądarkę internetową
Firefox
- Konfiguracja Firefoxa, aby używał KMail do odnośników mailto
- Ten wątek na forum pomoże Ci zintegrować wygląd Firefoxa ze środowiskiem oraz ustawić KGet jako menedżer pobierania
- W archiwum wiki Gentoo znajdziesz instrukcję jak zintegrować Firefoxa z KDE
- Ten blog omawia wrażenia użytkownika w konfiguracji Firefox 3.x
O Amarok em outras plataformas
O Amarok é destinado ao ambiente de trabalho KDE, mas também funciona bem em outras plataformas. Ainda que possa dar algum trabalho, o Amarok funciona nestas configurações:
| Ambientes de trabalho não-KDE | |
|
|
Windows |
|
|
OS X |
Доступність у KDE
- Допоміжні програми
- Список допоміжних програм у KDE. До списку включено програми для збільшення зображення, озвучування тексту та голосового керування.
- Початкові зауваження щодо програм для читання з екрана
- Огляд налаштовування програм KDE для читання з екрана.
- Огляд програм
- Список програм KDE та огляд доступності цих програм з точки зору читання з екрана.
- Доступність у Плазмі
- Як користуватися допоміжними програмами у Плазмі.
Oversigt over tastaturgenveje
Tastaturgenveje
Tastaturgenveje lader dig tilgå Amaroks funktioner hurtigt. Du kan ændre tastaturgenvejene ved at vælge .
Genvejene er inddelt i to grupper:
Kontrol fra konsollen
For at kontrollere Amarok fra konsollen kan du skrive
amarok --help-all
for at få den aktuel liste over tilgængelige kommandoer.
Amarok på andre platforme
Amarok er beregnet til at bruge på KDE's skrivebord, men den virker også på andre platforme. Selv om det kræver en indsats, så kan Amarok køre på disse konfigurationer:
| Andre skriveborde end KDE | |
|
|
Amarok på Windows |
|
|
Amarok på OS X |
Digital Audio Access Protocol (DAAP)
DAAP je protokol na sdílení multimédiíí přes síť. Nejprve byl použit pro přehrávač hudby iTunes, ale nyní je široce využíván.
Klient
Amarok ukáže skladby ze serveru v poli , pokud povolíte sbírku DAAP v . Pokud se sbírka neukazuje, klepněte na ikonu ![]() , abyste se ujistil, že nejste ve sloučeném pohledu.
, abyste se ujistil, že nejste ve sloučeném pohledu.
Klávesové zkratky
Klávesové zkratky
Klávesové zkratky vám rychle zpřístupní sílu Amaroku. Zkratky změníte pomocí .
Zkratky jsou rozděleny do dvou skupin:
Ovládání z konzole
Pro ovládání Amaroku z konzole napište toto:
amarok --help-all
Zobrazí se současný úplný seznam dostupných příkazů.
Dolphin은 파일 여러 개의 이름을 숫자를 지정하여 동시에 바꿀 수 있는 기능을 제공하지만, 이 기능의 제약 사항 때문에 일부 상황에서만 유용할 수 있습니다. 이 기능을 유용하게 사용할 수 있는 방법은 사진 모음의 이름을 바꾸는 것입니다.
이름을 바꿀 파일을 선택하고, 파일 중 하나에서 오른쪽 단추로 클릭한 다음 를 선택하거나 F2 키를 누르십시오. 이름을 바꿀 방법을 물어 볼 대화 상자가 표시됩니다.
파일 이름에 '#' 기호를 입력하면 첫 번째 파일은 '1'로 시작하여 이후 파일마다 1씩 증가하는 숫자로 대체됩니다. 해시 기호를 여러 개 입력하면 숫자 앞에 0을 붙입니다.
- #을 입력하면 1, 2, 3, 30, 150 등으로 대체됩니다
- ####을 입력하면 0001, 0002, 0003, 0030, 0150 등으로 대체됩니다
모든 WordPress 블로그는 RSS 버튼을 명시적으로 표시하지 않는 경우에도 RSS를 지원합니다.
RSS 버튼이 있는 블로그라면 버튼을 클릭했을 때 웹 브라우저에서 링크를 열 때 사용할 RSS 앱을 선택하는 팝업이 표시됩니다. 해당 팝업에서 를 선택하십시오.
RSS 버튼이나 링크가 없다면 URL을 수정하여 RSS 피드를 가져올 수도 있습니다. WordPress 분류 URL 끝에 를 추가하면 분류별 피드를 가져올 수 있고, 홈페이지 URL 끝에 추가하면 모든 글 피드를 가져옵니다.
이제 피드 창이 표시되며, 이 창에서 Akregator를 선택할 수 있습니다.
Hurtigt tip: Deaktivér visse filtyper i digiKam
Fra Dmitri Popovs blog, 3. august, 2011
digiKam understøtter en imponerende mængde af filformater, så du kan bruge programmet til at håndtere RAW-filer, videoer og alt der imellem; men hvad hvis du eksplicit vil ekskludere en vis filtype? digiKam giver en enkel løsning på dette.
Vælg og gå til afsnittet . Hvis du for eksempel vil ekskludere PPM-formatet, så skal du skrive -ppm i feltet . Du kan tilføje flere formater ved at adskille dem med et mellemrum. Når du ekskluderer specifikke formater fra digiKam, så bliver de ikke slettede; men de bliver gemt for digiKam og deres metadata slettes fra digiKams database Vær forsigtig, sådan at du ikke mister mærker, karakterer og andre metadata, når du ekskluderer filer.
Доступность
- Вспомогательные программы
- Список вспомогательных программ в KDE. В список включены программы для увеличения изображения, озвучивания текста и голосового управления.
- Начальные замечания по программам для чтения с экрана
- Обзор настройки программ KDE для чтения с экрана.
- Обзор программ
- Список программ KDE и обзор доступности этих программ с точки зрения чтения с экрана.
- Доступность в Plasma
- Как пользоваться вспомогательными программами в Plasma.
Assign Keyboard Shortcuts to Tags in digiKam
Transcribed from Dmitri Popov's blog, 25 May, 2011
digiKam makes it relatively easy to tag photos. Select one or several photos, expand the right sidebar, tick the tags you want, and press the button. You can also assign keyboard shortcuts to the often-used tags to speed up the tagging process. To assign a keyboard shortcut, right-click on the tag you want in the right sidebar and choose .
Press the button, and hit the key combination of your choice to register the shortcut. Press the button, and you are done. Select now a photo, press the specified keyboard shortcut, and digiKam assigns the appropriate tag to the photo.
|
Создавайте диаграммы и блок-схемы при помощи Flow |
Flow - простая в использовании программа для работы с диаграммами и блок-схемами, тесно интегрированная с другими программами Calligra. С эй помощью можно создавать сетевые,структурные диаграммы, блок-схемы и т.д.
Возможности
- Создание блок-схем, сетевых, структурных и других диаграмм
- Импортируемые шаблоны Dia
- Установка расширений для добавления возможностей
Ссылки
Blogilo è un'applicazione completa per gestire un blog. Permette di creare e modificare in locale articoli di blog. Supporta varie API di sistemi di blog per la pubblicazione.
Caratteristiche
- editor WYSIWYG o html completo di tutte le funzioni;
- ti permette di vedere in anteprima il risultato con il tuo foglio di stile, come i visitatori del tuo blog;
- puoi creare, modificare ed eliminare messaggi, creare bozze e pianificare l'inserimento;
- supporta Blogger1.0, MetaWeblog, MovableType e Google GData;
- supporta l'aggiunta di file multimediali se il tuo servizio li supporta;
- puoi aggiungere immagini dal tuo computer se il tuo servizio le supporta;
- puoi salvare una copia locale prima di pubblicare il messaggio;
- salva la tua bozza ad intervalli configurabili per prevenire perdite di dati;
- controlla l'ortografia utilizzando il correttore ortografico di KDE (sono disponibili la maggior parte delle lingue);
- può copiare i tuoi messaggi recenti dal blog.
- Amarok/Manual/Organization/ScriptManager/pt-br
Gerenciador de scripts
O Gerenciador de scripts contém as opções necessárias para ampliar as funcionalidades do Amarok através de scripts personalizados. Está acessível no menu em . Os scripts podem ser instalados a partir dos pacotes baixados ou a partir do botão , que permite-lhe baixar e instalar os mais recentes scripts disponibilizados pelos usuários na Internet.
Por favor, consulte a referência Configurando o Amarok -> Scripts para obter mais informações.
Coleções remotas
Frequentemente é muito útil compartilhar os seus arquivos multimídia pela rede, especialmente se você quiser compartilhar entre vários computadores. Isto pode ser feito de diferentes formas:
 |
Filelight cira um mapa interativo que ajuda a vizualizar a usagem de disco do seu computador |
Filelight allows you to quickly understand exactly where your diskspace is being used by graphically representing your file system as a set of concentric segmented-rings. You can use it to locate hotspots of disk usage and then manipulate those areas using Konqueror, Dolphin, or Krusader.
Funcionalidades
- Pode examinar discos removíveis, locais ou remotos
- Configurable color schemes
- Handy file system navigation by mouse clicks
- Full information on files and directories on hovering
- Files and directories can be copied or removed directly from Filelight context menu
The Handbook is available from here.
Simular un efecte d'esvaïment a digiKam
Transcrit des d'un article al blog d'en Dmitri Popov, el 18 d'abril de 2012
De vegades la millor manera de donar-li vida a una fotografia és fent que es vegi esvaïda, i digiKam fa que sigui summament fàcil aconseguir aquest efecte.
Obriu la fotografia per a l'edició i escolliu . Ajusteu la compensació de l'exposició per sobreexposar una mica la fotografia i ajusteu la temperatura del color a 12000 per afegir un tint daurat fort a la fotografia. Premeu el botó per aplicar les modificacions. Llavors escolliu i establiu a -50. Premeu , i ja està. La tècnica descrita funciona particularment bé amb els tons de la pell, pel que és adequat per al seu ús amb les fotografies de retrat.
- Вступний підручник з Calligra: інтернет-версія, PDF
- Підручник Kexi: інтернет-версія, вікі, PDF
- Підручник з Krita: вікі (чернетка)
- Підручник з Plan: вікі (чернетка)
- Підручник з Sheets: інтернет-версія, PDF
- Підручник зі Stage: інтернет-версія, PDF
Інші підручники ще не написано.
Blogilo, tam özellikli bir blog yazım istemcisidir. Blog gönderilerini yerel olarak oluşturmanızı ve düzenlemenizi sağlar. Yayın için çeşitli blog yazım API'ları desteklenmektedir.
Özellikler
- Tam özellikli WYSIWYG (Görsel) veya HTML düzenleme
- Önizlemelerinizi, ziyaretçilerinizin gördüğü gibi yapmanıza izin verir.
- Gönderi oluşturabilir, düzenleyebilir, silebilir, taslaklar oluşturabilir ve gönderileri zamanlayabilirsiniz.
- Blogger1.0, MetaWeblog, MovableType ve Google GData API'larını destekler
- API'ınız destekliyorsa ortam dosyaları eklemeyi destekler.
- API'ınız destekliyorsa sisteminizden göndermek üzere resim ekleyebilirsiniz.
- Gönderiyi yayınlamadan önce yerel bir kopyasını kaydedebilirsiniz
- Metninizin kaybını önlemek için metninizi yapılandırılabilir aralıklarla kaydedin.
- KDE'nin yazım denetleyicisi ile (çoğu dilde kullanılabilir) yazım denetimi yapın
- En son gönderilen gönderileri getirebilir
- Amarok/Manual/Organization/Collection/RemoteCollections
Remote Collections
Often it is very useful to share your media files across the network, especially if you want to use it on different computers. This can be done in different ways:
|
Filelight creates an interactive map of concentric segmented-rings that helps visualize disk usage on your computer |
Filelight allows you to quickly understand exactly where your diskspace is being used by graphically representing your file system as a set of concentric segmented-rings. You can use it to locate hotspots of disk usage and then manipulate those areas using Konqueror, Dolphin, or Krusader.
Features
- Can scan local, remote or removable disks
- Configurable color schemes
- Handy file system navigation by mouse clicks
- Full information on files and directories on hovering
- Files and directories can be copied or removed directly from Filelight context menu
The Handbook is available from here.
Tonificació simple en digiKam
Transcrit des d'un article al blog d'en Dmitri Popov, el 4 d'abril de 2012
Afegir una mica de tint de color a una fotografia en blanc i negre sovint pot presentar un efecte dramàtic, i digiKam té un grapat de filtres de to per a que proveu.
Però no esteu limitat als filtres integrats: utilitzant les eines d'edició de digiKam, podeu tintar amb facilitat fotografies utilitzant qualsevol color que us agradi. Per fer-ho, obriu una fotografia per editar, escolliu i el conjunt a -100. Això efectivament convertirà la imatge en una fotografia en blanc i negre. Premeu per desar els canvis, a continuació, escolliu . Utilitzeu els controls lliscants per crear el color que voleu tonificar. Premeu , i ja està fet
Blogilo ist ein voll ausgestatteter Blogging-Cleint. Er ermöglicht das lokale Erstellen und Bearbeiten von Blog-Beiträgen. Für die Veröffentlichung werden zahlreichen Blogging-APIs unterstützt.
Merkmale
- Voll ausgestattete WYSIWYG- oder HTML-Bearbeitung
- Ermöglicht es Ihnen, die Vorschau mit Ihrem Style-Sheet zu sehen, so wie es Ihre Besucher werden.
- Sie können Beiträge erstellen, bearbeiten und löschen, Entwürfe erstellen und Beiträge planen
- Unterstützt Blogger1.0-API, MetaWeblog-API, MovableType-API und Google-GData-APIs
- Sofern Ihre API es unterstützt, können Mediendateien hinzugefügt werden
- Sofern Ihre API es unterstützt, können Sie Bilder von Ihrem Computer hinzufügen
- Kann eine lokale Kopie des Beitrags vor dem Veröffentlichen speichern
- Speichern Sie Arbeitskopien in einstellbaren Intervallen, um Datenverlust zu vermeiden.
- Rechtschreibprüfung mittels der KDE-Rechtschreibprüfung (die meisten Sprachen sind verfügbar)
- Kann Ihre letzten Blog-Beträge holen
- Amarok/Manual/Organization/Collection/RemoteCollections/DAAP/en
Digital Audio Access Protocol (DAAP)
DAAP is a protocol to share media over a network. It was first used for the iTunes music player, but is used widely now. The current state is that the DAAP-plugin won't work with a recent iTunes, the Firefly media server is known to work.
Client
Amarok will show the tracks from the server in the pane if you enable the DAAP Collection in . If the collection is not showing up, click the ![]() icon to be sure you are not in Merged View.
icon to be sure you are not in Merged View.
Lav en Bleach Bypass-effekt i digiKam
Fra Dmitri Popovs blog, 2. april 2013
digiKam har værktøjer, som du kan bruge til at simulere en række effekter herunder bleach bypass. Denne effekt producerer et afmættet billede med høj kontrast. I digiKam laves bleach bypass-effekten i to enkle trin. Åbn et foto i editoren og vælg . Angiv den ønskede værdi for mætning imellem -35 og -59 og klik så på for at afmætte billedet.

Vælg så , vælg i drop-ned-listen Kanal og justér kurven, sådan at den får en s-form. Du kan frit eksperimentere med kurvens stejlhed for at opnå det bedste resultat. Som udgangspunkt kan du downloade en foruddefineret s-kurve og importere den i digiKam ved hjælp af knappen .
下列文章帮你设置浏览器
Firefox
- 通过Python将你的网络密码导出成纯文本文件 sourcecode.
- 这个论坛帖子帮你设定 Firefox 的外观,并设定 KGet 作为其下载管理器。
- 这份Gentoo wiki 的存档有如何将firefox与KDE集成的教程
- 在Firefox中使用plasma打开和关闭对话框.
- [[Special:myLanguage/Browser Configuration/Firefox Breeze theme|在Firefox中使用基于微风的主题].
Quick Tip: Disable Certain File Types in digiKam
Transcribed from Dmitri Popov's blog, 3 August, 2011
digiKam supports an impressive range of file formats, so you can use the application to handle RAW files, movies and everything in between. But what if you want to explicitly exclude a specific type of files? digiKam offers a simple solution for that.
Choose and switch to the section. To exclude, for example, the PPM format, enter -ppm in the field. You can add multiple formats using a space as separator. Excluding specific formats from digiKam doesn’t actually delete them, but simply hides them from digiKam and removes all metadata from the digiKam databases. So be careful when using exclusion filters if you don’t want to lose tags, ratings, and other metadata.
Hjem » Programmer » Uddannelse » BlinKen

|
Blinken er vores version af det velkendte spil Simon Says.
Det er en del af KDE Education Project. |

Beskrivelse
Blinken er baseret på et elektronisk spil udgivet i 1978, som udfordrede spillerne til at huske stadigt længere sekvenser.
På apparatets forside er det fire forskellige farvede knapper, som hver har sin egen lyd. Disse knapper lyser op i tilfældig orden og skaber derved den sekvens som du skal huske. Hvis du husker sekvensen af lys i den rigtige rækkefølge, så går du videre til det næste trin, hvor du præsenteres for den samme sekvens med et ekstra element tilføjet. Hvis du husker forkert, så er spillet tabt og du må starte forfra.
Målet er at opnå et højt pointtal - hvert trin i sekvensen givet et point, så hvis du husker en sekvens af 8 lys, så får du 8 point i topscoringslisten.
Dokumentation
Referência dos atalhos de teclado
Atalhos de teclado
Os atalhos de teclado permitem-lhe acessar rapidamente as funcionalidades do Amarok. Altere os atalhos usando a opção .
Os atalhos estão divididos em dois grupos:
Controle a partir da linha de comando
Para controlar o Amarok a partir da linha de comando, digite
amarok --help-all
para obter uma lista completa dos comandos disponíveis.
Référence des raccourcis clavier
Raccoucis clavier
Les raccourcis clavier vous permettent d'accéder rapidement à la puissance de Amarok. Modifiez les raccourcis avec .
Les raccourcis se divisent en deux groupes :
Contrôle à partir de la console
Pour controler Amarok à partir de la console, entrez
amarok --help-all
pour obtenir une liste complète des commandes disponibles.
Amarok on other platforms
Amarok is intended for the KDE desktop, but it works on other platforms as well. Although it takes some effort, Amarok can run on these configurations:
| Non-KDE Desktops | |
|
|
Windows |
|
|
OS X |
|
Ваша програма для створення діаграм та блок-схем. |
Flow — проста у користуванні програма для роботи з діаграмами та блок-схемами тісно інтегрована з іншими програмами Calligra. За її допомогою можна створювати діаграми мережі, структурні діаграми, блок-схеми тощо.
Можливості
Створення мережевих діаграм, структурних діаграм, блок-схем та інших діаграм.
- Імпортовані шаблони Dia.
- Оболонка додатків для додавання можливостей.
Посилання
- Форум Calligra
- Category Translation TemplatePlease use only the categories defined in this table. If your language translations of the term are not defined, please add suitable definitions now, so that others can follow them.
To avoid edit conflicts, please also use {{Being_Edited}} (then save before continuing) while you work, and remove it when you have finished.
| English | Language1 | Language2 | Language3 | Language4 |
|---|---|---|---|---|
| Accessibility | ||||
| Admin | ||||
| Advanced Users | ||||
| Applications | ||||
| Desktop | ||||
| Development | ||||
| Education | ||||
| File Management | ||||
| Games | ||||
| Getting Started | ||||
| Graphics | ||||
| Hidden Categories | ||||
| Home and Hobby | ||||
| Internet | ||||
| KDE3 | ||||
| Multimedia | ||||
| Office | ||||
| Plasma | ||||
| Security | ||||
| System | ||||
| Template | ||||
| Tutorials | ||||
| Utilities |
Create a Bleach Bypass Effect in digiKam
Transcribed from Dmitri Popov's blog, 2 April 2013
Using tools available in digiKam, you can simulate a number of effects, including bleach bypass. This effect produces a desaturated high-contrast image. Creating the bleach bypass effect in digiKam is done in two simple steps. Open a photo for editing and choose . Specify the desired saturation value somewhere between -35 and -59, then press to desaturate the photo.
Choose then , select from the Channel drop-down list, and adjust the curve so it’s shaped as S. Feel free to experiment with the steepness of the curve to achieve the best result. As a starting point, you can download a ready-made S curve and import it into digiKam using the button.
Assegnare scorciatoie da tastiera alle etichette in digiKam
Trascritto dal blog di Dmitri Popov, 25 maggio 2011
digiKam facilita l'assegnazione di etichette alle foto. Seleziona una o più foto, espandi la barra laterale destra , spunta le etichette desiderate e premi il pulsante . Puoi anche assegnare scorciatoie da tastiera alle etichette più utilizzate per velocizzare l'assegnazione delle etichette. Per assegnare una scorciatoia da tastiera fai clic destro sull'etichetta desiderata nella barra laterale destra e scegli .
Fai clic sul pulsante e premi la combinazione di tasti desiderata per registrare la scorciatoia. Premi il pulsante ed ecco fatto. Ora seleziona una foto, premi la scorciatoia da tastiera specificata e digiKam assegnerà la giusta etichetta alla foto.
Digital Audio Access Protocol (DAAP)
DAAP er en protokol til deling af medier over et netværk. Det blev først brugt i iTunes musikafspilleren, men er nu vidt udbredt. Den aktuelle status er, at DAAP-pluginet ikke virker med opdateret iTunes, men medieserveren Firefly vides at fungere.
Klient
Amarok viser sporene på serveren i feltet , hvis du aktiverer DAAP-samling i i gruppen Samlinger. Hvis samlingen ikke dukker op, så klik ikonet ![]() for at sikre dig, at du ikke er i sammenflettet visning.
for at sikre dig, at du ikke er i sammenflettet visning.
Tous les blogs WordPress supportent RSS, même si certain n'affiche pas explicitement un bouton RSS.
Pour les blogs qui ont un bouton RSS, il suffit de cliquer sur le bouton et votre navigateur web devrait ouvrir une fenêtre contextuelle, où vous pouvez sélectionner l'application pour ouvrir ce flux. Dans notre cas, sélectionner .
S’il n'y a pas de bouton RSS ou de lien, vous pouvez modifier l'URL pour obtenir un flux RSS. Il suffit d'ajouter à la fin d'une catégorie WordPress pour obtenir le flux RSS de la catégorie ou alors l'ajouter à la page d'accueil, pour obtenir un tous les articles.
Vous allez maintenant voir la fenêtre d'ouverture d'un flux RSS, d'où vous pouvez sélectionner Akregator.
Home » Applications » Multimedia » Dragon Player
 |
神龍播放器是個播放影片或音樂的簡單圖形程式 |
神龍播放器 是 KDE SC 4.x 默認的影音播放器。以前叫 Codeine。
特性
- 界面簡單
- 恢復視頻:從你上次看的地方開始播放視頻。
- 支持字幕:自動載入匹配名字的字幕。
- 視頻(亮度,對比度)調節。
- 由於採用了Solid 和 Phonon, 神龍播放器 獨立於任何多媒體框架或是硬件抽象層。
- 支持CD和DVD。
截圖
 |
 |
音樂
- 選擇 就會響起你的音樂。沒有分心的播放列表,只有聲音。
- 會打開一個對話框,允許你找到並播放單個音頻文件。會建立一個播放列表,但這不是主要功能。
更多信息
官網: http://www.dragonplayer.net

|
Integrate your Bluetooth devices with your Plasma workspaces |
Features
- Bluedevil connects your Bluetooth devices to Plasma workspaces
- Performs file actions on your Bluetooth devices as though they were local directories
- Has a System Settings module to aid configuration
- Allows sending of files from a terminal or from your favourite browser


You can get more information from the developer's blog (April 2011) and a video about the new systray menu is available from this nultimedia file
Home » Applications » Multimedia » Dragon Player
|
Dragon Player 是个播放电影或音乐的简单图形程序 |
DragonPlayer 是 KDE SC 4.x 默认的影音播放器。以前叫 Codeine。
特性
- 界面简单
- 恢复视频:从你上次看的地方开始播放视频。
- 支持字幕:自动载入匹配名字的字幕。
- 视频(亮度, 对比度)调节。
- 由于采用了 Solid 和 Phonon , DragonPlayer 独立于任何多媒体框架或是硬件抽象层。
- 支持播放 CD和DVD。
截图
|
|
音乐
- 选择就会响起你的音乐。没有分心的播放列表,只有声音。
- 会打开一个对话框,允许你找到并播放单个音频文件。会建立一个播放列表,但这不是主要功能。
更多信息
官网: http://www.dragonplayer.net
Home » Applications » Education » Test
|
|
Blinken is our version of the well-known game Simon Says.
It is part of the KDE Education Project. |
Description
Blinken is based on an electronic game released in 1978, which challenges players to remember sequences of increasing length.
On the face of the device, there are 4 different color buttons, each one with their own distinctive sound. These buttons light up randomly, creating the sequence that the player must then recall. If the player is successful in remembering the sequence of lights in the correct order, they advance to the next stage, where an identical sequence with one extra step is presented. If they are incorrect, the game is lost, and the player must start again from the beginning.
The goal is to get a high score - each step in the sequence is worth one point, so correct entry of a sequence of 8 lights is worth 8 points on the high score table.
Documentation
Keybinding Reference
Keyboard Shortcuts
Keyboard shortcuts let you quickly access Amarok's power. Change the shortcuts using .
Shortcuts are divided into two groups:
Control from Console
To control Amarok from the console, type
amarok --help-all
for a current complete list of available commands.
Firefox
- Dir-li al Firefox per usi el KMail quan veu un formulari «mailto:».
- Aquesta pàgina del fòrum us ajuda a integrar l'aparença del Firefox, i establir el KGet com a gestor de baixades.
- L'arxiu wiki de Gentoo té un Com es fa (HOWTO) sobre com integrar el Firefox amb el KDE.
- Utilitzar els diàlegs Obre i desa del Plasma en el Firefox.
- Utilitzar un tema inspirat en Brisa en el Firefox.
Protocolo de Acesso de Áudio Digital (DAAP - Digital Audio Access Protocol)
O DAAP é um protocolo para compartilhar conteúdos multimídia em uma rede. Foi usado pela primeira vez no reprodutor de música iTunes, mas agora é amplamente usado.
Cliente
O Amarok irá mostrar as faixas do servidor no painel , se estiver ativada a Coleção DAAP em . Se a coleção não estiver aparecendo, clique no ícone ![]() para se certificar de que não está na visualização combinada.
para se certificar de que não está na visualização combinada.
| BasKet is a note taking application that allows you to quickly and easily organize information. It is great for making todo lists, menus, schedules, and other lists. |
特性
不同於很多筆記城市, BasKet 允許使用者在 baskets 的下一層裡新建組織筆記,basket 裡的筆記可以互相組合分組便於更好的管理,筆記自身可以包含嵌入的多媒體(電影、圖片、甚至是聲音片段)以及純文本,鏈接和富文本。
BasKet 能夠導入其他各種程式的筆記,包括 KNotes,TomBoy,StickyNotes,KJots 和 TuxCards。
筆記可以標記為重要、完成、進行中,或其他很多名稱。使用標記,能非常方便的對列表中的東西進行核對和取消。BasKet 也支持創建用戶自定義的標記。
BasKet 其他一些特性包括:
- 對 baskets 的密碼和 public-key 保護
- 整合在 Kontact 和系統托盤中
- 能夠導出筆記為網頁
- Filelight/da
|
Filelight laver et interaktivt kort af koncentriske, segmenterede ringe, som skal visualisere diskforbruget på din computer |
Filelight lader dig hurtigt få overblik over, hvor meget diskplads du bruger ved at repræsentere dit filsystem grafisk som et sæt af koncentriske, segmenterede ringe. Du kan bruge det til at lokalisere steder, hvor der bruges meget diskplads for derefter at håndtere dem i Konqueror, Dolphin eller Krusader.
Hovedpunkter
- Kan scanne lokale, netværks- og flytbare diske
- Indstillelige farveskemaer
- Nem navigation i filsystemet ved klik med musen
- Fuld information om filer og mapper ved at lade musen svæve over dem
- Filer og mapper kan kopieres og slettes direkte ved hjælp af Filelights kontekstmenu
Håndbogen findes her.
Assignar dreceres de teclat a les etiquetes al digiKam
Transcrit des d'un article al blog d'en Dmitri Popov, el 25 de maig de 2011
digiKam facilita l'assignació d'etiquetes a les fotografies. Seleccioneu una o diverses fotografies, expandiu la barra lateral dreta , marqueu les etiquetes que voleu i premeu el botó . També és possible assignar dreceres de teclat a les etiquetes que sovint s'utilitzen per accelerar el procés d'etiquetatge. Per assignar una drecera de teclat, feu clic sobre l'etiqueta en la barra lateral dreta i escolliu .
Premeu el botó , i premeu la combinació de tecles de la vostra elecció per registrar la drecera. Premeu el botó i ja està. Seleccioneu ara una fotografia, premeu la drecera de teclat determinada, i digiKam assignarà l'etiqueta apropiada a la fotografia.
| BasKet is a note taking application that allows you to quickly and easily organize information. It is great for making todo lists, menus, schedules, and other lists. |
特性
不同于很多笔记程序, BasKet 允许使用者在 baskets 的下一层里新建组织笔记,basket里的笔记可以互相组合分组便于更好的管理,笔记自身可以包含嵌入的多媒体(电影,图片,甚至是声音片段)以及纯文本,链接和富文本。
BasKet 能够导入各种其他程序的笔记,包括 KNotes,TomBoy,StickyNotes,KJots 和 TuxCards。
笔记可以标记为重要,完成,进行中,或其他很多名称。使用标记,非常方便的对列表中的东西进行核对和取消。 BasKet 也支持创建用户自定义标记。
BasKet 其他一些特性包括:
- 对 baskets 的密码和 public-key 保护
- 整合在 Kontact和系统托盘内
- 能够导出你的笔记为 HTML 网页
- BlinKen/fr
Home » Applications » Education » Test
|
|
Blinken est notre version du célèbre jeu Simon.
Il fait partie du projet KDE Education. |
Description
Blinken est basé sur un jeu électronique sorti en 1978, qui défie les joueurs en leur demandant de se rappeler des séquences de longueur croissante.
Sur la face de l'appareil, il y a 4 boutons de couleurs différentes, chacun émettant un son distinctif. Ces boutons s'allument de façon aléatoire, créant une séquence que le joueur doit se rappeler. S'il parvient à se remémorer la séquence dans le bon ordre, il passe au niveau suivant où une séquence identique avec une étape supplémentaire est jouée. S'il se trompe, le joueur a perdu et doit recommencer du début.
Le but est d'obtenir un meilleur score - chaque étape de la séquence vaut un point, donc une entrée correcte d'une séquence de 8 lumières vaut 8 points sur le tableau des meilleurs scores.
Documentation
Home » Applications » Education » Test
|
|
Blinken ist unsere Version des bekannten Spiels "Senso".
Es gehört zum KDE Education Project. |
Beschreibung
Blinken basiert auf einem elektronischen Spiel, das 1978 veröffentlicht wurde. Das Ziel des Spiels ist es, sich eine immer länger werdende Farbfolge zu merken.
Die Oberfläche zeigt 4 verschiedene Farbtasten, jede mit einem eigenen, unverwechselbaren Ton. Die Tasten leuchten in zufälliger Reihenfolge auf, die sich der Spieler merken muss. Wenn die Folge richtig wiederholt wurde, folgt die nächste Stufe: Die Folge wird erneut angezeigt, jedoch mit einem zusätzlichen Schritt am Ende. Wenn man einen Fehler macht, ist das Spiel verloren und man muss von vorn beginnen.
Ziel ist es, möglichst viele Punkte zu erreichen - jeder Schritt zählt einen Punkt. Wenn man also zum Beispiel 8 Schritte richtig wiederholen konnte, ist das für Highscore Tabelle 8 Punkte wert.
Dokumentation
滑鼠手勢
要是沒用過滑鼠手勢的話去Mousegestures看看。
第一步 - 下載手勢文件
猛擊這裡下載配置文件。需要KDE SC 4.3+
支援
- Konqueror
- Firefox
- Opera
- Arora
- Rekonq
- Chromium
- Chrome Browser
- Dolphin
- Kontact
第二步 - 導入下載的文件
導入下載的配置文件。把Browser這個組移到最上層。然後打勾。

第三步 - 配置
點擊,啟用鼠標手勢,鼠標按鍵: 2 是“中鍵” 3 是“右鍵”。
特例
Opera :因為Opera自帶鼠標手勢,所以這部分可以關掉。點Browser ,右側的“條件”標籤頁,刪除Opera

Blogilo est un éditeur de blog riche en fonctionnalités. Il permet la création et l'édition locale des billets de blog. Plusieurs API sont pris en charge pour la publication.
Fonctionnalités
- Fonction complète d'édition WYSIWYG ou HTML
- Permet de prévisualiser votre feuille de style, regardez-la comme vos visiteurs la voit.
- Vous pouvez créer, modifier et supprimer des messages, créer des brouillons et planifier les publications
- Prend en charge Blogger1.0, MetaWeblog, MovableType et Google GData API
- Prend en charge l'ajout de fichiers multimédia si votre API le gère.
- Vous pouvez ajouter des images à message de votre système, si votre API le gère.
- Possibilité de sauvegarder une copie locale avant de publier le message
- Enregistrer votre brouillon lors que vous écrivez pour éviter toute perte de données, à des intervalles configurables.
- Vérification de l'orthographe, utilisant le correcteur orthographique de KDE (la plupart des langues sont disponibles)
- Peut récupérer vos messages récents de votre blog
- Bluedevil/nl
|
|
Integrate your Bluetooth devices with your Plasma workspaces |
Features
- Bluedevil verbindt uw Bluetoothapparaten met Plasma werkomgevingen
- Performs file actions on your Bluetooth devices as though they were local directories
- Heeft een Systeeminstellingen-module om te helpen tijdens de configuratie
- Laat u bestanden versturen vanuit een terminal of vanuit uw favoriete browser
You can get more information from the developer's blog (April 2011) and a video about the new systray menu is available from this nultimedia file
Inizio » Applicazioni » Istruzione » Blinken
|
|
Blinken è la nostra versione del celebre gioco Simon Says.
Fa parte del progetto KDE Education . |
Descrizione
Blinken è basato su un gioco elettronico pubblicato nel 1978 in cui i giocatori vengono sfidati a ricordare sequenze di lunghezza crescente.
Per quanto riguarda il dispositivo ci sono 4 pulsanti di colore diverso ognuno con un proprio suono distintivo. Questi pulsanti si illuminano in modo casuale creando la sequenza che il giocatore deve poi ricordare. Se il giocatore riesce a ricordare la sequenza di luci nell'ordine corretto, avanza al livello successivo in cui viene presentata una sequenza identica con un elemento in più. Se il giocatore sbaglia, la partita è persa e deve ricominciare dall'inizio.
L'obiettivo è ottenere un punteggio elevato: ogni passaggio della sequenza vale un punto, quindi una sequenza corretta di 8 luci vale 8 punti nella classifica.
Documentazione
Home » Applications » Education » Test
|
|
Blinken es nuestra versión del conocido juego "Simón dice".
Es parte del Proyecto de Educación KDE. |
Descripción
Blinken se basa en un juego electrónico publicado en 1978, que desafía a los jugadores a recordar secuencias cada vez mas largas.
En la cara del dispositivo, hay 4 botones de colores diferentes, cada uno con su propio sonido distintivo. Estos botones se encienden al azar, creando la secuencia que el jugador debe recordar. Si el jugador logra recordar la secuencia de luces en el orden correcto, avanza a la siguiente etapa, donde se presenta una secuencia idéntica con un paso adicional. si la sequencia es incorrecta, se pierde el juego, y el jugador debe volver a empezar desde el principio.
El objetivo es conseguir una alta puntuación - cada paso en la secuencia vale un punto, una secuencia de 8 luces recordada correctamente vale 8 puntos en la tabla de puntuación más alta.
Documentación
|
|
Integrerer din Bluetooth-enhed med din Plasma-arbejdsflade |
Hovedpunkter
- Bluedevil forbinder dine Bluetooth-enheder til Plasma arbejdsflader
- Udfører filhandlinger på dine Bluetooth-enheder, som om de var lokale mapper
- Har et modul i Systemindstillinger til hjælp med konfiguration
- Lader dig sende filer fra en terminal eller fra din yndlingsbrowser
Du kan få mere information fra udviklerens blog (april 2011) og en video om den nye menu i statusområdet findes i denne multimediefil
Consell ràpid: Desactivar certs tipus de fitxer a digiKam
Transcrit des d'un article al blog d'en Dmitri Popov, el 3 d'agost de 2011
digiKam implementa un impressionant interval de formats de fitxer, de manera que podeu utilitzar l'aplicació per gestionar fitxers RAW, pel·lícules i tot el demés. Però si voleu excloure de forma explícita un tipus específic de fitxer. digiKam ofereix una solució simple.
Escolliu i canvieu a la secció . Per excloure, per exemple, el format PPM, introduïu -ppm al camp . S'hi poden afegir múltiples formats amb un espai com a separador. Excloent els formats específics de digiKam en realitat no s'eliminen, sinó que simplement els oculteu des de digiKam i elimina totes les metadades de les bases de dades de digiKam. Així que aneu amb compte en utilitzar filtres d'exclusió si no voleu perdre les etiquetes, valoracions i altres metadades.
|
Filelight erzeugt eine interaktives Torten-Diagramm, das den Speicherverbrauch auf der Festplatte grafisch darstellt |
Filelight erlaubt es, den verbrauchten Festplattenplatz schnell und exakt zu erfassen, indem es das Dateisystem in einem Tortendiagramm darstellt. Man kann es nutzen, um Schwergewichte zu identifizieren, die dann mit dem Konqueror, dem Dolphin oder dem Krusader bearbeitet werden können.
Funktionen
- Kann lokale-, entfernte- (remote) oder Mobile Datenträger durchsuchen
- anpassbare Farbzuordnungen
- Einfache Dateisystem-Navigation per Maus-Klicks
- vollständige Informationen über Dateien und Verzeichnisse beim Überfahren mit der Maus
- Dateien und Verzeichnisse können direkt aus dem Filelight-Kontextmenü kopiert oder gelöscht werden
Das Handbuch ist hier zu finden
 |
GCompris en suite af læringsprogrammer af høj kvalitet med et stort antal aktiviteter for børn i alderen 2 til 10. |
Oversigt
Nogle af aktiviteterne er udformet som spil, men er dog stadig udviklende.
Her er en liste af aktivitetskategorier med nogle eksempler:
- lær computeren at kende: tastatur, mus, touchskærm ...
- læsning: bogstaver, ord, læsetræning, skrivning ...
- regning: tal, operationer, huske tabeller, tælning, fordoblingstabel ...
- videnskab: slusen, vandcyklussen, vedvarende energi ...
- geografi: lande, regioner, kultur ...
- spil: skak, hukommelse, 4 på linje, galgespil, kryds og bolle ...
- andre: farver, former, Braille, kend tiden ...
I øjeblikket rummer GCompris mere end 100 aktiviteter og flere bliver udviklet. GCompris er fri software, hvilket betyder at du kan tilpasse det til dine behov, forbedre det og vigtigst af alt: dele det med børn overalt.
Nyttige links
Disse artikler hjælper dig med at konfigurere din browser
Firefox
- Lad Firefox bruge KMail, når den møder en mailto: form
- eksportér dine "web-adgangskoder" i Firefox til en almindelig tekstfil med denne python programkode
- Denn forumside (på engelsk) hjælper dig med at integrate Firefox's udseende og bruge KGet som downloadmanager
- Gentoos wikiarkiver (på engelsk) om, hvordan man integrerer Firefox med KDE
- Brug Plasmas Åbn- og Gem-dialoger i Firefox.
- Brug et Breeze-inspireret tema i Firefox.
| Braindump — програма з відкритим кодом, призначена для створення архівів та впорядкування ідей, малюнків, зображень текстів тощо на вашому комп’ютері.
|
Можливості
- області, на яких ви можете розміщувати текст, додавати зображення, музичні записи, діаграми, формули тощо.
- векторна графіка.
- можливості з копіювання та вставлення елементів інших програм, які підтримують ODF.
Додаткові відомості
|
|
Интегрируйте ваши Bluetooth-устройства с рабочими пространствами Plasma |
Features
- Bluedevil connects your Bluetooth devices to Plasma workspaces
- Performs file actions on your Bluetooth devices as though they were local directories
- Has a System Settings module to aid configuration
- Allows sending of files from a terminal or from your favourite browser
You can get more information from the developer's blog (April 2011) and a video about the new systray menu is available from this nultimedia file
Create a Bleach Bypass Effect in digiKam
Transcribed from Dmitri Popov's blog, 2 April 2013
Using tools available in digiKam, you can simulate a number of effects, including bleach bypass. This effect produces a desaturated high-contrast image. Creating the bleach bypass effect in digiKam is done in two simple steps. Open a photo for editing and choose . Specify the desired saturation value somewhere between -35 and -59, then press to desaturate the photo.
Choose then , select from the Channel drop-down list, and adjust the curve so it’s shaped as S. Feel free to experiment with the steepness of the curve to achieve the best result. As a starting point, you can download a ready-made S curve and import it into digiKam using the button.
Various
Topics which didn't fit elsewhere, such a Moodbar, Amarok on other platforms, troubleshooting, common problems, and the FAQ:
- Moodbar
- ReplayGain
- Amarok on other Desktops and Operating Systems
- Troubleshooting and Common Problems
- FAQ
|
GCompris is a high-quality educational software suite, including a large number of activities for children aged 2 to 10. |
Overview
Some of the activities are game orientated, but nonetheless still educational.
Here is the list of activity categories with some examples:
- computer discovery: keyboard, mouse, touchscreen ...
- reading: letters, words, reading practice, typing text ...
- arithmetic: numbers, operations, table memory, enumeration, double entry table ...
- science: the canal lock, the water cycle, renewable energy ...
- geography: countries, regions, culture ...
- games: chess, memory, align 4, hangman, tic-tac-toe ...
- other: colors, shapes, Braille, learn to tell time ...
Currently, GCompris offers more than 100 activities, and more are being developed. GCompris is free software, it means that you can adapt it to your own needs, improve it, and most importantly share it with children everywhere.
Useful links
Digital Audio Access Protocol (DAAP)
DAAP is a protocol to share media over a network. It was first used for the iTunes music player, but is used widely now. The current state is that the DAAP-plugin won't work with a recent iTunes, the Firefly media server is known to work.
Client
Amarok will show the tracks from the server in the pane if you enable the DAAP Collection in . If the collection is not showing up, click the ![]() icon to be sure you are not in Merged View.
icon to be sure you are not in Merged View.
Ampache
Amarok is able to play music from an Ampache media server. If you want to install a server, see here for more information.
Ampache Client

Activate the Ampache service using . Click on the ![]() icon to open the configuration dialog.
icon to open the configuration dialog.
Select :

Configure the service with the data entered on the server:

Now the Ampache service should appear in .

Tethered Shooting with digiKam
Transcribed from Dmitri Popov's blog, 12 March 2012
While digiKam won’t rival dedicated software for tethered shooting, you can use the application’s interface to trigger the connected camera and instantly fetch photos from it. This functionality can come in handy when you want to have an instant preview of photos you take on a large screen.

To make use of this feature, connect your camera to the machine running digiKam, and turn the camera on. In digiKam, choose and select your camera model. You can then trigger the camera using the button. There are a couple of things you need to keep in mind, though. digiKam can’t control camera settings (shooting mode, aperture, shutter speed, etc.) remotely, so you should set them beforehand. The images captured from within the Import interface are not stored on the camera’s storage card, so make sure you import them into digiKam before you disconnect or turn off the camera.
|
Filelight crea una mappa interattiva di anelli segmentati e concentrici che aiuta a visualizzare l'utilizzo del disco sul tuo computer |
Filelight ti permette di capire rapidamente ed esattamente dove lo spazio disco viene utilizzato rappresentando graficamente il tuo filesystem come insiemi di anelli segmentati e concentrici. Puoi utilizzarlo per localizzare i punti critici dell'utilizzo del disco e quindi manipolare queste aree utilizzando Konqueror, Dolphin o Krusader.
Funzionalità
- Può analizzare dischi locali, remoti o rimovibili.
- Schemi di colore configurabili.
- Comoda navigazione del filesystem tramite clic del mouse.
- Informazioni complete su file e cartelle al passaggio del mouse.
- I file e le cartelle possono essere copiate o rimosse direttamente dal menu contestuale di Filelight.
Il manuale è disponibile qui.
Alle WordPress-Blogs unterstützen RSS-Feeds selbst wenn ein RSS-Knopf nicht ausdrücklich angezeigt wird.
Falls der Blog über einen RSS-Knopf verfügt, klicken Sie einfach auf den Knopf und ihr Browser sollte ein Fenster öffnen indem Sie die Anwendung auswählen können mit der Sie den RSS-Feed öffnen wollen. In unserem Fall wählen Sie .
Falls es keinen RSS-Knopf oder einen entsprechenden Link gibt, können Sie die URL im Browser so verändern, dass sie zu einem Feed wird. Fügen Sie dazu nur am Ende der URL in der entsprechenden Kategorie ein um einen Feed dieser Kategorie zu erhalten. Sie können auch auf der Homepage des Blogs einfügen um einen Feed mit allen Einträgen des Blogs zu erhalten.
Sie sehen das Fenster um den Feed zu öffnen. Wählen Sie wieder Akregator.
Amarok: відкрийте свою музику знову!
|
|
| Типове компонування вікна Amarok 2.8 |
Amarok — одна з основних вільних музичних програм з відкритим кодом. Це не простий програвач, Amarok допоможе вам відкрити нові грані вашої музичної збірки та розширить горизонти вашої музики. Скористайтеся нашим довідником початкового рівня, щоб ознайомитися з основними принципами роботи програми, або отримайте повну картину за допомогою підручника.
Ampache
Amarok kan spille musik fra en Ampache medieserver. Hvis du ønsker at installere en server, så se her for mere information.
Ampache-klient
Aktivér Ampache-tjenesten med . Klik på knappen ![]() for at åbne konfigurationsdialogen.
for at åbne konfigurationsdialogen.
Vælg
Indstil tjenesten med de data, som du han angivet på serveren:
Nu skulle Ampache-tjenesten dukke op i .
Universal Plug and Play (UPnP) / DLNA
UPnP is a set of protocols to share media on the network. It is also supported by a wide range of residential gateways and Network Attached Storage devices. UPnP support is now commonly marketed as DLNA.
Amarok has a built-in UPnP media share client so it can play tracks shared on the network. To enable it, use and check the box by the UPnP Collection plugin.

When a media share is discovered it will be shown in Local Music.

The UPnP feature depends on KDE's UPnP media server support. As of now (2015) there is no working UPnP kio-slave available.
Různé
Pojednání o tom, co se jinam nevešlo, jako je například náladový pruh, Amarok na jiných systémech, řešení problémů a běžné potíže, a často kladené otázky:
| BasKet is a note taking application that allows you to quickly and easily organize information. It is great for making todo lists, menus, schedules, and other lists. |
Features
Unlike many note-taking applications, BasKet allows the user to organize notes into a hierarchy of baskets. Notes in a basket can be grouped together for easier manipulation and can themselves contain embedded media (movies, pictures, even sound clips) as well as plain text, links, and rich text.
BasKet can import notes from a variety of other applications, including KNotes, TomBoy, StickyNotes, KJots, and TuxCards.
Notes can be tagged as important, completed, in progress, or can be given many other designations. Using tags, it is very easy to check off and uncheck items on a list. BasKet also enables the creation of custom user-defined tags.
Some other features of BasKet include:
- password and public-key protection of baskets
- integration into Kontact and the system tray
- and the ability to export your notes to an HTML web page.
- Digikam/Tethered Shooting/da
Opkoblet fotografering med digiKam
Fra Dmitri Popovs blog, 12. marts 2012
Selv om digiKam ikke kan konkurere med programmer specielt designet til opkoblet fotografering, så kan du bruge dens -brugerflade til at udløse et opkoblet kamera og med det samme hente fotoet fra det. Denne funktion kan være ret nyttig, når du gerne vil have en hurtig forhåndsvisning på en stor skærm af fotoet du tager.
For at bruge denne funktion skal du forbinde dit kamera til en maskine, hvor digiKam kører og tænde kameraet. I digiKam vælger du og vælger din kameramodel. Nu kan du udløse kameraet ved at klikke på knappen . Der er dog et par ting, som du bør huske på. digiKam kan ikke kontrollere kameraindstillinger (optagetilstand, blænde, lukketid osv.) fra computeren, så de skal indstilles på forhånd. Billedet, som optages fra Import-brugerfladen gemmes ikke på kameraets hukommelseskort, så sørg for at importere dem til digiKam før du frakobler kameraet og slukker det.
|
Filelight creates an interactive map of concentric segmented-rings that helps visualize disk usage on your computer |
Filelight allows you to quickly understand exactly where your diskspace is being used by graphically representing your file system as a set of concentric segmented-rings. You can use it to locate hotspots of disk usage and then manipulate those areas using Konqueror, Dolphin, or Krusader.
Features
- Can scan local, remote or removable disks
- Configurable color schemes
- Handy file system navigation by mouse clicks
- Full information on files and directories on hovering
- Files and directories can be copied or removed directly from Filelight context menu
The Handbook is available from here.
| BasKet is a note taking application that allows you to quickly and easily organize information. It is great for making todo lists, menus, schedules, and other lists. |
Features
Unlike many note-taking applications, BasKet allows the user to organize notes into a hierarchy of baskets. Notes in a basket can be grouped together for easier manipulation and can themselves contain embedded media (movies, pictures, even sound clips) as well as plain text, links, and rich text.
BasKet can import notes from a variety of other applications, including KNotes, TomBoy, StickyNotes, KJots, and TuxCards.
Notes can be tagged as important, completed, in progress, or can be given many other designations. Using tags, it is very easy to check off and uncheck items on a list. BasKet also enables the creation of custom user-defined tags.
Some other features of BasKet include:
- password and public-key protection of baskets
- integration into Kontact and the system tray
- and the ability to export your notes to an HTML web page.
- Dragon Player/en
Home » Applications » Multimedia » Dragon Player
|
Dragon Player is a simple interface for playing movies or music |
DragonPlayer is the default movie player of KDE SC 4.x. It was previously known as Codeine.
Features
- Simple interface
- Resuming videos: Starts playing a video where you were watching it last time
- Support for subtitles: Automatically loads subtitles with the matching name
- Video display settings (brightness, contrast)
- Due to using Solid and Phonon DragonPlayer is independent of any multimedia framework or hardware abstraction layer
- Supports playing CDs and DVDs
Screenshots
|
|
For Music
- Select and your music begins. No distracting playlist, just sound.
- opens a dialogue to allow you to find and play single files. A playlist can be built, but this isn't the primary function.
Further information
Official website: http://www.dragonplayer.net
Tjek og optimér digiKams database
Fra Dmitri Popovs blog, 19. December 2011
Som standard bruger digiKam to SQLite databaser til at gemme vigtige data: digikam4.db og thumbnails-digikam.db. For at få programmet til at køre hurtigere og uden hakken er det en god ide at tjekke og optimisere databaserne en gang i mellem. På Ubuntu og dens afledede skal du installere pakken sqlite3 ved hjælp af kommandoen sudo apt-get install sqlite3. Når du har gjort det, så lav en backup af databaserne digikam4.db og thumbnails-digikam.db. Åbn så terminalen og gå til den mappe, hvor databaserne gemmes. Først bør du tjekke begge databasers integritet ved hjælp af følgende kommandoer:
sqlite3 -line digikam4.db 'pragma integrity_check;'
sqlite3 -line thumbnails-digikam.db 'pragma integrity_check;'
Hvis begge databaser er i orden, så skulle du få beskeden
integrity_check = ok
For a optimisere databeserne skal du køre følgende to kommandoer:
1-sqlite3 -line digikam4.db 'vacuum;'
sqlite3 -line thumbnails-digikam.db 'vacuum;'
Kør så integritetstjekket igen for at sikre dig, at alting virker korrekt; så er du færdig.
Доступність у програмах KDE
Список програм та дані щодо їхньої доступності для засобів читання з екрана:
Будь ласка, вказуйте номер перевіреної версії та додавайте отримані вами відомості.
Стільниця Плазми
Щоб зробити меню доступнішим, перемкніться на класичний варіант і пов'яжіть із меню клавіатурне скорочення.
Пояснення щодо того, як це зробити, наведено на цій сторінці.
KMail
- Поліпшення у KDE 4.8, стан невідомий.
Konsole
Програма-термінал KDE.
- У поточній версії у командній оболонці не реалізовано доступного текстового інтерфейсу.
KCalc
- На деяких кнопках немає міток.
- Основне вікно не є доступним.
- Browser Configuration/pt-br
Firefox
- Diga ao Firefox para usar o KMail quando ele ver um formulário mailto:.
- Exporte suas senhas web do Firefox para um arquivo de texto usando Python sourcecode.
- Esse fórum auxilia você a integrar a aparência do Firefox e definir o KGet como gerenciador de download.
- Os arquivos da wiki do Gentoo possuem um tutorial para integrar o Firefox com o KDE.
- Usando os diálogos Abrir e Salvar do Plasma no Firefox.
- Use um tema inspirado no Breeze no Firefox.
Anvend billedeffekter i digiKam
Fra Mohamed Maliks blog, 19. februar 2011
digiKam kan anvende forskellige effekter på billeder i en batch-proces. For at gøre dette skal du vælge menuen .

Du får nu mulighed for at vælge, hvilken type effekt du vil anvende; i eksemplet ovenfor er der valgt , men der er også andre muligheder, som det ses af det næste skærmbillede.

Vælg en billedeffekt fra listen. Hvis du vil justere indstillingerne, så klik på . Jeg har valgt . Når du er klar, så klik på knappen for at få et indblik i, hvilket resultat du kan forvente. Herunder ser du et eksempel. Hvis du aktiverer , så bliver de oprindelige billeder slettet. Det er bedst ikke at aktivere denne funktion; så laver digiKam en ny, modificeret fil og påvirker ikke den oprindelige fil.

Доступность в программах KDE
Список приложений и данные об их доступности для средств чтения с экрана:
Пожалуйста, указывайте номер проверенной версии и добавляйте полученные вами сведения.
Plasma Desktop
Чтобы сделать меню более доступным, переключитесь на классический вариант и свяжите из меню клавиатурное сокращение.
Объяснение того, как это сделать, приведено на этой странице.
KMail
- Улучшения в KDE 4.8, состояние неизвестно.
Konsole
Программа-терминал KDE.
- В текущей версии в командной оболочке не реализовано доступного текстового интерфейса.
KCalc
- На некоторых кнопках нет меток.
- Основное окно не доступно.
- BasKet/pl
| BasKet is a note taking application that allows you to quickly and easily organize information. It is great for making todo lists, menus, schedules, and other lists. |
Funkcje
Inaczej niż inne podobne aplikacje, BasKet pozwala użytkownikowi organizować notatki w hierarchie. Notatki mogą zostać pogrupowane razem dla łatwiejszej manipulacji nimi i mogą zawierać różne dane (filmy, zdjęcia, a nawet klipy dźwiękowe) jak również zwykły tekst, odnośniki i sformatowany tekst.
Basket może importować notatki z wielu innych aplikacji włącznie z KNotes, TomBoy, StickyNotes, KJots i TuxCards.
Notatki mogą być oznaczane jako ważne, ukończone, w trakcie i mogą posiadać wiele innych oznaczeń. Używanie tagów ułatwia sprawdzanie i odznaczanie pozycji na liście. BasKet pozwala również tworzyć niestandardowe, zdefiniowane przez użytkownika tagi.
Kilka innych funkcji BasKet:
- Zabezpieczanie notatek hasłem i kluczem publicznym
- Interacja z Kontact i zasobnikiem systemowym
- Możliwość eksportu notatek jako stron HTML
- Amarok/Manual/Various/pl
Różne
Tematy, które nie pasowały nigdzie indziej, takie jak: pasek nastroju, Amarok na innych platformach, rozwiązywanie problemów, często spotykane problemy i FAQ.
- Pasek nastroju
- Amarok w innych środowiskach graficznych i systemach operacyjnych
- Rozwiązywanie problemów i często spotykane problemy
- FAQ
Check and Optimize digiKam’s Databases
Transcribed from Dmitri Popov's blog, 19 December 2011
By default, digiKam uses two SQLite databases for storing essential data: digikam4.db and thumbnails-digikam.db. And to make the application run fast and smoothly, it’s a good idea to check and optimize the databases every now and then. To do this on Ubuntu or its derivatives, you need to install the sqlite3 package using the sudo apt-get install sqlite3 command. Once you’ve done that, back up the digikam4.db and thumbnails-digikam.db databases. Open then the terminal and switch to the directory where the databases are stored. First off, you should check the integrity of both databases using the following commands:
sqlite3 -line digikam4.db 'pragma integrity_check;'
sqlite3 -line thumbnails-digikam.db 'pragma integrity_check;'
If both databases are in order, you should see the message
integrity_check = ok
To optimize the databases, run the two commands below:
1-sqlite3 -line digikam4.db 'vacuum;'
sqlite3 -line thumbnails-digikam.db 'vacuum;'
Run then the integrity check once again to make sure that everything works properly, and you are done.
|
Filelight crée une carte interactive d'anneaux segmentés concentriques qui permet de visualiser l'utilisation du disque sur votre ordinateur |
Filelight vous permet de comprendre rapidement où votre espace disque est utilisé en représentant votre système de fichiers par des anneaux segmentés concentriques. Vous pouvez l'utiliser pour localiser les endroits à forte utilisation de disque et manipuler ces zones en utilisant Konqueror, Dolphin, ou Krusader.
Fonctionnalités
- Peut analyser les disques locaux, distants ou amovibles.
- Schémas de couleurs configurables.
- Navigation du système de fichiers pratique, par clics de souris.
- Des informations complètes sur les fichiers et répertoires au passage de la souris.
- Les fichiers et répertoires peuvent être copiés ou supprimés directement depuis le menu contextuel de Filelight.
Le manuel est disponible ici.
Various
Topics which didn't fit elsewhere, such a Moodbar, Amarok on other platforms, troubleshooting, common problems, and the FAQ:
- Moodbar
- ReplayGain
- Amarok on other Desktops and Operating Systems
- Troubleshooting and Common Problems
- FAQ
| BasKet er en applikation til KDE til at skrive noter med; den lader dig hurtigt og nemt organisere information. Den er god til at lave gøremålslister, menuer, skemaer og lignende lister. |
Hovedpunkter
I modsætning til mange andre programmer til at tage noter, så lader BasKet dig organisere noterne i et hierarki af "baskets". Noter i en basket kan knyttes sammen, sådan at de lettere kan manipuleres og kan selv indeholde indlejrede medier (videoer, billeder, lydklip) så vel som almindelig tekst, links og formatteret tekst.
BasKet kan importere noter fra en række andre programmer, herunder KNotes, TomBoy, StickyNotes, KJots og TuxCards.
Noter kan mærkes som vigtige, færdiggjorte, under udformning og kan gives mange andre betegnelser. Ved at bruge tags er det let at markere emner i en liste eller fjerne markeringen. BasKet lader dig også lave dine egne tags.
Nogle af BasKets funktioner er:
- Beskyttelse af baskets med adgangskode og kryptering
- integration med Kontact og statusområdet
- og muligheden for at eksportere dine noter til en HTML-webside.
- Amarok/Manual/Various/fr
Divers
Sujets inclassables, tels que Moodbar, Amarok sur d'autres plateformes, disfonctionnements, problèmes communs, et la FAQ :
- Barre d'ambiance (Moodbar)
- Gain en relecture (ReplayGain)
- Amarok sur les autres bureaux et systèmes d'exploitation
- Disfonctionnements et problèmes communs
- FAQ
Rilevamento dei volti in digiKam 2.0 Beta 2
Trascritto dal blog di Mohamed Malik, 12 febbraio 2011
Google Picasa e Apple iPhoto non sono le uniche applicazioni in grado di rilevare i volti nelle fotografie. Il rilevamento dei volti ora è disponibile anche in Linux. L'imminente rilascio di digiKam 2.0 in maggio sarà caratterizzato dal supporto al rilevamento ed etichettatura dei volti. Ho compilato digiKam 2.0 beta 2 e provato questa funzione, funziona che è una meraviglia!
Ecco come utilizzare questa funzionalità.
Nella finestra principale di digiKam, sulla sinistra, vedrai ora un'icona con un volto. Fai clic su quell'icona ed otterrai una finestra che ti chiederà di eseguire una scansione della raccolta per cercare i volti. Puoi selezionare in quali cartelle cercare i volti. Dai un'occhiata alla schermata qui sotto.

Ora ti vengono mostrati tutti i volti rilevati. La sola cosa da fare è assegnare un' “etichetta”, per esempio il nome della persona e vedrai apparire il nome sotto l'etichetta Persone.


È tutto!
Uniwersalny Plug and Play (UPnP)
UPnP jest zestawem protokołów do współdzielenia mediów w sieci. Jest również obsługiwany przez niektóre urządzenia sieciowe. Obsługa UPnP jest zwykle oznaczana przez DLNA.
Amarok has a built-in UPnP media share client so it can play tracks shared on the network. To enable it, use and check the box by the UPnP Collection plugin.
When a media share is discovered it will be shown in Local Music.
Funkcjonalność UPnP zależy od wbudowanej w KDE obsługi UPnP.
Home » Applications » Education » Test
|
|
Blinken is our version of the well-known game Simon Says.
It is part of the KDE Education Project. |
Description
Blinken is based on an electronic game released in 1978, which challenges players to remember sequences of increasing length.
On the face of the device, there are 4 different color buttons, each one with their own distinctive sound. These buttons light up randomly, creating the sequence that the player must then recall. If the player is successful in remembering the sequence of lights in the correct order, they advance to the next stage, where an identical sequence with one extra step is presented. If they are incorrect, the game is lost, and the player must start again from the beginning.
The goal is to get a high score - each step in the sequence is worth one point, so correct entry of a sequence of 8 lights is worth 8 points on the high score table.
Documentation
Tethered Shooting with digiKam
Transcribed from Dmitri Popov's blog, 12 March 2012
While digiKam won’t rival dedicated software for tethered shooting, you can use the application’s interface to trigger the connected camera and instantly fetch photos from it. This functionality can come in handy when you want to have an instant preview of photos you take on a large screen.
To make use of this feature, connect your camera to the machine running digiKam, and turn the camera on. In digiKam, choose and select your camera model. You can then trigger the camera using the button. There are a couple of things you need to keep in mind, though. digiKam can’t control camera settings (shooting mode, aperture, shutter speed, etc.) remotely, so you should set them beforehand. The images captured from within the Import interface are not stored on the camera’s storage card, so make sure you import them into digiKam before you disconnect or turn off the camera.
|
GCompris é uma suíte de software de alta qualidade, incluindo uma grande variedade de atividades para crianças de 2 a 10 anos. |
Geral
Algumas atividades são orientadas para jogos, mas ainda assim continuam educacionais.
Aqui está uma lista de categorias de atividades com alguns exemplos:
- descobrindo o computador: teclado, mouse, tela sensível ao toque
- leitura: letras, palabras, prática de leitura, escrevendo ...
- aritmética: números, operações, tabuada, enumeração, tabelas com duas entradas ...
- ciência: o sistema de esgoto, o ciclo da água, energia renovável ...
- geografia: países, regiões, culturas ...
- jogos: xadrez, jogo da memória, forca, jogo da velha ...
- outros: cores, formas, braille, aprenda a dizer as horas ...
Atualmente, GCompris oferece mais de 100 atividades, e mais estão sendo desenvolvidas. GCompris é software livre, o que significa que ele se adapta a suas necessidades, melhore-o, e mais importante, compartilhe com as crianças em todo lugar.
Links Ùteis
- O Guia de Administração do GCompris
- Amarok/Manual/Organization/Collection/RemoteCollections/Ampache/pl
Ampache
Amarok może odtwarzać muzykę ze zdalnego serwera Ampatche. Jeśli chcesz uruchomić serwer, więcej informacji znajdziesz tutaj. Katalogi instalacji są tutaj.
Klient Ampache
Aktywuj usługę Ampache w oknie . Kliknij na ikonę ![]() , aby otworzyć okno konfiguracji.
, aby otworzyć okno konfiguracji.
Wybierz :
Skonfiguruj usługę używając danych wprowadzonych na serwerze.
Teraz usługa Ampache powinna znaleźć sie w .
|
|
Integració dels dispositius Bluetooth amb els espais de treball de Plasma. |
Característiques
- Bluedevil connecta els dispositius Bluetooth als espais de treball de Plasma.
- Realitza accions sobre els fitxers en els dispositius Bluetooth com si fossin directoris locals.
- Ofereix un mòdul a Arranjament del sistema per facilitar la configuració.
- Permet l'enviament de fitxers des d'una terminal o des del vostre navegador favorit:
Podeu obtenir més informació al blog dels desenvolupadors (april de 2011) i un vídeo sobre el nou menú de la safata del sistema està disponible en aquest fitxer multimèdia.
Diverse
Emner, som ikke passer ind andre steder så som Stemningslinje, Amarok på andre platforme, Fejlsøgning, almindelige problemer og ofte stillede spørgsmål:
- Stemningslinje
- ReplayGain
- Amarok på andre platforme og operativsystemer
- Fejlsøgning og almindelige problemer
- Ofte stillede spørgsmål
Ampache
O Amarok é capaz de reproduzir músicas de um servidor multimídia Ampache. Se quiser instalar um servidor, veja here para mais informações.
Cliente Ampache
Ative o serviço Ampache usando a opção . Clique no ícone ![]() para abrir a caixa de diálogo de configuração.
para abrir a caixa de diálogo de configuração.
Selecione :
Configure o serviço com os dados introduzidos no servidor:
Agora o serviço Ampache deverá aparecer em .
|
|
Integrate your Bluetooth devices with your Plasma workspaces |
Features
- Bluedevil connects your Bluetooth devices to Plasma workspaces
- Performs file actions on your Bluetooth devices as though they were local directories
- Has a System Settings module to aid configuration
- Allows sending of files from a terminal or from your favourite browser
You can get more information from the developer's blog (April 2011) and a video about the new systray menu is available from this nultimedia file
|
|
Integra tus dispositivos Bluetooth con el área de trabajo Plasma |
Características
- Bluedevil conecta tus dispositivos Bluetooth al Área de trabajo de Plasma
- Realiza acciones en los archivos de tus dispositivos Bluetooth como si fueran directorios locales
- Tiene un módulo en Preferencias del sistema para ayudar a la configuración
- Permite enviar archivos desde una consola o desde tu navegador favorito
Puedes obtener más información desde el blog del desarrollador (Abril 2011) y con un vídeo sobre el nuevo menú de la bandeja del sistema que está disponible en este archivo multimedia.
Geotag potos med Android kamera og digiKam
Fra Dmitri Popovs blog, 29. okt. 2012
Takket være digiKams evne til geokorrelation kan du geotagge fotos ved hjælp af en GPX-fil oprettet med et program som Open GPS Tracker; men der er også en anden måde at bruge din Android-enhed til geotagging. Den indbyggede kamera-app på de fleste Android-enheder er i stand til at geotagge fotos. Det betyder, at du kan tage geotaggede billeder med Android-kameraet og overføre geografiske koordinater fra det til andre fotos i digiKam. Når du næste gang hat taget billeder med dit rigtige kamera, så husk at tage et referencebillede med din Android-enhed (sørg for, at geotagging-tilvalget er aktiveret).

I digiKam markerer du referencebilledet sammen med de fotos du vil geotagge og vælger . Højreklik på referencebilledet i listen af markerede billeder og vælg . Markér så de resterende fotos i listen, højreklik på udvalget og vælg , klik på knappen , så er du færdig.
Universal Plug and Play (UPnP) / DLNA
UPnP er et sæt protokoller til at dele medier over netværket. Det understøttes også af et udvalg af hjemme-gateways og netværks-harddiske. Understøttelse af UPnP markedsføres nu almindeligvis som DLNA.
Amarok har en indbygget UPnP-mediedelingsklient, så den kan afspille spor, som deles over et netværk. For at aktivere dette bruges , hvor du skal markere tilvalgsboksen ved pluginet UPnP-samling.
Når et delt medie opdages vil det blive vist i Lokal musik.
UPnP-funktionen afhænger af KDE's understøttelse af UPnP-medieservere. I øjeblikket (2015) er der ingen fungerende kio-slave til UPnP tilgængelig.
Detección de caras en digiKam 2.0 Beta 2
Transcrito del blog de Mohamed Malik, 12 de febrero de 2011
Google Picasa y Apple iPhoto no son las únicas aplicaciones capaces de detectar caras en las fotografías. La detección de caras también se ha abierto camino en Linux. La próxima versión digiKam 2.0 en Mayo será compatible con la detección de caras y el etiquetado. He compilado digiKam 2.0 beta 2 para probar esta función, y funciona a las mil maravillas.
A continuación se explica como usar esta función.
En la ventana principal de digiKam, a la izquierda, verás un icono con la cara de una persona. Haz clic en ese icono y saldrá una ventana que te preguntará si quieres escanear tu colección en busca de caras. Puedes seleccionar en que carpetas quieres buscar. Echa un vistazo a la imagen de abajo.
A continuación se muestran todas las caras que se hayan detectado. Lo único que queda por hacer es poner una “etiqueta”, como el nombre de la persona, y verás como el nombre aparece debajo en la etiqueta.
¡Eso es todo!
Detectar les cares al digiKam 2.0 Beta 2
Transcrit des d'un article al blog d'en Mohamed Malik, el 12 de febrer de 2011
Google Picasa i iPhoto d'Apple no són les úniques aplicacions que poden detectar cares en les fotografies. La detecció de la cara ara també està disponible en Linux. L'imminent alliberament de digiKam 2.0 al maig comptarà amb el suport de la detecció i etiquetatge de les cares. He compilat digiKam 2.0 beta 2 i he provat aquesta característica. Funciona de somni!
Heus aquí com utilitzar aquesta característica.
A la finestra principal del digiKam, a la vostra esquerra, veureu una icona amb la cara d'una persona. Feu clic a aquesta icona i obtindreu una finestra que us permetrà escanejar la col·lecció a la cerca de cares. Podeu seleccionar les carpetes on cercar. Feu una ullada a la següent captura de pantalla.
Ara es mostren totes les cares detectades. L'única cosa a fer és assignar-lis una «etiqueta», per exemple, el nom de la persona i veurà el nom sota l'etiqueta Persona.
Això és tot!
Додавання текстур на ваші зображення за допомогою digiKam
На основі допису у блозі Мохамеда Маліка (Mohammed Malik), 21 лютого 2011 року
Декому подобається додавати на зображення текстури. Якщо ви бажаєте додати на свій знімок текстуру, ви можете зробити це дуже просто. Позначте фотографію, до якої слід додати текстуру і натисніть клавішу F4. У відповідь буде відкрито вікно редактора.
У вікні редактора виберіть пункт меню .

На правій панелі розташовано пункт вибору текстури та пункт , яким можна скористатися для керування рівнем застосування вибраної текстури.
|
|
Integra i tuoi dispositivi Bluetooth con gli ambienti di lavoro Plasma |
Caratteristiche
- Bluedevil connette i tuoi dispositivi Bluetooth agli ambienti di lavoro Plasma.
- Esegue operazioni sui file presenti nei tuoi dispositivi Bluetooth come se fossero locali.
- Offre un modulo di Impostazioni di sistema per facilitare la configurazione.
- Ti permette di inviare file da un terminale o dal tuo browser preferito.
Puoi ottenere maggiori informazioni dal blog dello sviluppatore (aprile 2011). È disponibile un video riguardo il nuovo menu nel vassoio di sistema in questo file multimediale.
Geotag Photos with Android Camera and digiKam
Transcribed from Dmitri Popov's blog, 29th October 2012
Thanks to digiKam’s geocorrelation capabilities, you can geotag photos using a GPX file created with apps like Open GPS Tracker. But there is also another way to use your Android device for geotagging. The built-in camera app of most Android devices is capable of geotagging photos. This means that you can take a geotagged snap with the Android camera and then transfer geographical coordinates from it to other photos using digiKam. So next time, when you are done shooting with your main camera, remember to take a reference snapshot with your Android device (make sure that the geotagging option is enabled).
In digiKam, select the reference snapshot along with the photos you want to geotag and choose . Right-click on the reference snapshot in the selection list and choose . Mark then the rest of the photos in the list, right-click on the selection, choose , press the button, and you are done.
Configure the Main Toolbar in digiKam
Transcribed from Dmitri Popov's blog, 31 May 2011
The main toolbar in digiKam provides quick access to several tools and features, and you can tweak it to fit your particular photographic workflow. To do this, choose the command. This opens the dialog window where you can add, remove, and tweak toolbar buttons.

To add a new button to the toolbar, simply select the entry you want in the pane and drag it with the mouse to the desired position in the pane (you can also use the Arrow buttons for that). To arrange the available commands into logical groups, you can use the special entry. You don’t fancy the default icon of a specific button? Press the button and assign the button an alternative icon. And using the button, you can modify the default button label. That’s all there is to it.
| BasKet is a note taking application that allows you to quickly and easily organize information. It is great for making todo lists, menus, schedules, and other lists. |
Características
A diferenza de moitas aplicacións para tomar notas, BasKet permite ao usuario organizar as notas mediante unha xerarquía de cestas. As notas dunha cesta pódense agrupar para facilitar a súa manipulación e poden conter medios embebidos (películas, fotos, mesmo clips de son), así como texto sen formato, enlaces e texto enriquecido.
BasKet pode importar notas desde unha gran variedade de aplicacións, como KNotes, TomBoy, StickyNotes, e TuxCards.
As notas pódense etiquetar como importante, completa, en progreso, ou se lles poden dar outras moitas etiquetas. Ao usar etiquetas, é moi fácil marcar ou desmarcar elementos dunha lista. BasKet tamén permite ao usuario crear etiquetas personalizadas.
BasKet inclúe algunhas outras funcionalidades: Protección de cestas mediante contrasinal e clave pública. Integración en Kontact e na bandexa do sistema. E a posibilidade de exportar as túas notas a unha páxina web *HTML.
Збірки сторонніх (віддалених) даних
Часто дуже корисним є спільне використання мультимедійних файлів у мережі, особливо якщо ви маєте намір користуватися збіркою на різних комп’ютерах. Надати таку збірку у спільне використання можна за допомогою декількох способів:
Home » Applications » Education » Test
What is Artikulate?
Artikulate is a pronunciation trainer that helps improving and perfecting a learner's pronunciation skills for a foreign language. For this, it provides courses with native speaker recordings of the target language. The learner can select a set of phrases, record her/his own voice when speaking the phrases, and compare the results to the native speaker's recordings.
Artikulate currently lives in the KDE Edu Playground, i.e., it is still under development and has not been released yet.
A More Detailed Look
The project contains different courses in various languages which in turn offer a variety of units: 'Scenarios' and 'Phonemes'. The 'Scenario Units' contain phrases of all lengths like words, expressions, sentences and paragraphs, while the 'Phoneme Units' contain all the basic phonemes of the particular language. Each phrase is accompanied by a recording which is done by native speakers and related phonemes are tagged to every phrase. You can now listen to these recordings and try speaking them in the same way, recording your own attempts in the process. By comparing and listening to the two recordings, you can correct your pronunciations in that specific language.
Use Adobe Photoshop Curve Presets with digiKam
Transcribed from Dmitri Popov's blog, 17 December 2012
While digiKam can’t handle Adobe Photoshop curve presets directly, the application supports curves in the GIMP-compatible CRV format. So if you want to use Adobe Photoshop curve presets with digiKam, you have to convert them into .crv files — and the acv2gimp.py Python script can help you with that. Before you put the script to use, make sure that Python is installed on your system. Next, use the chmod +x acv2gimp.py command to make the script executable. Once you’ve done that, you can convert a curve preset by running the ./acv2gimp.py command followed by the name of the file in the ACV format:
./acv2gimp.py curvepreset.acv
By default, the converted file has the same name as the original preset sans the file extension (e.g., curvepreset.acv becomes curvepreset), but you can use the -o parameter to specify a different name:
./acv2gimp.py -o converteredcurvepreset.crv curvepreset.acv
To load the converted curve preset in digiKam, open a photo for editing and choose . Press then the button and select the converted curve.
Crear un efecte de tractament sense blanquejar en digiKam
Transcrit des d'un article al blog d'en Dmitri Popov, el 2 d'abril de 2013
Utilitzant les eines disponibles a digiKam, podreu simular una sèrie d'efectes, incloent el tractament sense blanquejar. Aquest efecte produeix una imatge d'alt contrast desaturada. Crear l'efecte de tractament sense blanquejar en digiKam es realitza en dos senzills passos. Obriu una fotografia per a l'edició i escolliu . Especifiqueu el valor de saturació desitjat en algun punt entre -35 i -59, a continuació premeu per a desaturar la fotografia.
Després escolliu , seleccioneu des de la llista desplegable Canal i ajusteu la corba de manera que quedi en forma de S. Trobeu-vos lliure d'experimentar amb la pendent de la corba per aconseguir el millor resultat. Com a punt de partida, podeu descarregar una corba S ja feta i importar-la al digiKam utilitzant el botó .
Ampache
Amarok dokáže přehrávat hudbu z multimediálního serveru Ampache. Pokud byste chtěl server nainstalovat, podívejte se na here, kde naleznete další informace. Pokyny pro instalaci jsou zde.
Klient pro Ampache
Službu Ampache zapnete pomocí . Klepněte na ikonu ![]() pro otevření dialogu pro nastavení.
pro otevření dialogu pro nastavení.
Vyberte :
Službu nastavíte daty zapsanými do nastavení serveru:
Nyní by se měla služba Ampache objevit v .
Mousegestures for all Browsers 为许多文件和网络浏览器的基本操作提供了一组预配置的鼠标手势。
你从来没有用过鼠标手势吗?阅读 鼠标手势 以大致了解它们。请参阅 鼠标手势 了解它们在 Plasma 中的使用方式。
安装和使用
第一步,下载手势配置文件
猛击这里下载配置文件。需要KDE SC 4.3+
支持
- Konqueror
- Firefox
- Opera
- Arora
- Rekonq
- Chromium
- Chrome Browser
- Dolphin
- Kontact
第二部,导入配置文件
导入下载的配置文件。把Browser这个组移到最上层。然后打勾。
第三步 - 配置
点击 ,启用鼠标手势,鼠标按键: 2 是“中键” 3 是“右键”。
特例
Opera :因为Opera自带鼠标手势,所以这部分可以关掉。点 Browser ,右侧的“条件”标签页,删除Opera
Applying Image Effects Using digiKam
Transcribed from Mohamed Malik's web post of 19 February 2011
digiKam can apply various image effects to images as a batch process. To do this go to menu and select .
It gives you a few options, for an example on the above screen shot the specified image effect to be applied is , however that is not the only effect that is available. The screen shot below shows several effects which can be applied.
Choose any image effect from the list. If you want to adjust the settings press the button. I have chosen . When you are done press the button which give a glimpse of what you will get after the process is done. Example, see screen shot below. If you click option in the window your original files will be deleted. It is a better option to leave this off, since digiKam will create a new modified file, thereby leaving your original files untouched.
| BasKet is a note taking application that allows you to quickly and easily organize information. It is great for making todo lists, menus, schedules, and other lists. |
Características
A diferencia de muchas aplicaciones para tomar notas, BasKet permite al usuario organizar las notas mediante una jerarquía de cestas. Las notas de una cesta se pueden agrupar para facilitar su manipulación y pueden contener medios embebidos (películas, fotos, incluso clips de sonido), así como texto sin formato, enlaces y texto enriquecido.
BasKet puede importar notas desde una gran variedad de aplicaciones, como KNotes, TomBoy, StickyNotes, y TuxCards.
Las notas se pueden etiquetar como importante, completa, en progreso, o se les pueden dar otras muchas etiquetas. Al usar etiquetas, es muy fácil marcar o desmarcar elementos de una lista. BasKet también permite al usuario crear etiquetas personalizadas.
BasKet incluye algunas otras funcionalidades:
- Protección de cestas mediante contraseña y clave pública.
- Integración en Kontact y en la bandeja del sistema.
- Y la posibilidad de exportar tus notas a una página web HTML.
- Browser Configuration/fr
Les articles suivants vous aident à configurer votre explorateur
Firefox
- Indique que Firefox doit utiliser Kmail lorsqu'il détecte mailto:
- exporter vos mots de passe web de firefox dans un fichier texte brut en utilisant du source python
- Cette page de forum vous aide à intégrer l'aspect de Firefox, et à utiliser KGet comme gestionnaire de téléchargement
- Les archives wiki de Gentoo décrivent comment intégrer Firefox avec KDE.
- Utilisation de l'ouverture et de la sauvegarde des dialogues Plasma dans Firefox.
- Utilisation d'un thème inspiré de Breeze dans Firefox.
Batch Process Photos in digiKam
When you need to apply the same action to multiple photos, digiKam’s batch processing capabilities can come in rather handy. You can apply actions to alle the images in a batch in one fell swoop.

Using the Batch Queue Manager tool, you can set up rather advanced processing profiles and manage multiple queues. To add selected photos to the Batch Queue Manager, choose either (alternatively, use the Ctrl + B keyboard shortcut) or (or press Ctrl + Shift + B). This opens the Batch Queue Manager and adds the selected photos to an existing or new queue. To specify the actions you want to perform on the photos in the queue, pick the desired tools from the section, and specify the settings for each tool in the pane. The section in the pane lets you specify a renaming rule to apply to the modified photos. This can help you to differentiate between the processed photos and their originals.
Home » Applications » Multimedia » Dragon Player
|
Dragon Player - простая обёртка для проигрывания фильмов и музыки |
DragonPlayer стандартный проигрыватель видео KDE SC 4.x. Раньше он назывался Codeine.
Features
- Simple interface
- Resuming videos: Starts playing a video where you were watching it last time
- Support for subtitles: Automatically loads subtitles with the matching name
- Video display settings (brightness, contrast)
- Due to using Solid and Phonon DragonPlayer is independent of any multimedia framework or hardware abstraction layer
- Supports playing CDs and DVDs
Screenshots
|
|
For Music
- Select and your music begins. No distracting playlist, just sound.
- opens a dialogue to allow you to find and play single files. A playlist can be built, but this isn't the primary function.
Further information
Official website: http://www.dragonplayer.net
Univerzální připojování a přehrávání - Universal Plug and Play (UPnP) / DLNA
UPnP je sada protokolů pro sdílení multimédií v síti. Je podporována širokou řadou domácích bran a zařízení Network Attached Storage. Podpora pro UPnP je nyní běžně nabízena jako DLNA.
Amarok má vestavěného klienta UPnP pro sdílení multimédií, takže může přehrávat skladby sdílené po síti. Pro jeho povolení použijte a zaškrtněte políčko přídavného modulu pro sbírku UPnP.
Když je zjištěno sdílení multimédií, je ukázáno v Místní hudba.
Funkce UPnP závisí na podpoře pro multimediální server KDE UPnP.
辅助功能

KDE 社区关心所有的使用者,无论年龄,性别,种族或者身体状况。社区同时提供内嵌的工具和独立的程序来确保残障人士能轻松并高效的使用他们的电脑。
Kmag

又叫 KMagnifier, 来自KDE的屏幕放大镜。 KMouseTool

给肢体重复性劳损(RSI)或类似症状的用户的自动鼠标点击器。 KMouth

一个即输即读语音合成前端。 Jovie

KDE的文字阅读系统。 simon

替代鼠标和键盘的语音识别系统。
Vários
Os tópicos que não se encaixarem em outro local, como a Barra de atmosfera, o Amarok em outras plataformas, a resolução de problemas, problemas comuns e as Perguntas Frequentes (FAQ):
- Moodbar
- ReplayGain
- Amarok em outros Desktops e Sistemas Operacionais
- Solução de Problemas e Problemas Comuns
- Perguntas Frequentes
Amarok on Mac OS X
Amarok can be installed and used on the Mac OS X.
Installation using MacPorts
To install Amarok on Mac OS X, first one needs to install MacPorts from here. Once MacPorts is installed one needs to run the following command in the terminal:
sudo port install amarok

The port command will fetch all the dependencies, compile, build and install them. This process may take quite some time, four to five hours in a recent install.
Screenshots
The following screenshot shows Amarok running on the Mac OS X:

Other resources
If you run into difficulties, there is a troubleshooting page here.
Stapelverabeitung von Fotos mit digiKam
When you need to apply the same action to multiple photos, digiKam’s batch processing capabilities can come in rather handy. You can apply actions to alle the images in a batch in one fell swoop.
Using the Batch Queue Manager tool, you can set up rather advanced processing profiles and manage multiple queues. To add selected photos to the Batch Queue Manager, choose either (alternatively, use the Ctrl + B keyboard shortcut) or (or press Ctrl + Shift + B). This opens the Batch Queue Manager and adds the selected photos to an existing or new queue. To specify the actions you want to perform on the photos in the queue, pick the desired tools from the section, and specify the settings for each tool in the pane. The section in the pane lets you specify a renaming rule to apply to the modified photos. This can help you to differentiate between the processed photos and their originals.
Home » Applications » Multimedia » Dragon Player
|
Dragon Player film veya müzik oynatmak için sade bir arayüzdür |
DragonPlayer, KDE SC 4.x'ın öntanımlı film oynatıcısıdır. Önceden Codeine olarak bilinirdi.
Özellikler
- Basit arayüz
- Videolara devam etmek: Bir videoyu bıraktığınız yerden oynatmaya başlar
- Altyazı desteği: İsim eşleştiğinde altyazıları otomatik yükler
- Video görüntüleme ayarları (parlaklık, karşıtlık)
- Solid ve Phonon sayesinde DragonPlayer, herhangi bir çoklu ortam çalışma çerçevesi veya donanım soyutlama katmanından bağımsızdır
- CD ve DVD'leri oynatma desteği
Ekran Görüntüleri
|
|
Müzik İçin
- seçin ve müziğiniz başlasın. Rahatsız edici oynatma listeleri yok, sadece ses.
- , bir dosya bulup oynatmanız için bir iletişim kutusu açar. Bir oynatma listesi de oluşturulabilir ancak birincil işlevi bu değildir.
Daha fazla bilgi
Resmi website: http://www.dragonplayer.net
無障礙功能
KDE 社群關心所有的使用者,無論年齡、性別、種族或者身體狀況。社群同時提供內嵌的工具和獨立的程序來確保殘障人士能輕松並高效的使用他們的電腦。
Kmag
又叫 KMagnifier, KDE的螢幕放大鏡。 KMouseTool
給肢體重復性勞損(RSI)或類似症狀使用者的自動滑鼠點擊器。 KMouth
一個即輸即讀語音合成前端。 Jovie
KDE 文字閱讀系統。 simon
替換滑鼠和鍵盤的語音識別系統。
Home » Applications » Multimedia » Dragon Player
|
Dragon Player è un semplice lettore per film e musica |
Dragon Player è il lettore video predefinito di KDE SC 4.x. Era precedentemente noto come Codeine.
Caratteristiche
- Interfaccia semplice
- Riprende la riproduzione del video nel punto in cui lo stavi guardando l'ultima volta
- Supporta i sottotitoli: carica automaticamente i sottotitoli corrispondenti per nome
- Impostazioni della visualizzazione (luminosità, contrasto)
- Utilizzando Solid e Phonon, Dragon Player non dipende da un framework multimediale specifico
- Supporta la riproduzione di CD e DVD
Schermate
|
|
Per la musica
- Seleziona e la tua musica verrà riprodotta. Senza scalette fonte di distrazione, semplicemente suono.
- apre una finestra di dialogo che ti permette di trovare e riprodurre singoli file. È possibile creare una scaletta, ma questa non è la funzione primaria.
Ulteriori informazioni
Sito ufficiale: http://www.dragonplayer.net
Indstilling af digiKams hovedværktøjslinjen
Fra Dmitri Popovs blog, 31. maj 2011
Hovedværktøjslinjen i digiKam giver dig hurtig tilgang til forskellige værktøjer og funktioner og du kan ændre den, sådan at den bedre passer til din måde at arbejde med fotos på. For at gøre dette skal du vælge menuen . Herved åbnes dialogen Indstil værktøjslinjer, hvor du kan tilføje, fjerne og ændre knapper i værktøjslinjen.
For at tilføje en ny knap til værktøjslinjen skal du simpelt hen vælge det punkt, som du vil tilføje i feltet og trække det med musen til den ønskede placering i feltet (du kan også bruge pileikonerne til dette). For at arrangere de tilgængelige kommandoer i logiske grupper kan du bruge det specielle punkt . Hvis du ikke bryder dig om en knaps standardikon, så klik på knappen og vælg et andet ikon. På samme måde kan du bruge knappen til at indstille teksten på knappen. Mere skal der ikke til.
Ampache
Amarok bir Ampache ortam sunucusundan müzik oynatabilir. Eğer bir sunucu olarak kurmak isterseniz daha fazla bilgi için buraya bakın. Kurulum talimatları buradadır.
Ampache İstemcisi
Ampache hizmetini menü seçeneğinden etkinleştirin. Yapılandırma iletişim kutusunu açmak için ![]() simgesine tıklayın.
simgesine tıklayın.
seçin:
Hizmeti sunucu bilgileri ile yapılandırın:
Artık Ampache hizmeti bölümünde görülmelidir.
Universal Plug and Play (UPnP) / DLNA
UPnP is a set of protocols to share media on the network. It is also supported by a wide range of residential gateways and Network Attached Storage devices. UPnP support is now commonly marketed as DLNA.
Amarok has a built-in UPnP media share client so it can play tracks shared on the network. To enable it, use and check the box by the UPnP Collection plugin.
When a media share is discovered it will be shown in Local Music.
The UPnP feature depends on KDE's UPnP media server support. As of now (2015) there is no working UPnP kio-slave available.
Universal Plug and Play (UPnP) / DLNA
UPnP é um conjunto de protocolos para compartilhar conteúdos na rede. Também é suportado por um conjunto de gateways residenciais e dispositivos de armazenamento de rede (NAS). O suporte a UPnP agora é comercializado como DLNA.
O Amarok tem incorporado um cliente de compartilhamento multimídia por UPnP, e por este motivo, pode reproduzir as faixas compartilhadas na rede. Para ativá-lo, use a opção e assinale a opção respectiva no plugin Coleção UPnP.
Quando um compartilhamento multimídia é descoberto, ele será mostrado em Músicas locais.
A funcionalidade UPnP depende do suporte para servidores multimídia UPnP no KDE.
Überprüfen und optimieren der digiKam Datenbank
Transcribed from Dmitri Popov's blog, 19 December 2011
By default, digiKam uses two SQLite databases for storing essential data: digikam4.db and thumbnails-digikam.db. And to make the application run fast and smoothly, it’s a good idea to check and optimize the databases every now and then. To do this on Ubuntu or its derivatives, you need to install the sqlite3 package using the sudo apt-get install sqlite3 command. Once you’ve done that, back up the digikam4.db and thumbnails-digikam.db databases. Open then the terminal and switch to the directory where the databases are stored. First off, you should check the integrity of both databases using the following commands:
sqlite3 -line digikam4.db 'pragma integrity_check;'
sqlite3 -line thumbnails-digikam.db 'pragma integrity_check;'
Wenn beide Datenbanken in Ordnung sind, sollte diese Meldung erscheinen:
integrity_check = ok
Um die Datenbanken zu optimieren, nutzt man die beiden folgenden Befehle:
1-sqlite3 -line digikam4.db 'vacuum;'
sqlite3 -line thumbnails-digikam.db 'vacuum;'
Lassen Sie die Integritäts-Überprüfung erneut laufen, um sicher zu gehen, dass alles fehlerfrei arbeitet; damit ist der Vorgang abgeschlossen.
Ansigtsgenkendelse i digiKam
Fra Mohamed Maliks blog, 12. february 2011
Google Picasa og Apple iPhoto er ikke de eneste programmer, som kan genkende ansigter i billeder. Ansigtsgenkendelse kommer nu også til Linux. digiKam 2.0, som kommer til maj får en ny funktion, genkendelse og tagging af ansigter. Jeg kompilerede digiKam 2.0 beta 2 udgaven og testede denne funktion, og den fungerer perfekt.
Sådan bruger du funktionen...
Til venstre i digiKams hovedvindue vil du se et ikon af et ansigt. Klikker du på det, så dukker der en dialog op, som lader dig skanne samlingen for ansigter. Du kan vælge hvilke mapper, der skal skannes. Se skærmbilleder nedenunder.
Nu vises alle de ansigter, som den har fundet. Det eneste der skal gøres er at tildele et mærke, for eksempel personens navn; så vil mærket dukke op i listen.
Det var det!
|
|
Integra os seus dispositivos Bluetooth com os espaços de trabalho do Plasma |
Funcionalidades
- O Bluedevil conecta os seus dispositivos Bluetooth aos espaços de trabalho do Plasma
- Realiza ações com os arquivos dos seus dispositivos Bluetooth, como se fossem feitas em pastas locais
- Tem um módulo nas Configurações do Sistema para auxiliar a sua configuração
- Permite o envio de arquivos a partir de um terminal ou a partir do seu navegador favorito
Você pode obter mais informações a partir do blog do desenvolvedor (abril 2011) e um vídeo sobre o novo menu da área de notificação está disponível neste arquivo multimídia
References
Brug Adobe Photoshops fordefinerede kurver i digiKam
Fra Dmitri Popovs blog, 17 december 2012
Selv om digiKam ikke kan håndtere Adobe Photoshops fordefinerede kurver direkte, så understøtter programmet kurver i det GIMP-kompatible CRV-format, så hvis du vil bruge fordefinerede kurver fra Adobe Photoshop i digiKam, så skal du konverterer dem til .crv-filer. Her kan Python-scriptet acv2gimp.py hjælpe dig. Før du tager scriptet i anvendelse skal du sikre dig, at Python er installeret på dit system. Brug så kommandoen chmod +x acv2gimp.py til at gøre scriptet udførbart. Når du har gjort det kan du konvertere en fordefineret kurve ved at køre kommandoen ./acv2gimp.py fulgt af navnet på filen i ACV-format:
./acv2gimp.py curvepreset.acv
Som standard har den konverterede fil samme navn som den oprindelige fil uden filendelse (dvs. curvepreset.acv bliver til curvepreset), men du kan bruge parameteren -o til at angive et andet navn:
./acv2gimp.py -o converteredcurvepreset.crv curvepreset.acv
For at indlæse den konverterede kurve i digiKam skal du åbne et foto for redigering og vælge . Tryk på knappen og vælg den konverterede kurve.
Ampache
Amarok is able to play music from an Ampache media server. If you want to install a server, see here for more information.
Ampache Client
Activate the Ampache service using . Click on the ![]() icon to open the configuration dialog.
icon to open the configuration dialog.
Select :
Configure the service with the data entered on the server:
Now the Ampache service should appear in .
Check and Optimize digiKam’s Databases
Transcribed from Dmitri Popov's blog, 19 December 2011
By default, digiKam uses two SQLite databases for storing essential data: digikam4.db and thumbnails-digikam.db. And to make the application run fast and smoothly, it’s a good idea to check and optimize the databases every now and then. To do this on Ubuntu or its derivatives, you need to install the sqlite3 package using the sudo apt-get install sqlite3 command. Once you’ve done that, back up the digikam4.db and thumbnails-digikam.db databases. Open then the terminal and switch to the directory where the databases are stored. First off, you should check the integrity of both databases using the following commands:
sqlite3 -line digikam4.db 'pragma integrity_check;'
sqlite3 -line thumbnails-digikam.db 'pragma integrity_check;'
If both databases are in order, you should see the message
integrity_check = ok
To optimize the databases, run the two commands below:
1-sqlite3 -line digikam4.db 'vacuum;'
sqlite3 -line thumbnails-digikam.db 'vacuum;'
Run then the integrity check once again to make sure that everything works properly, and you are done.
 |
Gwenview - 浏览,编辑和打印你的图片 |
| Gwenview 能够载入和保存各种 KDE 程序支持的图形格式,比如 PNG,JPEG,和甚至是 GIMP 的 XCF!Gwenview's 同样支持在全屏模式下显示一条漂亮的缩略图工具栏。Gwenview 的简单界面会让你快速容易的查看自己的图像。 |
特性
- 支持简单的图形处理:旋转,镜像,翻转,缩放,裁剪,消除红眼。
- 支持基本的文件管理操作,比如复制,移动,删除等等。
- 可以作为一个独立的程序,也可以作为 web 浏览器 Konqueror 里的嵌入式图像浏览器。
- 能够使用 KIPI 插件扩展功能。
更多信息
- Gwenview 用户手册
- Gwenview 论坛
- Aurelien Gateau 的博客介绍照片抖动和处理方法。
- 隐藏的配置选项
- 添加的元信息(评分、标签、描述)存储在扩展文件系统属性中,通过下面命令查看
attr -l file.jpg. - Bluedevil/fr
|
|
Intégrez vos périphériques Bluetooth avec vos espaces de travail Plasma |
Fonctionnalités
- Bluedevil connecte vos périphériques Bluetooth aux espaces de travail Plasma.
- Effectue des actions de fichiers sur vos périphériques Bluetooth comme s'ils étaient des répertoires locaux.
- Dispose d'un module de paramètrage du système pour faciliter la configuration.
- Permet d'envoyer des fichiers à partir d'un terminal ou à partir de votre navigateur préféré.
Vous pouvez obtenir plus d'informations sur le blog du développeur (Avril 2011) et une vidéo sur le nouveau menu de la zone de notification de la barre des tâches est disponible sur ce fichier multimédia.
Gesichter finden in digiKam 2.0 Beta 2
beschrieben in Mohamed Malik's Blog, 12 Februar 2011
Google Picasa & Apple iPhoto sind nicht die einzigen Anwendungen welche Gesichter in Fotos finden können. Gesichter finden hat jetzt auch seinen Weg nach Linux gefunden. Mit der digiKam 2.0 Version ist diese Funktion der Gesichtsfindung und der Stichwortunterstützung vorhanden. Ich compilierte digiKam 2.0 beta 2 Release und testete diese Funktion und sie hat zauberhaft funktioniert.
So verwendet man diese Funktion ..
ImdigiKam Hauptfenster, auf der linken Seite,sehen sie ein Icon mit dem Gesicht einer Person. Drücken sie das Icon, von dort kommen sie zu einem Fenster, bei dem sie danach gefragt werden ob sie Ihre Sammlung nach Gesichtern durchsuchen wollen. Sie könne die nach Gesichtern zu durchsuchenden Ordner(Albums) auswählen. Sehen sie sich die Bildschirmkopie unten an.
Nun werden Ihnen alle gefunden Gesichter angezeigt. Das einzige was noch gemacht werden muss, ist dem Stichwort den Namen der Person zu geben und dieser erscheint unter dem Gesicht im Foto, wenn man mit dem Mauszeiger darüber fährt.
Das ist es!
|
GCompris est une suite de logiciel éducationnel d'une haute qualité, incluant un grand nombre d'activités pour les enfants de 2 à 10 ans. |
Vus d'ensemble
Certaine de ces activités sont des jeux, néanmoins ils sont tout de même éducationnels.
Voici une liste des catégories d'activités avec quelques exemples :
- découverte de l'ordinateur: clavier, souris, écran tactile...
- lecture: alphabets, mots, pratique de la lecture, écriture de texte...
- arithmétique: nombres, opérations, mémoire des tableaux, énumeration, table à double entrée...
- science: les écluses, le cycle de l'eau, l'énergie renouvelable ...
- géographie: les pays, régions, la culture ...
- jeux: échecs, mémorisation, alignement de 4, pendu, tic-tac-toe ...
- autre: couleurs, formes, le braille, apprenez à dire l'heure...
Actuellement, GCompris offre plus de 100 activités, et davantage sont en cours de développement. GCompris est un logiciel libre, cela signifie que vous pouvez l'adapter à vos propres besoins, l'améliorer, et le plus important, le partager avec les enfants de partout.
Liens utiles
Geotag Photos with Android Camera and digiKam
Transcribed from Dmitri Popov's blog, 29th October 2012
Thanks to digiKam’s geocorrelation capabilities, you can geotag photos using a GPX file created with apps like Open GPS Tracker. But there is also another way to use your Android device for geotagging. The built-in camera app of most Android devices is capable of geotagging photos. This means that you can take a geotagged snap with the Android camera and then transfer geographical coordinates from it to other photos using digiKam. So next time, when you are done shooting with your main camera, remember to take a reference snapshot with your Android device (make sure that the geotagging option is enabled).
In digiKam, select the reference snapshot along with the photos you want to geotag and choose . Right-click on the reference snapshot in the selection list and choose . Mark then the rest of the photos in the list, right-click on the selection, choose , press the button, and you are done.
Amarok 窗口
Amarok 窗口的设计宗旨是能让你重新发掘音乐,于是便尽可能的展现音乐信息。虽然多数用户用默认布局就 OK,但其实是能完全根据需求定制的。
默认的 Amarok 窗口布局
安装完成后,Amarok 看起来是这样的:

Amarok 窗口有四个主要部分:
- 顶层菜单正下方是工具栏,处于三个窗格之上:
- 左侧是你的 媒体源(音乐收藏和其他介质来源),
- 中间是 环境 窗格
- 右手窗格是 播放列表
使用 Amarok 窗口来管理和播放音乐
用 Amarok 播放音乐通常需要两个步骤:
- 选择收藏中要听的部分音乐到播放列表窗格来创建一份播放列表。
- 用播放列表窗格和/或 工具栏播放。
此外,你要是想将部分音乐发送到便携音乐播放器上,比如 iPod 啦。接下来的部分就涉及到这些操作。
Batch-behandling af fotos i digiKam
Når du har brug for af foretage den samme handling på et antal fotos, så kan digiKams batch-behandlingsfunktioner være temmelig nyttige. Du kan foretage handlinger på et et batch af fotos i et omgang.
Med værktøjet Batch Queue Manager kan du oprette ganske avancerede behandlingsprofiler og håndtere flere køer. For at føje udvalgte billeder til Batch Queue Manager kan du enten bruge kontekstmenuen (eller bruge tastaturgenvejen Ctrl + B) eller (eller tast Ctrl + Shift + B). Dette åbner Batch Queue Manager og føjer de udvalgte fotos til en eksisterende eller en ny kø. For at angive de handlinger, som du vil anvende på fotoene i køen vælger du de ønskede værktøjer i fanebladet og angiver indstillinger for hvdert værktøj i feltet . Fanebladet i feltet lader dig angive, hvordan de modificerede fotos skal navngives. Dette kan hjælpe dig til at skelne imellem de behandlede fotos og originalerne.
Applicare effetti alle immagini utilizzando digiKam
Trascritto dal blog di Mohamed Malik del 19 febbraio 2011
digiKam può applicare vari effetti alle immagini tramite un processo in serie. Per far questo vai sul menu e seleziona .
Ti vengono offerte alcune opzioni, per esempio nella schermata qui sopra l'effetto immagine specificato che sta per essere applicato è , ma non è il solo effetto disponibile. La schermata qui sotto mostra parecchi effetti che possono essere applicati.
Scegli un effetto immagine qualsiasi dall'elenco. Se vuoi regolare le impostazioni premi il pulsante . Nel mio caso ho scelto . Una volta fatto premi il pulsante che offre un assaggio del risultato finale. Per esempio guarda la schermata qui sotto. Se fai clic sull'opzione , i tuoi file originali verranno cancellati. È meglio lasciarla deselezionata dato che digiKam creerà un nuovo file modificato lasciando intatti i file originali.
Oversigt
Amarok w Mac OS X
Amarok może być zainstalowany i używany w systemie Mac OS X.
Instalacja przy użyciu MacPorts
Aby zainstalować Amaroka na Mac OS X trzeba najpierw zainstalować MacPorts (do pobrania tutaj). Po zainstalowaniu MacPorts należy wydać w terminalu następujące polecenie:
sudo port install amarok
Komenda port sprawdzi wszystkie zależności, skompiluje i zainstaluje je. Ten proces może zająć bardzo dużo czasu, cztery do pięciu godzin przy niedawnej instalacji.
Zrzuty ekranu
Poniższe zrzuty ekranu pokazują program Amarok uruchomiony w systemie Mac OS X:
Inne zasoby
Jeśli napotkasz jakieś problemy, zapraszamy na stronę dotyczącą rozwiązywania problemów tutaj.
- ← Amarok w systemie Windows
- ↑ Powrót do menu ↑
- Rozwiązywanie problemów i często spotykane problemy →
|
GCompris is a high-quality educational software suite, including a large number of activities for children aged 2 to 10. |
Overview
Some of the activities are game orientated, but nonetheless still educational.
Here is the list of activity categories with some examples:
- computer discovery: keyboard, mouse, touchscreen ...
- reading: letters, words, reading practice, typing text ...
- arithmetic: numbers, operations, table memory, enumeration, double entry table ...
- science: the canal lock, the water cycle, renewable energy ...
- geography: countries, regions, culture ...
- games: chess, memory, align 4, hangman, tic-tac-toe ...
- other: colors, shapes, Braille, learn to tell time ...
Currently, GCompris offers more than 100 activities, and more are being developed. GCompris is free software, it means that you can adapt it to your own needs, improve it, and most importantly share it with children everywhere.
Useful links
Home » Applications » Multimedia » Dragon Player
|
Dragon Player es una sencilla interfaz para reproducir películas o música |
DragonPlayer es el reproductor de películas por defecto en KDE SC 4.x. Fue conocido anteriormente como Codeine.
Características
- Interfaz simple
- Reanudación de vídeos: comienza la reproducción de un vídeo donde lo dejaste la última vez
- Compatibilidad con subtítulos: carga automáticamente los subtítulos que coincidan con el nombre
- Opciones de vídeo (brillo, contraste)
- Al usar Solid y Phonon DragonPlayer es independiente de cualquier infraestructura multimedia o capa de abstracción de hardware
- Puede reproducir CDs y DVDs
Imágenes
|
|
Para música
- Selecciona y tu música comenzará. No hay molestas listas de reproducción, solo sonido.
- abre un diálogo que te permite buscar y reproducir archivos individuales. Se puede construir una lista de reproducción, pero esa no es la función principal.
Más información
Página web oficial: http://www.dragonplayer.net
Amarok på Mac OS X
Amarok kan installeres og bruges på Mac OS X.
Installation ved hjælp af MacPorts
For at installere Amarok på Mac OS X skal man først installere MacPorts herfra. Når MacPorts er installeret, så skal man køre følgende kommando i terminalen:
sudo port install amarok
Kommandoen port vil hente alle afhængigheder, kompilere, bygge og installere dem. Denne proces kan tage ret lang tid, fire til fem timer i en helt ny installation.
Skærmbilleder
Det følgende viser Amarok kørende på Mac OS X:
Andre ressourcer
Hvis du løber ind i vanskeligheder, så er der en side om troubleshooting problemløsning her.
Verificar i optimitzar les bases de dades al digiKam
Transcrit des d'un article al blog d'en Dmitri Popov, el 19 de desembre de 2011
By default, digiKam uses two SQLite databases for storing essential data: digikam4.db and thumbnails-digikam.db. And to make the application run fast and smoothly, it’s a good idea to check and optimize the databases every now and then. To do this on Ubuntu or its derivatives, you need to install the sqlite3 package using the sudo apt-get install sqlite3 command. Once you’ve done that, back up the digikam4.db and thumbnails-digikam.db databases. Open then the terminal and switch to the directory where the databases are stored. First off, you should check the integrity of both databases using the following commands:
sqlite3 -line digikam4.db 'pragma integrity_check;'
sqlite3 -line thumbnails-digikam.db 'pragma integrity_check;'
Si les dues bases de dades estan en ordre, hauríeu de veureu el missatge
integrity_check = ok
Per optimitzar les bases de dades, executeu les dues ordres a continuació:
1-sqlite3 -line digikam4.db 'vacuum;'
sqlite3 -line thumbnails-digikam.db 'vacuum;'
Executeu a continuació la verificació de la integritat una vegada més per assegurar-vos que tot funciona correctament, i ja està.
Amarok Menu
Some of the common actions in Amarok are here, mostly to control media playback.
Contents

| Menu Item | Description | Shortcut |
|---|---|---|
| Opens a media file to be played. | Ctrl + O | |
| Skips back to the last track played within your current session. | ||
| Starts or temporarily stops the playing of the current media file. | Space | |
| Stops all playback in progress. | ||
| Waits until the current track ends before stopping the playback. This is useful when using a playlist. | ||
| Skips playback to the next media file in your playlist. | ||
| Exits out of Amarok. | Ctrl + Q |
Gesti del mouse per tutti i browser
Hai mai utilizzato i gesti del mouse? Leggi Mouse gesture per saperne di più.
Passo uno: scaricare il file dei gesti
Fai clic qui per scaricare il file browsergestures.khotkeys (richiede KDE SC 4.3 o successive)
Applicazioni attualmente supportate:
- Konqueror
- Firefox
- Opera
- Arora
- Rekonq
- Chromium
- Chrome Browser
- Dolphin
- Kontact
Passo due: importare il file scaricato
Imposta il file che hai scaricato utilizzando e scegli il file browsergestures.khotkeys.
Passo tre: configurare
Fai clic su ed attiva i . Il pulsante predefinito del mouse è "2" (la rotella). Puoi scegliere (pulsante destro) se preferisci.
Caso speciale
Opera: dato che Opera ha i suoi gesti del mouse, puoi cancellare Opera nella scheda .
Batch Process Photos in digiKam
When you need to apply the same action to multiple photos, digiKam’s batch processing capabilities can come in rather handy. You can apply actions to alle the images in a batch in one fell swoop.
Using the Batch Queue Manager tool, you can set up rather advanced processing profiles and manage multiple queues. To add selected photos to the Batch Queue Manager, choose either (alternatively, use the Ctrl + B keyboard shortcut) or (or press Ctrl + Shift + B). This opens the Batch Queue Manager and adds the selected photos to an existing or new queue. To specify the actions you want to perform on the photos in the queue, pick the desired tools from the section, and specify the settings for each tool in the pane. The section in the pane lets you specify a renaming rule to apply to the modified photos. This can help you to differentiate between the processed photos and their originals.
Home » Applications » Multimedia » Dragon Player
|
Dragon Player este o interfaţă simplă pentru redarea filmelor sau a muzicii |
DragonPlayer este plazer-ul filmului implicit din KDE SC 4.x.Anterior era cunoscut ca şi Codeine.
Caracteristici
- Interfaţă simplă
- Reluarea videourilor:Începe să ruleze un video în locul unde l-ai văzut ultima oară
- Suport pentru subtitrări:Încarcă automat subtitrările cu numele care se potriveşte
- Setările de afişare a videoului (luminozitate,contrast)
- Datorită folosirii Solid şi Phonon DragonPlayer este independent de oricare altă infrastructură multimedia sau strat de abstractizare hardware
- Suportă rularea CD-urilor şi a DVD-urilor
Imagini
|
|
Pentru Muzică
- Selecteaza şi melodia ta începe.Nici o listă de redare ce să distragă atenţia,numai sunet.
- deschide un dialog pentru a-ţi permite să găseşti şi să rulezi un singur fişier.O listă de redare poate fi construită,dar asta nu este funcţia de bază.
Informaţii suplimentare
Pagina web oficială:http://www.dragonplayer.net
Prendre fotografies amb el digiKam
Transcrit des d'un article al blog d'en Dmitri Popov, el 12 de març de 2012
Mentre digiKam no té rival amb cap programari específic per prendre fotografies des de l'ordinador, podeu utilitzar la interfície de l'aplicació per activar la càmera connectada i a l'instant prendre fotografies. Aquesta funcionalitat pot ser útil quan es vol tenir una vista prèvia instantània de les fotografies preses en una pantalla gran.
Per fer ús d'aquesta característica, connecteu la càmera a la màquina on s'executa digiKam, i engegueu la càmera. En digiKam, escolliu i seleccioneu el vostre model de càmera. A continuació, podeu activar la càmera amb el botó . Hi ha un parell de coses que cal tenir en compte. digiKam no pot controlar la configuració de la càmera (mode de tir, obertura, velocitat d'obturació, etc.) de forma remota, pel que l'haureu d'haber arranjat abans de prendre les fotografies. Les imatges capturades des de la interfície Importa no s'emmagatzemaran a la targeta d'emmagatzematge de la càmera, de manera que assegureu-vos d'importar-les a digiKam abans de desconnectar o apagar la càmera.
Menu and Command Reference
Amarok Top-level Menus

Optimise digiKam’s Performance
Transcribed from Mohamed Malik's web post of 21 February 2011
There are a few things that you can do in order to optimise the performance of digiKam when you are using it for the first time.
- 1. Rebuild All Thumbnails...
- When digiKam starts it loads the thumbnails whenever an album is opened. Most of the time this takes sometime, however you can solve this issue by generating thumbnails. To do this go to . Depending on the amount of images on your collection this will take sometime.
- 2. Rebuild All Fingerprints...
- This option is a must if you want to search your images for duplicates or if you want to enable fuzzy searches. To do this go to .
- 3. Scan for new items at startup (makes startup slower)
- By default digiKam scans your collections for new images. If you feel digiKam opens slowly when starting up disable this option. To do this go to . When the window opens go to the last option on the screen and disable it. See screen capture below.

These options will definitely improve performance and will give you a much more pleasant experience with digiKam.
Optimieren der Leistung von digiKam
Übernommen aus Mohamed Malik's web post vom 21 Februar 2011
There are a few things that you can do in order to optimise the performance of digiKam when you are using it for the first time.
- 1. Rebuild All Thumbnails...
- When digiKam starts it loads the thumbnails whenever an album is opened. Most of the time this takes sometime, however you can solve this issue by generating thumbnails. To do this go to . Depending on the amount of images on your collection this will take sometime.
- 2. Rebuild All Fingerprints...
- This option is a must if you want to search your images for duplicates or if you want to enable fuzzy searches. To do this go to .
- 3. Scan for new items at startup (makes startup slower)
- By default digiKam scans your collections for new images. If you feel digiKam opens slowly when starting up disable this option. To do this go to . When the window opens go to the last option on the screen and disable it. See screen capture below.
These options will definitely improve performance and will give you a much more pleasant experience with digiKam.
Use Adobe Photoshop Curve Presets with digiKam
Transcribed from Dmitri Popov's blog, 17 December 2012
While digiKam can’t handle Adobe Photoshop curve presets directly, the application supports curves in the GIMP-compatible CRV format. So if you want to use Adobe Photoshop curve presets with digiKam, you have to convert them into .crv files — and the acv2gimp.py Python script can help you with that. Before you put the script to use, make sure that Python is installed on your system. Next, use the chmod +x acv2gimp.py command to make the script executable. Once you’ve done that, you can convert a curve preset by running the ./acv2gimp.py command followed by the name of the file in the ACV format:
./acv2gimp.py curvepreset.acv
By default, the converted file has the same name as the original preset sans the file extension (e.g., curvepreset.acv becomes curvepreset), but you can use the -o parameter to specify a different name:
./acv2gimp.py -o converteredcurvepreset.crv curvepreset.acv
To load the converted curve preset in digiKam, open a photo for editing and choose . Press then the button and select the converted curve.
Nabídky
Linsekorrektioner med digiKam
Fra Mohammed Maliks blog, 18. Marts 2011
Ingen linse er optisk perfekt. Selv de dyreste linser har deres egne imperfektioner, men digiKam kan korrigere for konsekvenser af linsefejl så som forvrængning, kromatisk aberration, vignettering, farve og geometri.
Vælg det foto, som du vil korrigere og tast F4. Dette vil tage dig til -visningen. Her skal du vælge menuen .

Denne funktion bruger data om linser fra lensfun biblioteket, som har en meget up-to-date database over tilgængelige linser. Der er mere end hundrede linser i den aktuelle database. Det bruget også fotoets metadata for at finde ud af, hvilken linse, der blev brugt. Hvis den linse, der blev brugt til at tage billedet findes i databasen, så vil det blive nævnt; ellers vil de indstillinger, som bedst passer til den aktuelle linse blive valgt. I dette tilfælde kan du også selv vælge linse.
Du kan slå gitterlinjer til eller fra. Vælg den korrektion, som du vil have udført og flyt musen ind og ud af forvisningen for at se, hvordan billedet ser ud før og efter korrektionen. Nå du er tilfreds med resultatet klikker du på .
References
Configurar la barra d'eines principal al digiKam
Transcrit des d'un article al blog d'en Dmitri Popov, el 31 de maig de 2011
La barra d'eines principal en digiKam proporciona un ràpid accés a diverses eines i característiques, i la podeu ajustar per adaptar-la al vostre flux de treball fotogràfic en particular. Per fer-ho, escolliu l'element . Aquest obrirà el diàleg des d'on podreu afegir, eliminar i modificar els botons de la barra d'eines.
Per afegir un nou botó a la barra d'eines, només cal seleccionar l'entrada que voleu al plafó i arrossegar-la amb el ratolí cap a la posició desitjada en el plafó (també podeu utilitzar els botons de fletxa per això). Per organitzar les ordres disponibles en grups lògics, podeu utilitzar l'entrada especial . No us agradaria una icona per omissió per un botó específic? Premeu el botó i assigneu al botó una icona alternativa. I utilitzeu el botó per modificar l'etiqueta del botó per omissió. Això és tot el que cal fer.
Tilgængelighed
KDE-fællesskabet tager sig af sine brugere uanset alder, køn, race eller fysisk formåen. Der er redskaber, både indbyggede småprogrammer og selvstændige programmer som lader mennesker med fysiske handikap bruge deres computer let og effektivt.
Kmag
En skærmforstørrer også kendt som KMagnifier KMouseTool
En automatisk muse-klikker for mennesker med "Repetitive Strain Injury" (RSI) og lignende. KMouth
En tale-syntesizer, som kan læser op, hvad du skriver. Jovie
KDE's tekst til tale system. simon
Et talegenkendelsessystem, som kan erstatte mus og tastatur
Accessibility
The KDE Community cares for its users, whatever age, gender, race, or physical condition. The community provides tools, both built-in utilities and standalone applications that enable people with physical handicaps to still be able to use their computers easily and efficiently.
Kmag
Also known as KMagnifier, a screen magnifier from KDE. KMouseTool
An automatic mouse "clicker" for people with Repetitive Strain Injury (RSI) or similar. KMouth
A type-and-say GUI for speech synthesizers. Jovie
The KDE Text-to-Speech system. simon
A speech recognition system to replace mouse and keyboard.
歡迎!
歡迎來到 KDE 社群 和 UserBase wiki。無論你是 KDE 軟體新手,老手或粉絲,這裡的頁面不但能幫你迅速上手,也能幫你更加的了解 KDE 社群及它的軟體產品。但是首先,給你一些東西刺激胃口。
這裏有個 KDE 桌面的例子,請注意依照你的軟體版本和發行版,它的外觀可能會有些不同。舉個例子,這裏是Plasma桌面以及最新版本的KDE Frameworks 5(KDE架構5)的桌面截圖:

您可以在螢幕截圖頁面找到更多新版和舊版的截圖。
我們開始吧!
現在注意了,是時候聚焦 KDE 了。
- 什麽是 KDE? - 讓你知道什麽是 KDE(和一些其他有趣的東西)
- 上手教學 - 無論你是正在找這個網站上手的方法,或是准備貢獻,這裡是你的跳板。
- 術語 - 讓我們討論與 KDE 有關的詞彙術語
- Live CDs - 不安裝系統,嘗試 KDE 軟體!
- 關於 Plasma - 馴服你桌面上那頭漂亮的,閃閃發光的新野獸
- 得到幫助 - 如何以及去哪找到幫助
- 你知道嗎... - 少量關于 KDE 軟體的技巧提示
- Gwenview/en
|
Gwenview - browse, edit and print your images |
| Gwenview is able to load and save to a variety of image formats supported by KDE applications, such as PNG, JPEG, and even the Gimp's XCF! Gwenview also sports a beautiful thumbnail toolbar when viewing images in fullscreen. Gwenview's simple interface doesn't get in the way and lets you view your images quickly and easily. |
Features
- Supports simple image manipulations: rotate, mirror, flip, and resize
- Supports basic file management actions such as copy, move, delete, and others
- Functions both as a standalone application and an embedded viewer in the Konqueror web browser
- Can be extended using KIPI plugins.
More Information
- Gwenview User Manual
- Gwenview Forum
- Aurelien Gateau's blog explains how burst shots get shuffled, and what you can do about it.
- Hidden configuration options
- Semantic Information (rating, tags, description) added are stored in extended file system attributes. To list them, run
attr -l file.jpg. - Digikam/Face Detection/en
Face Detection In digiKam 2.0 Beta 2
Transcribed from Mohamed Malik's blog, 12 February 2011
Google Picasa & Apple iPhoto are not the only applications that are capable of detecting faces in pictures. Face detection now has made its way into Linux as well. The upcoming release of digiKam 2.0 in May will feature face detection and tagging support. I compiled digiKam 2.0 beta 2 release and tested this feature and it works like a charm.
Here is how to use this feature..
In the digiKam main window, on the left, you will now see a icon with a person's face. Click that icon, from there you will get a window asking you to scan the collection for faces. You can select which folders will be searched for faces. Take a look at the screenshot below.
Now it shows all the faces that it has detected. The only thing that has to be done is to give it a “tag”, like the person's name and you will see the name appears below the People tag.
That's it!
Applying Image Effects Using digiKam
Transcribed from Mohamed Malik's web post of 19 February 2011
digiKam can apply various image effects to images as a batch process. To do this go to menu and select .
It gives you a few options, for an example on the above screen shot the specified image effect to be applied is , however that is not the only effect that is available. The screen shot below shows several effects which can be applied.
Choose any image effect from the list. If you want to adjust the settings press the button. I have chosen . When you are done press the button which give a glimpse of what you will get after the process is done. Example, see screen shot below. If you click option in the window your original files will be deleted. It is a better option to leave this off, since digiKam will create a new modified file, thereby leaving your original files untouched.
Amarok no Mac OS X
O Amarok pode ser instalado e usado no Mac OS X.
Instalação usando o MacPorts
Para instalar o Amarok no Mac OS X, é necessário instalar primeiro o MacPorts a partir daqui. Assim que o MacPorts estiver instalado, é necessário executar o seguinte comando no terminal:
sudo port install amarok
O comando port irá obter todas as dependências, compilá-las e instalá-las. Este processo poderá levar bastante tempo, de quatro a cinco horas em uma instalação recente.
Imagens
A imagem seguinte mostra o Amarok em execução no Mac OS X:
Outros recursos
Se tiver alguma dificuldade, existe uma página para resolução de problemas.
Digital Audio Access Protocol (DAAP)
DAAP — протокол для оприлюднення мультимедійних даних у мережі. Вперше було використано для програвача iTunes, але зараз використовується іншими програвачами.
Клієнт
Amarok автоматично показує композиції з сервера на панелі . Додаткове налаштовування непотрібне. Якщо збірки не показано, натисніть кнопку , щоб вийти з режиму об’єднаного перегляду.
Hjem » Programmer » Multimedia » Dragon Player
|
DragonPlayer er en enkel brugerflade til at afspille musik og videoer |
DragonPlayer er standard videoafspilleren i KDE SC 4.x. Den var tidligere kendt som Codein.
Hovedpunkter
- Enkel brugerflade
- Kan genoptage afspilning af en video fra, hvor den blev stoppet sidst
- Understøtter undertekster: Indlæser automatisk undertekster med det matchende navn
- Indstilling af videodisplayet (lysstyrke, kontrast)
- DragonPlayer er uafhængig af multimedie frameworks og hardware abstraktionslag gennem sin brug af Solid og Phonon.
- Understøtter afspilning af CD'er og DVD'er
Skærmbilleder
|
|
Til musik
- Vælg og musikken begynder. Ingen distraherende spillelister, bare lyd.
- åbner en dialog, som lader dig finde og afspille en enkelt fil. En spilleliste kan opbygges, men det er ikke den primære funktion.
Yderligere information
- KDEs officielle hjemmeside for Dragon Player
- den officielle håndbog for Dragon Player
- Applications/Accessibility/ja
アクセシビリティ
The KDE Community cares for its users, whatever age, gender, race, or physical condition. The community provides tools, both built-in utilities and standalone applications that enable people with physical handicaps to still be able to use their computers easily and efficiently.
Kmag
Also known as KMagnifier, a screen magnifier from KDE. KMouseTool
An automatic mouse "clicker" for people with Repetitive Strain Injury (RSI) or similar. KMouth
A type-and-say GUI for speech synthesizers. Jovie
The KDE Text-to-Speech system. simon
A speech recognition system to replace mouse and keyboard.
|
Gwenview - 画像のブラウズ、編集、印刷 |
| Gwenview is able to load and save to a variety of image formats supported by KDE applications, such as PNG, JPEG, and even the Gimp's XCF! Gwenview also sports a beautiful thumbnail toolbar when viewing images in fullscreen. Gwenview's simple interface doesn't get in the way and lets you view your images quickly and easily. |
機能
- Supports simple image manipulations: rotate, mirror, flip, and resize
- Supports basic file management actions such as copy, move, delete, and others
- Functions both as a standalone application and an embedded viewer in the Konqueror web browser
- Can be extended using KIPI plugins.
その他の情報
- Gwenview User Manual
- Gwenview Forum
- Aurelien Gateau's blog explains how burst shots get shuffled, and what you can do about it.
- Hidden configuration options
- Semantic Information (rating, tags, description) added are stored in extended file system attributes. To list them, run
attr -l file.jpg. - Gwenview/zh-tw
|
Gwenview - 瀏覽,編輯和列印你的圖片 |
| Gwenview 能夠載入和保存各種 KDE 程式支援的圖形格式,比如 PNG,JPEG,和甚至是 GIMP 的 XCF!Gwenview 同樣支援在全螢幕模式下顯示一條漂亮的預覽縮圖工具列。Gwenview's 的簡單介面會讓你快速容易的檢視自己的影像。 |
特性
- 支援簡單的圖形處理:旋轉,映像檔,翻轉,縮放,裁剪,消除紅眼。
- 支援基本的文件管理操作,比如複製,移動,刪除等等。
- 可以作為一個獨立的程式,也可以作為網頁瀏覽器 Konqueror 里的嵌入式影像瀏覽器。
- 能夠使用 KIPI 外掛程式擴充套件功能。
更多訊息
- Gwenview User Manual
- Gwenview Forum
- Aurelien Gateau's blog explains how burst shots get shuffled, and what you can do about it.
- Hidden configuration options
- Semantic Information (rating, tags, description) added are stored in extended file system attributes. To list them, run
attr -l file.jpg. - Amarok/Manual/References/MenuAndCommandReference/da
Referências
Nabídky a příkazy
Hlavní nabídky Amaroku
| BasKet ist eine Notizen-Anwendung, mit der Sie schnell und einfach Informationen organisieren. Sie ist hervorragend geeignet, um ToDo-Listen, Menüs, Aufgaben- und andere Listen zu erstellen. |
Merkmale
Im Gegensatz zu vielen Notizen Anwendungen ermöglicht BasKet dem Benutzer, Notizen in einer Hierarchie von Körben zu organisieren. Hinweise können in einem Korb zusammen gruppiert werden für eine einfachere Handhabung und können eingebettete Medien enthalten (Filme, Bilder, Screenshots, sogar Soundclips) sowie Nur-Text, Links und Rich-Text.
BasKet kann Notizen aus einer Vielzahl von anderen Anwendungen, einschließlich KNotes, Wildfang, StickyNotes, KJots und TuxCards importieren.
Notizen können als 'wichtig', 'abgeschlossen', 'in Arbeit' markiert werden, oder können noch viele andere Bezeichnungen erhalten. Mit Tags, ist es sehr einfach, Objekte einer Liste zu markieren oder wieder zu deaktivieren. BasKet ermöglicht auch das Erstellen von angepassten benutzerdefinierten Tags.
Zu einigen der anderen Funktionen von BasKet gehören:
- Passwort und Public-Key-Schutz von Körben
- Integration inKontact und der Taskleiste
- und die Fähigkeit, Ihre Notizen in eine HTML-Web-Seite zu exportieren.
- An introduction to KDE/zh-cn
欢迎!
欢迎来到 KDE 社区和 UserBase wiki。不管您是新手、老用户、还是粉丝,这些页面既能让您更加了解 KDE 社区和 KDE 软件,也能帮您迅速上手。但是首先,给你来点真的!
下面是 KDE 桌面的例子。请注意,桌面会因软件版本和发行版的不同而有些差异。这是 Plasma 桌面和最新版本的 KDE Framework 5 的截图:
你可以在KDE 截图页面找到更多新版和旧版 KDE 的截图。
开始吧!
既然你都往下翻了,那么,是时候去进一步了解 KDE 了。
- 什么是 KDE? - 让你明白 KDE 到底是什么东西(还有些有趣的东西)
- UserBase 快速上手 - 无论你是在想这个网站怎么用,还是准备贡献点什么,你都将从这里开始。
- 术语表 - 用超纯正的“KDE 语言”来说话
- Live CD - 你的下一个 KDE 软件,何必是安装版。
- 关于 Plasma 的许多东西 - 来看看这闪亮的异类吧
- 求助 - 让您知道去哪里、怎么求助
- KDE System Administration - 让你明白 Plasma 这个庞大的系统是怎么工作的
- Amarok/Manual/References/MenuAndCommandReference/AmarokMenu/da
Menuen Amarok
Nogle af de almindelige handlinger i Amarok findes her; mest, hvad der har med afspilning af medier at gøre.
Indhold
| Menupunkt | Beskrivelse | Genvej |
|---|---|---|
| Åbn en mediefil til afspilning. | Ctrl + O | |
| Hop tilbage til det senest afspillede spor i denne session. | ||
| Starter eller stopper midlertidigt afspilning af den aktuelle mediefil. | Mellemrum | |
| Stopper al igangværende afspilning. | ||
| Venter til det aktuelle spor er slut før afspilning stoppes. Dette er nyttigt i forbindelse med spillelister | ||
| Spring til den næste mediefil i spillelisten. | ||
| Afslutter Amarok. | Ctrl + Q |
Optimér digiKams ydelse
Fra Mohamed Maliks blog, 21. februar 2011
Der er et par ting, som du kan gøre for at optimere digiKams ydelse første gang du bruger den.
- 1. Gendan miniaturer...
- digiKam indlæser miniaturer hver gang et album åbnes. Dette tage som regel noget tid, men du kan forbedre situationen ved at danne miniaturer. Dette gør du ved at vælge menuen . Dette vil tage nogen tid afhængigt af, hvor mange billeder der er i din samling.
- 2. Gendan fingeraftryk...
- Denne funktion er et must, hvis du vi søge efter dupletter blandt dine billeder eller hvis du vil muliggøre uklare søgninger. Vælg menuen .
- 3. Scan efter nye emner ved opstart (gør opstarten langsommere)
- Son standard scanner digiKam din samling for nye billeder. Hvis du synes, at det tager for lang tid for digiKam at starte op, så fravælg denne funktion. Dette gør du ved at vælge menuen ; i den dialog, så åbner vælger du den sidste side, , og fravælger her. Se skærmbilleden herunder.
Disse ting vil givetvis forbedre ydelsen og gøre digiKam meget rarere at arbejde med.
Aplicar efectes d'imatge utilitzant digiKam
Transcrit des d'un article al blog d'en Mohamed Malik, el 19 de febrer de 2011
digiKam pot aplicar diversos efectes a les imatges per mitjà d'un procés per lots. Per fer-ho aneu al menú i seleccioneu .
Us dóna unes quantes opcions, per exemple en la captura de pantalla l'efecte d'imatge especificat que s'ha d'aplicar és , de tota manera no és l'únic efecte que està disponible. La següent captura de pantalla mostra els diversos efectes que es poden aplicar.
Escolliu qualsevol efecte d'imatge de la llista. Per ajustar la configuració premeu el botó . He triat l'efecte . En acabar, premeu el botó que us donarà una idea del que obtindreu després del procés. Exemple, veure la següent captura de pantalla. Si feu clic a l'opció a la finestra els fitxers originals seran eliminats. Aquí és una millor opció deixar aquesta opció desactivada, ja que digiKam crearà un fitxer modificat nou, deixant els fitxers originals intactes.
| BasKet è un'applicazione per prendere appunti che ti permette di organizzare velocemente e facilmente informazioni. È perfetta per creare elenchi di cose da fare, menu, piani orari e altri elenchi. |
Caratteristiche
A differenza di molte applicazioni per prendere appunti, BasKet permette all'utente di organizzare le note in una gerarchia di cestini (basket). Gli appunti in un cestino possono essere raggruppati per una facile manipolazione e possono essi stessi contenere dei file multimediali integrati (video, immagini, anche clip audio) così come semplice testo, collegamenti e testo formattato.
BasKet è in grado di importare note da varie altre applicazioni, incluse KNotes, TomBoy, StickyNotes, KJots e TuxCards.
Le note possono essere contrassegnate come importanti, completate, in corso o è possibile assegnare molte altre designazioni. Utilizzando le etichette è molto facile spuntare e deselezionare elementi in un elenco. BasKetpermette anche la creazione di etichette personalizzate definite dall'utente.
Alcune altre caratteristiche di BasKet sono:
- protezione dei cestini con password e chiavi pubbliche,
- integrazione con Kontact e il vassoio di sistema
- e la possibilità di esportare le tue note in una pagina web HTML.
- Amarok/Manual/References/MenuAndCommandReference/pl
Menu i polecenia

The Amarok Window
When you open Amarok, this is what you will see, once Amarok has fully loaded:

Window Layout
Amarok is organized in four main areas, the toolbar and three panes:
 |
The Main Toolbar |
 |
The Slim Toolbar |
 |
The Media Sources pane |
 |
The Context pane |
 |
The Playlist pane |
Startseite » Anwendungen » Multimedia » Dragon Player
|
Dragon Player ist ein einfache Schnittstelle um Videos oder Musik abzuspielen |
DragonPlayer ist der Standardvideoplayer von KDE SC 4.x. Es war früher als Codeine bekannt.
Funktionen
- Einfaches Interface
- Fortsetzen von Videos: Beginnt das Abspielen eines Videos dort wo du zuletzt gesehen hast
- Unterstützung von Untertiteln: Lädt automatisch die Untertitel mit passendem Namen
- Videoanzeigeeinstellungen (Helligkeit, Kontrast)
- Durch das Nutzen von Solid und Phonon ist DragonPlayer unabhängig von einem Multimediaframework oder einem Hardwareabstraktionslayer
- Unterstützt das Abspielen von CDs und DVDs
Screenshots
|
|
Für Musik
- Wähle und deine Musik beginnt. Keine störende Playliste, nur Sound.
- öffnet einen Dialog, der dir erlaubt einzelne Dateien zu finden und abzuspielen. Eine Playlist kann erstellt werden, aber das ist nicht die Hauptfunktion.
Weitere Informationen
- Die offizielle Dragon-Player-Seite von KDE
- Das offizielle Dragon-Player-Handbuch
- Browser Configuration/Mousegestures for all Browsers/en
Mousegestures for all Browsers provides premade set of mouse gestures for basic operations in many file and web browsers.
Have you never used mousegestures? Read Mousegestures to learn about them in general. See Mouse Gestures to learn how they are used in Plasma.
Installation and usage
Step One - download the gestures file
Click here to download browsergestures.khotkeys file.(requires KDE SC 4.3 or later)
Currently supported applications:
- Konqueror
- Firefox
- Opera
- Arora
- Rekonq
- Chromium
- Chrome Browser
- Dolphin
- Kontact
Step Two - Import the downloaded file
Import the file you downloaded, using and navigate to the browsergestures.khotkeys file.
Step Three - Configure
Click , and enable . The default mousebutton is set to "2" (mouse wheel). You can choose (right button) if you prefer it.
Special Case
Opera :Because Opera has its own mousegestures, you can delete Opera in the tab
Amarok sous Mac OS X
Amarok peut être installé et utilisé sous Mac OS X.
Installation via MacPorts
Pour installer Amarok sous Mac OS X, il faut d'abord installer MacPorts à partir d' ici. Une fois que MacPorts est installé, il faut exécuter les commandes suivantes dans le terminal:
sudo port install amarok
La commande port va rechercher toutes les dépendances, les compiler, résoudre leurs liens et les installer. Ce processus peut prendre du temps, de quatre à cinq heures pour une nouvelle installation.
Captures d'écran
La capture suivante montre Amarok s'exécutant sous Mac OS X:
Autres ressources
Si vous rencontrez des difficultés, il existe une page traitant des dysfonctionnements ici .
Toegankelijkheid
The KDE Community cares for its users, whatever age, gender, race, or physical condition. The community provides tools, both built-in utilities and standalone applications that enable people with physical handicaps to still be able to use their computers easily and efficiently.
Kmag
Ook bekend als KMagnifier, een vergrootglas voor het scherm van KDE. KMouseTool
Een automatische "muisklikker" voor gebruikers met RSI of soortgelijke beperkingen. KMouth
Een grafische interface voor invoeren-en-uitspreken voor spraaksynthese. Jovie
Het KDE-systeem voor tekst naar spraak. simon
A speech recognition system to replace mouse and keyboard.
Utilitzar les corbes predefinides de Adobe Photoshop amb digiKam
Transcrit des d'un article al blog d'en Dmitri Popov, el 17 de desembre de 2012
Ja que el digiKam no maneja directament les corbes predefinides de l'Adobe Photoshop, l'aplicació suporta corbes en el format CRV compatible amb el GIMP. De manera que si voleu utilitzar corbes predefinides de l'Adobe Photoshop amb digiKam, haureu de convertir-los a fitxers CRV -i l'script de Python «acv2gimp.py» us ajudarà-. Abans de llançar l'script, assegureu-vos que Python està instal·lat al vostre sistema. A continuació, utilitzeu l'ordre chmod +x acv2gimp.py per fer executable l'script. Una vegada fet, podreu convertir una corba predefinida executant l'ordre ./acv2gimp.py seguida pel nom del fitxer en el format ACV:
./acv2gimp.py curvepreset.acv
Per omissió, el fitxer convertit tindrà el mateix nom que l'original sense l'extensió de fitxer (p. ex., «curvepreset.acv» esdevindrà «curvepreset»), però es pot utilitzar el paràmetre -o per especificar un nom diferent:
./acv2gimp.py -o converteredcurvepreset.crv curvepreset.acv
Per a carregar les corbes predefinides prèviament convertides al digiKam, obriu una fotografia per editar i escolliu . Premeu llavors el botó i seleccioneu la corba convertida.
Home » Applications » Multimedia » Dragon Player
|
Dragon Player é uma interface simples para reprodução de vídeos e músicas |
DragonPlayer é o reprodutor de vídeos padrão do KDE SC 4.x. Ele era anteriormente conhecido como Codeine.
Funcionalidades
- Interface simples
- Continuação da reprodução de vídeos: Começa a reprodução dos vídeos no mesmo ponto onde você estava assistindo na última vez que fechou o programa
- Suporte para legendas: Carrega automaticamente as legendas que correspondem ao nome do vídeo
- Configurações do vídeo (brilho, contraste)
- Por usar o Solid e o Phonon, o DragonPlayer é independente de qualquer framework multimídia ou camada de abstração de hardware
- Suporte a reprodução de CDs e DVDs
Imagens
|
|
Para músicas
- Selecione e as suas músicas começam a tocar. Nenhuma lista de reprodução para distrair, apenas reproduz o som.
- abre uma caixa de diálogo para permitir a reprodução de arquivos individuais. É possível criar uma lista de reprodução, mas não é sua função principal.
Mais informações
Página Web oficial: http://www.dragonplayer.net
Amarok on Mac OS X
Amarok can be installed and used on the Mac OS X.
Installation using MacPorts
To install Amarok on Mac OS X, first one needs to install MacPorts from here. Once MacPorts is installed one needs to run the following command in the terminal:
sudo port install amarok
The port command will fetch all the dependencies, compile, build and install them. This process may take quite some time, four to five hours in a recent install.
Screenshots
The following screenshot shows Amarok running on the Mac OS X:
Other resources
If you run into difficulties, there is a troubleshooting page here.
Ret din billeder op med digiKam
Fra Mohamed Maliks blog, 16. februar 2011
Har du billeder, hvor horizonten ikke er vandret? Jeg har mange. Sådanne billeder kan rettes op i digiKam. Sådan gør du:
Se engang på dette billede... det har bestemt brug for opretning...

Fra billedvisningen kan du enten taste F3 eller højreklikke på billedet og vælge for at komme til editoren.
I editoren vælger du menuen

Nu ser vinduet sådan ud - læg mærke til den højre side...

Til højre ser du indstillingsmuligheder som og . Ændrer du disse, så vil du se resultatet med det samme. Justér disse værdier, indtil du har rettet dit billede ind. Dette er, hvad jeg opnåede:

Nu ser billedet meget bedre ud!
Xanela principal
When you open Amarok, this is what you will see, once Amarok has fully loaded:
Disposición da xanela
Amarok está dividido en catro zonas principais, a barra de ferramentas e tres paneis:
|
The Main Toolbar |
|
The Slim Toolbar |
|
The Media Sources pane |
|
The Context pane |
|
The Playlist pane |
Menus principais do Amarok
Amaroks vindue
Dette er, hvad du ser, når du åbner Amarok efter at den er fuldt indlæst:
Vinduets layout
Amarok er organiseret i fire hovedområder, værktøjslinjen og de tre felter:
|
Hovedværktøjslinjen |
|
Den slanke værktøjslinje |
|
Mediekildefeltet |
|
Kontekstfeltet |
|
Spillelistefeltet |
Amaroks vindue
Amaroks vindue er designet til at lade dig genopdage din musik. Derfor giver det dig så meget visuel information om din musik som muligt. Selv om mange brugere vil have glæde af standardlayoutet, så er det muligt at indstille alting.
Amarok-vinduets standardlayout
Fra starten ser Amarok sådan ud:
Amaroks vindue har fire hovedkomponenter:
- under menulinjen er Værktøjslinjen, som ligger over de tre paneler:
- dine Mediekilder (musiksamling og andre medier) i feltet til venstre,
- Feltet Kontekst i midten og
- Feltet Spilleliste til højre.
Brug Amarok-vinduet til at håndtere og afspille din musik
For at spille musik i Amarok skal du som regel gøre to ting:
- Lave en spilleliste ved at vælge nogle spor fra din samling, som du finder i feltet '"Mediekilder"' og sende musikken til feltet '"Spilleliste"'.
- Afspille musikken i din spilleliste ved brug af feltet Spilleliste eller værktøjslinjen.
Du kan også overføre musik til en mobil musikafspiller som for eksempel en iPod. De følgende afsnit vil forklare hvordan.
¿Nunca has utilizado gestos de mouse? Lee Gestos de Mouse para todos los navegadores para aprender más.
Primer paso - descargar el archivo de gestos
Haga clic aquí para descargar el archivo browsergestures.khotkeys. (Requiere KDE SC 4.3 o superior)
Aplicaciones compatibles actualmente:
- Konqueror
- Firefox
- Opera
- Arora
- Rekonq
- Chromium
- Chrome Browser
- Dolphin
- Kontact
Segundo Paso - Importe el archivo descargado
Importe el archivo descargado, utilizando y navegue hasta el archivo browsergestures.khotkeys.
Tercer Paso - Configurar
Haga clic en , Y active . El botón del ratón por defecto es "2" (rueda del ratón). Usted puede elegir (Botón derecho) si usted lo prefiere.
Caso Especial
Opera: Debido a que ópera tiene sus propios gestos de mouse, puede eliminar Opera en la ficha
Acessibilidade
A comunidade KDE preocupa-se com os seus utilizadores independentemente da idade, sexo, raça ou condição física. Estas ferramentas, quer as utilidades integradas quer as aplicações independentes, permitem a pessoas com incapacidades físicas utilizar o computador de forma fácil e eficiente.
Kmag
Também conhecido como KMagnifier, uma lupa para o ecrã. KMouseTool
Um “clicker” automático do rato para pessoas com Lesões por Esforços Repetitivos (LER) ou similares. KMouth
A type-and-say GUI for speech synthesizers. Jovie
The KDE Text-to-Speech system. simon
A speech recognition system to replace mouse and keyboard.
Acţiuni ale mouse-ului pentru toate Browser-ele
Nu aţi folosit niciodată acţiuni ale mouse-ului? Citeşte Mousegestures pentru toate Browser-ele în scopul de a învăţa mai multe.
Pasul unu - descarcă fişierul de acţiuni
Click aici here pentru a descărca fişierul browsergestures.khotkeys.(Necesită KDE SC 4.3 sau recenta)
Aplicaţiile compatibile curent:
- Konqueror
- Firefox
- Opera
- Arora
- Rekonq
- Chromium
- Chrome Browser
- Dolphin
- Kontact
Pasul doi - Importă fişierul de download
Importă fişierul pe care l-ai descărcat folosind şi navighează spre fişierul browsergestures.khotkeys.
Pasul trei - Configurează
Click pe şi permite . Butonul mouse-ului implicit este setat la "2" (cursorul mouse-ului).Poţi alege (butonul din dreapta) dacă îl preferaţi.
Caz special
Opera :Deoarece Opera are propriile sale acţiuni ale mouse-ului, puteţi şterge Opera în fila
Zpřístupnění
KMag
Znamý také jako KMagnifier, slouží jako lupa obrazovky pro KDE. KMouseTool
Automatický "klikač" myši pro lidi trpící RSI (Repetitive Strain Injury) nebo podobnými. KMouth
A type-and-say GUI for speech synthesizers. KTTS
KDE systém zpracování textu na řeč. simon
Systém pro rozpoznávání řeči k nahrazení myši a klávesnice.
|
Gwenview - vis, rediger og udskriv dine billeder |
| Gwenview kan indlæse og gemme billeder i mange formater, som understøttes af KDE programmer, så som PNG, JPEG og Gimp'ens XCFI. Gwenview har en smuk miniatureværktøjslinje når man viser billeder på hele skærmen. Gwenviews enkle brugerflade kommer ikke i vejen for dig, men lader dig vise dine billeder hurtigt og let. |
Hovedtræk
- Kan foretage simple billedmanipulationer som at rotere, spejle vandret eller lodret og ændre størrelse.
- Kan foretage elementær filhåndtering som at kopiere, flytte og slette filer.
- Fungerer både som et selvstændigt program og som indlejret fremviser i KDE's webbrowser Konqueror
- Kan udvides ved hjælp af KIPI plugins.
Mere Information
- Gwenviews brugermanual
- Gwenviews forum
- Aurelien Gateaus blog forklarer, hvordan burst fotos kan blive blandet rundt og hvad du kan gøre ved det.
- Skjulte indstillingsmuligheder
- Tilføjet semantisk information (vurdering, mærker, beskrivelse) gemmes i udvidede filsystem-attributter. For at opliste dem, kør
attr -l file.jpg. - Digikam/Optimise
Optimise digiKam’s Performance
Transcribed from Mohamed Malik's web post of 21 February 2011
There are a few things that you can do in order to optimise the performance of digiKam when you are using it for the first time.
- 1. Rebuild All Thumbnails...
- When digiKam starts it loads the thumbnails whenever an album is opened. Most of the time this takes sometime, however you can solve this issue by generating thumbnails. To do this go to . Depending on the amount of images on your collection this will take sometime.
- 2. Rebuild All Fingerprints...
- This option is a must if you want to search your images for duplicates or if you want to enable fuzzy searches. To do this go to .
- 3. Scan for new items at startup (makes startup slower)
- By default digiKam scans your collections for new images. If you feel digiKam opens slowly when starting up disable this option. To do this go to . When the window opens go to the last option on the screen and disable it. See screen capture below.
These options will definitely improve performance and will give you a much more pleasant experience with digiKam.
Dostępność
Kmag
Znany również jako KMagnifier. Umożliwia powiększanie wybranych fragmentów ekranu z poziomu KDE. KMouseTool
Automatyczny "klikacz" myszką dla ludzi z RSI lub podobnymi. KMouth
Narzędzie do przetwarzania wprowadzonego tekstu na mowę. Jovie
Syntezator mowy. simon
System rozpoznawania mowy w celu zastąpienia myszy i klawiatury.
Benvida/o!
Reciba a nosa benvida ao KDE e ao wiki UserBase. Se é completamente novo en KDE, un usuario antigo ou un siareiro actual, estas páxinas axudarán a comprender máis acerca do KDE así omo a iniciarse. Mais, primeiro, algo para abri o apetito!
Here's an example of a KDE desktop. Please take note that it may look differently depending on your version of the software, and distribution. As an example, here is a screenshot of a Plasma Desktop and the latest version of KDE Frameworks 5:
Pode ver máis capturas das versións actuais e anteriores do KDE na páxina depantallas do KDE.
Imos!
Agora que temos a súa atención é hora de coñecer o KDE, de maneira próxima e persoal.
- Que é KDE? - Saiba que é o KDE (e outras cousiñas interesantes)
- Quick Start - Se só está empezando a atopar o camiño de volta, ou preparado para contribuír, este é o seu trampolín
- Glosario - Falemos como fala o KDE
- CD ao vivo - Experimente co KDE, sen o instalar!
- Todo sobre Plasma - Dome esa besta brillante e divertida do seu escritorio
- Obter axuda - Como e onde atopar axuda
- KDE System Administration - Understand how things work inside the Plasma system.
- Browser Configuration/Mousegestures for all Browsers/da
Mousegestures for all Browsers giver dig et sæt af musegestusser for almindelige handlinger i mange fil- og webbrowsere klar til brug.
Har du aldrig brugt musegestusser? Læs om musegestusser for at lære mere. Se hvordan de bruges i Plasma her: Musegestusser.
Installation og brug
Første skridt - download gestus-filen
Klik her for at hente filen browsergestures.khotkeys. (kræver KDE SC 4.3 eller senere)
Aktuelt understøttede programmer:
- Konqueror
- Firefox
- Opera
- Arora
- Rekonq
- Chromium
- Chrome Browser
- Dolphin
- Kontact
Andet skridt - Importér den downloadede fil
Importér den fil, som du downloadede i og gå til filen browsergestures.khotkeys.
Tredje skridt - Konfigurér
Klik og sæt flueben ved - standard museknappen er 2 (musehjulet), men du kan også vælge (den højre museknap).
Specielt tilfælde
Opera :Da Opera har sine egne musegestusser kan du slette Opera i fanebladet .
The Amarok window
The Amarok window is designed to let you rediscover your music. So, it gives you as much information about your music as possible. While many users will enjoy the default layout, it is fully customizable.
Default layout of the Amarok window
Upon installation, Amarok will look like this:
The Amarok window has four main parts:
- under the top-level menus is the Toolbar which lies above three panes:
- your Media Sources (music collection and other media) in the left pane,
- the Context pane in the center, and
- the Playlist in the right-hand pane.
Using the Amarok window to manage and play your music
Playing music using Amarok usually takes two steps:
- Create a playlist by selecting some of the tracks in your collection, which you will find listed in the Media Sources pane, and send your music to the Playlist pane.
- Play the music in your playlist, using the Playlist pane and/or the Toolbar.
Also, you may want to transfer some of your music to a mobile music player, such as an iPod. The next sections will explain how.
Sbírka
Amarok uspořádává vaši hudbu ve sbírce.
- Collection Scanning
- Search in Collection
- Organize Collection
- Statistics Synchronization Between Collections and with Last.fm
- Remote Collections
- External Database
- Working with Media Devices
Ottimizzare le prestazioni di digiKam
Trascritto dal blog di Mohamed Malik, 21 febbraio 2011
Ci sono alcune cose che puoi fare per ottimizzare le prestazioni di digiKam quando lo utilizzi per la prima volta.
- 1. Ricalcola tutte le miniature...
- quando digiKam viene avviato, le miniature vengono caricate all'apertura degli album. Il più delle volte è necessario un po' di tempo, tuttavia puoi risolvere questo inconveniente generando le miniature. Per far questo vai su . A seconda del numero delle immagini nella tua raccolta, sarà necessario un po' di tempo.
- 2. Ricalcola tutti i codici di controllo...
- questa opzione è assolutamente irrinunciabile se vuoi cercare duplicati tra le tue immagini o abilitare le ricerche approssimate. Per farlo vai su .
- 3. Cerca nuovi elementi all'avvio (rallenta l'avvio)
- In modo predefinito digiKam cerca nuove immagini nelle tue raccolte. Se ritieni che digiKam sia lento all'avvio, disattiva questa opzione. Per far questo vai su . Aperta la finestra vai all'ultima opzione nella sezione e disattivala. Guarda la schermata qui sotto:
Queste opzioni miglioreranno certamente le prestazioni e ti offriranno un'esperienza assai più piacevole con digiKam.
Erişebilirlik
Kmag
Ayrıca KMagnifier olarak da bilinir, KDE'den bir ekran büyüteci. KMouseTool
Hareket Tekrarı Ağrısı (RSI) veya benzeri durumdan şikayetçi olan kullanıcılar için otomatik fare "tıklayıcı". KMouth
Konuşma sentezleyici için bir yaz ve konuş arayüzü. Jovie
KDE Metin Okuma sistemi. simon
Fare ve klavyenin yerini alan konuşma tanıma sistemi.
|
Gwenview - przeglądaj, edytuj i drukuj swoje zdjęcia |
| Gwenview ma możliwość odczytu i zapisu do wielu różnych formatów zdjęć wspieranych przez aplikacje KDE takich jak PNG, JPEG a nawet Gimpowy XCF! Gwenview posiada również piękny pasek boczny z miniaturkami podczas przeglądania zdjęć na pełnym ekranie. Gwenview ma prosty i intuicyjny interfejs, który pozwoli przeglądać zdjęcia szybciej i łatwiej. |
Cechy
- Wpiera proste czynności na zdjęciach: obracanie, odbicie lustrzane i zmianę rozmiaru
- Wspiera proste operacje na plikach takie jak kopiuj, przenieś, usuń i inne
- Funkcjonuje jako samodzielna aplikacja i jako wbudowany podgląd zdjęć w przeglądarce Konqueror
- Możliwość rozszerzenia funkcjonalności za pomocą wtyczek KIPI.
Więcej informacji
- Gwenview User Manual
- Gwenview Forum
- Aurelien Gateau's blog explains how burst shots get shuffled, and what you can do about it.
- Hidden configuration options
- Semantic Information (rating, tags, description) added are stored in extended file system attributes. To list them, run
attr -l file.jpg. - Juk/en
Home » Applications » Multimedia » Juk
 |
Juk is audio jukebox. |

JuK
JuK is an audio jukebox application, supporting collections of MP3, Ogg Vorbis, and FLAC audio files. It allows you to edit the "tags" of your audio files, and manage your collection and playlists. It's main focus, in fact, is on music management.
JuK is part of the KDE Multimedia package. Features include
- Collection list and multiple user defined playlists
- Ability to scan directories to automatically import playlists and music files on start up
- Dynamic Search Playlists that are automatically updated as fields in the collection change.
- A Tree View mode where playlists are automatically generated for sets of albums, artists and genres.
- Playlist history to indicate which files have been played and when.
- Inline search for filtering the list of visible items.
- The ability to guess tag information from the file name or using MusicBrainz online lookup.
- File renamer that can rename files based on the tag content.
- ID3v1, ID3v2 and Ogg Vorbis tag reading and editing support (via TagLib).
History
JuK was originally started by Scott Wheeler in 2000. It was called QTagger at this time. Over the time it has grown into a mature audio application. It is an official part of KDE since KDE 3.2.
Links
- Juk on kde.org
- The JuK Handbook
- Amarok/Manual/AmarokWindow/pl
Amarok - Okno Główne
Kiedy uruchomisz program Amarok to po całkowitym załadowaniu zobaczysz takie okno:
Układ Okna
Amarok zorganizowany jest w cztery główne obszary, pasek narzędziowy i trzy panele:
 |
Główny pasek narzędzi |
 |
Wąski pasek narzędzi |
 |
Panel Źródła mediów |
 |
Panel Kontekst |
 |
Panel Lista odtwarzania |
Nabídka Amaroku
Zde jsou některé běžné činnosti Amaroku. Většinou se týkají ovládání přehrávání multimediálních souborů.
Obsah
| Položka nabídky | Popis | Zkratka |
|---|---|---|
| Otevře soubor, který se má přehrát. | Ctrl + O | |
| Skočí zpět na naposledy přehrávanou skladbu během nynějšího sezení. | ||
| Spustí nebo dočasně zastaví přehrávání nynějšího souboru. | Mezerník | |
| Zastaví všechno probíhající přehrávání. | ||
| Před zastavením přehrávání počká, až nynější skladba skončí. To je užitečné při používání seznamu skladeb. | ||
| Skočí na další soubor v seznamu skladeb. | ||
| Ukončí Amarok. | Ctrl + Q |
Okno Amaroku
Když spustíte Amarok uvidíte toto, jakmile se Amarok zcela nahraje:
Rozvržení oken
Amarok je uspořádán do čtyř hlavních oblastí, nástrojového pruhu a čtyř polí:
|
Hlavní nástrojový pruh |
|
Štíhlý nástrojový pruh |
|
Pole s hudebními zdroji |
|
Pole se souvislostmi |
|
Pole se seznamem skladeb |
Menu Amarok
Algumas das ações comuns no Amarok estão aqui, principalmente para controlar a reprodução dos conteúdos multimídia.
Conteúdo
| Item do menu | Descrição | Atalho |
|---|---|---|
| Abre um arquivo multimídia para reprodução. | Ctrl + O | |
| Volta à última faixa reproduzida na sua sessão atual. | ||
| Inicia ou para temporariamente a reprodução do arquivo multimídia atual. | Espaço | |
| Para todas as reproduções em andamento. | ||
| Aguarda até a faixa atual terminar antes de parar a reprodução de músicas. Isto é útil ao utilizar uma lista de músicas. | ||
| Salta a reprodução para o próximo arquivo multimídia da sua lista de músicas. | ||
| Sai do Amarok. | Ctrl + Q |
Collection
Amarok organizes your music in the Collection.
- Collection Scanning
- Search in Collection
- Organize Collection
- Statistics Synchronization Between Collections and with Last.fm
- Remote Collections
- External Database
- Working with Media Devices
Collection
Amarok organizes your music in the Collection.
- Collection Scanning
- Search in Collection
- Organize Collection
- Statistics Synchronization Between Collections and with Last.fm
- Remote Collections
- External Database
- Working with Media Devices
Accessibility
Kmag
Also known as KMagnifier, a screen magnifier from KDE. KMouseTool
An automatic mouse "clicker" for people with Repetitive Strain Injury (RSI) or similar. KMouth
A type-and-say GUI for speech synthesizers. Jovie
The KDE Text-to-Speech system. සයිමන්
මෙය මූසිකය හා යතුරු පුවරුව ප්රතිස්ථාපනය සදහා වන කථන හදුනා ගැනීමෙ පද්දතියකි
Menu
Najważniejsze akcje w programie Amarok, głównie do kontroli odtwarzania.
Zawartość

| Pozycja w menu | Opis | Skrót klawiszowy |
|---|---|---|
| Otwiera plik do odtwarzania. | Ctrl + O | |
| Powraca do poprzednio odtwarzanego utworu. | ||
| Wznawia lub tymczasowo zatrzymuje aktualnie odtwarzany utwór. | Space | |
| Zatrzymuje odtwarzanie. | ||
| Czeka do zakończenia aktualnie odtwarzanego utworu, a następnie zatrzymuje odtwarzanie. Użyteczne podczas korzystania z list odtwarzania. | ||
| Pomija aktualnie odtwarzany utwór i przechodzi do następnego na liście odtwarzania. | ||
| Zamyka program Amarok. | Ctrl + Q |
Welkom!
Welkom bij de KDE-gemeenschap en de UserBase-wiki. Of u nu een nieuwe gebruiker bent van KDE-software, een oud-gebruiker, of een huidige enthousiaste gebruiker, door deze pagina's komt u meer te weten over zowel de KDE-gemeenschap als KDE-software. U vindt hier hulp bij het van start gaan. Maar eerst is hier iets om u te laten watertanden!
Here's an example of a KDE desktop. Please take note that it may look differently depending on your version of the software, and distribution. As an example, here is a screenshot of a Plasma Desktop and the latest version of KDE Frameworks 5:
Meer schermafdrukken van huidige en vorige uitgaven vindt u op de pagina Schermafdrukken.
Daar gaan we!
Nu we uw interesse hebben gewekt, wordt het tijd u persoonlijk kennis te laten maken met KDE.
- Wat is KDE? - Kom te weten wat KDE is (en andere interessante dingen)
- Snel beginnen - Of u net wegwijs begint te worden, of al bij wil dragen aan de KDE, hier kunt u beginnen!
- Woordenlijst - Leer KDE praten
- Live cd's - Probeer KDE-software uit zonder te hoeven installeren!
- Alles over Plasma - Tem dat hippe, glanzende nieuwe beest op uw bureaublad
- Hulp - Hoe en waar om hulp vinden
- Wist u dat... - Praktische feitjes over KDE-software
- Dragon Player
Home » Applications » Multimedia » Dragon Player
|
Dragon Player is a simple interface for playing movies or music |
DragonPlayer is the default movie player of KDE SC 4.x. It was previously known as Codeine.
Features
- Simple interface
- Resuming videos: Starts playing a video where you were watching it last time
- Support for subtitles: Automatically loads subtitles with the matching name
- Video display settings (brightness, contrast)
- Due to using Solid and Phonon DragonPlayer is independent of any multimedia framework or hardware abstraction layer
- Supports playing CDs and DVDs
Screenshots
|
|
For Music
- Select and your music begins. No distracting playlist, just sound.
- opens a dialogue to allow you to find and play single files. A playlist can be built, but this isn't the primary function.
More Information
Hvordan man kan aktivere hurtig indlæsning af miniaturer i digiKam
Fra Mohamed Maliks blog, 13. februar 2011
En af de ting, der generede mig de første par dage, hvor jeg brugte digiKam var, at indlæsningen af miniaturer tog lang tid i forhold til, hvad jeg havde været vant til i Picasa. Picasa indlæser miniaturer hurtigere end noget andet billedbehandlingsprogram. Det skyldes selvfølgelig, at Picasa er udviklet af et stort firma med masser af penge. Ikke desto mindre kan digiKam også indlæse miniaturer ganske hurtigt, men er stadig ikke så hurtigt som Picasa.
Når du installerer digiKam første gang, så laver det to databaser, en med al information om billederne i din samling og en med miniaturer. Som standard dannes miniaturerne efterhånden som mapperne tilgås. Du kan dog generere miniaturer med nogle få klik med musen.
Efter at have installeret digiKam og vist det rodmappen for dine billeder, er det meget enkelt. Vælg menuen ; så får du to muligheder.

- 1. Scan
- Dette vil scanne efter manglende miniaturer i din samling og generere dem. Det går hurtigt.
- 2. Gendan alle
- denne valgmulighed gennemgår alle billederne i din samling og danner miniaturer - dette er en langvarig proces.
Efter at gennemføre en af disse vil du føle, at miniaturerne indlæses næsten øjeblikkeligt i digiKam. Det er smart at gøre og forøger digiKams ydelse.
Acessibilidade
Kmag
Também conhecido como KMagnifier, uma lupa para a tela do KDE. KMouseTool
Clica automaticamente com o mouse para pessoas com Lesões por Esforços Repetitivos (LER) ou similares. KMouth
Um interface que permite que seja lido o que você digita usando sintetizadores de voz. Jovie
O sistema texto-para-fala do KDE. simon
Um sistema de reconhecimento de voz para substituir o mouse e o teclado.
Face Detection In digiKam 2.0 Beta 2
Transcribed from Mohamed Malik's blog, 12 February 2011
Google Picasa & Apple iPhoto are not the only applications that are capable of detecting faces in pictures. Face detection now has made its way into Linux as well. The upcoming release of digiKam 2.0 in May will feature face detection and tagging support. I compiled digiKam 2.0 beta 2 release and tested this feature and it works like a charm.
Here is how to use this feature..
In the digiKam main window, on the left, you will now see a icon with a person's face. Click that icon, from there you will get a window asking you to scan the collection for faces. You can select which folders will be searched for faces. Take a look at the screenshot below.
Now it shows all the faces that it has detected. The only thing that has to be done is to give it a “tag”, like the person's name and you will see the name appears below the People tag.
That's it!
Kolekcja
Amarok organizuje Twoją muzykę w tzw. Kolekcje.
- Collection Scanning
- Search in Collection
- Organize Collection
- Statistics Synchronization Between Collections and with Last.fm
- Remote Collections
- External Database
- Working with Media Devices
Raddrizzare le tue foto utilizzando digiKam
Trascritto dal blog di Mohamed Malik, 16 febbraio 2011
Hai qualche immagine in cui l'orizzonte non è dritto? Nel mio caso ne ho molte. Se è così, puoi raddrizzarle utilizzando digiKam. Ecco come fare:
dai un'occhiata a questa immagine...ne ha decisamente bisogno...
Dalla vista dell'immagine premi F4 o fai clic destro sulla foto e premi per andare all'editor.
Dall'editor vai su
Vedrai quindi questa finestra: dai un'occhiata a destra...
A destra puoi vedere opzioni come e . Modificale e vedrai i risultati in tempo reale. Cambia questi valori fino a raddrizzare la tua immagine. Ecco cosa ho ottenuto:
Beh, l'immagine ora è decisamente migliore!
Fenêtre d'Amarok
En ouvrant Amarok, vous verrez ceci lorsqu' Amarok sera complètement chargé:
Disposition des Fenêtres
Amarok est organisé en quatre sections principales, la barre d'outils ainsi que trois panneaux:
|
Barre d'outils principale |
|
Barre d'outils compacte |
 |
Le panneau des sources de média |
|
Le panneau Contexte |
|
Le panneau de la Liste de lecture |
Optimitzar el rendiment de digiKam
Transcrit des d'un article al blog d'en Mohamed Malik, el 21 de febrer de 2011
Hi ha quelcom que podeu fer per tal d'optimitzar el rendiment de digiKam quan s'utilitza per primera vegada.
- 1. Reconstrucció de totes les miniatures...
- Quan s'inicia el digiKam, carrega les miniatures cada vegada que s'obre un àlbum. La majoria de les vegades triga algun temps, però ho podeu resoldre generant les de miniatures. Per fer-ho, aneu a . Depenent de la quantitat d'imatges a la vostra col·lecció això prendrà algun temps.
- 2. Reconstrueix totes les empremtes digitals...
- Aquesta opció és necessària si voleu cercar les imatges per duplicats o voleu habilitar cerques aproximades. Per fer-ho aneu a .
- 3. Explora elements nous en iniciar (alenteix la inicialització)...
- Per omissió digiKam explora les vostres col·leccions per a noves imatges. Si trobeu que digiKam s'obre lentament en activar aquesta opció. Accediu a . Quan s'obri la finestra aneu a l'última opció de la pantalla i desactiveu-la. Veure captura de pantalla a continuació.
Aquestes opcions milloraran definitivament el seu rendiment i us oferiran una experiència molt més agradable amb digiKam.
Barrierefreiheit
Kmag
Auch bekannt als KMagnifier, eine Bildschirmlupe von KDE. KMouseTool
Ein automatischer Maus "Klicker" für Menschen mit einem Repetitive Strain Injury Syndrom oder ähnlichem Leiden. KMouth
Eine grafische Oberfläche für Sprachgeneratoren. Jovie
Das KDE System, um Text in Sprache zu wandeln. simon
Ein Spracherkennungssystem, um Maus und Tastatur zu ersetzen.
Ampache
Amarok здатен відтворювати музику з сервера мультимедійних даних Ampache. Якщо ви хочете встановити сервер, ознайомтеся з докладною інформацією тут. Настанови зі встановлення можна знайти тут.
Клієнт Ampache
Activate the Ampache service using . Click on the ![]() icon to open the configuration dialog.
icon to open the configuration dialog.
Select :
Налаштуйте службу за допомогою даних, введених на сервері:
Тепер пункт служби Ampache має з’явитися у меню .
Accesibilidad
Kmag
También conocido como KMagnifier, una lupa para la pantalla. KMouseTool
Hace clic automáticamente para ayudar a personas con lesiones por esfuerzo repetitivo o similares. KMouth
Una interfaz para sintetizadores de voz que lee lo que le escribes. KTTS
Sistema para pasar texto a voz. simon
A speech recognition system to replace mouse and keyboard.
Witamy!
Witamy w społeczności KDE oraz wiki Bazy użytkowników (UserBase). Nieważne czy jesteś nowy w KDE, dawnym użytkownikiem, czy obecnym fanem, te strony pomogą ci dowiedzieć się więcej o społeczności i oprogramowaniu KDE, jak również uzyskać pomoc jak zacząć. Ale najpierw coś na zaostrzenie apetytu:
To jest przykład pulpitu KDE. Zwróć uwagę , że może on wyglądać inaczej w zależności od wersji oprogramowania i dystrybucji. Jako przykład, tutaj znajduje się zrzut ekranu pulpitu Plasmy w wersji 5.6 i najnowszej wersji KDE Frameworks 5.

Możesz zobaczyć więcej screenów z obecnych i poprzednich wydań na stronie Zrzuty ekranu.
Zaczynamy!
Teraz, kiedy już zwróciliśmy twoją uwagę, czas poznać KDE z bliska.
- Czym jest KDE? - Poznaj co to jest KDE (oraz kilka innych ciekawych rzeczy)
- Szybki Start - Niezależnie od tego czy dopiero szukasz swojej drogi, czy jesteś gotowy do współpracy - zacznij właśnie tu.
- Słownik - Słownik terminów
- Live CDs - Wypróbuj KDE bez instalacji!
- Plasma - Opanuj strach - nowa, błyszcząca bestia na twoim pulpicie
- Jak uzyskać pomoc - Jak i gdzie szukać pomocy
- Administracja systemem KDE - Zrozum jak działa KDE od środka.
- An introduction to KDE/en
Welcome!
Welcome to the KDE community and to the UserBase wiki. Whether you are completely new to KDE software, a previous user or a current fan, these pages will help you learn more about both the KDE community and its software, as well as assist you in getting started. But first, something to whet your appetite!
Here's an example of a KDE desktop. Please take note that it may look differently depending on your version of the software, and distribution. As an example, here is a screenshot of a Plasma Desktop and the latest version of KDE Frameworks 5:
You can see more screenshots of current and previous releases in the Screenshots page.
Let's Go!
Now that we've got your attention, it's time to get to know KDE, up close and personal.
- What is KDE? - Get to know what KDE is (and some other interesting things)
- Quick Start - Whether you are just beginning to find your way around, or ready to contribute, this is your springboard
- Glossary - Let's talk the KDE talk
- Live CDs - Try out KDE software, without installing!
- All about Plasma - Tame that funky, shiny new beast on your desktop
- Getting Help - How and where to find help
- KDE System Administration - Understand how things work inside the Plasma system.
- Blogilo/es
Mucha gente no quiere ni necesita una gran aplicación como WordPress. Si tu eres uno de ellos, esta aplicación es tu salvación. Cuenta con una interfaz simple, pero tiene todas estas características:
- Edición mediante WYSIWYG o html.
- Permite ver una vista previa con tu hoja de estilo, tal como tus visitantes lo harán.
- Puedes crear, modificar y borrar posts, crear borradores y planificar la publicación.
- Soporta Blogger 1.0, MetaWeblog, MovableType y las APIs de Google GData.
- Puedes añadir archivos multimedia si tu API lo soporta.
- Puedes guardar una copia antes de publicar el post.
- Puedes guardar una copia de lo escrito para evitar perder datos, mediante un intervalo configurable.
- Revisión ortográfica, gracias al corrector ortográfico de KDE (disponible en la mayoría de idiomas).
- Puedes recuperar tu post recientes del blog.
- Fully-featured WYSIWYG or html editing
- Allows you to preview with your style-sheet, see it as your visitors do.
- You can create, modify and delete posts, create drafts, and schedule posting
- Supports Blogger1.0, MetaWeblog, MovableType and Google GData APIs
- Supports adding media files if your API supports them.
- You can add images to post from your system, if your API supports it.
- Can save a local copy before publishing the post
- Save your writing copy to prevent data loss, at configurable intervals.
- Check spelling, using KDE's spell-checker (most languages available)
- Can fetch your recent blog posts
- Gwenview
Home » Applications » Graphics » Gwenview
|
Gwenview - browse, edit and print your images |
| Gwenview is able to load and save to a variety of image formats supported by KDE applications, such as PNG, JPEG, and even the Gimp's XCF! Gwenview also sports a beautiful thumbnail toolbar when viewing images in fullscreen. Gwenview's simple interface doesn't get in the way and lets you view your images quickly and easily. |
Features
- Supports simple image manipulations: rotate, mirror, flip, and resize
- Supports basic file management actions such as copy, move, delete, and others
- Functions both as a standalone application and an embedded viewer in the Konqueror web browser
- Can be extended using KIPI plugins.
More Information
- Gwenview User Manual
- Gwenview Forum
- Aurelien Gateau's blog explains how burst shots get shuffled, and what you can do about it.
- Hidden configuration options
- Semantic Information (rating, tags, description) added are stored in extended file system attributes. To list them, run
attr -l file.jpg. - Digikam/Lens Correction Using digiKam
Lens Corrections Using digiKam
Transcribed from Mohammed Malik's blog, 18 March 2011
No lens is optically perfect. Even the most expensive lenses have there own imperfections, however digiKam can correct lens imperfections such as distortion, chromatic aberration, vignetting, color & geometry.
Choose the picture that you want to add corrections to and press F4 on the keyboard. This will take you to view. In the view go to .
This feature uses lens data from the lensfun library and it has a very much up to date database of lenses which are available. It has more than a hundred lenses in its current databases. It also uses the metadata from the image to find-out which lens is used. If the exact used to take the picture is available it will mention that it matches with the meta-data, however if the exact match is not available it will choose the settings from the most closes match. In this case it also allows users to select the lens themselves.
You can either enable or disable the grid lines. Select the corrections you want to apply move you mouse inwards and outwards of the preview window which will show you before and after. When you are satisfied with the result press .
Correzione lenticolare utilizzando digiKam
Trascritto dal blog di Mohammed Malik, 18 marzo 2011
Nessuna lente è otticamente perfetta. Anche le più costose hanno delle imperfezioni, tuttavia digiKam può correggere le imperfezioni delle lenti come la distorsione, l'aberrazione cromatica, la vignettatura, il colore e la geometria.
Scegli l'immagine a cui vuoi applicare le correzioni e premi F4 sulla tastiera. Passerai così alla vista . In questa vista vai su .
Questa funzione utilizza i dati delle lenti provenienti dalla raccolta lensfun che raccoglie in un database molto aggiornato le lenti disponibili. Ha più di un centinaio di lenti nel suo database attuale. Lo strumento utilizza anche le informazioni aggiuntive dall'immagine per scoprire quale lente è stata utilizzata. Se è disponibile proprio quella utilizzata, verrà segnalata la corrispondenza con le informazioni aggiuntive, se invece non è disponibile una corrispondenza perfetta, sceglierà le impostazioni più vicine possibili. In questo caso permetterà anche all'utente di selezionare manualmente le lenti.
Puoi attivare o disattivare le linee della griglia. Seleziona le correzioni che vuoi applicare e sposta il mouse dentro e fuori dalla finestra di anteprima per vedere il prima e dopo. Quando sei soddisfatto del risultato premi .
Coleção
O Amarok organiza suas músicas na Coleção.
- Analisando Coleção
- Pesquise em Coleção
- Organize Coleção
- Estatísticas de Sincronização Entre Coleções e Last.fm
- Coleções remotas
- Base de Dados Externa
- Trabalhando com Dispositivos de Mídia
Velkommen!
Velkommen til KDE-fællesskabet og til UserBase-wiki'en. Hvad enten du lige er begyndt med KDEs software, er en tidligere bruger eller en nuværende fan, så vil disse sider lære dig mere om KDE-fællesskabet og vores software og hjælpe dig med at komme i gang. Men først en lille appetitvækker!
Her er et eksempel på et KDE-skrivebord. Bemærk, at det kan se anderledes ud afhængigt af, hvilken version af softwaren og hvilken distribution du har. Som et eksempel er her et skærmbillede af et Plasma-skrivebord og den seneste version af KDE Frameworks 5:
Du kan se flere skærmbilleder af både den seneste og ældre udgaver på denne side.
Lad os komme i gang!
Nu da vi har din opmærksomhed er det tid til at lære KDE at kende.
- Hvad er KDE? - Lær KDE at kende (og andre interessante ting)
- Kom godt i gang - Hvad enten du lige er begyndt at se dig omkring her eller du er klar til at bidrage, så er dette et godt sted at starte.
- Ordliste - De særlige KDE-ord
- Live CD'er - Afprøv software fra KDE uden at installere!
- Alt om Plasma - Tæm dit smarte, funklende nye skrivebord
- Få hjælp - Hvordan og hvor du får hjælp
- KDE systemadministration - Forstå, hvordan tingene fungerer inde i Plasma-systemet.
- Applications/Accessibility/ko
접근성
Kmag
KMagnifier라고도 하는 KDE의 화면 돋보기입니다. KMouseTool
반복성 긴장 장애(RSI)나 비슷한 질환이 있는 사람들을 위한 자동 마우스 "클릭 도구"입니다. KMouth
입력한 대로 읽어 주는 음성 합성 도구 GUI입니다. Jovie
KDE 텍스트 음성 변환 시스템입니다. Simon
마우스와 키보드를 대체하는 음성 인식 시스템입니다.
Generating aspect ratio crops in digiKam
Transcribed from Mohamed Malik's web post of 21 February 2011
Each and every monitor has an aspect ratio, which the ratio of the width versus the height. digiKam can produce these crops very easily. This is very useful if you are creating wallpapers and images to fit a certain ratio. I use this feature when I upload my wallpapers to kde-look
Here is how to create them.
Choose the image and press F4 or right click on the image and go to . In the editor view go to the menu bar and click and this window will appear.

The tool has the following predefined ratios:
- 1:1
- 3:2
- 4:3
- 5:4
- 7:5
- 10:7 & 5:8
It also has an option named golden aspect ratio... Please read more on this in digiKam manual. [1]
It also gives the option of custom aspect ratio. Therefore you can choose any ratio that you may prefer.
After choosing an aspect ratio hold the tiny square that you see on the edges of the highlighted area and move to the area of the image that you want to crop, any area you select will have the aspect that you specified.
Références
- ↑ An explanation of the Golden Ratio can be found at the Maths is Fun site
Vitajte!
Vitajte v KDE komunite a vo wiki UserBase. Či už ste úplne nový používateľ KDE softvéru, predchádzajúci používateľ alebo aktuálny fanúšik, tieto stránky vám pomôžu naučiť sa viac o KDE komunite a jej softvéri, ako aj vám pomôžu začať. Najprv však niečo na povzbudenie vášho apetítu!
Here's an example of a KDE desktop. Please take note that it may look differently depending on your version of the software, and distribution. As an example, here is a screenshot of a Plasma Desktop and the latest version of KDE Frameworks 5:
Viac obrázkov aktuálnych a predošlých verzií nájdete na stránke Screenshoty.
Začíname!
Teraz keď sme si získali vašu pozornosť, je časť zoznámiť sa s KDE zblízka a osobne.
- Čo je KDE? - Zistite čo je KDE (a iné zaujímavé veci)
- Rýchly štart - Či iba začínate objavovať vašu cestu okolo, alebo ste pripravení aj prispieť, toto je váš odrazový mostík
- Glosár - Poďme sa rozprávať o KDE
- Live CD - Vyskúšajte KDE softvér bez inštalácie!
- Všetko o Plasma - Nová zábavná, svietiaca potvora na vašej ploche
- Získanie pomoci - Ako a kde získať pomoc
- KDE System Administration - Understand how things work inside the Plasma system.
- Applications/Accessibility/id
Kemudahan Akses
Komunitas KDE perduli dengan penggunanya dengan tidak memandang usia, jenis kelamin atau kondisi fisik. KDE memiliki alat bantu, baik yang berupa utility bawaan atau aplikasi terpisah yang memungkinkan pengguna dengan kondisi fisik terbatas menggunakan komputernya dengan mudah dan efisien.
Kmag
Juga dikenal dengan nama KMagnifier, alat bantu kaca pembesar KDE. KMouseTool
Merupakan fitur klik mouse otomatis untuk orang-orang yang menderita Repetitive Strain Injury (RSI) dan sejenisnya. KMouth
Antarmuka grafis ketik-bicara untuk sintesizer lisan. Jovie
Sistem Teks-Bicara KDE simon
A speech recognition system to replace mouse and keyboard.
Accesibilidade
Kmag
Tamén coñecido coma “KMagnifier”, trátase dunha lupa para KDE. KMouseTool
Un “premedor” automático do rato para persoas con enfermidades osteomusculares ou similares. KMouth
Unha interface gráfico de reprodución da escrita para sintetizadores de voz. Jovie
O sistema de lectura da pantalla de KDE. simon
Un sistema de recoñecemento da fala para substituír o rato e mailo teclado.
Home » Applications » Multimedia » Dragon Player
|
Dragon Playerは映像または音楽を再生する簡単なインターフェイスです |
DragonPlayerはKDE SC 4.xの既定の映像再生プログラムです。これは以前Codeineとして知られていました。
特長
- 簡単なインターフェース
- 映像の再開:前回視聴したところから映像の再生を開始します
- 字幕への対応:自動的に名前に適合する字幕を読み込みます
- 映像表示の設定(明るさ、コントラスト)
- SolidそしてPhononを使うことによりDragonPlayerはマルチメディアのフレームワークまたはハードウェアの抽象レイヤーから独立しています
- CDそしてDVDの再生への対応
スクリーンショット
|
|
音楽について
- を選択すると音楽が始まります。プレイリストというものに紛らわされることなく、音のみです。
- を選択すると一つのファイルを見つけ再生できるダイアログが開きます。プレイリストを構築することはできますが、これは初期の機能ではありません。
追加情報
公式ホームページ: http://www.dragonplayer.net
مرحبا!
Welcome to the KDE community and to the UserBase wiki. Whether you are completely new to KDE software, a previous user or a current fan, these pages will help you learn more about both the KDE community and its software, as well as assist you in getting started. But first, something to whet your appetite!
Here's an example of a KDE desktop. Please take note that it may look differently depending on your version of the software, and distribution. As an example, here is a screenshot of a Plasma Desktop and the latest version of KDE Frameworks 5:
You can see more screenshots of current and previous releases in the Screenshots page.
Let's Go!
Now that we've got your attention, it's time to get to know KDE, up close and personal.
- What is KDE? - Get to know what KDE is (and some other interesting things)
- Quick Start - Whether you are just beginning to find your way around, or ready to contribute, this is your springboard
- Glossary - Let's talk the KDE talk
- Live CDs - Try out KDE software, without installing!
- All about Plasma - Tame that funky, shiny new beast on your desktop
- Getting Help - How and where to find help
- KDE System Administration - Understand how things work inside the Plasma system.
- Digikam/MetadataToRaw/it
Scrivere dati aggiuntivi nei file Raw in digiKam
Trascritto dal blog di Mohamed Malik, 1 marzo 2011
Quasi tutte le immagini contengono dati aggiuntivi e questi dati contengono tutte le impostazioni che hai utilizzato per creare l'immagine stessa. Queste includono la velocità dell'otturatore, il tempo di posa, la lunghezza della focale, ecc.
La maggior parte delle applicazioni di gestione delle immagini ti permettono di aggiungere e rimuovere dati aggiuntivi personalizzati ai tuoi file. Queste operazioni sono facili da fare utilizzando i file JPEG, lo stesso non è però vero per i file RAW.
Quando aggiungiamo più etichette e didascalie ai dati aggiuntivi di un'immagine, dobbiamo poi salvarle. Se hai molti file RAW, digiKam ti offre la possibilità di scrivere dati aggiuntivi anche in questi file. Tuttavia tieni a mente che questa funzionalità è ancora sperimentale.
Per attivare la scrittura dei dati aggiuntivi nei file RAW, devi modificare la configurazione di digiKam.
Dal menu principale vai su .
Quindi vedrai il menu di configurazione. Sulla sinistra seleziona e attiva l'opzione .
Guarda la schermata qui sotto:

Tüm Tarayıcılar için Fare Hareketleri
Fare hareketlerini hiç kullanmadınız mı? Bilgi almak için Mousegestures wikipedia makalesini okuyabilirsiniz.
İlk Adım - hareketlerin tanımlandığı dosyayı indirin
browsergestures.khotkeys dosyasını indirmek için buraya tıklayın. (KDE SC 4.3 veya üstü için)
Şu anda desteklenen uygulamalar:
- Konqueror
- Firefox
- Opera
- Arora
- Rekonq
- Chromium
- Chrome Browser
- Dolphin
- Kontact
İkinci Adım - İndirilen dosyayı içe aktarın
yolunu takip ederek indirdiğiniz browsergestures.khotkeys dosyasını seçin.
Üçüncü Adım - Yapılandırma
, içinden seçeneğini, başındaki kutuya tıklayarak etkin hale getirin. Öntanımlı fare düğmesi "2" (fare tekerleği) olarak belirlenmiştir. Dilerseniz bu alandaki değeri "3" yaparak sağ tuşu atayabilirsiniz.
Özel Durum
Opera: Opera'nın kendi fare hareketleri bulunur, Opera altındaki sekmesinden hareketleri silerek çakışmasını engelleyebilirsiniz.
Bem-vindo!
Bem-vindo à comunidade do KDE e à wiki de UserBase. Quer seja um novo utilizador ao programa KDE , um antigo utilizador ou um fã atual, estas páginas irão ajudá-lo a saber mais sobre a comunidade do KDE e o seu programa, e como começar. Mas antes, algo para aguçar o seu apetite!
Aqui está um exemplo de um KDE desktop. Por favor, note que o aspeto pode variar com a versão e a distribuição do programa. Como um exemplo, tem aqui uma captura de ecrã de um Plasma Desktop e a versão mais recente de KDE Framesorks5:
Pode ver outras capturas de ecrã das versões atuais e anteriores na página das 'Capturas de ecrã'.
Vamos lá!
Agora que nós já temos a sua atenção, é hora de conhecer o KDE mais de perto.
- O que é KDE? - Conheça o que é KDE (e outras coisas interessantes)
- Início Rápido - Quer esteja ainda a orientar-se, ou já esteja pronto para colaborar, este é o seu trampolim.
- Glossário - Falar a linguagem do KDE
- Live CDs - Experimente o programa KDE, sem instalar!
- Tudo sobre Plasma - Domine essa fera, exótica e brilhante no seu ambiente de trabalho
- Obter Ajuda - Como e onde encontrar ajuda
- Administração do Sistema KDE - Saber como as coisas funcionam dentro do sistema Plasma.
- Amarok/Manual/Organization/Collection/da
Samling
Amarok organiserer din musik i Samlingen.
- Scanning af samling
- Søgning i samling
- Organisér samling
- Synkronisér statistik imellem samlinger og med Last.fm
- Eksterne samlinger
- Ekstern database
- Arbejdet med medieenheder
В усіх блоґах WordPress передбачено підтримку RSS, хоча вони не завжди показують кнопку RSS явним чином.
Якщо у блозі показано кнопки RSS, достатньо натискання кнопки — у вашому браузері має відкритися контекстне вікно, у якому ви зможете вибрати програму RSS для відкриття посилання. Виберіть .
Якщо на сторінці блоґу немає кнопок або посилань RSS, ви можете змінити адресу блоґу так, щоб отримати адресу подачі RSS. Просто додайте наприкінці категорії WordPress, щоб отримати подачу для категорії, або допишіть це до адреси домашньої сторінки блоґу, щоб отримувати подачі для усіх дописів.
У відповідь буде відкрито вікно, у якому ви зможете вибрати Akregator.
Accessibilità
Kmag
Noto anche come KMagnifier, una lente d'ingrandimento per lo schermo proposto da KDE. KMouseTool
Uno strumento per fare clic del mouse automaticamente, pensato per persone con Repetitive Strain Injury (RSI) o simili. KMouth
Un'interfaccia grafica (GUI) per sintetizzatori vocali che pronuncia quanto viene scritto. Jovie
Il sistema Text-to-Speech creato da KDE. simon
Un sistema di riconoscimento vocale per sostituire mouse e tastiera.
Hjem » Programmer » Multimedia » Juk
|
Juk er en jukeboks |
JuK
JuK er et jukebox-program, som understøtter samlinger af lydfiler i formaterne MP3, Ogg Vorbis og FLAC. Det lader dig redigere dine lydfilers "tags" og håndtere dine samlinger og spillelister. Faktisk er dets hovedfokus på håndtering af musiksamlinger.
JuK er en del af KDE's multimediepakke. Dens funktioner inkluderer
- Liste over samling og multible brugerdefinerede spillelister
- Kan scanne mapper og automatisk importere spillelister og musik ved opstart
- Dynamiske spillelister baseret på søgning, som automatisk opdateres når felter i samlingen ændres
- En trævisningstilstand, hvor spillelister automatisk dannes for sæt af albums, kunstnere og genrer
- Spillelistehistorik som indikerer hvilke filer, der er blevet spillet og hvornår
- Søgning på linjen for at filtrere listen for synlige emner
- Kan gætte mærke-information ud fra filnavnet eller ved online opslag i MusicBrainz.
- Filomdøber, som kan navngive filer baseret på indholdet af mærker
- Læsning og redigering af mærker i ID3v1, ID3v2 og Ogg Vorbis format (via TagLib)
Historie
JuK blev oprindeligt startet af Scott Wheeler i 2000. Det blev dengang kaldt QTagger. Med tiden er det vokset og blevet et veludviklet musikprogram. Det har været en officiel del af KDE siden KDE 3.2.
Links
- Juk på kde.org
- JuKs håndbog
- An introduction to KDE/pt-br
Bem-vindo!
Bem-vindo à comunidade KDE e à wiki UserBase. Se você for iniciante nos aplicativos do KDE, um usuário experiente ou um fã, estas páginas irão ajudá-lo a aprender mais sobre a comunidade KDE e seus aplicativos, assim como auxiliá-lo a começar. Mas primeiro, algo para abrir o seu apetite!
Aqui está um exemplo de área de trabalho do KDE. Lembre-se de que o visual pode variar, dependendo da versão dos seus programas e da distribuição. Como exemplo, esta é uma captura de tela do Plasma Desktop e a versão mais recente do KDE Frameworks 5:
Você pode ver mais imagens da versão atual e das anteriores na página Imagens.
Vamos lá!
Agora que já temos a sua atenção, é hora de conhecer o KDE mais de perto.
- O que é KDE? - Conheça o que é o KDE (e outras coisas interessantes)
- Início rápido - Se você está iniciando a procura por orientação ou já está pronto para colaborar, este é o seu trampolim.
- Glossário - Fale a língua do KDE
- Live CDs - Experimente o software KDE sem instalar!
- Tudo sobre o Plasma - Dome essa fera exótica e brilhante na sua área de trabalho
- Obtendo ajuda - Como e onde encontrar ajuda
- Administração de Sistema KDE - Entenda como as coisas funcionam dentro do sistema Plasma.
- Amarok/Manual/AmarokWindow/pt-br
Janela do Amarok
Quando você abre o Amarok, isto é o que verá assim que o Amarok esteja completamente carregado:
Leiaute da janela
O Amarok é organizado em quatro áreas principais, a barra de ferramentas e três painéis:
|
Barra de ferramentas principal |
|
A barra de ferramentas compacta |
|
O painel de Fontes de mídias |
|
O painel de Contexto |
|
Painel da lista de músicas |
Accessibilitat
Kmag
També conegut com a KMagnifier, un ampliador de la pantalla per al KDE. KMouseTool
Un ratolí automàtic «fa accions de clic» per a les persones amb lesions per esforç repetitiu (RSI) o similar. KMouth
Una interfície per a sintetitzadors de veu que llegeix el que escriviu. Jovie
El sistema de text a veu per al KDE. simon
Un sistema de reconeixement de la veu per a substituir el ratolí i el teclat.
Tervetuloa!
Tervetuloa KDE-yhteisöön ja UserBase-wikiin. Ovatpa KDE-ohjelmat täysin uutta sinulle tai oletpa sitten aiempi käyttäjä tai nykyinen fani, nämä sivut auttavat sinua tietämään enemmän sekä KDE-yhteisöstä että sen ohjelmista, kuten myös alkuun pääsemissä. Ensin kuitenkin jotain, jolla herättää ruokahalusi!
Here's an example of a KDE desktop. Please take note that it may look differently depending on your version of the software, and distribution. As an example, here is a screenshot of a Plasma Desktop and the latest version of KDE Frameworks 5:
Voit nähdä lisää ruudunkaappauksia nykyisistä ja aiemmista julkaisuista ruudunkaappaussivulla.
Aloitetaan!
Nyt kun olemme saaneet huomiosi, on aika tutustua KDE:hen lähemmin.
- Mikä on KDE? – Saa selville, mikä KDE on (ja muita mielenkiintoisia seikkoja)
- Quick Start - Whether you are just beginning to find your way around, or ready to contribute, this is your springboard
- Sanasto – Puhutaan KDE-kieltä
- Live-CDt – Kokeile KDE-ohjelmia asentamatta niitä!
- All about Plasma - Tame that funky, shiny new beast on your desktop
- Avun saaminen – Miten ja mistä löytää apua
- KDE System Administration - Understand how things work inside the Plasma system.
- Amarok/Manual/AmarokWindow
The Amarok Window
When you open Amarok, this is what you will see, once Amarok has fully loaded:
Window Layout
Amarok is organized in four main areas, the toolbar and three panes:
|
The Main Toolbar |
|
The Slim Toolbar |
|
The Media Sources pane |
|
The Context pane |
|
The Playlist pane |
Välkommen!
Välkommen till KDE-gemenskapen och till UserBase-wikin. Oavsett om du är helt ny till KDE-program, en tidigare användare eller en aktiv beundrare kommer de här sidorna hjälpa dig att lära dig mer om både KDE-gemenskapen och dess programvara, samt hjälpa dig att komma igång. Men först lite ögongodis!
Here's an example of a KDE desktop. Please take note that it may look differently depending on your version of the software, and distribution. As an example, here is a screenshot of a Plasma Desktop and the latest version of KDE Frameworks 5:
Det finns fler skärmdumpar av nuvarande och tidigare versioner på sidan med Skärmdumpar.
Kom igång!
Nu när vi har din uppmärksamhet är det dags att lära känna KDE, på nära håll.
- Vad är KDE? - Få reda på vad KDE är (och några andra intressanta saker)
- Snabbstart - Oavsett om man bara har börjat hitta rätt eller om man är redo att hjälpa till är det här man börjar.
- Ordlista - Dags att förstå KDE-språket
- Live CD-skivor - Prova KDE-plattformen utan att installera något!
- Allt om Plasma - Tämj det häftiga, glänsande odjuret på skrivbordet
- Få hjälp - Hur och var man hittar hjälp
- KDE System Administration - Understand how things work inside the Plasma system.
- Gwenview/ko
|
Gwenview - 그림 탐색, 편집, 인쇄 |
| Gwenview는 PNG, JPEG, 심지어 김프의 XCF와 같은 KDE 프로그램에서 지원하는 다양한 그림 형식을 불러오고 저장할 수 있습니다! Gwenview는 또한 전체 화면으로 이미지를 볼 때 훌륭한 축소판 도구 모음을 제공합니다. Gwenview의 간단한 인터페이스는 방해가 되지 않으며 그림을 빠르고 쉽게 볼 수 있습니다. |
기능
- 회전, 대칭 이동, 뒤집기 및 크기 조정과 같은 간단한 이미지 조작 지원
- 복사, 이동, 삭제 등과 같은 기본 파일 관리 작업 지원
- 독립 실행형 프로그램 및 Konqueror 웹 브라우저에 임베드된 뷰어로 모두 사용 가능능
- KIPI 플러그인을 사용하여 확장 가능
더 많은 정보
- Gwenview 사용자 설명서
- Gwenview 포럼
- Aurelien Gateau의 블로그에서는 버스트샷이 왜 섞여 버렸는지, 그리고 어떻게 해결할 수 있을지 설명합니다.
- 숨겨진 설정 옵션
- 시맨틱 정보(별점, 태그, 설명)는 확장된 파일 시스템 속성에 저장됩니다. 해당 속성을 보려면
attr -l file.jpg명령을 실행하십시오. - An introduction to KDE/it
Benvenuto!
Benvenuto nella comunità KDE e nel Wiki UserBase. Che tu sia un novellino, un precedente utente o un fan, queste pagine ti aiuteranno a saperne di più sulla comunità KDE, sul suo software e a iniziare a utilizzarlo. Ma prima, qualcosa per stimolare il tuo appetito!
Ecco qui un esempio di desktop KDE. Nota che lo stile può differire per la versione installata e per la distribuzione. Ad esempio ecco una schermata di un desktop Plasma con l'ultima versione disponibile di KDE Frameworks 5:
Puoi vedere altre schermate della versione corrente o di versioni precedenti in questa pagina.
Iniziamo!
Ora che abbiamo la tua attenzione, è tempo di farti conoscere KDE in modo più diretto e personale.
- Cos'è KDE? - Scopri cos'è KDE (ed altre cose interessanti)
- Avvio veloce - Sia che tu stia appena iniziando ad ambientarti che tu sia pronto per contribuire, questo è il tuo trampolino di lancio
- Glossario - Parliamo la lingua di KDE
- Live CD - Prova il software KDE senza dover installare!
- Tutto su Plasma - Scopri quella nuova fiammante bestiola che c'è nel tuo desktop
- Ottenere aiuto - Come e dove trovare aiuto
- Amministrazione di sistema - Per comprendere come funziona un sistema Plasma.
- Gwenview/tr
|
Gwenview - resimlerinizi gözden geçirin, düzenleyin ya da yazdırın |
| Gwenview KDE uygulamalarının desteklediği PNG, JPEG ve hatta Gimp'in XCF gibi biçimlerinde kaydedilen görüntüleri açabilir, düzenleyebilir. Gwenview aynı zamanda tam ekran kipindeyken küçüm resimlerden oluşan bir araç çubuğu sunar. Gwenview'in basit arayüzü görüntülerle uğraştığınız sırada aranıza girip kalabalık yapmaz. |
Özellikler
- Görüntü dosyalarına dair basit düzenlemeler sunar: eksen üstünde çevirme, yansıma görüntüsü, döndürme ve çerçeve büyüklüğünü değiştirme
- Dosyaları kopyalama, taşıma, silme gibi basit işlemleri yapmanızı sağlar
- Hem kendi başına çalışan bir uygulamadır hem de Konqueror web tarayıcısının içinde gömülü olarak çalışır
- KIPI eklentileriyle yeni yetenekler kazandırabilirsiniz.
Daha Fazla Bilgi
- Gwenview User Manual
- Gwenview Forum
- Aurelien Gateau's blog explains how burst shots get shuffled, and what you can do about it.
- Hidden configuration options
- Semantic Information (rating, tags, description) added are stored in extended file system attributes. To list them, run
attr -l file.jpg. - Amarok/Manual/Organization/Collection
Collection
Amarok organizes your music in the Collection.
- Collection Scanning
- Search in Collection
- Organize Collection
- Statistics Synchronization Between Collections and with Last.fm
- Remote Collections
- External Database
- Working with Media Devices
Bun venit!
Bine ai venit la KDE și UserBase. Fie că nu ai mai folosit KDE niciodată, că l-ai folosit cândva sau ești un admirator, aceste pagini te vor ajuta să înveți multe despre KDE și te vor asista în a porni la drum. Dar mai întâi, ceva care să-ți trezească interesul!
Here's an example of a KDE desktop. Please take note that it may look differently depending on your version of the software, and distribution. As an example, here is a screenshot of a Plasma Desktop and the latest version of KDE Frameworks 5:
Poți vedea mai multe imagini cu versiunea cea mai recentă sau versiuni precedente în pagina cu Imagini KDE.
La drum!
Acum că te-am captivat, e momentul să faci cunoștință cu KDE mai de aproape.
- Ce este KDE? - Află ce este KDE (și alte lucruri interesante)
- Quick Start - Fie ca sunt doar începutul pentru a găsi drumul în jurul tău, sau sunt gata să contribuie, aceasta este rampa de lansare dvs
- Glosar - Să învățăm limbajul KDE
- CDuri live - Testează KDE, fără să-l instalezi!
- otul despre Plasma - Învață să îmblânzești scorpia cea nouă, strălucitoare și excentrică de pe desktopul tău.
- jutor - Cum și unde îl găsești
- KDE System Administration - Understand how things work inside the Plasma system.
- An introduction to KDE/cs
Vítejte!
Vítejte v KDE a její wiki UserBase. Ať jste začátečník v KDE, stálý uživatel nebo fanoušek, tyto stránky Vám pomohou naučit se více o KDE, stejně tak Vám budou i pomáhat v úplných začátcích. Ale nejdříve malá ochutnávka!
Zde je příklad, jak vypadá pracovní plocha KDE. Uvědomte si ovšem, že se vzhled může lišit v závislosti na verzi software a použité distribuci.
Jako příklad je zde snímek obrazovky pracovní plochy Plasma a nejnovější verze frameworku KDE 5:
Více screenshotů aktuální i starší verze KDE najdete na stránce KDE Snimky obrazovky.
Začněme!
Nyní, když jsme upoutali vaši pozornost, je čas se blíže seznámit s KDE .
- Co je to KDE? - Zjistíte, co to je KDE (a pár dalších zajímavých věci).
- Strůčný úvod - Ať již pouze začínáte prozkoumávat zdejší okolí, nebo jste připraveni přispívat, zde najdete Váš odrazový můstek
- Glosář - Pojďme si promluvit o KDE. Vysvětlení základních pojmů.
- Živá CD - Vyzkoušejte KDE bez jakékoli instalace!
- Vše o Plasmě - Zkroťte to modní, zbrusu nové zvíře na Vaší pracovní ploše
- Nápověda - Jak a kde hledat nápovědu
- Administrace systému KDE - Porozumějte tomu jak věci pracují uvnitř systému Plasma.
- Digikam/Lens Correction Using digiKam/ca
Correcció de la lent amb el digiKam
Transcrit des d'un article al blog d'en Mohamed Malik, el 18 de març de 2011
Cap lent és òpticament perfecte. Fins i tot les lents més cares tenen imperfeccions, però digiKam pot corregir les imperfeccions de la lent com la distorsió, l'aberració cromàtica, vinyetes, el color i la geometria.
Escolliu la fotografia en que voleu afegir correccions i premeu F4 al teclat. D'aquesta manera passareu a la vista . En la vista aneu a .
Aquesta característica utilitza les dades de lents des de la biblioteca lensfun i aquesta té una base de dades molt actualitzada de les lents que estan disponibles. Compta amb més d'un centenar de lents en les seves bases de dades actuals. També utilitza les metadades de la imatge per trobar la que s'utilitza. Si està disponible exactament la utilitzada per prendre la fotografia, la que coincideixi amb les metadades, però, si no està disponible el resultat exacte, es tria l'ajustament de les més coincidents. En aquest cas també es permet a l'usuari seleccionar la lent.
Podeu activar o desactivar les línies de la graella. Seleccioneu les correccions que voleu aplicar movent el ratolí cap a dintre i fora de la finestra de vista prèvia que us mostrarà un abans i un després. Quan esteu satisfet amb el resultat premeu .
কেডিই অ্যাক্সেসযোগ্যতা
- সহায়ক অ্যাপ্লিকেশন
- কেডিই প্রদত্ত সহায়ক অ্যাপ্লিকেশনের তালিকা। এর মধ্যে রয়েছে ম্যাগনিফিকেশন, টেক্সট-টু-স্পীচ বা ভয়েস নিয়ন্ত্রণ।
- স্ক্রিন রিডার দিয়ে শুরু করা
- একটি স্ক্রিন রিডারের সাহায্যে কেডিই অ্যাপ্লিকেশনগুলি কীভাবে সেটআপ করা যায় তার একটি সংক্ষিপ্ত বিবরণ দেয়।
- অ্যাপ্লিকেশন ওভারভিউ
- কেডিই অ্যাপ্লিকেশনগুলির তালিকা এবং স্ক্রিন রিডারের সাথে ব্যবহার করার সময় সেগুলি কতটা অ্যাক্সেসযোগ্য।
- প্লাজমাতে অ্যাক্সেসযোগ্যতা
- প্লাজমাতে সহায়ক অ্যাপ্লিকেশনগুলি কীভাবে ব্যবহার করবেন।
Willkommen!
Willkommen bei KDE und bei der KDE UserBase. Egal, ob Sie komplett neu bei KDE, ein Benutzer oder gar Fan sind: Diese Seiten werden Ihnen helfen, mehr über KDE zu erfahren und Ihnen auf den ersten Schritten zur Seite stehen. Aber zuerst etwas, um Ihren Appetit zu wecken!
Hier ist ein Beispiel, wie die KDE-Arbeitsfläche aussieht. Bitte beachten Sie, dass das Aussehen von KDE von der von Ihnen verwendeten KDE-Version und Ihrer Distribution abhängt. Dieses Beispiel zeigt die KDE-Arbeitsfläche und die zur Zeit aktuellste Version des KDE-Framework 5:
Mehr Bilder der aktuellen und früheren Versionen von KDE sind auf der Seite KDE Screenshots zu finden.
Los geht’s!
Wenn wir nun Ihre Neugier geweckt haben, ist es Zeit, KDE näher und besser kennen zu lernen.
- Was ist KDE? - Lernen Sie kennen, was KDE ist (und einige andere interessante Dinge)
- Schnelleinstieg - Egal, ob Sie gerade anfangen, sich zurechtzufinden oder bereit sind, einen Beitrag zu leisten: dies ist Ihr Sprungbrett
- Glossar - Lernen Sie KDE-Ausdrücke kennen
- Live CDs - Probieren Sie KDE aus ohne etwas zu installieren!
- Plasma - Zähmen Sie das neue und glänzende Biest auf ihrem Desktop
- Hilfe bekommen - Wo und wie man Hilfe findet
- Wussten Sie schon... - Nützliche kleine Fakten über die KDE Software
- Applications/Accessibility/fr
Accessibilité
Kmag
Aussi connu sous KMagnifier, un agrandisseur d'écran de KDE. KMouseTool
Une souris cliquant automatiquement pour les personnes souffrant de troubles musculosquelettiques (TMS) ou pathologies similaires. KMouth
Une interface graphique « tape et parle » pour synthétiseurs vocaux. Jovie
Le système de KDE Texte Vers Parole (text-to-speech). simon
Un système de reconnaissance de la parole pour remplacer la souris et le clavier.
|
Gwenview - durchsuche, bearbeite und drucke deine Bilder |
| Gwenview unterstützt eine Vielzahl an Dateiformaten, die auch von anderen KDE-Programmen verwendet werden, darunter PNG, JPEG und sogar das XCF-Format von Gimp! Gwenview besitzt eine hübsche Thumbnail-Leiste, die im Vollbildmodus erscheint. Gwenview's benutzerfreundliche Oberfläche zeigt dir deine Bilder schnell und einfach. |
Merkmale
- Unterstützt einfache Bildbearbeitung: Drehen, Spiegeln und Größenänderung
- Unterstützt einfache Dateioperationen: Kopieren, Verschieben, Löschen und andere
- Funktioniert sowohl als eigenständiges Programm als auch als eingebetteter Bildbetrachter im Web-Browser Konqueror
- Erweiterbar durch KIPI plugins.
Weitere Informationen
- Gwenview-Handbuch
- Gwenview Forum (englisch)
- Aurelien Gateaus Blog erklärt wie Serienbilder durcheinander geraten und was man dagegen tun kann (englisch).
- Versteckte Optionen der Konfiguration
- Semantische Informationen (Bewertung, Stichwörter, Beschreibungen) werden in erweiterten Dateiattributen (xattr) gespeichert. Um sich diese anzuzeigen geben Sie auf der Kommandozeile folgendes ein:
attr -l file.jpg
Escriure les metadades a fitxers RAW en digiKam
Transcrit des d'un article al blog d'en Mohamed Malik, l'1 de març de 2011
Gairebé totes les imatges contenen metadades i aquestes dades contenen tots els ajustaments que heu utilitzat per crear la fotografia. Aquests inclouen la velocitat d'obturació, obertura, distància focal, etc.
La majoria de les aplicacions de gestió d'imatges us permeten afegir i eliminar metadades personalitzades als vostres fitxers. Aquest plantejament és fàcil utilitzant fitxers JPEG, però no és gaire cert per als fitxers RAW.
Quan afegiu més etiquetes i comentaris a les metadades d'una imatge necessitareu desar-la. Si teniu un munt de fitxers RAW, digiKam també us dóna l'opció d'escriure les metadades dels fitxers RAW. Però, si us plau, tingueu en compte que aquesta característica encara és experimental.
Per tal d'activar l'escriptura de les metadades als fitxers RAW, cal que modifiqueu la configuració de digiKam.
Des del menú principal aneu a
A continuació veureu el menú de configuracions. A la part esquerra seleccioneu i activeu l'opció
Veure la captura de pantalla a continuació.
¡Bienvenido!
Bienvenido a la comunidad KDE y al Wiki UserBase. Ya seas un usuario nuevo del software KDE, un usuario experimentado o un aficionado actual, estas páginas te ayudarán a aprender más acerca de la comunidad KDE y su software, así como también a asistirte en tus inicios. Pero primero, ¡algo para abrir tu apetito!
Aquí hay un ejemplo de un escritorio KDE. Ten en cuenta que podría tener un aspecto diferente dependiendo de la versión del software y su distribución. Como ejemplo, aquí vemos una captura de pantalla del escritorio Plasma y la última versión de KDE Frameworks 5.
Puedes ver más capturas de pantalla de versiones actuales y anteriores de KDE en la página de capturas de pantalla.
¡Vamos!
Si hemos despertado tu curiosidad, ahora es el momento conocer KDE de forma más cercana y personal.
- ¿Qué es KDE? - Conoce lo que KDE es (y algunas otras cosas interesantes)
- Inicio rápido - Ya sea que estés comenzando a encontrar tu camino, o preparado para colaborar, este es tu trampolín.
- Glosario - Hablemos el idioma que KDE habla
- Live CDs - Prueba el software de KDE, ¡sin necesidad de instalar!
- Todo sobre Plasma - Doma a esa bestia brillante de tu escritorio
- Obtener ayuda - Cómo y dónde encontrar ayuda
- ¿Sabías qué... - Pequeños datos útiles sobre el software de KDE
- Digikam/Exif/en
Apply EXIF Metadata to Multiple Photos in digiKam
Transcribed from Dmitri Popov's blog, 7th August 2013 (corrected according to digiKam v7.2 in January 2021)
If you happen to use digiKam for managing photos scanned from negatives, you’ll appreciate the application’s capabilities to add and edit EXIF metadata. Using digiKam’s dedicated interface for managing metadata, you can add key EXIF values, such as maker, device model, aperture, shutter speed, ISO, focal length, etc., to the scanned photos (provided you have these data handy).

However, digiKam doesn’t allow you to apply the same EXIF data to multiple photos in a single operation. Adding the same maker, device, ISO, and focal length to a set of photos one-by-one can be a bit of a nuisance, but you can use a simple trick to work around this limitation. Start with adding EXIF values to a single photo. Select then the rest of the photos, choose , pick the processed photo, and press . This will apply EXIF data from the processed photo to the selected images. Copy-pasting metadata is not supported in digiKam 7.2[1].
References:
科学
数据绘图与图形
LabPlot

LabPlot is an application for interactive graphing and analysis of scientific data. Rocs 图论

一个供学生使用的互动式图论IDE。
数据操作
RKWard

一个为数据分析设计的R编程语言的前端
模拟
信息系统
Kalzium

一个元素周期表软件,包含了103个化学元素的资讯。 Marble

一个强大的虚拟地球和世界地图,采用 OpenStreetMaps。你可以在这个视频中看到运转中的Marble。
Aplicar metadades EXIF a múltiples fotografies al digiKam
Transcrit des d'un article al blog d'en Dmitri Popov, el 7 d'agost de 2013
Si utilitzeu digiKam per a gestionar fotografies digitals des dels negatius, apreciareu la capacitat de l'aplicació per afegir i editar les metadades EXIF. Utilitzant la interfície dedicada del digiKam per a gestionar les metadades, podreu afegir valors EXIF clau, com el fabricant, el model de dispositiu, obertura, velocitat d'obturació, ISO, distància focal, etc. a les fotografies escanejades (sempre tindreu aquestes dades a mà).
No obstant, digiKam no permet aplicar les mateixes dades EXIF a múltiples fotografies en una sola operació. Afegir la mateixa marca, dispositiu, ISO, i la distància focal a una sèrie de fotografies una per una pot ser una mica molest, però podeu utilitzar un simple truc per evitar aquesta limitació. Comenceu afegint els valors EXIF d'una sola fotografia. Després seleccioneu la resta de fotografies, escolliu , trieu la fotografia processada, i premeu . Això aplicarà les dades EXIF de la fotografia processada a les imatges seleccionades.
References:
|
Gwenview: sfoglia, modifica e stampa le tue immagini |
| Gwenview è in grado di caricare e salvare molti formati di immagini supportati dalle applicazioni KDE come PNG, JPEG, e anche XCF (Gimp)! Gwenview inoltre presenta un'utile barra delle miniature nella modalità a tutto schermo. La semplice interfaccia di Gwenview ti permette di visualizzare le tue immagini velocemente e facilmente. |
Caratteristiche
- Supporta semplici manipolazioni delle immagini: ruota, rispecchia, ribalta e ridimensiona;
- supporta le operazioni di base con i file come copia, sposta, elimina e altre;
- è disponibile sia come applicazione indipendente che come visualizzatore integrato nel browser web Konqueror;
- le sue funzionalità possono essere estese tramite i plugin KIPI.
Maggiori informazioni
- Manuale utente di Gwenview
- Forum di Gwenview
- Il blog di Aurelien Gateau spiega come vengono ordinate le foto prese in rapida sequenza e come gestirle al meglio.
- Opzioni nascoste di configurazione
- Informazioni semantiche (valutazione, tag, descrizione) aggiunte sono salvate negli attributi estesi del file system. Per averne una lista, esegui
attr -l file.jpg. - Dragon Player/fr
Home » Applications » Multimedia » Dragon Player
|
Dragon Player est une interface simple pour lire des films ou écouter de la musique |
Dragon Player est le lecteur vidéo par défaut de KDE4.x SC. Il est anciennement connu sous le nom de Codeine.
Fonctionnalités
- Interface simple
- Reprendre la lecture d'une vidéo : commencez à visionner une vidéo là où vous l'aviez interrompu la dernière fois
- Support des sous-titres : chargement automatique des sous-titres dont le nom correspond à celui de la vidéo
- Configuration des paramètres d'affichage de la vidéo (luminosité, contraste)
- Grâce à l'utilisation de Solid et Phonon Dragon Player est indépendant de tout framework multimedia ou couche d'abstraction matérielle
- Supporte la lecture des CDs et des DVDs
Captures d'écran
|
|
Pour la musique
- Sélectionnez et votre musique commence. Pas de listes de lecture distrayantes, juste du son.
- ouvre un dialogue pour vous permettre de trouver et de lire des fichiers simples. Une liste de lecture peut être construite, mais ce n'est pas la fonction première.
Autres informations
- page web KDE officielle de Dragon Player
- manuel utilisateur officiel de Dragon Player
- Digikam/AspectRatios/de
Bilder nach dem Seitenverhältnis zuschneiden mit digiKam
Übernommen von Mohamed Malik's web post am 21 Februar 2011
Jeder Bildschirm hat ein Seitenverhältnis, von Breite zu Höhe. Mit DigiKam geht dieser Zuschnitt sehr leicht. Das ist sehr hilfreich für Bildschirmhintergründe und Bilder mit einem bestimmten Seitenverhältnis. Ich verwende diese Funktion für das hinaufladen der Bildschirmhintergründe auf kde-look
So erstellt man sie.
Choose the image and press F4 or right click on the image and go to . In the editor view go to the menu bar and click and this window will appear.
Die Funktion hat folgende vordefinierte Seitenverhältnisse:
- 1:1
- 3:2
- 4:3
- 5:4
- 7:5
- 10:7 & 5:8
Es gibt auch die Option des Goldenen Schnitts... Bitte lesen Sie mehr dazu hier digiKam manual. [1]
Es gibt auch die Option für ein benutzerdefiniertes Seitenverhältnis . Da können sie jedes bevorzugte Verhältnis wählen.
After choosing an aspect ratio hold the tiny square that you see on the edges of the highlighted area and move to the area of the image that you want to crop, any area you select will have the aspect that you specified.
Referenzen
- ↑ An explanation of the Golden Ratio can be found at the Maths is Fun site
Skriv metadata til RAW-filer i digiKam
Fra Mohamed Malik's blog, 1. marts 2011
Næsten alle billeder indeholder metadata, og disse data angiver alle de indstillinger du brugte, dat du tog billedet. Det inkluderer blændehastighed, apertur, fokallængde osv.
De fleste billedhåndteringsprogrammer lader dig tilføje og fjerne brugerdefinerede metadata til din fil. Dette kan let gøre med JPEG-filer; men ikke så let med RAW-filer.
Når vi føjer flere mærkater og billedtekster til et fotos metadata, så skal vi gemme dem. Hvis du har en masse RAW-filer, så lader digiKam dig også skrive metadata til dem. Vær dog opmærksom på, at denne funktion stadig er eksperimentel.
For at muliggøre skrivning af metadata til RAW-filer skal du redigere digiKams indstillinger.
Fra hovedmenuen vælger du
Nu kommer indstillingsdialogen frem. I venstre side vælger du og aktiverer tilvalget
Se skærmbilledet herunder.
KDE Global Shortcuts
Global Shortcuts are KDE's control key combinations. Use them to control Amarok from the keyboard as an alternative to using the mouse.
Default Global Shortcuts
| Action | Default Global Shortcut |
|---|---|
| Add Media... | Meta + A |
| Decrease Volume | Meta + - |
| Increase Volume | Meta + + |
| Last.fm: Love Current Track | Meta + L |
| Last.fm: Skip Current Track | Meta + S |
| Mute Volume | Meta + M |
| Next Track | Media Next |
| Play/Pause | Media Play |
| Stop | Media Stop |
| Previous Track | Media Previous |
| Rate Current Track: 1 star | Meta + 1 |
| Rate Current Track: 2 stars | Meta + 2 |
| Rate Current Track: 3 stars | Meta + 3 |
| Rate Current Track: 4 stars | Meta + 4 |
| Rate Current Track: 5 stars | Meta + 5 |
| Seek Backward | Meta + Shift + - |
| Seek Forward | Meta + Shift + + |
| Show Notification Popup | Meta + O |
| Toggle Main Window | Meta + P |
Writing Meta Data To Raw Files In digiKam
Transcribed from Mohamed Malik's blog, 1 March 2011
Almost all images contain metadata and this data contains all the settings that you used to create the picture. These include shutter speed, aperture, focal length etc..
Most image management applications allow you to add and remove custom metadata to your files. This can be easily done while using JPEG files. However the same is not very true for RAW files.
When we add more labels and captions to the metadata of an image we need to save it. If you have a lot of RAW files, digiKam gives you the option to write metadata to RAW files as well. However please bear in mind that this feature is still experimental.
In order to enable the writing of metadata to RAW files, you need to edit your configuration of digiKam.
From the main menu go to
Then you will see the configurations menu. On the left hand side select and enable the option
See screen capture below.
Science
Plotting Data and Graphs
LabPlot
LabPlot is an application for interactive graphing and analysis of scientific data. Rocs
An interactive Graph Theory IDE for Students.
Data Manipulation
RKWard
A front-end for the R programming language designed for data manipulation
Simulations
KStars

A desktop planetarium from KDE, accurately representing the night sky from any location on the planet. Step

An interactive physical simulator which shows how a scene will evolve according to the laws of physics.
Information Systems
Kalzium
An application for viewing information about the elements in the periodic system. Marble
A powerful virtual globe and world map. It is able to use OpenStreetMaps. You can see it in action in this video
Fotografies amb geolocalització amb una càmera Android i digiKam
Transcrit des d'un article al blog d'en Dmitri Popov, el 29 d'octubre de 2012
Gràcies a les capacitats de correlació geogràfica de digiKam, podeu etiquetar geogràficament les fotografies utilitzant un fitxer GPX creat amb aplicacions com Open GPS Tracker. Però també hi ha una altra manera d'utilitzar el vostre dispositiu Android amb aquesta finalitat. L'aplicació incorporada a la càmera en la majoria dels dispositius Android és capaç d'etiquetar geogràficament les fotografies. Això vol dir que podeu prendre una fotografia etiquetada geogràficament amb la càmera de l'Android i després transferir les coordenades geogràfiques de la mateixa a altres fotografies amb digiKam. De manera que la propera vegada, quan preneu fotografies amb la càmera principal, recordeu prendre una fotografia de referència amb el dispositiu Android (assegureu-vos que l'opció d'etiquetatge geogràfic està activada).
Al digiKam, seleccioneu la fotografia de referència juntament amb les fotografies que voleu etiquetar geogràficament i escolliu . Feu clic dret sobre la fotografia de referència a la llista de selecció i escolliu . Marqueu llavors la resta de les fotografies a la llista fent clic dret sobre una selecció, escolliu , premeu el botó i ja està.
Anvend EXIF-metadata til flere fotos i digiKam
Fra Dmitri Popovs blog, 7. august 2013 (opdateret i overensstemmelse med digiKam v7.2 i januar 2021)
Hvis du bruger digiKam til at håndtere fotos scannet fra negativer, så vil du sætte pris på programmets mulighed for at tilføje og redigere EXIF-metadata. Ved brug af digiKams særlige brugerflade til håndtering af metadata kan du føje centrale EXIF-værdier så som mærke, enhedsmodel, blænde, lukkehastighed, ISO, fokuslængde osv. til de scannede fotos (forudsat, at du har disse data tilgængelige).
Dog lader digiKam dig ikke anvende de samme EXIF-data til flere billeder i en enkelt operation. Det kan blive noget ensformigt at skulle føje samme mærke, model, ISO og fokuslængde til hvert foto i et sæt et ad gangen, men der er et simpelt trick til at omgå denne begrænsning. Start med at føje EXIF-værdier til et enkelet foto. Markér så resten af fotoerne, vælg , udpeg det behandlede foto og klik på . Det vil anvende EXIF-data fra det behandlede foto på de markerede billeder. Copy-paste af metadata understøttes ikke i digiKam 7.2[1].
Referencer:
|
Gwenview - navegue, edite e imprima suas imagens |
| Gwenview é capaz de carregar e salvar em uma variedade de formatos suportados pelas aplicações do KDE, como PNG, JPEG, e até mesmo o XCF do Gimp! Gwenview também possui uma bonita barra miniaturizada de ferramentas quando a visualização de imagens é feita em tela cheia. A interface simples do Gwenview não atrapalha e permite que você visualize suas imagens de forma rápida e simples. |
Características
- Suporta manipulações de imagem simples: girar, espelhar, virar e redimensionar
- Suporta ações de gerenciamento de arquivos básicas como copiar, mover, excluir e outras
- Funciona tanto como um aplicativo independente como um visualizador embutido ao navegador web Konqueror
- Pode ser ampliado utilizando os plugins KIPI.
Mais informações
- Manual do Usuário do Gwenview
- Fórum do Gwenview
- Blog do Aurelien Gateau - explica porque as fotos tiradas em modo contínuo (burst) ficam embaralhadas e como fazer para corrigir isso.
- Opções ocultas de configuração
- Informações Semânticas (avaliação, rótulos, descrição) adicionadas são guardadas com atributos de sistema de arquivos extendidos. Para listá-los, execute o comando
attr -l file.jpg. - Digikam/Batch Process/it
Elaborare in serie le foto in digiKam
Quando hai bisogno di applicare la stessa azione a più foto, le funzionalità di elaborazione in serie di digiKam possono essere alquanto comode. L'applicazione per la gestione delle foto fornisce vari modi per applicare azioni ad una serie di foto in un colpo solo.
Per una elaborazione in serie più impegnativa dovresti utilizzare lo strumento dedicato Gestore elaborazione in serie. Utilizzandolo puoi impostare profili di elaborazione piuttosto avanzati e gestire più code di elaborazione. Per aggiungere le foto selezionate al Gestore elaborazione in serie, scegli (in alternativa utilizza la scorciatoia da tastiera Ctrl + B) o (o premi Ctrl + Shift + B). In questo modo viene aperto il Gestore elaborazione in serie ed aggiunte le foto selezionate ad una coda esistente o nuova. Per specificare le azioni che vuoi eseguire sulle foto nella coda, seleziona lo strumento desiderato nella sezione e specifica le impostazioni per ciascun strumento nel riquadro . La sezione nel riquadro ti permette di specificare una regola di rinominazione da applicare alle foto modificate. Questo può aiutarti a distinguere le foto elaborate dagli originali.
Processar per lots les fotografies al digiKam
Quan us calgui aplicar la mateixa acció a múltiples fotografies, les capacitats de processament per lots del digiKam us poden venir bé. I l'aplicació per a la gestió fotogràfica ofereix diferents maneres d'aplicar accions a un lot de fotografies d'una sola vegada.
Per obtenir un processament per lots més seriós, haureu d'utilitzar l'eina Gestor de la cua de lots. Amb ella, podreu configurar els perfils de processament avançat i gestionar múltiples cues. Per afegir fotografies seleccionades al gestor de cues per lots, seleccioneu (una altra alternativa és utilitzar la drecera de teclat Ctrl + B) o (o premeu Ctrl + Majús. + B). Això obrirà el gestor de cues per lots i afegirà les fotografies seleccionades a una cua nova o existent. Per especificar les accions que voleu dur a terme a les fotografies en la cua, escolliu les eines que voleu des de la secció , i especifiqueu la configuració de cada eina en el plafó . La secció en el plafó us permet especificar una regla de canvi de nom per aplicar a les fotografies modificades. Això pot ajudar-vos a diferenciar entre les fotografies processades i les originals.
Redibuixar les fotografies amb el digiKam
Transcrit des d'un article al blog d'en Mohamed Malik, el 16 de febrer de 2011
Teniu alguna imatge on l'horitzó no és recte? En el meu cas, en tinc moltes. En aquest cas, ho podeu arranjar utilitzant digiKam. Aquí teniu com fer-ho.
Feu una ullada a aquesta fotografia... sens dubte ho necessita...
Des de la vista de la fotografia premeu la tecla F4 o feu clic dret sobre la fotografia i premeu per anar a la vista de l'editor.
Des de la vista de l'editor aneu a .
A continuació veureu aquesta finestra: feu una ullada a la dreta...
A la dreta podeu veure el menú com i . Canvieu-ho i veureu els efectes en temps real. Altereu aquests valors fins que s'hagi redreçat la vostra imatge. Això és el que obtinc:
Bé, ara la fotografia es veu molt millor!
Videnskab
Data- og grafplottere
LabPlot
LabPlot er et program til at lave grafer og analysere videnskabelige data interaktivt. Rocs
En interaktiv brugerflade til grafteori for studerende.
Datamanipulation
RKWard
En brugerflade til programsproget R, som er designet til datamanipulation.
Simulering
KStars
Et planetarium til skrivebordet, som giver en nøjagtig fremstilling af nattehimlen fra enhver position på jorden. Step
En interaktiv fysiksimulator, som viser, hvordan en situation vil udvikle sig efter fysikkens love.
Informationssystemer
Kalzium
Fremviser information om grundstofferne og det periodiske system. Marble
Kraftfuld virtuel globus og og verdenskort. Den kan bruges med OpenStreetMaps. Du kan se det i aktion i denne video
Els Gestos del ratolí per a tots els navegadors proporciona un conjunt premat de gestos del ratolí per a operacions bàsiques en molts navegadors de fitxers i web.
Mai heu utilitzat els gestos del ratolí? Per a aprendre més llegiu Mousegestures per a conèixer-los en general. Per a aprendre com s'utilitzen en el Plasma, vegeu els gestos del ratolí.
Instal·lació i ús
Primer pas: Descarregar el fitxer de gestos
Feu clic a aquí per a descarregar el fitxer «browsergestures.khotkeys» (requereix KDE SC 4.3 o posterior).
Les aplicacions actualment compatibles:
- Konqueror
- Firefox
- Opera
- Arora
- Rekonq
- Chromium
- Chrome Browser
- Dolphin
- Kontact
Segon pas: Importar el fitxer descarregat
Importeu el fitxer descarregat, utilitzant i navegueu fins el fitxer «browsergestures.khotkeys».
Tercer pas: Configurar
Feu clic a , i activeu els . El botó del ratolí per omissió és «2» (la roda del ratolí). Si ho preferiu podeu triar (el botó dret).
Cas especial
Opera: A causa que Opera disposa dels seus propis gestos del ratolí, podeu eliminar Opera a la pestanya .
Üdvözöljük!
Üdvözöljük a KDE közösségben és a UserBase wikin. Legyen ön teljesen új a KDE szoftverek terén, régi felhasználó, vagy jelenlegi rajongó, ezek az oldalak segíteni fognak Önnek a KDE közösség és a KDE szoftverek megismerésében, úgy ahogy segítségére lesz a kezdetekben. Reméljük, hogy a lenti kép felkelti az érdeklődését!
Here's an example of a KDE desktop. Please take note that it may look differently depending on your version of the software, and distribution. As an example, here is a screenshot of a Plasma Desktop and the latest version of KDE Frameworks 5:
További képernyőképeket a jelenlegi és korábbi verziókból a Képernyőképek oldalon találhat.
Csapjunk bele!
Most, hogy felkeltettük a figyelmét, itt az idő, hogy közelről és személyesen is megismerjük a KDE-t.
- Mi az a KDE? - Ismerje meg a KDE-t (és más érdekes dolgokat)
- Gyorskezdés - Akár most kezd eligazodni, vagy készen áll a közreműködésre, ez az Ön ugródeszkája!
- Szójegyzék - Ismerje meg a KDE nyelvét
- Live CD-k - Próbálja ki a KDE-t, telepítés nélkül!
- Minden a Plasmáról - Szelídítse meg az asztalát!
- Segítség kérése - Tájékozódhat arról, hogy hol és hogyan kaphat segítséget
- KDE System Administration - Understand how things work inside the Plasma system.
- Amarok/Manual/AmarokWindow/uk
Вікно Amarok
When you open Amarok, this is what you will see, once Amarok has fully loaded:
Компонування вікна
Вікно Amarok поділено на чотири основні області: панель інструментів та три панелі:
|
Основний режим панелі інструментів |
|
The Slim Toolbar |
|
The Media Sources pane |
|
The Context pane |
|
The Playlist pane |
환영합니다!
KDE 커뮤니티와 사용자 센터 위키에 오신 것을 환영합니다. KDE 소프트웨어를 완전히 처음 접하는 사용자든, 이전 사용자든, 현재 팬이든, KDE 커뮤니티와 소프트웨어에 대한 도움말과 따라할 수 있는 정보를 제공합니다. 들어가기 전에 잠시 주목해 주세요!
다음은 KDE 데스크톱의 예입니다. 소프트웨어 버전 및 배포판에 따라 다르게 보일 수 있습니다. 예를 들어 아래 화면은 KDE 프레임워크 5를 사용하는 최신 Plasma 데스크톱 스크린샷입니다.
스크린샷 페이지에서 더 많은 스크린샷, 이전 버전의 스크린샷을 볼 수 있습니다.
시작합시다!
이제 KDE를 더 자세히 알아 볼 시간입니다.
- KDE에 대하여 - KDE가 무엇인지 알아보기(또 다른 재미난 것도 있습니다)
- 첫 걸음 - 이 사이트에 처음 와서 정보를 찾기 시작했거나, 기여할 준비가 되었을 때 읽어 볼 거리
- 용어집 - KDE 안에서 사용하는 단어
- 라이브 CD - 설치하지 않고 KDE 소프트웨어를 사용해 볼 수 있습니다!
- Plasma의 모든 것 - 새로운 멋진 데스크톱과의 첫 만남
- 도움말 보기 - 도움말을 찾는 방법 및 위치
- KDE 시스템 관리 - Plasma 시스템 내부의 작동 방식 이해하기
The Amarok window
The Amarok window is designed to let you rediscover your music. So, it gives you as much information about your music as possible. While many users will enjoy the default layout, it is fully customizable.
Default layout of the Amarok window
Upon installation, Amarok will look like this:
The Amarok window has four main parts:
- under the top-level menus is the Toolbar which lies above three panes:
- your Media Sources (music collection and other media) in the left pane,
- the Context pane in the center, and
- the Playlist in the right-hand pane.
Using the Amarok window to manage and play your music
Playing music using Amarok usually takes two steps:
- Create a playlist by selecting some of the tracks in your collection, which you will find listed in the Media Sources pane, and send your music to the Playlist pane.
- Play the music in your playlist, using the Playlist pane and/or the Toolbar.
Also, you may want to transfer some of your music to a mobile music player, such as an iPod. The next sections will explain how.
У Dolphin передбачено можливість перейменування одразу декількох файлів з заміною їх назв на номери. Ця можливість є доволі обмеженою, але може бути корисною за певних обставин. Одним з випадків застосування може бути перейменування набору фотографій.
Позначте файли, які ви хочете перейменувати, а потім наведіть вказівник на пункт одного з них і клацніть правою кнопкою миші. Виберіть у контекстному меню пункт (клавіатурне скорочення F2). У відповідь буде відкрито діалогове вікно, за допомогою якого ви зможете визначити спосіб перейменування файлів.

Символи «#» у назві файлів буде замінено номером. Перший файл матиме номер «1», інші файли — послідовні номери у наборі. Якщо додати декілька таких символів, до назв буде додано відповідну кількість нулів.
- # буде замінено на 1, 2, 3, 30, 150 тощо;
- #### буде замінено на 0001, 0002, 0003, 0030, 0150 тощо.
Straighten Your Pictures Using digiKam
Transcribed from Mohamed Malik's blog, 16 February 2011
Do you have any images where the horizon is not straight? In my case I have many. In that case you can straighten them using digiKam. Here is how to do it.
Take a look at this picture...it definitely needs it...
From the view picture either press F4 or right click on the picture and press to go to the editor view.
From the editor view go to
Then you will see this window - take a look at the right…
On the right you can see the menu as and . Change these and you will see effects in real time. Alter these values until you have straightened your image. Here is what I got:
Well the picture now looks much better!
Bienvenue !
Bienvenue dans la communauté KDE et sur le wiki UserBase. Que vous soyez un tout nouvel utilisateur des logiciels KDE, un ancien utilisateur ou un fan, ces pages vous aideront à en apprendre davantage autant sur la communauté KDE que sur ses logiciels, et vous aideront à démarrer. Mais d'abord, quelque chose pour vous mettre en appétit !
Voici un exemple de bureau KDE. Notez qu'il peut être différent selon la version de votre logiciel et de votre distribution. À titre d'exemple, voici une capture d'écran d'un bureau Plasma Desktop, et la dernière version de KDE Frameworks 5:
Vous pouvez voir plus de captures d'écran des versions actuelles et antérieures sur cette page.
En avant !
Maintenant que nous avons toute votre attention, il est temps de faire plus ample connaissance avec KDE.
- Qu'est-ce que KDE ? - Apprenez à connaître ce qu'est KDE (et plein d'autres choses intéressantes)
- Pour commencer - Que vous commenciez juste à savoir où aller, ou si vous êtes prêt à contribuer, voilà votre tremplin
- Glossaire - Parlons le langage KDE
- Live CDs - Essayez les logiciels KDE sans les installer !
- Tout sur Plasma - Domptez ce fauve sublime et funky sur votre bureau
- Obtenir de l'aide - Comment et où trouver de l'aide
- Administration Système de KDE - Comprendre le fonctionnement interne du système Plasma.
- An introduction to KDE/ca
Benvingut/da!
Us donem la benvinguda a la comunitat KDE i al wiki UserBase. Si sou completament nou al programari KDE, un usuari anterior o un entusiasta, aquestes pàgines us ajudaran a aprendre més quant a la comunitat KDE i el seu programari, així com una ajuda per a començar. Però primer, alguna cosa per a obrir la gana!
Aquest és un exemple d'un escriptori KDE. Cal tenir en compte que es podrà veure diferent depenent de la versió del programari i la distribució. Com a exemple, aquí teniu una captura de pantalla d'un escriptori Plasma amb l'última versió dels Frameworks 5 del KDE:
Podeu veure més captures de pantalla de les versions actuals i anteriors a la pàgina Captures de pantalla.
Som-hi!
Si hem despertat la teva curiositat, ara és el moment conèixer KDE de manera més propera i personal.
- Què és el KDE? - Conèixer què és el KDE (i algunes altres coses interessants).
- Inici Ràpid - Ja sigui que comenceu a trobar el vostre camí, o esteu preparat per a col·laborar, aquest és el vostre trampolí.
- Glossari - Parlem del llenguatge KDE.
- Live CD - Proveu el programari KDE, sense necessitat d'instal·lar!
- Tot sobre Plasma - Doma a la bèstia brillant del teu escriptori!
- Com obtenir ajuda - Com i on trobar ajuda.
- Administració del sistema KDE - Comprendre com funcionen les coses a l'interior del sistema Plasma.
- Amarok/Manual/References/MenuAndCommandReference
Menu and Command Reference
Amarok Top-level Menus
KDE's globale genveje
Globale genveje er tastekombinationer, som kan kontrollere KDE. Brug dem til at kontrollere Amarok fra tastaturet som et alternativ til at bruge musen.
Globale standardgenveje
| Handling | Global standardgenvej |
|---|---|
| Tilføj medie... | Meta + A |
| Formindsk lydstyrke | Meta + - |
| Forøg lydstyrke | Meta + + |
| Last.fm: Elsk dette spor | Meta + L |
| Last.fm: Skip dette spor | Meta + S |
| Sæt på lydløs | Meta + M |
| Næste spor | Næste medie |
| Spil/pause | Afspiul medie |
| Stop | Stop medie |
| Forrige spor | Forrige medie |
| Vurdér dette spor: 1 | Meta + 1 |
| Vurdér dette spor: 2 | Meta + 2 |
| Vurdér dette spor: 3 | Meta + 3 |
| Vurdér dette spor: 4 | Meta + 4 |
| Vurdér dette spor: 5 | Meta + 5 |
| Søg tilbage | Meta + Shift + - |
| Søg fremad | Meta + Shift + + |
| Vis bekendtgørelses-pop-op | Meta + O |
| Slå hovedvinduet til og fra | Meta + P |
Effettuare tagli secondo proporzioni in digiKam
Trascritto dal blog di Mohamed Malik, 21 febbraio 2011
Ogni singolo schermo ha una proporzione, cioè un rapporto tra la larghezza e l'altezza. digiKam può effettuare tagli conformi a queste molto facilmente. È molto utile se stai creando sfondi ed immagini che debbano adattarsi ad una determinata proporzione. Personalmente utilizzo questa funzionalità quando carico i miei sfondi su kde-look.
Ecco come farli.
Scegli l'immagine e premi F4 o fai clic destro sull'immagine e scegli . Nella finestra dell'editor vai sulla barra del menu e fai clic su , comparirà questa finestra.
Lo strumento offre le seguenti proporzioni predefinite:
- 1:1
- 3:2
- 4:3
- 5:4
- 7:5
- 10:7 & 5:8
Offre anche un'opzione chiamata rapporto aureo... Leggi ulteriori informazioni al riguardo nel manuale di digiKam. [1]
Offre anche la possibilità di personalizzare le proporzioni. Puoi quindi scegliere la proporzione che preferisci.
Dopo aver scelto una proporzione, prendi il piccolo quadrato che vedi sugli angoli dell'area evidenziata e spostalo sulla parte dell'immagine che vuoi tagliare. Qualsiasi area selezionerai, avrà le proporzioni da te specificate.
Note
- ↑ Una spiegazione del rapporto aureo è disponibile sul sito Maths is Fun
Beskæring med aspektforhold i digiKam
Fra Maliks blog of 21. februar 2011
Enhver monitor har et aspektforhold, som er forholdet mellem bredden og højden. digiKam kan let beskære billeder i disse forhold. Dette er meget nyttigt, hvis du laver baggrundsbilleder og andre billeder, som skal passe til et bestemt forhold. Jeg bruger denne funktion, når jeg uploader mine beggrundsbilleder til kde-look.
Sådan her laves de.
Vælg billedet og tast F4 eller højreklik på billedet og vælg . I editoren vælger du menuen ; så dukker dette vindue op.
Værktøjet har følgende forhåndsdefinerede forhold:
- 1:1
- 3:2
- 4:3
- 5:4
- 7:5
- 10:7 & 5:8
Det har også en valgmulighed ved navn (det gyldne snit)... Læs mere om dette i digiKams manual. [1]
Du har også mulighed for at anvende dine egne aspektforhold. Du kan således vælge ethvert forhold, som du har brug for.
Efter at have valgt et aspektforhold ser du et fremhævet område i billedet med en lille firkant i hvert hjørne. Træk i disse firkanter for at ændre størrelsen af beskæringen. Ethvert område, som du vælger på denne måde vil have det ønskede aspektforhold.
Referencer
- ↑ En forklaring af det gyldne snit kan findes på webstedet Maths is Fun
Home » Applications » Education » Test

|
Cantor 是计算机代数系统 (CAS) 的一个华丽的图形用户界面。
它是 KDE 教育项目 中的一部分。  描述Cantor 是一个在良好的 KDE 集成工作表界面中,使用您最爱的数学程序的应用程序。它提供辅助通常任务的对话框,并允许您分享您的工作表给他人。 Eleven backends are currently available: Julia, Lua, Maxima, GNU Octave, python2, python, Qalculate, Sage, Scilab, R and KAlgebra. 特性
Screenshots
 More InformationAmarok MenuSome of the common actions in Amarok are here, mostly to control media playback. Contents
AppletsOverview Amarok can display a variety of applets. These applets provide extra functionally that appears in the center column of the interface. The toolbar above is located at the bottom of the Amarok main window and can be used to switch which applet is active on screen.
 AppletsBelow are descriptions of the currently included applets. AlbumsThe Albums applets displays other albums, including the tracks on the albums, by the artist of the currently playing track. When there is no track playing, this applet displays a few recently added albums. AnalyzerThis is a new applet in version 2.8. It provides basic audio visualizations. Current TrackDisplays information about the track that is currently playing: title, artist, play count, last played, track rating, and more. The album cover and a simple interface to Last.fm are also present. InfoProvides some straightforward explanations of what some areas of Amarok can be used for. LabelsGive support for syncing Last.fm labels. LyricsCan search multiple sites for lyrics to the currently playing track. PhotosSearches the web for images based on currently playing track. TabsGoes through a database of guitar and bass tabs and attempts to find the current track. WikipediaShows the Wikipedia article for the artist of the current track. NaturwissenschaftenDarstellung von Daten und Graphen
Daten Verwaltung
Simulationen
Informationssysteme
Credits and LicenseProgram copyrightCopyright 2002, 2003 Mark Kretschmann (kretschmann kde.org). Copyright 2003, 2004, 2005, 2006, 2007, 2008, 2009, 2010, 2011, 2012, 2013 The Amarok Development Squad Documentation copyright
Adrián Chaves Fernández (adriyetichaves gmail.com) Caleb Bryant (c.bryant.30 gmail.com) Daniel Marth (danielmarth gmx.at) Dima Panov (fluffy freebsd.org) Dion Moult () Emilio Castro González (periliocastrol gmail.com) eqisow () Geoffry Song (goffrie gmail.com) Jeff Mitchell (mitchell kde.org) José Antonio Rey (joseeantonior ubuntu.com) Lydia Pintscher (lydia kde.org) Mayank Madan (mayankmadan live.com) Myriam Schweingruber (myriam kde.org) Nick Adams (runey676 gmail.com) Paul Ivan (bit.alex001 gmail.com) Pedro Raimundo (pedrooraimundo gmail.com) Pete Daniels (pete guerrillatechsupport.com), screenshots Salma Sultana (salma4534 yahoo.com) Sash Karttunen (sasu.karttunen tpnet.fi) tris r () Valorie Zimmerman (valorie.zimmerman gmail.com) Walter P. Little (walterplittle gmail.com) Willem Ferguson (willemferguson zoology.up.ac.za) LicensesThis documentation is licensed under the terms of the GNU Free Documentation License. This program is licensed under the terms of the GNU General Public License.
Home » Applications » Multimedia » Juk
JuKJuK is an audio jukebox application, supporting collections of MP3, Ogg Vorbis, and FLAC audio files. It allows you to edit the "tags" of your audio files, and manage your collection and playlists. It's main focus, in fact, is on music management. JuK is part of the KDE Multimedia package. Features include
HistoryJuK was originally started by Scott Wheeler in 2000. It was called QTagger at this time. Over the time it has grown into a mature audio application. It is an official part of KDE since KDE 3.2. Links Proposed for Deletion This page has been proposed for deletion for the following reason:
Please use the discussion section of this page to voice your opinion on this.
Have you never used mousegestures? Read Mousegestures to learn about them in general. See Mouse Gestures to learn how they are used in Plasma. Installation and usageStep One - download the gestures fileClick here to download browsergestures.khotkeys file.(requires KDE SC 4.3 or later) Currently supported applications:
Step Two - Import the downloaded fileImport the file you downloaded, using and navigate to the browsergestures.khotkeys file. Step Three - ConfigureClick , and enable . The default mousebutton is set to "2" (mouse wheel). You can choose (right button) if you prefer it. Special CaseOpera :Because Opera has its own mousegestures, you can delete Opera in the tab Apply EXIF Metadata to Multiple Photos in digiKamTranscribed from Dmitri Popov's blog, 7th August 2013 (corrected according to digiKam v7.2 in January 2021) If you happen to use digiKam for managing photos scanned from negatives, you’ll appreciate the application’s capabilities to add and edit EXIF metadata. Using digiKam’s dedicated interface for managing metadata, you can add key EXIF values, such as maker, device model, aperture, shutter speed, ISO, focal length, etc., to the scanned photos (provided you have these data handy).
However, digiKam doesn’t allow you to apply the same EXIF data to multiple photos in a single operation. Adding the same maker, device, ISO, and focal length to a set of photos one-by-one can be a bit of a nuisance,
Using the Advanced Search Tool In digiKamTranscribed from Mohammed Malik's blog, 8 April, 2011 As the number of images in your database increases, you will need to spend more time trying to find those images. There are even occasions when we might need to spend a lot of time searching for them, however digiKam has a very powerful search tool that can help you find images fast and effectively. In the main window go to and select . From here click . It will show your options for finding pictures:

Select the albums you want to search or either select any album and any tag. 
Here you can set


 A xanela de AmarokA xanela do Amarok está deseñada para permitirlle volver descubrir a súa música. Iso significa que fornece toda a información posíbel sobre a súa música. Moitos usuarios están a gusto coa disposición predeterminada, pero pode personalizarse completamente. Disposición predeterminada da xanela de AmarokEste será o aspecto de Amarok despois da instalación: A xanela de Amarok consta de catro partes principais:
Usar a xanela de Amarok para xestionar e reproducir músicaPara reproducir música con Amarok siga estes pasos:
Tamén pode transferir parte da súa música a un dispositivo móbil de música, como por exemplo un iPod. Atopará máis información sobre isto nas seguintes seccións.
Fonctionnalités
Plus d'informations
Medvirkende og licensOphavsret for programmetCopyright 2002, 2003 Mark Kretschmann (kretschmann kde.org). Copyright 2003, 2004, 2005, 2006, 2007, 2008, 2009, 2010, 2011, 2012, 2013 The Amarok Development Squad Ophavsret for dokumentationen
Adrián Chaves Fernández (adriyetichaves gmail.com) Caleb Bryant (c.bryant.30 gmail.com) Daniel Marth (danielmarth gmx.at) Dima Panov (fluffy freebsd.org) Dion Moult () Emilio Castro González (periliocastrol gmail.com) eqisow () Geoffry Song (goffrie gmail.com) Jeff Mitchell (mitchell kde.org) José Antonio Rey (joseeantonior ubuntu.com) Lydia Pintscher (lydia kde.org) Mayank Madan (mayankmadan live.com) Myriam Schweingruber (myriam kde.org) Nick Adams (runey676 gmail.com) Paul Ivan (bit.alex001 gmail.com) Pedro Raimundo (pedrooraimundo gmail.com) Pete Daniels (pete guerrillatechsupport.com), skærmbilleder Salma Sultana (salma4534 yahoo.com) Sash Karttunen (sasu.karttunen tpnet.fi) tris r () Valorie Zimmerman (valorie.zimmerman gmail.com) Walter P. Little (walterplittle gmail.com) Willem Ferguson (willemferguson zoology.up.ac.za) LicenserDenne dokumentation er underlagt betingelserne i GNU Free Documentation License. Dette program er underlagt betingelserne i GNU General Public License.
Help MenuImportant information about Amarok and KDE.

Generating aspect ratio crops in digiKamTranscribed from Mohamed Malik's web post of 21 February 2011 Each and every monitor has an aspect ratio, which the ratio of the width versus the height. digiKam can produce these crops very easily. This is very useful if you are creating wallpapers and images to fit a certain ratio. I use this feature when I upload my wallpapers to kde-look Here is how to create them. Choose the image and press F4 or right click on the image and go to . In the editor view go to the menu bar and click and this window will appear.
It also has an option named golden aspect ratio... Please read more on this in digiKam manual. [1] It also gives the option of custom aspect ratio. Therefore you can choose any ratio that you may prefer. After choosing an aspect ratio hold the tiny square that you see on the edges of the highlighted area and move to the area of the image that you want to crop, any area you select will have the aspect that you specified. References
DescriptionCantor is an application that lets you use your favorite mathematical applications from within a nice KDE-integrated Worksheet Interface. It offers assistant dialogs for common tasks and allows you to share your worksheets with others. Eleven backends are currently available: Julia, Lua, Maxima, GNU Octave, python2, python, Qalculate, Sage, Scilab, R and KAlgebra. Features
Screenshots
More InformationSelamat Datang!Selamat datang di komunitas KDE dan wiki UserBase (wiki basis pengguna) KDE. Jika Anda baru mengenal perangkat lunak KDE, pengguna sebelumnya, atau penggemar baru, halaman situs web ini akan membantu Anda mengetahui lebih lanjut perihal komunitas KDE dan perangkat lunaknya, di samping dapat membantu Anda untuk memulai. Namun sebelumnya, berikut sesuatu yang dapat membangkitkan ketertarikan Anda pada KDE! Here's an example of a KDE desktop. Please take note that it may look differently depending on your version of the software, and distribution. As an example, here is a screenshot of a Plasma Desktop and the latest version of KDE Frameworks 5:
Ayo!Setelah Anda tertarik, tiba saatnya untuk mengenal KDE lebih dekat.
Gestes de souris pour tous les navigateurs fournit un ensemble prédéfini de gestes de la souris pour des opérations de base dans de nombreux fichiers et navigteurs web. Vous n'avez jamais utilisé les gestes de la souris ? Lisez ceci pour en savoir plus en général. Voir aussi les geste de la souris pour apprendre comment ils sont utilisés dans Plasma. Installation et usagePremière étape - télécharger le fichier des gestesCliquez ici pour télécharger le fichier browsergestures.khotkeys (nécessite KDE SC 4.3 ou ultérieur). Applications actuellement prises en charge :
Deuxième étape - Importer le fichier téléchargéImportez le fichier que vous avez téléchargé, en utilisant et naviguez vers le fichier browsergestures.khotkeys. Troisième étape - ConfigurationCliquez sur , et cochez . Par défaut, le bouton de la souris est « 2 » (roulette de la souris). Vous pouvez choisir (bouton droit) si vous préférez. Cas spécialOpera : parce qu'Opera a ses propres gestes de souris, vous pouvez supprimer Opera dans l'onglet How to find duplicate images on digiKam!Transcribed from Mohamed Malik's blog, 14 February 2011 At the moment I'm unlocking digiKam’s features one by one and as I'm doing it I would like to share them with you. Here is how to filter and locate duplicate images and look-alikes on your library. If you are like me and have a huge number of pictures in your database then this feature is definitely worth it. However in order to use the feature you need to do something first. I tried and tried to find duplicates but couldn't do it, due to this. First go to on digikam's tool bar and from there go to . Just like the thumbnail generating option that I wrote last night this has two options.

When you have done that it is easy to identify duplicates from there. In the left side bar click the icon like the wand and you will get 3 options. Here i will talk about the last option . When you do to the duplicates section you will get a menu like below where you will be asked which folder to search. Choose a folder.

When the folder is scanned it will show you pictures on the left hand side that might be duplicates. And when you select a particular image it will show you the duplicates and look-alikes. Here is an example:
 Hoş Geldiniz!KDE topluluğuna ve KullanıcıÜssü Viki'sine hoş geldiniz. İster KDE ile yeni tanışıyor olun, ister daha önce kullanmış ya da halen kullanıyor olun, bu sayfalarda KDE topluluğu ve yazılımlarıyla ilgili size yardımcı olabilecek bilgiler bulacağınıza inanıyoruz. Başlamadan önce, iştahınızı açmak için KDE'ye hızlıca bir göz atalım... İşte KDE masaüstü ortamından bir manzara. Kullandığınız sürüm ya da işletim sistemine bağlı olarak ufak tefek farklılıklar olabileceğini hatırlatalım. Örnek olarak, KDE Framework 5'in Plasma Masaüstü 5.6'nın ekran görüntüsünü görebilirsiniz.
Haydi Başlayalım!Hazırsanız, KDE'yi daha yakından tanıma zamanı geldi.
Zásluhy a licenceAutorské právo k programuAutorské právo 2002, 2003 Mark Kretschmann (kretschmann kde.org). Autorské právo 2003, 2004, 2005, 2006, 2007, 2008, 2009, 2010, 2011, 2012, 2013 Družstvo vývojářů Amaroku Autorské právo k dokumentaci
Adrián Chaves Fernández (adriyetichaves gmail.com) Caleb Bryant (c.bryant.30 gmail.com) Daniel Marth (danielmarth gmx.at) Dima Panov (fluffy freebsd.org) Dion Moult () Emilio Castro González (periliocastrol gmail.com) eqisow () Geoffry Song (goffrie gmail.com) Jeff Mitchell (mitchell kde.org) José Antonio Rey (joseeantonior ubuntu.com) Lydia Pintscher (lydia kde.org) Mayank Madan (mayankmadan live.com) Myriam Schweingruber (myriam kde.org) Nick Adams (runey676 gmail.com) Paul Ivan (bit.alex001 gmail.com) Pedro Raimundo (pedrooraimundo gmail.com) Pete Daniels (pete guerrillatechsupport.com), screenshots Salma Sultana (salma4534 yahoo.com) Sash Karttunen (sasu.karttunen tpnet.fi) tris r () Valorie Zimmerman (valorie.zimmerman gmail.com) Walter P. Little (walterplittle gmail.com) Willem Ferguson (willemferguson zoology.up.ac.za) LicenceTato dokumentace je licencována za podmínek GNU Free Documentation License. Tento program je licencován za podmínek GNU General Public License.
Generar escapçaments de relació d'aspecte a digiKamTranscrit des d'un article al blog d'en Mohamed Malik, el 21 de febrer de 2011 Cada monitor té una relació d'aspecte diferent, estreta de l'amplada en comparació amb l'alçada. digiKam pot presentar aquests retallats amb molta facilitat. Això és molt útil si creeu fons de pantalla i imatges per ajustar-se a una certa proporció. Jo faig servir aquesta funció quan pujo els meus fons de pantalla a kde-look. Aquí hi ha la manera de crear-les. Escolliu la imatge i premeu F4 o feu clic dret sobre la imatge i aneu a . A la vista de l'editor aneu a la barra de menú i feu clic a i apareixerà aquesta finestra.
També hi ha una opció anomenada relació d'aspecte raó àuria... Llegiu més sobre això en el manual de digiKam. [1] També ofereix la possibilitat de personalitzar les proporcions (relació d'aspecte). Podent així triar la proporció que preferiu. Després de triar una relació d'aspecte, preneu el petit quadrat que es veu a les vores de l'àrea seleccionada i moveu-lo a la zona de la imatge que voleu retallar, qualsevol àrea que trieu tindrà l'aspecte especificat. Referències
Okno programu AmarokOkno programu Amarok zostało zaprojektowane by na nowo odkrywać muzykę. W tym celu ukazuje ono tobie tak wiele informacji o twoich utworach, jak tylko to możliwe Choć dla wielu użytkowników domyślny wygląd będzie wystarczający, to jest on całkowicie konfigurowalny, abyś mógł go dostosować do własnych potrzeb. Domyślny wygląd programu AmarokPo instalacji programu, Amarok wygląda następująco: Okno programu Amarok składa się z czterech głównych elementów:
Używanie interfejsu użytkownika do zarządzania i odtwarzania kolekcji muzycznejWłaściwie potrzeba dwóch kroków do odtworzenia muzyki:
Czasami może zajść potrzeba przeniesienia muzyki na odtwarzacz, taki jak iPod. Następny punkt opisuje jak to zrobić.
AppletterOversigtAmarok kan vise en række forskellige appletter. Disse appletter giver yderligere funktioner, som vises i brugerfladens midterste kolonne. Værktøjslinjen herover findes nederst i Amaroks hovedvindue og kan bruges til at indstille, hvilke appletter der er aktive påskærmen.
AppletterHerunder er beskrivelser af de appletter, som er inkluderede på nuværende tidspunkt. AlbummerAppletten Albummer viser andre albummer, herunder spor på albummer, af den kunstner, som afspilles i øjeblikket. Når der ikke afspilles noget spor, så viser appletten nogle få nyligt afspillede albummer. AnalysatorDette er et nyt applet i version 2.8. Det giver simple lydvisualiseringer. Aktuekt sporViser information om det spor, som afspilles lige nu: titel, kunstner, afspilningstæller, karakter med mere. Der er også omslagsbilleder og en enkel brugerflade til Last.fm. InfoGiver simple forklaringer på, hvad nogle områder af Amarok kan bruges til. EtiketterGiver mulighed for at synkronisere Last.fm-etiketter. SangteksterFinder sangtekster for det aktuelt afspillede spor fra forskellige websteder. FotosSøger webbet for billeder baseret på det aktuelt afspillede spor. TabulaturerGennemgår en database med guitar- og bastabulaturer og forsøger at finde det aktuelle spor. WikipediaViser Wikipedias artikel om det aktuelle spors kunstner. Customize Folder IconCustomizing the icon of a folder makes it easier to navigate through your filesystem, since you do not depend only on the name of the folder to identify it. In fact, it is usually easier to identify a file or folder by its icon than it is to identify it by its name. Dolphin makes it easy to customize the icon of any folder: First, right-click the folder and go to . Then go to tab, and click the icon in the top left corner. A dialog window will pop up. There, you can:
Once you find the icon you want to use for the folder, click it. You will be back to the Properties dialog window, and the icon you clicked will have replaced the old one. Now, click to finally apply the changes for real. Your folder will be now using the icon of your choice. How to create panoramas in digiKam 2.1Transcribed from Mohammed Malik's blog, 11 September, 2011. digiKam 2.1 has been released a few days ago with many new features and improvements. One of the most exciting tools in this release is the tool. Which is simple and quite effective. Select the images that you want to stitch and go to and the wizard open up.


 Hvordan man finder duplikater af billeder i digiKamFra Mohamed Maliks blog, 14. februar 2011 Jeg er i gang med at opdage digiKams funktioner en efter en, og jeg vil gerne dele resultaterne med dig. Her kan du se, hvordan du finder duplikerede billeder og billeder med næsten ens motiver i dit bibliotek. Hvis du som jeg har et enormt antal billeder i din database, så er denne funktion bestemt nyttig. Men for at kunne bruge den, skal du gøre noget først. Jeg prøvede flere gange forgæves at finde duplikater på grund af dette. Vælg først menuen - lige som med funktionen til at lave miniaturer, som jeg skrev om sidste aften, så har denne to muligheder.
Når du har gjort dette er det let at identificere duplikater. I sidepanelet i venstre side klikker du på ikonet, som ligner en tryllestav; så får du tre muligheder. Her vil jeg tale om den sidste mulighed, . Når du åbner fanebladet , så skal du først vælge, hvilken mappe, du vil undersøge i dropnedlisten .
Når mappen scannes, så vises de billeder, som har duplikater øverst i fanebladet. Når du markerer et af disse, så vises duplikaterne og billederne med næsten ens motiver. Her er et eksempel.
Fonctionnalités BasKet peut importer des données à partir de nombreuses autres applications dont KNotes, TomBoy, StickyNotes, KJots, et TuxCards. Les données peuvent être marquées selon les statuts "important", "completé", "en cours", ou bien d'autres encore. Il est possible également de désigner une note par plusieurs Marques simultanément de manière très aisée en cochant/décochant simplement les éléments de la liste. BasKet permet également le création de marques personnalisées définies par l'utilisateur.
Tilpas mappeikonAt tilpasse mappeikonet kan gøre det lettere at navigere igennem filsystemet, da du så ikke længere er afhængig af mappens navn, for at lokalisere den. Det er faktisk som regel lettere at identificere en fil eller mappe ved sit ikon end ved navnet. Dolphin gør det let at tilpasse en mappes ikon: Først højreklikker du på mappen og vælger . Gå så til fanebladet og højreklik på ikonet i det øverste venstre hjørne. Nu dukker en dialog frem. Her kan du:
Når du har fundet det ikon, som du vil bruge, så klik på det. Du kommer så tilbage til dialogvinduet Egenskaber og det ikon, som du valgte vil have erstattet det gamle ikon. Klik nu på for at anvende ændringen. Din mappe vil nu få det valgte ikon. Імітація ефекту вицвілого зображення у digiKamСтворено на основі допису у блозі Дмітрія Попова (Dmitri Popov), 18 квітня 2012 року
CiênciasPlotagem de dados e gráficos
Manipulação de dados
Simulações
Sistemas de informação
CiènciaRepresentar dades i gràfics
Manipulació de dades
Simulacions
Sistemes d'Informació
Writing Meta Data To Raw Files In digiKamTranscribed from Mohamed Malik's blog, 1 March 2011 Almost all images contain metadata and this data contains all the settings that you used to create the picture. These include shutter speed, aperture, focal length etc.. Most image management applications allow you to add and remove custom metadata to your files. This can be easily done while using JPEG files. However the same is not very true for RAW files. When we add more labels and captions to the metadata of an image we need to save it. If you have a lot of RAW files, digiKam gives you the option to write metadata to RAW files as well. However please bear in mind that this feature is still experimental. In order to enable the writing of metadata to RAW files, you need to edit your configuration of digiKam. From the main menu go to Then you will see the configurations menu. On the left hand side select and enable the option See screen capture below.
Brug XMP Sidecar i digiKam 2beta 3Fra Mohammed Maliks blog, 18. marts 2011 Hvad betyder XMP Sidecar? Det betyder, at når metadata til et foto gemmes, så laves der en XMP-fil sammen med fotoet. Derved gemmes billedets metadata i den nye XMP-fil, som sammenkædes med billedet, i stedet for at skrive metadata ind i billedfilen. EksempelHvis et billede har navnet mohamedmalik.JPG, så vil billedets metadata blive gemt i filen mohamedmalik.JPG.XMP i samme mappe. Denne fil indeholder alle de nye og tidligere gemte metadata, sådan at billedet selv ikke bliver berørt. Dette er meget nyttigt, når der skrives metadata til RAW-filer. Der er mange tilvalg, som påvirker XMP Sidecar-understøttelsen. Du skal konfigurere XMP Sidecar-understøttelsen, før du kan bruge den. I digiKams hovedvindue vælger du menuen og vælg siden

|
|||||||||||||||||||||||||||||||||||||||||||||||||||||||||||||||||||||||||||||||||||||||||||||||||||||||||||||||||||||||||||||||||||||||||||||||||||||||||||||||||||||||||||||||||||||||||||||||||||||||||||||||||||||||||||||||||||||||||||||||||||||||||||||||||||||||||||||||||||||||||||||||||||||||||||||||||||||||||||||||||||||||||||||||||||||||||||||||||||||||||||||||||||||||||||||||||||||||||||||||||||||||||||||||||||||||||||||||||||||||||||||||||||||||||||||||||||||||||||||||||||||||||||||||||||||||||||||||||||||||||||||||||||||||||||||||||||||||||||||||||||||||||


The pages in the translation containing a category statement (K):
- Kdenlive/Manual/Credits and License
- Kdenlive/Manual/Useful Information/Useful Resources
- Kdenlive/Manual/Useful Information/Tips Tricks
- Kdenlive/Manual/Useful Information/Surround Sound
- Kdenlive/Manual/Useful Information/Shortcuts
- Kdenlive/Manual/Useful Information/FAQ
- Kdenlive/Manual/Useful Information
- Kdenlive/Manual/KdenliveOnOtherPlatforms/OSX
- Kdenlive/Manual/KdenliveOnOtherPlatforms/Non-KDE Desktops
- Kdenlive/Manual/KdenliveOnOtherPlatforms
- Kdenlive/Manual/Troubleshooting and Common Problems
- Kdenlive/Manual/ShootingHints
- Kdenlive/Manual/Toolbars
- Kdenlive/Manual/CapturingAudio
- Kdenlive/Manual/Capturing
- Kdenlive/Manual/Project Menu/Render/Render Profile Parameters
- Kdenlive/Manual/Rendering
- Kdenlive/Manual/Project Menu/Render
- Kdenlive/Manual/Settings Menu
- Kdenlive/Manual/View Menu
- Kdenlive/Manual/Monitor Menu
- Kdenlive/Manual/Timeline Menu
- Kdenlive/Manual/Clip Menu
- Kdenlive/Manual/Tool Menu
- Kdenlive/Manual/Project Menu
- Kdenlive/Manual/Edit Menu/Undo
- Kdenlive/Manual/Edit Menu/Redo
- Kdenlive/Manual/Edit Menu/Copy
- Kdenlive/Manual/Edit Menu/Paste
- Kdenlive/Manual/Edit Menu/Paste Effects
- Kdenlive/Manual/Edit Menu
- Kdenlive/Manual/File Menu/New
- Kdenlive/Manual/File Menu/Open
- Kdenlive/Manual/File Menu/Open Recent
- Kdenlive/Manual/File Menu/Save
- Kdenlive/Manual/File Menu/Save As
- Kdenlive/Manual/File Menu/Revert
- Kdenlive/Manual/File Menu/Transcode Clips
- Kdenlive/Manual/File Menu/DVD Wizard
- Kdenlive/Manual/File Menu/Quit
- Kdenlive/Manual/File Menu
- Kdenlive/Manual/Menu
- Kdenlive/Manual/Titles
- Kdenlive/Manual/Monitors
- Kdenlive/Manual/Effects/Motion
- Kdenlive/Manual/Effects/Misc
- Kdenlive/Manual/Effects/Fun
- Kdenlive/Manual/Effects/Fade
- Kdenlive/Manual/Effects/Enhancement
- Kdenlive/Manual/Effects/Distort
- Kdenlive/Manual/Effects/Custom
- Kdenlive/Manual/Effects/Crop and transform
- Kdenlive/Manual/Effects/Colour Correction
- Kdenlive/Manual/Effects/Colour
- Kdenlive/Manual/Effects/Blur and hide/Auto Mask
- Kdenlive/Manual/Effects/Blur and hide
- Kdenlive/Manual/Effects/Audio Correction
- Kdenlive/Manual/Effects/Audio channels
- Kdenlive/Manual/Effects/Artistic
- Kdenlive/Manual/Effects/Analysis and Data
- Kdenlive/Manual/Effects/Alpha manipulation/Blue Screen
- Kdenlive/Manual/Effects/Alpha manipulation/Color Selection
- Kdenlive/Manual/Effects/Alpha manipulation/Alpha operations
- Kdenlive/Manual/Effects/Alpha manipulation/Alpha shapes
- Kdenlive/Manual/Effects/Alpha manipulation/Rotoscoping
- Kdenlive/Manual/Effects/Alpha manipulation
- Kdenlive/Manual/Transitions
- Kdenlive/Manual/Timeline/Right Click Menu
- Kdenlive/Manual/Timeline/Guides
- Kdenlive/Manual/Timeline/Grouping
- Kdenlive/Manual/Timeline
- Kdenlive/Manual/Projects and Files/Management
- Kdenlive/Manual/Projects and Files/Importing
- Kdenlive/Manual/Projects and Files/Clips
- Kdenlive/Manual/Projects and Files/Notes
- Kdenlive/Manual/Projects and Files/Backup
- Kdenlive/Manual/Projects and Files/Archiving
- Kdenlive/Manual/Projects and Files/Project Settings
- Kdenlive/Manual/Projects and Files/Project
- Kdenlive/Manual/Projects and Files/Project Tree
- Kdenlive/Manual/Projects and Files
- Kdenlive/Manual/Windows Issues
- Kdenlive/Manual/Tutorials
- Kdenlive/Manual/Introduction
- KDE Connect
- Krita/Tutorials
- Kivio/Tutorials
- Kdenlive/Manual/Transitions/Hue shift
- Khipu/newstuff/provider.xml
- Khipu/QuickStartGuide/HowToPlotFunctionsInKhipu ?
- Kdenlive/Manual/WIndows Issues
- Kategorie: Utilities
- Kopete/Bookmarks
- Kopete/Contact Notes
- Kopete/Highlight
- Kopete/History
- Kopete/KopeteTeX
- Kopete/Now Listening
- Kopete/Pipes
- Kopete/Preview of Pictures in Chats
- Kopete/Privacy
- Kopete/Statistics
- Kopete/Text Effect
- Kopete/Translator
- Kopete/Web Presence
- KXStitch/Manual
- Kexi/Handbook/Building Simple Databases/Designing Reports
- KDE Applications Versioning
- Kategorie: Sicherheit
- Kdenlive/Manual/Effects/Misc/Glow (GLSL)
- KWord/*
- Kdenlive/Manual/UsingKdenlive/QuickStart/CreatingProject
Proposed for Deletion
Please use the discussion section of this page to voice your opinion on this.Empty page.
Proposed for Deletion
Please use the discussion section of this page to voice your opinion on this.Empty page.
Proposed for Deletion
Please use the discussion section of this page to voice your opinion on this.Empty page.
- KDE System Administration/Kiosk/Resources
- KDE System Administration/PlasmaDesktopScripting
- Kdialog
- Krita/Manual
- KDE System Administration/Kiosk/Keys
- KDE System Administration/PlasmaTwoDesktopScripting
- KDE System Administration/Kiosk/Introduction
- KMenusee: Plasma/KickoffMenu
- Kopete/SMS


Placeholder
Proposed for Deletion
Please use the discussion section of this page to voice your opinion on this.Empty page.
The Snippets tool view
- Kdenlive/Manual/BugReporting
- Kopete/Gadu-Gadu

Gadu-Gadu logo
Placeholder
- Kopete/Novell GroupWise

Groupwise logo
Placeholder
- Kopete/Meanwhile

Meanwhile logo
Placeholder
Proposed for Deletion
Please use the discussion section of this page to voice your opinion on this.Empty page.

Placeholder
Proposed for Deletion
Please use the discussion section of this page to voice your opinion on this.This app is unmaintained and no longer released by the KDE community. Empty page.

Information
包在這:
http://www.xandros.or.id/software/konversation/
包由 Matt Larose (matty at xandros.com)維護。
Konversation Stable
Konversation findes i arkivet apps.
Skriv som root:
pacman -S konversation
Pakker findes her:
http://www.xandros.or.id/software/konversation/
Pakkerne er lavet af Matt Larose (matty at xandros.com).

Konversation 稳定版
Konversation 在 apps 仓库。
以root权限输入:
pacman -S konversation
Konversation 穩定版
Konversation 在 apps 倉庫。
以root權限輸入:
pacman -S konversation
Konversation Stable
Konversation is available in the apps repository.
Type as root:
pacman -S konversation
Packages are available at:
http://www.xandros.or.id/software/konversation/
Packages are courtesy of Matt Larose (matty at xandros.com).
Stabil
Den seneste stabile udgave af KMail findes i Gentoos almindelige pakketræ.
Som root:emerge -av kmail
Stable
The latest stable release of KMail is available in Gentoo's regular package tree.
As root:emerge -av kmail
ArkLinux
Konversation 1.0.1 is in the main repo, just issue:
apt-get update
apt-get install konversation
Los paquetes están disponibles en:
http://www.xandros.or.id/software/konversation/
Los paquetes son cortesía de Matt Larose. (Matty at xandros.com)
Os pacotes estão disponíveis em:
http://www.xandros.or.id/software/konversation/
Os pacotes são cortesia de Matt Larose (matty no xandros.com).
ArkLinux
Konversation 1.0.1 findes i arkivet main, skriv blot:
apt-get update
apt-get install konversation
ArkLinux
Konversation 已经位于源中,只需要执行:
apt-get update
apt-get install konversation
SQL Reference
 |
KTux 是外太空中,乘载 Tux 飞行的宇宙飞船屏幕保护。 |
|
KTux 是外太空中,乘載 Tux 飛行的宇宙飛船屏幕保護。 |
I pacchetti sono disponibili su:
http://www.xandros.or.id/software/konversation/
I pacchetti sono una gentile concessione di Matt Larose (matty at xandros.com).
Konversation (Versão Stable)
Konversation esta disponivel nos repositórios de aplicação.
Digite como root:
pacman -S konversation
Estable
L'última versió estable de KMail està disponible a l'arbre de paquets normal de Gentoo.
Com a superusuari:emerge -av kmail
|
KTux er en skærmskåner fra det ydre rum med Tux, som flyver forbi i et rumskib. |
ArkLinux
Konversation 1.0.1 si trova nel repository principale, senza problemi:
apt-get update
apt-get install konversation
Konversation (versione stabile)
Konversation è disponibile nel repository delle applicazioni.
Digita come amministratore:
pacman -S konversation
|
KTux je spořič obrazovky, zobrazující vnější vesmír s Tuxem ve vesmírné lodi. |
ArkLinux
Konversation 1.0.1 est dans le dépôt principal, utilisez simplement :
apt-get update
apt-get install konversation
Konversation version stable
Konversation est disponible dans le dépôt des applications.
Tapez en tant que superutilisateur:
pacman -S konversation
|
KTux è un salvaschermo con Tux che vola nello spazio profondo in una navicella spaziale. |
Kexi and Other Database Applications
|
KTux es un salvapantallas del espacio exterior, con Tux volando por él en una nave espacial. |
|
O KTux é um protetor de tela do espaço sideral, com o Tux voando em uma nave espacial. |
ArkLinux
Konversation 1.0.1 esta no repositório principal, por isso, apenas digite:
apt-get update
apt-get install konversation
|
Ktux est un économiseur d'écran venu de l'espace, avec Tux volant dans un vaisseau spatial. |
Пакунки можна отримати за адресою
http://www.xandros.or.id/software/konversation/
Пакунки створено Matt Larose. (matty at xandros.com)
|
KTux ist ein Bildschirmschoner aus dem äußeren Weltall, in dem Tux mit einem Raumschiff umherfliegt. |
|
KTux is een schermbeveiligingsprogramma met een ruimtethema waarin Tux in een ruimteschip voorbijvliegt. |
Konversation Stable
Konversation is available in the apps repository.
Type as root:
pacman -S konversation
Packages are available at:
http://www.xandros.or.id/software/konversation/
Packages are courtesy of Matt Larose (matty at xandros.com).
|
KTux — зберігач екрана, у якому пінгвін Тукс подорожує космосом. |
ArkLinux
Konversation 1.0.1 is in the main repo, just issue:
apt-get update
apt-get install konversation
- Kdenlive/Manual/Transitions/addition
- Kword/1.6/DocBook
- Kword/1.6/LaTex
- KDevelop4/Manual/Appendix: Pages that still lack documentationThe following pages and sections are still largely empty and need help with documentation:
Setting up a new project from scratch
Appendix: A list of all available tools
- KDevelop5/Manual/Appendix: Pages that still lack documentationThe following pages and sections are still largely empty and need help with documentation:
Setting up a new project from scratch
Appendix: A list of all available tools
Konversation Stable
Konversation findes i Fedora. For at installere behøves blot en kommando.
Skriv som root:
yum install konversation
Du kan rapportere om pakningsfejl i Redhat Bugzilla
Konversation Stable
Konversation is available in Fedora. To install all you need is one command.
Type as root:
yum install konversation
Please file all packaging bug reports in Redhat Bugzilla.
ArkLinux
Пакунок з Konversation 1.0.1 є частиною основного сховища, достатньо віддати команди:
apt-get update
apt-get install konversation
View>Timeline
Toggles the display of the Timeline
Konversation is part of a default KDE install on Mageia.
If you want to install it separately,
- just run
su -c "urpmi konversation",
- or use Control Center (MCC) module (drakrpm).
- Kdenlive/Manual/View Menu/Audio Signal
Audio Signal
You can monitor the levels of the audio as the clip plays with this widget.

Konversation er en del af Mageias standard KDE-installation.
Hvis du vil installere den separat,
- kør blot
su -c "urpmi konversation",
- eller brug Kontrolcenter (MCC) module (drakrpm).
- Kdenlive/Manual/View Menu/Effect Stack
View>Effect Stack
Toggles the display of the Effect Stack
View>Transition
Toggles the display of the Transition Tab
- KAlgebra/Screenshots==Screenshots==


- Kdenlive/Manual/View Menu/Project Monitor==== View>Project Monitor ====
Toggles the display of the Project Monitor.
Proposed for Deletion
Please use the discussion section of this page to voice your opinion on this.This wiki page does not have a parent wiki page.
Stable
The latest stable release of KMail is available in Gentoo's regular package tree.
As root:emerge -av kmail
View>Project Tree
Toggles the display of the The Project Tree
- Kdenlive/Manual/Effects/View Menu/Vectorscope==Vectorscope Window ==
This window allows you to monitor the colour properties of your clip in detail.
See Granjow's blog here and here on the Vectorscope.
Стабільна версія
Найсвіжішу стабільну версію KMail можна встановити зі звичайного дерева портів Gentoo.
Від імені адміністратора (root):emerge -av kmail
Стабільна версія Konversation
Konversation можна встановити зі сховища програм.
Віддайте команду від імені адміністративного користувача:
pacman -S konversation
Full Screen Mode
Selecting this causes Kdenlive to fill the entire screen. Select this menu item again to undo full screen mode.
View Menu — Clip Monitor
Toggles the display of the Clip Monitor.
Toolbars Shown
Toggles the display of the Main and Extra Toolbars
Konversation (versione stabile)
Konversation è disponibile in Fedora. Per installarlo hai bisogno di un solo singolo comando.
Digita come amministratore:
yum install konversation
Per favore segnala tutti i bug del pacchetto su Redhat Bugzilla.
TODO - Appears to be deprecated in 2.9
 |
 |
 |
|
|
|
Konversation fa parte di un'installazione predefinita di KDE su Mageia.
Se vuoi installarlo separatamente
- esegui semplicemente
su -c "urpmi konversation",
- In alternativa utilizza il modulo (drakrpm) del Centro di controllo (MCC).
- KMail/Screenshots/tr
|
|
|
|
|
|
- Khipu/Screenshots==Screenshots==


Konversation Stable
Konversation is available in Fedora. To install all you need is one command.
Type as root:
yum install konversation
Please file all packaging bug reports in Redhat Bugzilla.
Supported File Formats
|
|
|
Stable
The latest stable release of Konversation is available in Gentoo's regular package tree, justemerge -av konversation.
Development
- Gentoo maintains a git ebuild for Konversation in the kde overlay.
- Kword/1.6/PalmDoc
- KWord/1.5/Manual/MimeType
Proposed for Deletion
Please use the discussion section of this page to voice your opinion on this.KWord has been superseded by Calligra Words.
Kword MIME types
The KWord MIME type is : application/x-kword
| Prev | Contents | Next |
| Key Bindings Summary (Shortcuts) | Glossary |
Stable
Den seneste stabile udgivelse af Konversation findes i Gentoos regulære pakketræ; skriv blotemerge -av konversation.
Udvikling
- Gentoo vedligeholder en git ebuild af Konversation i overlayet kde.
- KMail/Screenshots/ca
|
|
|
|
|
|
|
|
|
Konversation is part of a default KDE install on Mageia.
If you want to install it separately,
- just run
su -c "urpmi konversation",
- or use Control Center (MCC) module (drakrpm).
twolay0r
This is the Frei0r-twolay0r filter.
Dynamic thresholding
Proposed for Deletion
Please use the discussion section of this page to voice your opinion on this.No content, also unmaintained since at least 2015: https://invent.kde.org/unmaintained/ktux
|
KTux is a screensaver of outer space, with Tux in a spaceship flying by. |
|
|
|
- Kdenlive/Manual/Project Menu/Open Backup File==== Open Backup File ====
This allows you to open up the automatic backups of the projects that Kdenlive creates.
See Backup.
File Menu - Close
Not sure what this is supposed to do. It is always greyed out on my Kdenlive.
Maybe it is there ready for a version of Kdenlive that can have more than one project open at a time.
|
|
|
KMail er inkluderet i standardinstallationen af KDE på openSUSE.
Hvis du vil installere den,
- Gå til [software.opensuse.org/package/kmail] for one-click-installationer.
- Eller gå til YaST2's modul til håndtering af software og installér det herfra.
- Alternative kan du åbne Konsole. Skriv som root:
zypper in kmail - Kmail/Distributions/OpenSUSE/en
KMail is part of a default KDE install on openSUSE.
If you want to install it,
- Go to software.opensuse.org/package/kmail for one-click installs.
- Or go to YaST2 software management module and install it from there.
- Alternatively, you may open Konsole. Type as root:
zypper in kmail - Kexi/Handbook/ Template

Under Construction
TITLE
Page template for Kexi manual
| Previous | Next | |
| XXX | XXX |
- Kword/1.6/WordPerfect
- Kdenlive/Manual/Effects/Misc/nosync0r==== nosync0r ====
This is the Frei0r-nosync0r MLT filter
Video looks like a broken TV with bottom half of picture on the top of screen
KDevelop 4 页面-
- KDevelop 4 手册
- KDevelop 4 FAQ
- KDevelop 4 提示和技巧
- Kdenlive/Manual/Project Menu/Generators==== Generators ====
Used to create a clip with either a countdown timer or noise.
This option is also available from the Add Clip icon in the Project Tree — see Generators.
Proposed for Deletion
Please use the discussion section of this page to voice your opinion on this.KWord has been superseded by Calligra Words.
Compilation and Installation
Complete instructions on installing KOffice from source are located at http://www.koffice.org/download/source.php.
| Prev | Contents | Next |
| Requirements | Command Line Options |
 |
 |
 |
Configure Notifications
This feature allows you to customize the feedback the application provides when certain events happen. For example, you can change the sound effect that fires when rendering finishes.

KRunner es una herramienta para buscar y lanzar archivos y aplicaciones. También puede ser usado para operaciones más genéricas como una calculadora o un conversor de unidades. En la mayoría de los sistemas puedes activar KRunner con la combinación de teclas Alt+F2.

Tutoriales
Stable
The latest stable release of Konversation is available in Gentoo's regular package tree, justemerge -av konversation.
Development
- Gentoo maintains a git ebuild for Konversation in the kde overlay.
Меню «Перегляд» — Монітор кліпу
Вмикає або вимикає показ панелі монітора кліпу.
threshold0
This is the Frei0r-threshold0r filter
Thresholds a source image.
Different to Threshold
 |
使用撥號調製解調器(dial-up modem) |
這個軟體用來設定 PPP (點對點協議,Point-to-Point Protocol)聯網。用來設定手機 "modem" 聯網很有用。也用來設定真實的 modem 聯網。但現在 NetworkManager 套件也計劃實現 PPP 功能,總有一天,會讓 KPPP 過時。
| kdesvn 是一个 KDE平 台的 Subversion 客户端 |
它尽力做到感官上和 KDE 工作空间的标准文件管理器一样,并通过 KPart 整合到工作空间。

链接
KRunner è uno strumento per cercare ed avviare file ed applicazioni. Può anche essere utilizzato per operazioni più generiche come calcolatrice o convertitore di unità. Nella maggior parte dei sistemi KRunner può essere attivato premendo la combinazione di tastiera Alt+F2.
Guide
| kdesvn è un client subversion per la piattaforma KDE |
Cerca di mimare l'aspetto del gestore di file dell'ambiente KDE ed è integrato in esso tramite KPart.
Collegamenti
 |
KPager 能立刻访问到所有桌面 |
KPager 允许你在虚拟 X11 桌面间切换。它通常驻留在任务栏,可以通过这个图标访问。
特性
- 一键访问每个桌面
- 图标显示桌面上各种程序的位置
- 通过拖拽程序可以在桌面间移动
- 成为 KDE 任务栏或面板的标准组件
- KPager/zh-tw
|
KPager 能立刻訪問到所有桌面 |
KPager 允許你在虛擬 X11 桌面間切換。它通常駐留在任務列,可以透過這個圖示訪問。
特性
- 一鍵訪問每個桌面
- 圖示顯示桌面上各種程式的位置
- 透過拖拽程式可以在桌面間移動
- 成為 KDE 任務列或面板的標准組件
- Kdenlive/Manual/Transitions/Hue/en
Hue
This is the Frei0r hue MLT Transition.
Perform a conversion to hue only of the source input1 using the hue of input2.
![]()
![]()
 |
支持撥號上網,有線和無線網路的網路管理器 |
特性
- 支持多個配置文件
![]()
- 連接開放和加密網路
- 能使用所有的 wpa_supplicant 類型- wep, wpa, wpa2 等
- 能在系統托盤圖標上顯示每個接口的統計信息
參見專案首頁
|
支持拨号上网,有线和无线网络的网络管理器 |
特性
![]()
- 支持多个配置文件
- 连接开放和加密网络
- 能使用所有的 wpa_supplicant 类型 - wep, wpa, wpa2 等
- 能在系统托盘图标上显示每个接口的统计信息
参见 项目主页
Flere sider om KDevelop 4 -
- Manualen for KDevelop 4
- KDevelop 4 FAQ
- Tips and Tricks til KDevelop 4
- Kdenlive/Manual/Settings Menu/Themes===Settings>Themes===

Brings up a list of pre-configured color themes to choose from. Some people have strong preferences about whether light or dark themes are better for a video editor. There are some of both to choose from here.
編譯 Slackware 包
Slackware 發行版用來編譯軟體套件是用叫 SlackBuilds 的腳本,編譯成 .tgz/txz 的套件。官方提供的額外腳本在 SlackBuilds.org ,你搜索 Konversation的編譯腳本看看。
SlackBuilds.org 有提供 編譯教程。更多信息可以上 Freenode 的 #slackbuilds 頻道。
View Menu — Clip Monitor
Toggles the display of the Clip Monitor.
KDevelop 4 頁面-
- KDevelop 4 手冊
- KDevelop 4 FAQ
- KDevelop 4 提示和技巧
- Kdenlive/Manual/Project Menu/Analyse Keyframes
- KPPP/da
|
Brug opkalds-modem |
Dette program bruges til at sætte PPP (Point-to-Piont Protocol) forbindelser op. Nu om stunder bruges den mest til at forbinde med et mobiltelefom-modem. Det kan også bruges med rigtige modem forbindelser. NetworkManager-suiten implementerer også PPP funktionalitet, så KPPP bliver nok på et tidspunkt overflødigt.
- KWord/1.5/Manual/TempCat=How do I remove template categories from the startup dialog?=
Templates can only be removed using the Create Template dialog. For instructions, click Removing template group.
| Prev | Contents | Next |
| Create a .pdf file | Introduction to the Menubar and Toolbars |
- Krita/Manual/Tools/Star==Star Tool==
![]()
Note:This tool has been moved into the Add Shape Docker along with an entire set of other geometric shapes
| kdesvn es un cliente de subversion para las plataformas KDE |
Intenta simular el aspecto del gestor de archivos estándar de los espacios de trabajo de KDE y se integra gracias a KPart.
Enlaces
KMail forma part d'una instal·lació KDE per omissió a openSUSE.
Si el voleu instal·lar,
- Aneu a software.opensuse.org/package/kmail per instal·lacions d'un sol clic.
- O aneu al mòdul per a la gestió del programari de YaST2 i instal·leu-lo des d'aquí.
- De manera alternativa, podeu obrir Konsole. Escriure com a superusuari:
zypper in kmail - Kdenlive/Manual/View Menu/Show Title Bars/en
View Menu — Show Title Bars
This toggles the display of the title bar and control buttons on dockable windows in Kdenlive.


Additional pages for KDevelop4 -
The KWord Handbook
An Introduction to KWord
- An Introduction to Frame-Oriented Word Processing
- Introducing KWord's Graphical User Interface
- KWord Tutorials
- KPPP/zh-cn
|
使用拨号调制解调器(dial-up modem) |
这个软件用来设定 PPP (点对点协议,Point-to-Point Protocol)联网。用来设定手机 "调制解调器(modem)"联网很有用。也用于设定真实的调制解调器(modem)联网。但现在 NetworkManager 套件也计划实现 PPP 功能,终有一天,会让 KPPP 过时。
Konversation is part of a default KDE install on openSUSE.
If you want to install it,
- Go to openSUSE Software for one-click installs.
- Or go to YaST2 software management module and install it from there.
- Alternatively, you may open Konsole and type as root:
zypper in konversation
|
Použití modemu pro vytáčené připojení |
This software is used to setup PPP (Point-to-Point Protocol) connections. This is most useful for connecting with a cell phone "modem" card these days. It is also use to configure real modem connections. The NetworkManager suite intends implementing PPP functionality that will probably, in time, make KPPP obsolete.
|
Netværksmanager med opkalds-profiler, til kablede og trådløse netværk |
Hovedpunkter
![]()
- Understøtter mange profiler
- Kan forbinde til åbne og krypterede netværk
- Kan bruge alle 'wpa_supplicant' typer - wep, wpa, wpa2 m.fl.
- Kan vise statistik for hvert interface i statusområdet
Screen Grab

Start recording: click the “record” button.
Stop record: click the "record" button again.
Clicking on the configure button brings you to the capture configuration window.
KDiskFree

KDiskFree is a simple tool which gives a graphical view the disks available to a system.
- 顯示列表包括大小,類型和剩餘容量
- 提供簡單的圖表便於你預覽分區情況
- 能清楚的看到分區掛載的位置
專案主頁提供針對最近發布版本的手冊。
KDiskFree
KDiskFree is a simple tool which gives a graphical view the disks available to a system.
- 显示列表包括大小,类型和剩余容量
- 提供简单的图表便于你预览分区情况
- 能清楚的看到分区挂载的位置
项目主页 提供针对最近发布版本的手册。
Konversation є частиною типового комплекту пакунків KDE у Mageia.
Якщо ви хочете встановити програму окремо,
- просто віддайте команду
su -c "urpmi konversation",
- або скористайтеся модулем Центру керування (MCC) (drakrpm).
- Kdesvn/da
| Kdesvn er en subversion-klient til KDE-platforme |
Den prøver at se ud og virke ligesom KDE's standard filmanager og er integreret i den som en KPart.
Links
KMail is part of a default KDE install on openSUSE.
If you want to install it,
- Go to software.opensuse.org/package/kmail for one-click installs.
- Or go to YaST2 software management module and install it from there.
- Alternatively, you may open Konsole. Type as root:
zypper in kmail
Håndbog for KWord
En introduktion til KWord
- En introduktion til rammebaseret tekstbehandling
- Introduktion til KWords grafiske brugerflade
- Vejledninger til KWord
- Kdesvn/en
| kdesvn is a subversion client for KDE platforms |
It tries to setup a look and feel like the standard filemanager on KDE workspaces and is integrated into it via KPart.
Links
|
Usar um modem de discagem |
Este programa é usado para configurar conexões PPP (Point-to-Point Protocol). Isto é muio útil para conectar-se com uma placa de modem de celular nos dias atuais. É também usado para configurar conexões via modem real. O pacote NetworkManager tenta implementar a funcionalidade PPP o que provavelmente, com o tempo, tornará o KPPP obsoleto.
Konversation Stable
Konversation is available in the extra repository.
Type as root:
pacman -S konversation
Konversation Git PKGBUILD
If you want to build the latest development version of Konversation you can use this PKGBUILD from the AUR:
Or, if installed yaourt(Do not use root rights to build.):
yaourt -S konversation-git
The Help Menu
From the menu you can you can get help.
TODO
Le manuel de KWord
Une introduction à KWord
- Une introduction à un traitement de texte fondé sur les cadres
- Introduction à l'interface utilisateur graphique de KWord
- Tutoriels de KWord
- Kbluetooth (de)
- KDE SVN/zh-tw
KDE SVN 是存放 KDE 原始码 的在線存儲服務。任務人都可以訪問 web SVN 來瀏覽 SVN。"SVN" 這個詞來自存儲服務使用的軟體,名叫 Subversion。
在線存檔中不僅包括了開發中的 KDE 版本,也包括了當前穩定的版本以及 KDE 歷史上的版本變動。
如果某人提到某個新特性在 SVN 中,意思是该特性当前还不可用,可能会在下个版本中公布。
KDiskFree
KDiskFree is a simple tool which gives a graphical view the disks available to a system.
- The display lists the size, type, and full capacity and free space of all mounted disks - local and remote
- A simple graph gives you a quick overview
- The position of your mounts is clearly seen
The home page for the project offers handbooks for recent releases.
KDE SVN 是存放 KDE 源代码 的在线存储服务。任何人都可以访问 web SVN 来浏览 SVN。"SVN" 这个词来自存储服务使用的软件,名叫 Subversion。
在线存档中不仅包括了开发中的 KDE 版本,也包括了当前稳定的版本以及 KDE 历史上的版本变动。
如果有人提到说某个新特性在 SVN 中,意思是该特性当前还不可用,可能会在下个版本中公布。
- KGpg/Manual/Credits==Chapter 4. Credits and License==
KGpg
Program copyright (c) 2002-2003 Jean-Baptiste Mardelle (bj altern.org).
(c) 2006-2007 Jimmy Gilles (jimmygilles gmail.com)
(c) 2006,2007,2008,2009,2010 Rolf Eike Beer (kde opensource.sf-tec.de)
This documentation is licensed under the terms of the GNU Free Documentation License.
This program is licensed under the terms of the GNU General Public License.
| Contents |
|
Utilizza un modem dial-up |
Questo programma è utilizzato per impostare connessioni PPP (Point-to-Point Protocol). Attualmente è più utile per effettuare connessioni con una carta "modem" di un telefono cellulare. È anche utilizzato per configurare connessioni di veri modem. La suite NetworkManager intende implementare la funzionalità PPP e questo probabilmente renderà obsoleto KPPP.
Páginas adicionales para KDevelop4 -
- Manual de KDevelop 4
- Preguntas frecuentes sobre KDevelop 4
- Consejos y trucos para KDevelop 4
- KDevelop4/de
Weitere Seiten für KDevelop4:
- KDevelop 4 Handbuch
- KDevelop 4 FAQ
- KDevelop 4 Tipps und Tricks
- Kdenlive/Manual/Transitions/alphaxor/en
alphaxor transtion
The alpha XOR operation.
Yellow clip has a triangle alpha shape with min = 0 and max =618.
Green clip has rectangle alpha shape with min=0 and max =1000
alphaxor is the transition in between

Konversation fa parte dell'installazione predefinita di KDE su openSUSE.
Se vuoi installarlo
- vai su openSUSE Software per i collegamenti one-click install
- o vai nel modulo Gestione pacchetti di YaST2 e installalo da lì.
- In alternativa puoi aprire Konsole e digitare come amministratore:
zypper in konversation
|
Utiliza un modem dial-up |
Este software se utiliza para configurar conexiones PPP (Point-to-Point Protocol). Esto es útil para conectarse utilizando un teléfono móvil como "módem" en la actualidad. También se puede usar para configurar conexiones con módem reales. La suite NetworkManager intenta implementar la funcionalidad PPP lo que hará, en su debido momento, que KPPP quede obsoleto.
|
Gestore della rete che supporta i profili per le reti dial-up, con filo e wireless |
Caratteristiche
![]()
- Supporta profili multipli
- Si collega a reti aperte e criptate
- Utilizza tutti i tipi wpa_supplicant: wep, wpa, wpa2, ecc
- Può mostrare statistiche per ogni interfaccia nell'icona del vassoio di sistema
Vedi questa pagina del progetto
KRunner est un outil de recherche et de lancement de fichiers et applications. Il peut également être utilisé pour des opérations plus génériques comme une calculatrice ou un convertisseur. Sur la plupart des systèmes KRunner peut être activé en appuyant sur la combinaison de touches Alt + F2.
Tutoriels
- KPlato/Manual/Project Performance View==Description==
The Project performance view is a project management chart where can be understood the actual situation of the project according the Earned Value Method.

where:
- BCWS means Budgeted Cost Work Scheduled,
- BCWP means Budgeted Cost Work Performed,
- ACWP means Actual Cost Work Performed.
All these are considered as effort in hours and costs.
PI are the Performance Indexes, where:
- CPI is the Cost Performance Index,
- SPI is the Schedule Performance Index.
- KTimer/zh-cn
 |
准时启动你的任务! |
一个用途单一的小程序 -
- 以秒为单位设定
- 输入要运行的
- 点击按钮
- 继续你之前正在做的事,等它到时候启动设定的新任务。
点击上方的缩略图查看详细情况。
访问 项目主页 了解联系信息
|
準時啟動你的任務! |
一個用途單一的小程序 -
- 以秒為單位設定
- 輸入要運行的
- 點擊按鈕
- 繼續你之前正在做的事,等它到時候啟動設定的新任務。
點擊上方的縮略圖查看詳細情況。
訪問 項目主頁 了解聯繫信息
Konversation er en del af openSUSEs standard KDE-installation.
Hvis du vil installere den separat,
- Gå til openSUSE Software for enkeltkliksinstallationer,
- eller gå til YaST2s modul Håndtering af software og installér den derfra.
- Alternativt kan du åbne Konsole og som root skrive:
zypper in konversation - KNotes/zh-tw
 |
KNotes是一個粘性即時貼程序。即使Kontact關閉了您依舊可以在桌面上看到它們。 |
特性
- 自定義字體和背景顏色
- 使用拖放郵寄您的便貼
- 能夠拖到日曆裡成新事件
- 打印便箋
彈出式記事本組件由KNotes提供。
More Information
 |
Kile is a user-friendly TeX/LaTeX editor |
Features include
- Auto-completion of (La)TeX commands
- Templates and wizards
- Easy insertion of standard tags
- User-defined tags
- Easy insertion of citations and references
- Compile, convert and view your document with one click
and many more features.
 |
 |
|
Verwenden Sie ein DFÜ-Modem |
Diese Software wird zum Einrichten einer PPP (Punkt-zu-Punkt Protokoll) Verbindung benutzt. Dies ist heute vor allem für die Verbindung mit einer Handy "Modem"-Karte sinnvoll. Es wird zudem zur Konfigurationen einer echten Modem Verbindung verwendet. Das "NetworkManager" Paket hat vor die PPP Funktionalität zu implementieren, das vermutlich in Zukunft KPPP überflüssig machen wird.
Appendix B. Comparing Kexi to other database applications
- Kdenlive/Manual/Projects and Files/Media Browser==== Media Browser ====
Since Version 21.04.0
The new Media Browser allows you to easily navigate through your file system and add clips directly to the Bin or Timeline. You can enable it from View menu.
Konversation (versione stabile)
Konversation è disponibile nel repository extra.
Digita come amministratore:
pacman -S konversation
Konversation (Git PKGBUILD)
Se vuoi compilare la versione di sviluppo più recente di Konversation, puoi utilizzare questo PKGBUILD da AUR:
Or, if installed yaourt(Do not use root rights to build.):
yaourt -S konversation-git
Konversation Stable
Konversation er tilgængelig i arkivet extra.
Skriv som root:
pacman -S konversation
Konversation Git PKGBUILD
Hvis du ønsker at bygge den seneste udviklingsudgave af Konversation, så kan du bruge denne PKGBUILD fra AUR:
Eller yaourt, hvis den er installeret (anvend ikke root-rettigheder ved bygning.):
yaourt -S konversation-git
|
Netzwerk-Manager unterstützt Profile für Einwahl-Verbindung, kabelgebundene und drahtlose Netzwerke |
Merkmale
![]()
- Unterstützt mehrere Profile
- Verbindet zu offenen und verschlüsselten Netzwerken
- Verwendet alle wpa_supplicant Arten - wep, wpa, wpa2 etc.
- Kann Statistiken pro Schnittstelle im Infosymbolbereich anzeigen
Siehe diese Projektseite
Pagine aggiuntive per KDevelop4:
|
KNotes 是一个粘性即时贴程序。即使Kontact关闭了您依旧可以在桌面上看到它们。 |
特性
- 自定义字体和背景颜色
- 使用拖放邮寄您的便贴
- 能够拖到日历里成新事件
- 打印便笺
弹出式记事本组件由KNotes提供。
More Information
Стабільна версія
Найсвіжішу стабільну версію Konversation можна встановити зі звичайної ієрархії пакунків Gentoo, достатньо командиemerge -av konversation.
Нестабільна версія
- У Gentoo можна встановити ebuild git Konversation з оверлея kde.
- Kdenlive/Manual/View Menu/Effect List/en
View Menu — Effects
Toggles the display of the Effects Tab

|
Network manager supporting profiles for dial-up, wired and wireless networks |
Features
![]()
- Supports multiple profiles
- Connects to open and encrypted networks
- Uses all wpa_supplicant types - wep, wpa, wpa2 etc
- Can show statistics per interface in systray icon
Under Construction
The Resource Manager
The Resource Manager will be availeble in Krita 2.9. It is a tool to allow artists to manage the resources in their copy of Krita. This page will be updated as more details are known.
Pages supplémentaires pour KDevelop4 -
- KDevelop 4 Manuel
- KDevelop 4 FAQ
- KDevelop 4 Trucs et astuces
- Kdenlive/Manual/Clip Menu/Rename Clip/en
Rename Clip
Change the name of a clip in the Project Bin to an arbitrary name. Does not rename the file on the file system.
This menu item is available from right-click on a clip in the Project Bin.

Home » Applications » Education » KTurtle » Test
Some screenshots taken from KTurtle, scroll down for screenshots of older versions of KTurtle. You may also want to search for KTurtle images with google.
0.8
 |
 |
0.7
nothing yet...
0.3
nothing yet...
Hue
This is the Frei0r hue MLT Transition.
Perform a conversion to hue only of the source input1 using the hue of input2.
![]()
![]()
|
Telefon hattından çalışan modem kullanımı |
Bu yazılım, "PPP" (Point-to-Point / Noktadan Noktaya protokol) bağlantıları yapılandırmaya yarar. Günümüzde en çok cep telefonlarını modem olarak kullanmak için kullanılır. Gerçek modemlerle bağlantı kurmak için de işlevseldir. NetworkManager (Ağ Yöneticisi) bu görevleri başarıyla yerine getirmeye başlayınca KPPP kullanım dışı kalır diye tahmin ediliyor.
- Khipu/Manual/Introduction== Khipu Plotting is just a fun ==
Khipu is an Advanced Mathematical function plotter application.
It is part of the KDE Education Project and a replacement of an earlier function plotting application KmPlot.

![]() KDirStat 是图形化的磁盘使用情况分析工具。很像 Unix "du" 命令。除此之外,它还有一些清理功能来释放磁盘空间。
KDirStat 是图形化的磁盘使用情况分析工具。很像 Unix "du" 命令。除此之外,它还有一些清理功能来释放磁盘空间。
KDirStat is not a KDE Project anymore, but it's maintained under QDirStat.

外部链接
KDiskFree
KDiskFree is a simple tool which gives a graphical view the disks available to a system.
- La pantalla muestra el tamaño, tipo, el espacio libre y el espacio total
- Un simple gráfico te da una visión rápida
- Los puntos de montaje se muestran claramente
La página principal del proyecto ofrece manuales para las últimas versiones.
Additional pages for KDevelop4 -
|
Utilisation d'un modem |
Ce logiciel est utilisé pour l'installation PPP (protocole point à point) des connexions. De nos jours, ceci est très utile pour se connecter avec un une carte "modem" d'un téléphone cellulaire. Il est également utilisé pour configurer les connexions par modem. La suite NetworkManager entend implanter les fonctionnalités PPP ce qui probablement, dans le temps, fera de KPPP un logiciel obsolète.
The KWord Handbook
An Introduction to KWord
- An Introduction to Frame-Oriented Word Processing
- Introducing KWord's Graphical User Interface
- KWord Tutorials
- KDiskFree/ro
KDiskFree
KDiskFree is a simple tool which gives a graphical view the disks available to a system.
- Ecranul listează mărimea,tipul,și liber- și spațiul total
- Un simplu graf vă oferă o privire de ansamblu rapidă
- Poziția suporturilor dumneavoastră este clar văzută.
Pagina de început pentru proiect oferă manuale pentru versiuni recente.
Appendix B. Sammenligning af Kexi med andre databaseprogrammer
| kdesvn est un client subversion pour la multiplateforme KDE |
Fonctionne à la manière du gestionnaire de fichiers standard de l'espace de travail de KDE. Il est totalement intégré grâce à KPart.
Liens
Stop Motion Capture
Capture images a frame at a time from a camera plugged into the HDMI port of a Linux-compatible capture card to create stop motion animation. You can also transparently overlay the last captured frame on the monitor to easily see the difference with current live feed.
See j-b-m's blog on this feature.
| Kdesvn ist ein Subversion-Client für die KDE Plattform |
Es versucht das Aussehen und das Verhalten des vorgegebenen Dateiverwalter von KDE zu imitieren und sich darin zu integrieren über einen KPart.
Verknüpfungen
KDiskFree
KDiskFree er et enkelt værktøj til at give et grafisk overblik over systemets tilgængelige lagermedier.
- Listen viser størrelse, type, ledig og brugt kapacitet for alle monterede diske - lokale såvel som på netværket
- En enkel graf giver dig et hurtigt overblik
- Du kan let se stien til dine partitioner (mount points)
Projektets hjemmeside har en håndbog til de nyeste udgaver.
![]() KDirStat 是一個圖形化磁盤使用情況分析工具,很像 Unix 的“du”的命令。除此之外,它還有一些清理功能來釋放磁盤空間。
KDirStat 是一個圖形化磁盤使用情況分析工具,很像 Unix 的“du”的命令。除此之外,它還有一些清理功能來釋放磁盤空間。
KDirStat is not a KDE Project anymore, but it's maintained under QDirStat.
外部鏈接
Clip Menu — Locate Clip
This menu item is available from right-clicking a clip in the Project Bin. Locate Clip opens up the systems file browser at the location on the file system where the selected clip is stored. Useful for tracking down the sources of clips in the project bin.
Páginas adicionais sobre o KDevelop4 -
Home » Applications » Multimedia » KMPlayer
 |
播放视频的浏览器插件 |
特性
- 从文件或网站播放视频
- 能隐藏操控按钮
- 能用插件播放QuickTime、微软媒体播放器和 RealPlayer 格式的文件
- 支持标签
- 装好所需后台之后,支持录制
另外,有个独立版本可以
- Play DVDs, with DVDNav, if xine backend is used.
- 播放 VCD
- 从电视播放(实验性的)
欲知详情,请访问官网
KDiskFree
KDiskFree è un semplice strumento che ti dà una vista grafica dei dischi disponibili nel sistema.
- Elenca la dimensione, il tipo, la capacità totale e lo spazio libero di tutti i dischi montati, locali e remoti
- Un semplice grafico ti offre una veloce panoramica visiva
- La posizione del punto di montaggio è chiaramente visibile
La pagina principale del progetto offre dei manuali per le versioni recenti.
Konfiguration af Kexi
- ← Indskriv data ved hjælp af en formular
- ↑ Indholdsfortegnelse ↑
- Fastgøring og løsrivelse af sidepaneler →
Konversation is part of a default KDE install on openSUSE.
If you want to install it,
- Go to openSUSE Software for one-click installs.
- Or go to YaST2 software management module and install it from there.
- Alternatively, you may open Konsole and type as root:
zypper in konversation
| kdesvn és un client de subversion per a plataformes KDE |
Tracta d'ajustar-se en aparença i comportament al gestor de fitxers estàndard als espais de treball del KDE i s'integra en ell a través de KPart.
Enllaços
Стабільна версія Konversation
Konversation можна встановити зі сховища програм Fedora. Щоб встановити програму вам достатньо віддати одну команду.
Відайте команду від імені адміністративного користувача:
yum install konversation
Про всі вади щодо пакування програми слід повідомляти до Redhat Bugzilla.
|
KPager giver dig øjeblikkelig adgang til alle dine skriveborde |
KPager lader dig skifte mellem virtuelle X11-skriveborde. Den findes typisk i panelet og kan tilgås via dette ikon
Hovedpunkter
- Et enkelt klik bringer dig til ethvert skrivebord
- Ikoner indikerer placering af åbne vinduer på de forskellige skriveborde
- Programmer kan trækkes mellem de forskellige skriveborde
- KPager er en standardkomponent i KDE's opgavelinjer og paneler
- Krita/Manual/Tools/Pan==Pan==
![]()
The pan tool is used to move or rotate your canvas. To pan across the image simply click on the image and drag. To rotate your image hold Shift and then click and drag. This will not affect the position or rotation of your image file but only your perspective of your image.
![]() KDirStat is a graphical disk usage utility, very much like the Unix "du" command. In addition to that, it comes with some cleanup facilities to reclaim disk space.
KDirStat is a graphical disk usage utility, very much like the Unix "du" command. In addition to that, it comes with some cleanup facilities to reclaim disk space.
KDirStat is not a KDE Project anymore, but it's maintained under QDirStat.
External links
Run Config Wizard
This feature re-runs the config wizard that runs when you first install or upgrade Kdenlive. It gives you the opportunity to choose the default settings again for things like the default project settings. It also resets many settings back to "factory defaults" so it can be useful to run this if the Kdenlive application is misbehaving.

日曆處理
| KOrganizer 用的是叫 iCalendar 的文件來存儲數據。iCalendar 是日曆數據的開發標準,除了 iCalendar KOrganizer 還支持 vCalendar 標準。 |
多數其它日曆程序都是同時支援這兩種標準的,一些手機之類的移動設置也是支援的。

KOrganizer 能夠以 network-transparent 的方式直接導入文檔工作,使你能夠,例如無需複製或同步的情況下,在辦公室和家裡能夠訪問同一個日曆。
 |
KNemo monitors your Internet connection giving real-time information |
KNemo is highly configurable, and can monitor as many connections as you have active.
 |
 |
 |
 |
|
Start dine programmer til tiden! |
Et lille program med et eneste formål -
- Angiv i sekunder
- Skriv den , der skal udføres
- Klik på knappen
- Vend tilbage til det, som du var i gang med og afvent signalet til at starte kommandoen.
Klik på ovenstående miniature for at se detaljerne.
Se projektsiderne for kontaktinformation
 |
KMag是KDE SC上的放大镜 |
主要特性
- 放大鼠标指针指向的屏幕区域
- 多种放大倍数
其他特性
- 高度可定制
截图
查看 Sourceforge
安全问题
没有已知的安全问题。
开发团队
- Michael Forster: 最初的创意和实现(KDE1)
- Sarang Lakare: 重写
- Olaf Schmidt: 重做用户界面,扩展选择窗口模式,优化速度,旋转,bug修复。
- KNotes/en
|
KNotes is the non-sticky sticky notes application. See them on your desktop even when Kontact is closed |
Features
- Write notes in your choice of font and background color
- Use drag and drop to email your notes
- Can be dragged into Calendar to book a time-slot
- Notes can be printed
The Notes component is provided by KNotes.
More Information
KDiskFree
KDiskFree est un outil simple qui donne une vue graphique des disques disponibles sur un système.
- L'écran liste la taille, le type, et l'espace total et l'espace libre de tous les disques montés - locaux ou distants.
- Un graphe simple permet d'avoir une vision rapide
- Les points de montage de vos appareils sont clairement montrés
La page d'accueil du projet offre des manuels pour les versions récentes.
|
KNotes is the non-sticky sticky notes application. See them on your desktop even when Kontact is closed |
特徴
- Write notes in your choice of font and background color
- Use drag and drop to email your notes
- Can be dragged into Calendar to book a time-slot
- Notes can be printed
The Notes component is provided by KNotes.
More Information
KDiskFree
KDiskFree é uma ferramenta simples que dá uma visão gráfica dos discos disponíveis para um sistema.
- A tela lista o tamanho, tipo, o espaço livre e o espaço total de todos os discos montados - locais e remotos
- Contém gráfico simples que fornece uma visão rápida
- Os pontos de montagem são percebidos claramente
A página para o projeto oferece manuais e disponibiliza as versões mais recentes.
KDiskFree
KDiskFree is a simple tool which gives a graphical view the disks available to a system.
- The display lists the size, type, and full capacity and free space of all mounted disks - local and remote
- A simple graph gives you a quick overview
- The position of your mounts is clearly seen
The home page for the project offers handbooks for recent releases.
Configuring Kexi
Status
3.5
Kopete understøtter visning af venneikoner på kontaktlisten for AIM's protokol.
Opsæt en AIM-konto i Kopete
- Brug kun de første 8 bogstaver af dit password, hvis det er længere
- i kontonavnet skelnes der mellem store og små bogstaver (i modsætning til andre AIM-klienter)
- Kopete/AIM/it
Stato
3.5
Kopete supporta la visualizzazione di icone nell'elenco dei contatti per il protocollo AIM.
Impostare un account AIM in Kopete
- Utilizza solo i primi 8 caratteri della tua password se è più lunga
- è importante rispettare maiuscole e minuscole nel nome dell'account (a differenza di altri client aim)
- Kexi/File Format Support/en
Text Filter (including CSV support)
Overview
Kexi is capable of importing data from a variety of text file formats.
Text files containing comma-delimited fields (known as Comma Separated Values, or CSV files) may be imported into a new table. Most spreadsheet and database applications can import and export in this format, making this an appropriate format to migrate textual data between different applications.
Kexi also supports other field delimiters, such as tabs, and may be configured for more unusual text file formats.
- Kdenlive/Manual/Settings Menu/Download New Project Profiles==== Download New Project Profiles ====
Note: Since around August, 2013 when the kdenlive.org web site was refurbished, this feature has been unavailable and the "Get Hot New Stuff" window will wait forever to update. See Mantis 3133.
The Download new Render profiles is now working as at Oct 2105. However the download New Project Profiles is still not working as at Oct 2015.
Status
3.5
Kopete supporte l'affichage des avatars dans la liste de contact pour le protocole AIM.
Définir un compte AIM dans Kopete
- Utilisez uniquement les 8 premiers caractères de votre mot de passe s'il en contient plus
- Le nom du compte est sensible à la casse (par opposition à d'autres clients AIM)
- KTimer/it
|
Inizia le tue attività in tempo! |
Una piccola applicazione con un unico scopo
- Imposta il in secondi
- inserisci il da eseguire
- premi il pulsante
- torna a quello che stavi facendo ed attendi l'avviso per iniziare la nuova attività.
Fai clic sull'anteprima sopra per vedere i dettagli.
Consulta le pagine del progetto per informazioni sui contatti
Appendix B. Comparing Kexi to other database applications
|
¡Inicia tus tareas a la hora! |
Una pequeña aplicación con un solo propósito -
- Introduce la en segundos
- Introduce la a ejecutar
- Pulsa el botón
- Vuelve a lo que estuvieras haciendo, y espera a que el sistema inicia la nueva tarea.
Haz clic en la imagen superior para ver los detalles.
Visita la página del proyecto para información de contacto
Status
3.5
Kopete supports displaying buddy icons on the contact list for AIM's protocol.
Set a AIM account in Kopete
- Only use the first 8 characters of your password if longer
- the account name is case-sensitive (as opposite to other aim clients)
- Kdenlive/Manual/Project Menu/Adjust Profile to Current Clip
Adjust Profile to Current Clip
This function is available from the Project menu.
This function offers up a suggested Project Profile that would be most suitable for the properties of the currently selected clip (selected in the Project Tree?).
You get to see the profile it suggests and accept the suggestion or cancel.

|
Use a dial-up modem |
This software is used to setup PPP (Point-to-Point Protocol) connections. This is most useful for connecting with a cell phone "modem" card these days. It is also use to configure real modem connections. The NetworkManager suite intends implementing PPP functionality that will probably, in time, make KPPP obsolete.
Відтінок
Це реалізація переходу MLT відтінок Frei0r.
Виконує перехід до відтінку вхідних даних 1 з використанням відтінку вхідних даних 2.
![]()
![]()
|
KPager daje natychmiastowy dostęp do wszystkich pulpitów |
KPager pozwala na przełączanie pomiędzy wirtualnymi pulpitami X11. Zazwyczaj znajduje się na pasku zadań i może być uruchamiany przez tę ikonę.
Funkcje
- Natychmiastowy dostęp do każdego pulpitu
- Ikony pokazujące rozmieszczenie aplikacji na poszczególnych pulpitach
- Aplikacje mogą być przenoszone między pulpitami przez przeciąganie
- Wygląda jak standardowa część każdego paska zadań KDE lub panelu
- Kile
|
Kile is a user-friendly TeX/LaTeX editor |
Features include
- Auto-completion of (La)TeX commands
- Templates and wizards
- Easy insertion of standard tags
- User-defined tags
- Easy insertion of citations and references
- Compile, convert and view your document with one click
and many more features.
|
|
Very simple plugin that replaces text.
It can be used to replace incorrect forms like "u" into the correct "you".
Can be configured to perform replaces on incoming and outgoing messages.
To configure it: then select and click on the configure icon.
Un complemento muy sencillo que reemplaza texto.
Puede ser usado para reemplazar formas incorrectas como "tb" en la correcta "también".
Puede ser configurado para realizar sustituciones en mensajes entrantes y salientes.
Para configurarlo: luego selecciona y haz clic en el icono para configurar.
|
Kile er en brugervenlig TeX/LaTeX editor |
Hovedpunkter
- Automatisk fuldførelse af (La)TeX-kommandoer
- Skabeloner og guider
- Let indsættelse af standard tags
- Brugerdefinerede tags
- Let indsættelse af citater og henvisninger
- Oversætter, omdanner og fremviser dit dokument med et klik
og mange andre funktioner.
|
|
Tilpasning
KOrganizer giver dig en bred vifte af tilpasningsmuligheder. Som alle KDE-programmer er det oversat til mange sprog, i øjeblikket mere end 50.
Skal du bruge en kinesisk, en tysk eller en fransk kalender? Ikke noget problem, KOrganizer taler dit sprog.

Men det standser ikke ved sprogene. KOrganizer understøtter også lokalisering af datoformat og nationale helligdage. Foretrækker du at ugen starter om søndagen i stedet for om mandagen? Nemt nok, du skifter bare.

Si usas Kopete para comunicarte y te preguntas donde conseguir más documentación, puedes mirar en el área de documentación de KDE, y no dudes en preguntar en el Canal IRC de Kopete.
Si has encontrado un fallo en Kopete, por favor abre e informa a los desarrolladores de KDE.

- ← Volver al índice
- Claus chr/DPL/Test
|
KMag 是 KDE SC上 的放大鏡 |
主要特性
- 放大鼠標指針指向的屏幕區域
- 多種放大倍數
其他特性
- 高度可定制
截圖
檢視 Sourceforge 上各種視角的截圖
安全問題
沒有已知的安全問題。
開發團隊
- Michael Forster: 最初的創意和實現(KDE1)
- Sarang Lakare: 重寫
- Olaf Schmidt: 重做用戶界面,擴展選擇窗口模式,優化速度,旋轉,bug 修復。
- Kopete/Auto Replace/da
Et meget enkelt plugin, som erstatter tekst. Det kan bruges til at erstatte ukorrekte former som "u" til det korrekte "you".
Kan indstilles til at udføre erstatninger på indkommende og udgående meddelelser.
For at indstille det går du til og aktiverer . Klik så på indstillingsikonet.
KAddressBook
|
KPager te da acceso instantáneo a todos tus escritorios |
KPager te permite cambiar entre escritorios virtuales X11. Por lo general se encuentra en la barra de tareas y se puede acceder por medio de este icono
Características
- Acceso a cada escritorio con un solo clic
- Los iconos indican la colocación de las aplicaciones en los distintos escritorios
- Las aplicaciones se pueden mover entre escritorios arrastrándolas
- Es una parte estándar de cada panel o barra de tareas de KDE
- Kopete/Auto Replace/it
Plugin molto semplice che sostituisce del testo. Può essere utilizzato per sostituire forme errate come "u" nella corretta "you".
Può essere configurato per eseguire sostituzioni nei messaggi in entrata e uscita.
Per configurarlo: quindi seleziona e fai clic sull'icona di configurazione.
|
KNemo controlla la tua connessione Internet offrendoti informazioni in tempo reale |
KNemo è altamente configurabile e può controllare tutte le connessioni attive che hai.
|
|
|
|
Estado
3.5
Kopete permite mostrar los iconos de amigos en la lista de contactos para el protocolo AIM.
Configuración de una cuenta AIM en Kopete
- Utiliza solo los 8 primeros caracteres de tu contraseña en caso de que sea más larga
- En el nombre de la cuenta se distingue entre mayúsculas y minúsculas (a diferencia de otros clientes aim)
- KAddressBook/index/zh-cn
KAddressBook
- Kdenlive/Manual/Clip Menu/Reload Clip==== Clip Menu — Reload Clip ====

This menu item is available from right-clicking a clip in the Project Bin. Reload Clip will re-import the clip into Kdenlive from the system. This is useful when you edit a clip outside of Kdenlive and want Kdenlive to update it in the project.
![]() KDirStat er et program, som giver en grafisk visning af brugen af lagerenheder meget lig "du" kommandoen i Unix. Oven i det har den faciliteter til at genindvinde ikke-brugt lagerplads.
KDirStat er et program, som giver en grafisk visning af brugen af lagerenheder meget lig "du" kommandoen i Unix. Oven i det har den faciliteter til at genindvinde ikke-brugt lagerplads.
KDirStat er ikke længere et KDE-projket; det vedligeholdes her: QDirStat.
Eksterne links
|
Görevlere zamanında başlamak için! |
Tek bir amaca yönelik minik bir uygulama -
- 'yi saniye ile seçin
- 'u girin
- tuşuna basın
- İşinizin başına gönül rahatlığıyla dönebilirsiniz, kaydettiğiniz görev, zamanı gelince karşınıza çıkacak
Ayrıntılı görmek için üstteki resme tıklayın
Projenin kendi sayfasına bu adresten ulaşabilirsiniz.
|
Commencez votre travail en temps voulu ! |
Une petite application avec un seul but -
- Réglez le en secondes
- Entrez la à lancer
- Appuyez sur le bouton
- Retournez à ce que vous faisiez, et attendez le prompt pour commencer la nouvelle tâche.
Cliquez sur la vignette ci-dessus pour voir les détails.
Voir les pages du projet pour des informations sur les contacts
![]() O KDirStat é um utilitário de uso gráfico do disco, muito parecido com o comando "du" do Unix. Além disso, ele vem com algumas facilidades de limpeza para recuperar espaço em disco.
O KDirStat é um utilitário de uso gráfico do disco, muito parecido com o comando "du" do Unix. Além disso, ele vem com algumas facilidades de limpeza para recuperar espaço em disco.
KDirStat não é mais um Projeto KDE, mas é mantido como QDirStat.
Links externos
KDE SVN er et onlinearkiv, hvor KDE's kildekode gemmes. Enhver kan se indholdet ved at besøge web SVN. Navnet "SVN" kommer fra den software, der bruges, nemlig Subversion.
Arkivet indeholder ikke bare den udgave af KDE, som er under udvikling, men også den aktuelt stabile udgave og historikken over ændringer i KDE.
Hvis nogen siger om en ny funktion, at den er "i SVN", så betyder det normalt, at den ikke er tilgængelig endnu, men at en gungerende version er blevet lavet og sandsynligvis vil være tilgængelig i den næste udgivelse.
![]() KDirStat este o utilitate de folosire grafică a discului,foarte asemănătoare comenzii Unix "du".În plus, vine cu unele facilități de curățare pentru a revendica spațiul pe disc.
KDirStat este o utilitate de folosire grafică a discului,foarte asemănătoare comenzii Unix "du".În plus, vine cu unele facilități de curățare pentru a revendica spațiul pe disc.
KDirStat is not a KDE Project anymore, but it's maintained under QDirStat.
Legături externe
|
KPager dóna accés instantani a tots els vostres escriptoris. |
KPager us permet canviar entre escriptoris virtuals X11. En general es troba en la barra de tasques i s'hi pot accedir per mitjà d'aquesta icona.
Característiques
- Accés a cada escriptori amb un sol clic.
- Les icones indiquen la col·locació de les aplicacions en els diferents escriptoris.
- Les aplicacions es poden moure entre escriptoris arrossegant-les.
- És una part estàndard de cada barra de tasques de KDE o plafó.
- KPPP/ja
|
ダイヤルアップ モデムの使用 |
このソフトウェアのセットアップには PPP (Point-to-Point Protocol)というコネクションを利用しています。これは現代にて携帯電話の モデム カードとの接続で一番便利な方法です。また、実際にモデム接続部分の接続の設定で使われています。この ネットワークマネージャー スイートは KPPP を時代遅れにさせるような PPP を実装する予定です。
![]() KDirStat es una utilidad gráfica que muestra el uso del disco, muy parecido al comando "du" de Unix. Además de eso, viene con algunas utilidades de limpieza para recuperar espacio en disco.
KDirStat es una utilidad gráfica que muestra el uso del disco, muy parecido al comando "du" de Unix. Además de eso, viene con algunas utilidades de limpieza para recuperar espacio en disco.
KDirStat is not a KDE Project anymore, but it's maintained under QDirStat.
Enlaces externos
Dunque se utilizzi Kopete per comunicare e ti stai chiedendo dove ottenere ulteriore documentazione, puoi semplicemente guardare nell'area della documentazione KDE o sentirti libero di chiedere nel canale IRC di Kopete.
Se hai trovato un errore in Kopete, apri e segnalalo agli sviluppatori KDE.
- ← Ritorna all'indice
- Claus chr/DPL/Test
Personalización
KOrganizer es muy personalizable. Como todas las aplicaciones de KDE, está traducido a muchos idiomas, en la actualidad a más de 50.
¿Necesitas un organizador en chino, alemán o francés? No hay problema, KOrganizer habla tu idioma.
Pero no solo se acaba en el idioma. KOrganizer tambén es compatible con distintos formatos para la fecha o días festivos de cada país. ¿Prefieres que tu semana empiece en domingo en vez de en lunes? No hay problema, simplemente cámbialo.
Hvis du bruger Kopete til kommunikation og spekulerer på, hvor du kan få mere information, så se på KDE's dokumentationsside, og du kan frit spørge på Kopetes IRC-kanal.
Hvis du har fundet en fejl i Kopete, så vær venlig at vælge og rapporter den til KDE's udviklere.
- ← Tilbage til indholdsfortegnelsen
- Claus chr/DPL/Test
Tekstfilter (herunder understøttelse for CVS)
Oversigt
'Kexi er i stand til at importere data fra en lang række tekstfil-formater
Tekstfiler, som indeholder kommaseparerede felter (kendt som kommaseparerede værdier eller CSV-filer) kan importeres i en ny tabel. De fleste regneark og databaseprogrammer kan importere og eksportere i dette format, hvilket gør det til et passende format til at overføre tekst-data imellem programmer.
Kexi understøtter også andre feltadskillere så som tabulatortegn og kan indstilles til mere usædvanlige filformater.
Konversation Stable
Konversation is available in the extra repository.
Type as root:
pacman -S konversation
Konversation Git PKGBUILD
If you want to build the latest development version of Konversation you can use this PKGBUILD from the AUR:
Or, if installed yaourt(Do not use root rights to build.):
yaourt -S konversation-git
|
KPager ti dà accesso immediato a tutti i tuoi desktop |
KPager ti permette di passare tra i desktop virtuali di X11. Tipicamente si trova nella barra delle applicazioni ed è possibile utilizzarlo tramite questa icona
Caratteristiche
- Accesso con un clic ad ogni desktop
- Icone che indicano la posizione delle applicazioni nei vari desktop
- Le applicazioni possono essere spostate tra i desktop tramite trascinamento
- Rappresenta una componente standard di ogni barra delle applicazioni o pannello KDE
- KNotes/nl
|
KNotes is de applicatie voor plaknotities. Ze staan op uw desktop, zelfs als Kontact is afgesloten. |
Functies
- Notities maken in een lettertype en kleur naar keuze
- Via klikken en slepen uw notities e-mailen
- Kan in Calendar worden gesleept voor het plannen van een afspraak
- Notities kunnen worden afgedrukt
De component Notes wordt geïmplementeerd door KNotes
More Information
|
O KNemo monitora sua conexão com a Internet, fornecendo informações em tempo real |
O 'KNemo' é altamente configurável e pode monitorar quantas conexões você tiver.
|
|
|
|
Byg en Slackware-pakke
Metoden til at bygge pakker, som bruges af Slackware-distributionen selv er at bruge scripts kaldet SlackBuilds, som kompilerer og bygger en Slackware .tgz/txz-pakke. Ud over Slackwares officielle kildetræ findes der scripts i det frie arkiv SlackBuilds.org, og du kan finde et aktuelt script for Konversation der.
SlackBuilds.org giver instruktioner i at bygge pakker for de SlackBuilds, som den stiller til rådighed. Mere support kan findes i kanalen #slackbuilds på Freenode.
Transitions - Screen
This is very much like Chroma Key but it works with footage filmed against a black background.
Timeline showing how to apply the "Screen" transition

This video composites a video of fire filmed on a black background into another bit of footage using the Screen transition.
![]() KDirStat è uno strumento per rappresentare graficamente l'utilizzo del disco, molto simile al comando Unix "du". Oltre a questo viene offerto con alcune facili opzioni di pulizia per liberare spazio sul disco.
KDirStat è uno strumento per rappresentare graficamente l'utilizzo del disco, molto simile al comando Unix "du". Oltre a questo viene offerto con alcune facili opzioni di pulizia per liberare spazio sul disco.
KDirStat is not a KDE Project anymore, but it's maintained under QDirStat.
Collegamenti esterni
KDiskFree
KDiskFree ist ein einfaches Werkzeug, das einen optischen Überblick über die auf einem System verfügbaren Laufwerke anzeigt.
- Die Anzeige zeigt die Größe, Typ, freie und Gesamtkapazität aller eingehängten Laufwerke. Sowohl für lokale als auch für entfernte Laufwerke.
- Ein einfaches Diagramm gibt Ihnen einen schnellen Überblick.
- Die Einhängepunkte sind deutlich erkennbar.
Die Homepage für das Projekt bietet Handbücher für die aktuellsten Versionen.
|
KPager gibt Ihnen direkten Zugriff auf all Ihrer Desktops. |
KPager bietet Ihnen die Möglichkeit zwischen den virtuellen X11 Desktops zu wechseln. Üblicherweise sitzt es in der Kontrollleiste und ist erreichbar über sein Symbol.
Funktionen
- 1 Klick Zugriff auf jeden Desktop
- Symbole deuten die Position von Programmen auf den verschiedenen Desktops an.
- Programme können zwischen den Desktops verschoben werden durch "Ziehen"
- Ist ein Standardbestandteil von jeder KDE Kontrollleiste oder Panel.
- KNemo/da
|
KNemo overvåger din internetforbindelse og giver dig helt aktuelle informationer |
KNemo er meget konfigurerbar og kan overvåge lige så mange forbindelser, som du har åbne.
|
|
|
|
|
Kile est un éditeur convivial TeX/LaTeX |
Les fonctionnalités comprennent
- Une auto-complétion de commandes (La)TeX
- Des modèles et des assistants
- Une insertion simple des étiquettes standardes
- Des étiquettes définies par l'utilisateur
- Une insertion simple de citations et références
- Compiler, convertir et visionner vos documents en un clic
et de nombreuses autres fonctionnalités.
|
|
alphaxor transtion
The alpha XOR operation.
Yellow clip has a triangle alpha shape with min = 0 and max =618.
Green clip has rectangle alpha shape with min=0 and max =1000
alphaxor is the transition in between
Стабильная версия Konversation
Konversation есть в экстра репозитории.
Введите от root:
pacman -S konversation
Konversation Git PKGBUILD
Если вы хотите получить последнюю разрабатываемую версию Konversation, Вы можете использовать PKGBUILD из AUR:
Or, if installed yaourt(Do not use root rights to build.):
yaourt -S konversation-git
KAddressBook
The following vendors sell computers with KDE pre-installed:
- KDE Slimbook: https://kde.slimbook.es/. Laptops with KDE Neon preinstalled. The company is Spanish and ships worldwide.
- ZaReason, Inc.: http://zareason.com/ (select KDE-distribution when customizing purchase). Ships to USA and Canada.
- TUXEDO Computers: https://www.tuxedocomputers.com/ (select KDE-distribution when customizing. purchase). German company, ships worldwide.
- KDirStat/fr
![]() KDirStat est un utilitaire de visualisation d'espace disque graphique, similaire à la commande Unix "du". En outre, il dispose de fonctions de nettoyage pour récupérer de l'espace disque.
KDirStat est un utilitaire de visualisation d'espace disque graphique, similaire à la commande Unix "du". En outre, il dispose de fonctions de nettoyage pour récupérer de l'espace disque.
KDirStat n'est plus un projet KDE, mais il reste maintenu sur QDirStat.
Liens externes
View Menu — Show Title Bars
This toggles the display of the title bar and control buttons on dockable windows in Kdenlive.
|
Kile es un editor TeX/LaTeX fácil de usar |
Las características incluyen
- Autocompleta comandos (La)TeX
- Plantillas y asistentes
- Inserción sencilla de etiquetas estándar
- Etiquetas definidas por el usuario
- Inserción sencilla de citas y referencias
- Compila, convierte y muestra tu documento con un solo clic
y muchas más características.
|
|
![]() KDirStat, "du" adlı Unix komutuna benzer biçimde disk kullanımını grafikle gösteren bir araçtır. Ek olarak, disk alanını temizlemeye yardımcı olan araçlar sunar.
KDirStat, "du" adlı Unix komutuna benzer biçimde disk kullanımını grafikle gösteren bir araçtır. Ek olarak, disk alanını temizlemeye yardımcı olan araçlar sunar.
KDirStat is not a KDE Project anymore, but it's maintained under QDirStat.
External links
- Proje ana sayfası
- Basit bir tarif ve Nasıl Kullanılır? belgesi (İngilizce)
- Kdenlive/Manual/Settings Menu/Download New Wipes==== Download New Wipes ====
This feature allows you to download and install files that can be used as Wipe files in the Wipe transition. These files are greyscale images in the pgm format.
If you have your own wipe files that you would like to share with the community you can upload them to store.kde.org which should make them available from this Download New Wipes function.
So if you use Kopete to communicate and wonder where to get more documentation, you just could look in the KDE Documentation area or feel free to ask in the Kopete IRC-channel.
If you found a bug in Kopete, please open and report it to the KDE developers.
- ← Return to index
- Claus chr/DPL/Test
Hjem » Programmer » Multimedia » Kio-audiocd
 |
Nemt værktøj til at tilgå og konvertere musik-CD'er. |
Funktioner
- Sømløs integration af musik-CD'er i Plasma og KDE's programmer.
- Nem konvertering til formaterne wav, ogg, mp3 og flac.
- Mulighed for at gemme lyddata med en filnavnsskabelon og CD-TEXT eller internet-database over CD-titler.
- Eget indstillingsmodul i Systemindstillinger.
Vink, tips og fejlfinding
KIO-AudioCD's dokumentationsside.
 |
KImageMapEditor is an utility to create and modify HTML image maps. |
Features
- Ability to load and edit existing HTML image maps.
- Tools to create image maps: Circle, Rectangle, and Polygon.
- Ability to create image maps for user-defined image (JPEG, PNG, or GIF).
- Ability to edit tags, map coordinates, and map JavaScript.
- Map HTML code reviewing.
The Handbook is available from here.
|
O KPager fornece acesso instantâneo a todas as suas áreas de trabalho |
O KPager permite alternar entre o áreas de trabalho virtuais do X11. Ele geralmente fica na barra de tarefas e pode ser acessado por este ícone
Características
- Acesso à cada área de trabalho com um único clique
- Os ícones indicam a colocação das aplicações nas diferentes áreas de trabalho
- As aplicações podem ser movidas entre áreas de trabalho arrastando-as
- É uma parte padrão da cada painel ou barra de tarefas do KDE
- KMPlayer/en
Home » Applications » Multimedia » KMPlayer
|
A browser plugin to play video streams |
Features
- Plays video from file or web site
- Popup controls stay neatly out of sight until you want them
- Can use plugins to play QuickTime, MS Media Player and RealPlayer files
- Supports bookmarking
- Supports recording if required backends are installed
Additionally, there is a stand-alone version which can
- Play DVDs, with DVDNav, if xine backend is used.
- Play VCDs
- Play from a TV device (experimental)
Visit the home page for more details
|
Kile è un editor per TeX/LaTeX facile da utilizzare |
Le caratteristiche includono
- Auto-completamento dei comandi (La)TeX
- Modelli e procedure guidate
- Facile inserimento dei tag standard
- Tag definiti dall'utente
- Facile inserimento di citazioni e riferimenti
- Compila, converti e visualizza il tuo documento con un clic
e molte altre caratteristiche.
|
|
KAddressBook
KAddressBook
KAddressBook
The KDE SVN is an online archive that stores the source code for KDE. It is possible for anyone to browse the SVN by visiting the web SVN. The name "SVN" comes from the software that the archive uses, which is called Subversion.
The archive contains not only the version of KDE that is under development but also the current stable release and the history of changes to KDE.
If someone refers to a new feature as being "in the SVN" it usually means that it is not available yet but that a working version has been created and will probably be available in the next release.
Calendar Handling
| KOrganizer uses so-called iCalendar files to store your data. iCalendar is an open standard for calendar data. In addition to iCalendar KOrganizer also supports the vCalendar standard. |
Both standards are supported by a variety of other calendar programs and also some devices like mobile phones.
KOrganizer is able to directly load the files and work with them in a network-transparent way. This allows you, for example, to have only one calendar, which is accessible from the office and from home without the need for copying or syncing.
Zum Vergrößern anklicken Ein klassischer CD-Player

Funktionen
- Die Buttons zur Linken -
- Nächstes Stück, letztes Stück, Stopp und Auswerfen
- Auf der Anzeige -
- Künster- und AlbumnamenThe artist and album names
- Zeitpunkt des aktuell gespielten Stückes
- Lautstärke
- Auf dem Rad -
- Lautstärkekontrolle, stellt einen Lautstärkedrehschalter nach.
- Unterhalb der Anzeigt -
- Zufallswiedergabe, Schleife, Abspielliste und Lautlos-Schalter
- Die Abspielliste öffnet ein neues Fenster, das alle Stücke mit Nummer, Name und Länge aufzählt.
The KDE SVN is an online archive that stores the source code for KDE. It is possible for anyone to browse the SVN by visiting the web SVN. The name "SVN" comes from the software that the archive uses, which is called Subversion.
The archive contains not only the version of KDE that is under development but also the current stable release and the history of changes to KDE.
If someone refers to a new feature as being "in the SVN" it usually means that it is not available yet but that a working version has been created and will probably be available in the next release.
|
KNotes és l'aplicació de notes adhesives. Es veuen a l'escriptori, fins i tot quan Kontact està tancat |
Característiques
- Escriure notes escollint el tipus de lletra i el color de fons
- Utilitzar arrossega i deixa per enviar-les per correu electrònic
- Es poden arrossegar al calendari per reservar un horari
- Les notes es poden imprimir
El component «Notes» és proporcionat per KNotes.
More Information
|
Start your tasks on time! |
A tiny application with a single purpose -
- Set the in seconds
- Enter the to be run
- Hit the button
- Go back to what you were doing, and wait for the prompt to start the new task.
Click on the thumbnail above to see the details.
See the project pages for contact information
|
KNotes è l'applicazione per note adesive "non adesive". Visualizzale sul tuo desktop anche quando Kontact è chiuso |
Caratteristiche
- Scrivi note con caratteri e colore di sfondo di tua scelta.
- Trascina e rilascia le tue note nelle email.
- Possono essere trascinate nel Calendario per annotare una fascia oraria.
- Le note possono essere stampate.
Il componente Note è fornito da KNotes.
More Information
![]() KDirStat ist ein grafisches Programm zur übersichtlichen Darstellung der Datenträgerverwendung, ähnlich dem Unix "du" (disk usage) Befehl. Zusätzlich enthält es einige Aufräumhilfen, um Speicherplatz freizugeben.
KDirStat ist ein grafisches Programm zur übersichtlichen Darstellung der Datenträgerverwendung, ähnlich dem Unix "du" (disk usage) Befehl. Zusätzlich enthält es einige Aufräumhilfen, um Speicherplatz freizugeben.
KDirStat ist mittlerweile kein KDE Projekt mehr, es wird nun als QDirStat gewartet.
Externe Links
|
KNemo surveille votre connexion Internet en vous donnant des informations en temps réel |
Knemo est hautement configurable, et peut surveiller toutes les connexions que vous avez d'activées.
|
|
|
|
Home » Applications » Multimedia » Kio-audiocd
|
Simple access and conversion tool for audio CDs. |
Features
- Transparent integration of audio CDs with KDE Plasma and KDE applications.
- Transparent data conversion into wav, ogg, mp3, and flac formats.
- Ability to save audio data using user filename templates and CD-TEXT or internet CD database for the titles.
- Own configuration module of System Settings.
Hints, Tips and Troubleshooting
KIO-AudioCD documentation page.
Il KDE SVN è un archivio online che memorizza il codice sorgente per KDE. Chiunque può navigare in SVN visitando web SVN. Il nome "SVN" viene dal programma utilizzato dall'archivio, è chiamato Subversion.
L'archivio contiene non solo la versione di KDE in fase di sviluppo, ma anche l'attuale rilascio stabile e la cronologia delle modifiche a KDE.
Se qualcuno fa riferimento a una nuova funzione come "in SVN", di solito vuol dire che non è ancora disponibile, ma che è stata creata una versione funzionante e che probabilmente diverrà disponibile nel prossimo rilascio.
Proposed for Deletion
Please use the discussion section of this page to voice your opinion on this.No useful content.
| kdesvn is a subversion client for KDE platforms |
It tries to setup a look and feel like the standard filemanager on KDE workspaces and is integrated into it via KPart.
Links
|
Kile ist ein benutzerfreundlicher TeX/LaTeX-Editor |
Die Funktionen umfassen
- Auto-Vervollständigung von (La)TeX Befehlen
- Vorlagen und Assintenten
- Einfaches Einfügen von Standard-Tags
- Benutzerdefinierte Tags
- Einfaches Einfügen von Zitaten und Referenzen
- Kompilieren, konvertieren und betrachten Sie Ihr Dokument mit einem Klick
und viele weitere Funktionen.
|
|
Si vous êtes utilisateur de Kopete et que vous vous demandez où trouver de la documentation plus détaillée, vous pouvez alors consulter la documentation de KDE. N'hésitez pas pour vous rendre également sur le canal IRC de Kopete.
Si vous trouvez un bogue dans Kopete, veuillez ouvrir et de le signaler aux développeurs de KDE.
- ← Retour vers l'index
- Claus chr/DPL/Test
|
KNemo überwacht ihre Internet-Verbindung und gibt ihnen Echtzeit Informationen |
KNemo kann umfangreich konfiguriert werden und überwacht alle ihre aktiven Verbindungen.
|
|
|
|
Obtener Kopete

Por supuesto, debes conseguir Kopete antes de poder trabajar con él. Si usas un Sistema GNU/Linux hay muchas posibilidades de que Kopete ya esté instalado (si ya tienes instalado KDE Software Compilation) o estará en alguno de los repositorios de tu distribución.
Ahora instala Kopete e inícialo por primera vez.
- ← Volver al índice
- Claus chr/DPL/Test
- Página 3 - Crea tu cuenta Jabber →
Build A Slackware Package
The method used by the Slackware distribution itself to build packages is to use scripts called SlackBuilds which compile and build a Slackware .tgz/txz package. Additional scripts to those provided by the Official Slackware source tree are available from a free repository at SlackBuilds.org and you can find a current script for Konversation on the same site.
SlackBuilds.org provides build instructions for the SlackBuilds it makes available. More support is available in the #slackbuilds channel on Freenode.
|
KNotes es la aplicación de notas adhesivas que no se pegan. Puedes verlas en tu escritorio incluso cuando Kontact esté cerrado |
Características
- Escribe notas con la fuente y el color de fondo que quieras
- Usa arrastrar y soltar para enviar tus notas por e-mail.
- Pueden ser arrastradas al Calendario para reservar un horario
- Puedes imprimir las notas
El componente Notas es proporcionado por KNotes
More Information

Hovedtræk
- Send og modtag beskeder
- Tilføj, flyt og fjern kontakter
- Understøtter venneikoner
- Stealth-funktion
- Buzz-funktion
- Mail-bekendtgørelser
- Send og modtag webcam
- Konferencer
- Filoverførsler
Mangler endnu
- Understøttelse af YahooAddressbook
- Håndtering af "ignorelist"
Funktioner, som måske bliver tilføjet
- Voicechat
- Deling af billeder
- Spil
- Kdenlive/Manual/View Menu/Screen Grab
Screen Grab
Start recording: click the “record” button.
Stop record: click the "record" button again.
Clicking on the configure button brings you to the capture configuration window.
El SVN de KDE es un archivo online que almacena el código fuente de KDE. Cualquier persona puede navegar por el SVN visitando la web SVN. El nombre "SVN" viene del software que utiliza el archivo, que se llama Subversion.
El archivo no solo contiene la versión de KDE que está siendo desarrollada, también la versión estable actual y el historial de cambios de KDE.
Si alguien dice que una nueva característica está "en el SVN" normalmente significa que no está disponible todavía pero se ha creado una versión que funciona y que estará disponible en la próxima liberación.
Håndtering af kalendere
| KOrganizer bruger såkaldte iCalendar-filer til at gemme dine data. iCalendar er en åben standard for kalenderdata. Ud over iCalendar understøtter KOrganizer også vCalendar-standarden. |
Begge standarder understøttes af en mangfoldighed af andre kalenderprogrammer og også af enheder som mobiltelefoner.
KOrganizer kan indlæse filer direkte og arbejde med dem på en netværks-gennemsigtif måde. Dette lader dig for eksempel have en kalender, som er tilgængelig både fra kontoret og hjemmefra uden at skulle kopiere eller synkronisere.
- Kdenlive/Manual/Clip Menu/Duplicate Clip==== Clip Menu — Duplicate Clip ====

This menu item is available from right-clicking a clip in the Project Bin. Duplicate Clip will add another clip in the project bin from the first clip. This can be useful when applying effects to clips, and allowing you to have the same source file with two different sets of applied effects.
|
KImageMapEditor er et program til at lave og modificere HTML imagemaps. |
Hovedpunkter
- Kan indlæse og redigere eksisterende HTML imagemaps.
- Værktøjer til at lave imagemaps: Cirkel, Rektangel og Polygon.
- Kan lave imagemaps til brugerdefinerede billeder (JPEG, PNG eller GIF).
- Kan redigere mærker, kortkoordinater og JavaScript til kort
- Gennemsyn af HTML-kode for kort
Håndbogen findes her.
Come avere Kopete
Naturalmente devi avere Kopete prima di poterlo utilizzare. Su utilizzi un sistema GNU/Linux ci sono ottime possibilità che tu possa trovare Kopete già installato (se hai già installato la KDE Software Compilation) o che sia in uno dei repository della tua distribuzione.
Ora installa Kopete e avvialo per la prima volta.
- ← Ritorna all'indice
- Claus chr/DPL/Test
- Pagina 3 - Crea un tuo account Jabber →
Features
- send/receive messages
- add/move/remove contacts
- Buddy icon support
- Stealth feature
- Buzz feature
- Mail notification
- Sending and receiving webcam
- Conferences
- Filetransfers
Todo's
- YahooAddressbook support
- Ignorelist handling
Features that might be added sometime
- Voicechat
- Picturesharing
- Games
- KDiskFree/bg
KDiskFree
KDiskFree is a simple tool which gives a graphical view the disks available to a system.
* На дисплея ви ще се появат списъци с размера, вида,  оставащата свободна както  и запалнена памет
    * Простата графика  ви дава бърз преглед
    * Позицията на вашите точки за за достъп се виждат ясно
Home » Applications » Education » Kig » Test
Kig Screenshots
 |
Kig exports to several formats: bitmap images, XFig and SVG vector format, LaTeX |
 |
Kig is drawing a sine-curve using locus and calculating functionality. |
 |
A neat pattern |
 |
Another neat pattern |
 |
One of the cool new Conic objects by Maurizio Paolini: the radical line of two conics. Have a look at the list of available macros. |
Possibilità di personalizzazione
KOrganizer fornisce un'ampia possibilità di personalizzazione. Come tutte le applicazioni KDE è tradotto in molte lingue. attualmente più di 50.
Hai bisogno di un organizzatore in cinese, tedesco o francese? Nessun problema, KOrganizer parla la tua lingua.
Ma non si ferma alla lingua. KOrganizer supporta anche la localizzazione dei formati delle date o delle festività specifiche dei paesi. Preferisci iniziare la settimana di domenica piuttosto che di lunedì? Nessun problema, semplicemente cambia l'impostazione.
Åbn en eksisterende Kexi databasefil
Der er to måder at åbne en eksisterende Kexi-databasefil:
|
KNotes é uma aplicação de notas adesivas "não adesivas". Visualize-as em sua área de trabalho mesmo com o Kontact fechado. |
Características
- Faça anotações escolhendo ao seu gosto a fonte e a cor de fundo
- Use arrastar e soltar para enviar suas notas por e-mail
- Podem ser arrastadas para o Calendário para reservar um horário
- As notas podem ser impressas
O componente Notes é fornecido pelo Knotes.
More Information
Características
- Enviar y recibir mensajes
- Añadir, mover y eliminar contactos
- Soporte para iconos de amigo
- Opción de invisibilidad
- Zumbidos
- Notificación de e-mail
- Envío y recepción de webcam
- Conferencias
- Transferencias de archivos
Tareas pendientes
- Compatibilidad con YahooAddressbook
- Gestión de listas de ignorados
Características que quizás se añadan alguna vez
- Chat de voz
- Compartir imágenes
- Juegos
- KDE SVN/ca
El SVN del KDE és un arxiu en línia que emmagatzema el codi font pel KDE. És possible per a qualsevol persona cercar al SVN visitant el web de SVN. El nom «SVN» prové del programari que utilitza l'arxiu, que es diu Subversion.
L'arxiu no només conté la versió del KDE que es troba en desenvolupament, sinó també la versió estable actual i l'historial de canvis al KDE.
Si algú es refereix a una nova característica que està «al SVN» usualment vol dir que encara no està disponible, però que s'ha creat una versió de treball i probablement estarà disponible a la següent versió.
View Menu — Effects
Toggles the display of the Effects Tab
O KDE SVN é um arquivo on-line que armazena o código fonte para o KDE. É possível que qualquer pessoa navegue no SVN visitando o SVN web. O nome "SVN" vem do software usado pelo arquivo, chamado Subversion.
O arquivo contém não apenas a versão do KDE que está em desenvolvimento, mas também a versão estável atual e o histórico de alterações no KDE.
Se alguém se refere a um novo recurso como estando "no SVN", isso normalmente significa que ele ainda não está disponível, mas que uma versão de trabalho foi criada e provavelmente estará disponível no próximo lançamento.
Customizability
KOrganizer provides a wide range of customizability. Like all KDE applications it is translated to a lot of languages, currently more than 50.
You need a Chinese, a German or a French Organizer? No problem, KOrganizer speaks your language.
But it doesn't stop at the language. KOrganizer also supports localisation of date formats or country-specific holidays. Do you prefer to start your week on Sunday rather than Monday? No problem, just switch it.
KAddressBook
Filtri Testo (incluso supporto CSV)
Panoramica
Kexi è in grado di importare dati da diversi formati di file di testo.
File di testo contenenti campi separati da virgole (noti come file CSV o Comma Separated Values) possono essere importati direttamente in nuove tabelle. La maggior parte dei fogli di calcolo e delle applicazioni per database possono importare ed esportare dati in questo formato, rendendolo un formato appropriato per migrare dati testuali tra applicazioni diverse.
Kexi supporta anche altri separatori di campo, come le tabulazioni, e può essere configurato per formati di file testuali anche inusuali.
Delete Clip
This menu item is available from right-click on a clip in the Project Bin or under the Clip Menu when a clip is selected in the Project Bin.
This function removes the clip from the Project Bin and from the timeline if it is being used on the timeline.
You are warned if the clip is in use on the timeline.

Krunner — програма для пошуку і запуску файлів та програм. Нею також можна скористатися для виконання загальніших завдань, зокрема обчислень та перетворення значень у різних одиницях. У більшості систем вікно KRunner можна відкрити натисканням комбінації клавіш Alt+F2.

Настанови
Criando um pacote para Slackware
O método utilizado pela distribuição Slackware para criar pacotes é usar os scripts chamados de SlackBuilds que compila e cria um pacote Slackware .tgz / txz. Scripts adicionais separados a árvore oficial do Slackware fonte estão disponíveis a partir de um repositório em [SlackBuilds.org http://slackbuilds.org/] e você poderá encontrar o atual script para Konversation no mesmo local.
SlackBuilds.org fornece instruções de construção para deixar os SlackBuilds disponível. Um suporte maior é possível no canal #slackbuilds na rede Freenode.
 |
Create complex formulae for embedding into your documents |
Some features:
- Easy Greek letter insertion
- Intelligent cursor movement
- Advanced syntax highlighting
- Multi-level undo support
- LaTeX export (copy and paste into a text editor)
- MathML import
 |
 |
Hints, Tips and Tutorials
The pages in the translation containing a category statement (L-Z):
- Plan/Manual/1/Definitions
- Tips/Take screenshots faster with Spectacle by using shortcuts
- Showcase/Tutorials
Proposed for Deletion
Please use the discussion section of this page to voice your opinion on this.Empty page.
Proposed for Deletion
Please use the discussion section of this page to voice your opinion on this.Empty page.
Proposed for Deletion
Please use the discussion section of this page to voice your opinion on this.Empty page.
Placeholder
Proposed for Deletion
Please use the discussion section of this page to voice your opinion on this.Empty page.
Placeholder
Proposed for Deletion
Please use the discussion section of this page to voice your opinion on this.Empty page.
Placeholder
Proposed for Deletion
Please use the discussion section of this page to voice your opinion on this.Empty page.
Placeholder
Note
Create New Project
- Macaw-Movies
- Projects/Usability/HIG/Layout
- LabPlot/2DPlotting/Histogram
- Toolbox/Subpage DemoThis page is purely to demonstrate the use of the Subpages templates described on Toolbox
- Plan/Manual/Menus and Tool bars
- LabPlot/Cursor tool
- LabPlot/CursorTool
- LabPlot/Statistics
- LabPlot/DataAnalysis/Smoothing
- Plan/Manual/Cost Breakdown View
Under Construction
Cost Breakdown View
Under Construction
Work Package View
Under Construction
Configure Plan Dialog
Note
Shared Resources is created in a separate file and then referenced when you create a new project.
Under Construction
Task Progress Dialog
Under Construction
Define Currency Dialog
Information
Remember that if you ask questions on the Discussion page others may benefit from it.
Under Construction
Project Settings Dialog
TODO
Under Construction
Task Settings Dialog
Under Construction
Summary Task Settings Dialog
Under Construction
Edit Work Intervals Dialog
Under Construction
Define Estimate Conversions Dialog
Under Construction
Resource Settings Dialog
Under Construction
Insert File Dialog
Information
Remember that if you ask questions on the Discussion page others may benefit from it.
The instructions for compiling Tellico have moved to TechBase.
Under Construction
Define WBS Pattern Dialog
Instruktionerne i at kompilere Tellico er flyttet til TechBase.
Instrukcja kompilacji Tellico została przeniesiona do TechBase.
Le istruzioni per compilare Tellico sono state spostate su TechBase.
- Userbase Technical IssuesThis page is where you are supposed to discuss technical issues concerning UserBase. There are currently some issues being discussed or solved at Talk:Userbase_Technical_Issues.
- Plan/1/Manual
- Tellico/Compiling/fr
Les instructions pour compiler Tellico ont été déplacées sur TechBase.
As instruções para compilação do Tellico foram movidas para o TechBase.
دستور عملی برای کامپایل کردن Tellico دارد moved to TechBase.
The instructions for compiling Tellico have moved to TechBase.
Настанови щодо збирання Tellico було перенесено на TechBase.
Information
 |
Semantik 透過心智圖的使用來製作複雜的文檔。 |
多功能外设
Samsung scx-4500W 激光打印机/扫描仪
据说是不支持,阅读Samsung_scx-4500W了解如何在 Fedora 10 中使用。
多功能外設
Samsung scx-4500W 激光列印機/掃描儀
據說是不支援,閱讀Samsung_scx-4500W了解如何在 Fedora 10 中使用。
Rekonqmanualen: Indeks
Introduktion
Brugerflade
Tips og tricks
|
Semantik 通过思维导图的使用来制作复杂的文档。 |
The Rekonq Manual index
Introduction
User Interface
Tip / Tricks
Periféricos tudo em um
Impressora laser/scanner Samsung SCX-4500W
Supostamente incompatível, leia como foi usado no Fedora 10 em Samsung_scx-4500W
|
Semantik is a tool for making complicated documents through the use of mindmaps. |
Periferiche All-in-one
Stampante/scanner laser Samsung scx-4500W
Apparentemente non supportata, leggi come è stata utilizzata in Fedora 10 su Samsung_scx-4500W
|
Semantik er et værktøj til at lave komplicerede dokumenter ved hjælp af mindmaps. |
|
Semantik ist ein Werkzeug um komplizierte Dokumente mithilfe von Mindmaps zu erstellen. |
- Semantik/ko
- Parley/FileFormatsParley can open files in .kvtml format (version 1 and 2) and text files (csv). It normally writes the vocabulary collections in .kvtml 2 format and can export to text format (csv).
The .dtd for kvtml 2 can be found here: http://edu.kde.org/kvtml/kvtml2.dtd
Periféricos All-in-one (todo en uno)
Impresora láser / escáner Samsung scx-4500W
Aunque supuestamente no es compatible, lee como se usó con Fedora 10 en Samsung_scx-4500W
Périphériques tout-en-un
Samsung scx-4500W Imprimante laser/scanner
Soit-disant non pris en charge, lisez comment il a été utilisé dans Fedora 10 sur Samsung_scx-4500W
 |
Plasmate bruges til at lave tilføjelser så som widgets, DataEngines og Runners (plugins til søgning) til Plasma-programmer og arbejdsflader |
|
Semantik הוא כלי לכתיבת מסמכים מסובכים דרך מיפוי המוח. |
All-in-one-apparaten
Samsung scx-4500W Laser printer/scanner
Vermoedelijk niet ondersteund. Lees hoe dit apparaat te gebruiken was in Fedora 10 op de pagina Samsung_scx-4500W.
Perifèrics tot en un (all-in-on)
Impressora làser/escàner Samsung scx-4500W
Encara que suposadament no és compatible, llegiu com es va usar amb Fedora 10 a Samsung_scx-4500W.
|
Semantik és una eina per a crear complicats documents mitjançant l'ús de mapes mentals. |
Multifunktionsenheder
Samsung scx-4500W Laser printer/scanner
Selvom Samsung_scx-4500W angiveligt ikke understøttes, så kan du her læse om, hvordan den blev anvendt med Fedora 10
|
Semantik è uno strumento per creare documenti complessi tramite l'utilizzo di mappe mentali. |
|
Semantik es una herramienta para crear documentos complicados mediante el uso de mapas mentales. |
|
Semantik é uma ferramenta para criar documentos complexos por meio do uso de mapas mentais. |
Indice del manuale di Rekonq
Introduzione
Interfaccia utente
Consigli/trucchi
Domande frequenti, consigli e trucchi
Índice del manual de Rekonq
Introducción
Interfaz del usuario
Consejo / Trucos
Preguntas frecuentes, consejos y trucos
Periperal All-in-one
Samsung scx-4500W Laser printer/scanner
Biasanya tidak didukung, namun silakan baca di Samsung_scx-4500W bagaimana alat ini digunakan di Fedora 10
Periféricos "All-in-one" (tudo em um)
Impressora laser/scanner Samsung SCX-4500W
Supostamente incompatível, leia como foi usado no Fedora 10 em Samsung_scx-4500W
Ikoner

Indstil ikon-temaet Emotikoner

Indstil emotikon-temaet
All-in-one Peripherals
Samsung scx-4500W Laser printer/scanner
Supposedly unsupported, read how it was used in Fedora 10 at Samsung_scx-4500W
Icon Theme
Configure the icon theme Emoticon Theme
Configure the emoticon theme
Note
The Plan How to
|
Semantik est un outil pour créer des documents compliqués grâce à l'utilisations de cartes heuristiques. |
|
Sematik, zihin haritası yönteminden yararlanarak karmaşık yapıda belge üretimi için kullanılan bir araçtır. |
All-in-one Peripherals
Dä Läjserdröcker un ßkänner Samsung scx-4500W
Dä weet wall nit ongershtöz. Mer kann op dä Sigg Samsung_scx-4500W nohlässe, wi dä en Fedora 10 enjesaz wood.
- LabPlot/ImportExport/ImportFromFiles
- System Settings/Global Policy Configurations{|class="tablecenter vertical-centered"

|Global Policy Configurations |}
Tema di icone
Configura il tema di icone Tema di faccine
Configura il tema di faccine
|
Plasmate is used to create add-ons such as widgets, DataEngines and Runners (search plugins) for Plasma applications and workspaces |
|
Plasmate wordt gebruikt om add-ons, zoals widgets te maken, DataEngines en Runners (zoekplug-ins) voor Plasma-toepassingen en werkruimten |
Information
The PlanWork Handbook
Introduction
| Next | |
| Introducing PlanWork |
- System Settings/Permissions{|class="tablecenter vertical-centered"

|Setting permissions for the K3b disc burning application |}
Fonts

Configure the font used by your system. Font Management

Manage the fonts installed on your computer.
|
Plasmate wird verwendet, um Erweiterungen wie Widgets, DataEngines und Runners (Suchplugins) für Plasma Programme und Arbeitsbereiche zu erstellen. |
Icônes du thème
Configurer les icônes du thème Emoticones du thème
Configurer les émoticones du thème
|
Plasmate 用來創建 Plasma 程式和工作空間的附加組件,例如元件、數據引擎(DataEngines)和 Runners(KRunner 搜索外掛)。 |
|
Plasmate s'utilitza per crear components tals com estris, DataEngines i Runners (cerca complements) per a les aplicacions i espais de treball Plasma. |
This is a module to configure global options for the Plasma™ workspace.

More information
 |
Configure authorizations for various system actions |
Applications to make your life easier
Viewing documents
When you need a Command Line Interface
What are the differences between those two files?
|
Plasmate jest używane do tworzenia dodatków takich jak widgety, DataEngines oraz Runners (wtyczki wyszukiwania) dla aplikacji i przestrzeni roboczej Plasmy. |
|
Semantik is a tool for making complicated documents through the use of mindmaps. |
|
Plasmate se utiliza para crear componentes como widgets, DataEngines y Runners (complementos de búsqueda) para las aplicaciones de Plasma y sus espacios de trabajo. |
|
Plasmate 的功能是创建 Plasma 程序和工作空间的附加组件,例如部件、数据引擎(DataEngines)和运行工具(KRunner 搜索插件)等 |
|
Plasmate se utilizează pentru a crea suplimente cum ar fi widget-uri, DataEngines și Runners (pluginuri de căutare) pentru aplicații și spații de lucru Plasma |
The Rekonq Manual index
Introduction
User Interface
Tip / Tricks
|
O Plasmate é usado para criar add-ons, tais como widgets, DataEngines e Runners (plug-ins de pesquisa) para os aplicativos e espaços de trabalho do Plasma |
Універсальні пристрої
Лазерний принтер/сканер Samsung scx-4500W
Ймовірно, не підтримується, більше про використання у Fedora 10 на сторінці Samsung_scx-4500W
|
Plasmate è utilizzato per creare componenti aggiuntivi come oggetti, motori di dati ed esecutori (plugin di ricerca) per le applicazioni e gli ambienti di lavoro Plasma. |
Caratteri
Configura il carattere usato dal tuo sistema. Gestione dei caratteri
Gestisci i caratteri installati sul tuo computer.
|
Plasmate est utilisé pour créer des composants comme les widgets, moteurs de données et Runners (plugins de recherche) pour les applications Plasma et les espaces de travail |

These settings let you configure that visual feedback you get when starting an app.
More Information
Dette er et modul til at angive globale indstillinger af Plasma-arbejdsområdet.
Mere information
Polices (fontes)
Configurer la police utilisée par votre système. Gestion des polices
Gérez les polices installées sur votre ordinateur.
Des applications pour vous faciliter la vie
Visionner des documents
Si vous avez besoin d'une interface en ligne de commande
Quelles sont les différences entre deux fichiers ?
Device Actions

Configure which actions are available when a new device is connected to your machine. Removable Devices

Configure automatic handling of removable storage media. I dette modul kan du vælge en stil til knapper og rammer om vinduer.
Systemindstillinger vinduesdekorationer Mere information
Skrifttyper
Indstil skrifttyperne, som bruges i dit system. Håndtering af skrifttyper
Håndtér de skrifttyper, der er installeret på din computer.
Карта пам’яті Semantik. Semantik — програма для створення складних документів за створеними користувачами картами пам’яті. - Simon/Back endsSimon supports both CMU SPHINX and a combination of HTK and Julius.
They provide similar functionality but have different strengths and weaknesses.
While converters do exist, in general, speech models (and base models) can not be transferred between the two systems.
Plasma lets you configure a spell checker that works with all application using Sonnet.
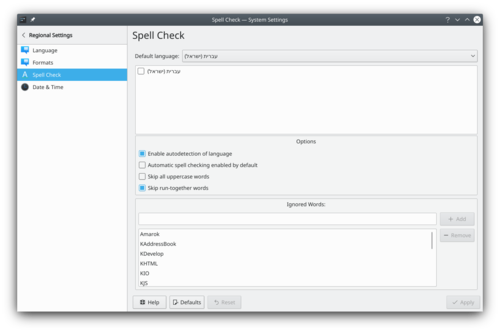
More Information
Under Construction
This is a new page, currently under construction!Task Dependency Editor (List)
It can be activated using the View Selector context menu.
This module allows you to select a style for the buttons and borders around windows.
System settings windows decoration Plus d'information
Enhedshandlinger
Indstil hvilke handlinger der skal tilbydes, når en ny enhed forbindes til din maskine. Flytbare enheder
Indstil automatisk håndtering af flytbare lagringsmedier. Add actions that are triggered by swiping from the screen edge towards the center of the screen.
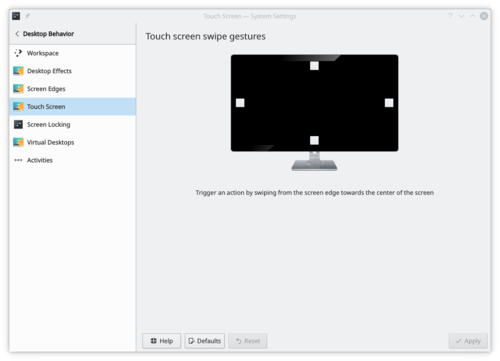
Touch Screen settings More information
- Martin Flöser blog article about this module.
- System Settings/Launch Feedback/da
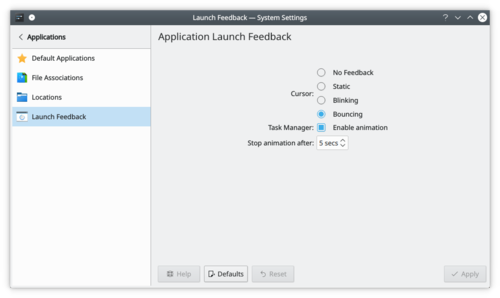
Opstartsfeedbach for programmer Disse indstillinger lader dig indstille den visuelle feedback du får, når du starter et program.
Mere information
- KDE official documentation
- System Settings/Information Sources{|class="tablecenter vertical-centered"
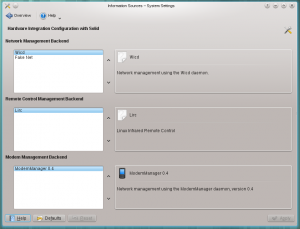
Integrating hardware with your workspace
This configuration dialog is used to manage the backends used by Solid to retrieve information from and handle hardware.
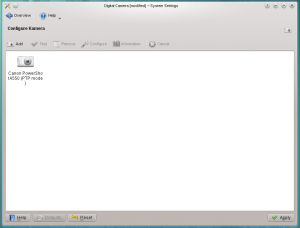
Configure your digital cameras In this settings module you can configure your digital camera. See the Handbook for more.
This setting module lets you configure KRunner.
You can activate or disable plugins and also access if available the plugin configuration.
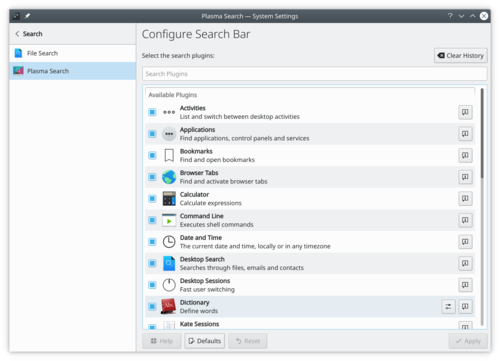
More Information
- Read about all functionalities of Krunner in userbase.
- Plasmate/uk

Plasmate Plasmate призначено для створення додатків до програм та робочих середовищ Плазми, зокрема віджетів, рушіїв даних та інструментів запуску (додатків пошуку). Raptor 菜单是KDE4的一个程序启动器,由Nuno Pinheiro设计开发.完全与传统开始菜单不同的激进的改进,以高效率和整洁为设计目标,所以悲剧到KDE4.3.0发布的时候还没做好(囧...),详细访问Raptor主页.
编者按:
开发停滞,悲剧中。
命令行界面
查看文件差异
Tilføj handlinger, som bliver udløst ved at swipe fra en skærmkant mod midten af skærmen.
Indstilling af Touchskærm Mere information
- Martin Flöser blog article about this module.
- System Settings/Workspace
This is a module to configure global options for the Plasma™ workspace.
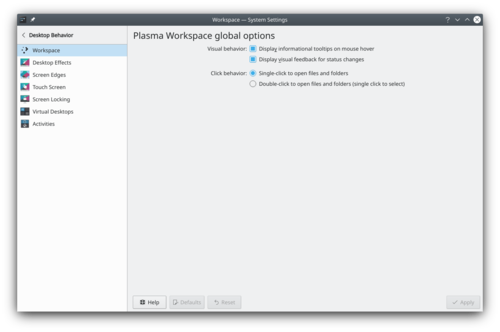
Workspace settings More information
Plasma lader dig indstille et system til stavekontrol, som virker med alle de programmer, som bruger Sonnet.
Mere information
Applications to make your life easier
Viewing documents
When you need a Command Line Interface
What are the differences between those two files?
Raptor 選單是 KDE 4 的一個程式啟動器,由Nuno Pinheiro設計開發。完全與傳統開始選單不同的激進的改進,以高效率和整潔為設計目標,所以悲劇到KDE4.3.0發布的時候還沒做好(囧...),詳細訪問Raptor 選單首頁。
編者按:
開發停滯,悲劇中
Тема піктограм
Налаштовування теми піктограм. Тема емоційок
Налаштовування теми емоційок.
KDE Wallet

Here you will find settings for KWalletManager, the application that manages your passwords and controls which applications gets access to them. User Manager

Add, remove or edit users on your computer.
KDE Wallet
Here you will find settings for KWalletManager, the application that manages your passwords and controls which applications gets access to them. User Manager
Add, remove or edit users on your computer.
KDE Wallet
Here you will find settings for KWalletManager, the application that manages your passwords and controls which applications gets access to them. User Manager
Add, remove or edit users on your computer.
KDE Wallet
Here you will find settings for KWalletManager, the application that manages your passwords and controls which applications gets access to them. User Manager
Add, remove or edit users on your computer.
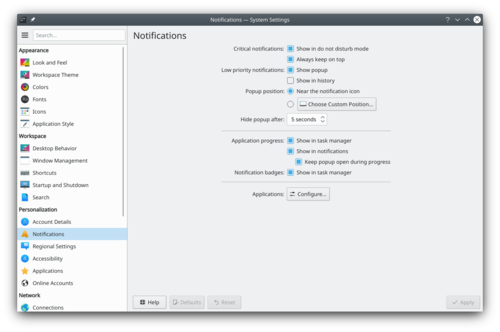
Some applications and subsystems of your workspace can notify you about various events. Here you can specify which events you wish to be notified about, and how you want to be notified.
More Information
Azioni del dispositivo
Configura quali azioni sono disponibili quando un nuovo dispositivo viene connesso al computer. Dispositivi rimovibili
Configura la gestione automatica dei supporti di archiviazione rimovibili. Proposed for Deletion
This page has been proposed for deletion for the following reason:
Please use the discussion section of this page to voice your opinion on this.Nothing here.
Plasmate Plasmate is used to create add-ons such as widgets, DataEngines and Runners (search plugins) for Plasma applications and workspaces Actions des périphériques
Configurez les actions disponibles lorsqu'un nouvel appareil est connecté à votre machine. Périphériques amovibles
Configurez automatiquement la gestion des supports de stockage amovibles. Raptor menu is an application launcher for KDE 4 designed by Nuno Pinheiro. It is a radical departure from the traditional start menu, designed to be both efficient and uncluttered. More information can be found at the Raptor menu homepage.
編集者向けの注記:
Development appears to have stalled without reaching release.
Il s'agit d'un module permettant de configurer les options globales pour l'espace de travail Plasma™.
Paramètres de l'espace de travail Plus d'informations
KDE Wallet
Here you will find settings for KWalletManager, the application that manages your passwords and controls which applications gets access to them. User Manager
Add, remove or edit users on your computer.
Dette indstillingsmodul lader dig indstille KRunner.
Du kan aktivere og deaktivere plugins her og også tilgå indstillingerne for de plugins, som kan indstilles.
Mere information
- Læs om alle Krunners funktioner på userbase.
- System Settings/Account Details/it
KDE Wallet
Here you will find settings for KWalletManager, the application that manages your passwords and controls which applications gets access to them. User Manager
Add, remove or edit users on your computer.
Raptor menuen er en start menu til KDE 4 designet af Nuno Pinheiro. Det er en radikal ny retning for startmenuer, desigenet til at være både effektiv og overskuelig. Mere information kan findes på Raptor menuens hjemmeside.
Redaktørens bemærkning:
Udviklingen synes at være gået i stå før en færdig version er blevet klar.
KDE Wallet
Here you will find settings for KWalletManager, the application that manages your passwords and controls which applications gets access to them. User Manager
Add, remove or edit users on your computer.
Under Construction
This is a new page, currently under construction!Context Help
Many functions and views have help and hints that can be displayed with the What's This function. You can activate it with the menu entry or keyboard shortcut Shift+F1.
In dialogs it is activated by pressing the
?in the dialogs title bar.O menu Raptor é um lançador de aplicativos para o KDE 4 desenhado por Nuno Pinheiro. É uma mudança radical do menu inicial tradicional, projetado para ser eficiente e organizado. Mais informações podem ser encontradas na página web do menu Raptor.
Nota do editor:
O desenvolvimento parece ter parado sem atingir o lançamento.
當您需要命令列介面時
那兩個檔案有什麼不同?
Kui vaja läheb käsurida
Mille poolest need failid erinevad?
Application Launch Feedback These settings let you configure that visual feedback you get when starting an app.
More Information
Покажчик підручника з Rekonq
Вступ
Інтерфейс користувача
Підказки і настанови
Поширені питання, підказки і настанови
Nogle programmer og delsystemer af din arbejdsflade kan informere dig om forskellige hændelser. Her kan du angive hvilke begivenheder du ønsker at blive informeret om og hvordan du vil informeres.
Mere information
This module allows you to select a style for the buttons and borders around windows.
System settings windows decoration More information
KDE Wallet
Her finder du indstillingrne til KWalletManager, programmet som håndterer dine adgangskoder og kontrollerer hvilke programmer, som kan få adgang til dem. Brugerhåndtering
Tilføj, fjern og redigér brugere på din computer
Témoin de démarrage des applications Ces paramètres vous permettent de configurer le retour visuel que vous obtenez lors du démarrage d'une application.
Plus d'information
- Engineering To Order project tutorial is a step-by-step walk-through setting up and executing a project.
- Engineering To Order project tutorial: Planning
- Engineering To Order project tutorial: Executing and Controlling
- System Settings/Spell Check
Plasma lets you configure a spell checker that works with all application using Sonnet.
More Information
Når du har brug for en kommandolinje
Hvad er forskellen mellem disse to filer?
Plasma vous permet de configurer un correcteur orthographique qui fonctionne avec toutes les applications utilisant Sonnet.
Plus d'information
- KDE official documentation
- System Settings/Color/it
- Simon/TTS VoicesSimon provides multiple TTS backends. One of them is called "Webservice" and can use any web based TTS Server that returns WAV files. One of those servers is the OpenMARY project.
OpenMARY does include a couple of languages by default (English, German,...). A voice for brazilian portoguese is currently being added. At the moment it can be found on the creators website.
Icon Theme
Configure the icon theme Emoticon Theme
Configure the emoticon theme
KDE Wallet
Here you will find settings for KWalletManager, the application that manages your passwords and controls which applications gets access to them. User Manager
Add, remove or edit users on your computer.
Plasma let you fully customize your workspace theme.
Plasma Theme

Configure the plasma theme. Cursors

Change the look of the mouse cursor. Splash Screen

Change the splash screen.
Cartera del KDE
Aquí trobareu les opcions de configuració per al KWalletManager, l’aplicació que gestiona les vostres contrasenyes i controla quines aplicacions hi accedeixen. Gestor d'usuaris
Afegeix, elimina o edita els usuaris al vostre ordinador.
Add actions that are triggered by swiping from the screen edge towards the center of the screen.
Touch Screen settings More information
- Martin Flöser blog article about this module.
- Tools/cs
Když potřebujete konzolové rozhraní
Jaké jsou rozdíly mezi dvěma soubory?
- Tutorial Aplicando para Solicitar um Projeto é um passo a passo para configurar e executar um projeto.
- Tutorial Aplicando para Solicitar um Projeto: Planejando
- Tutorial Aplicando para Solicitar um Projeto: Executando e Controlando
- Plasmate/ru
Plasmate Plasmate используется для создания дополнений Plasma — виджетов, источников данных Plasma и модулей запуска (поисковых модулей) для приложений и оболочек рабочего стола Plasma. 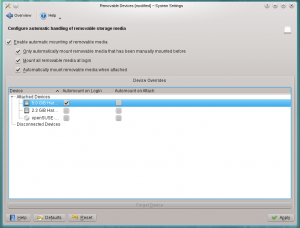
Configure automatic mounting of movable devices
This dialog allows you to configure automatic handling of removable storage media. You can find more information in the Handbook.
Komut Satırı Arayüzüne ihtiyacınız olduğunda
Bu iki dosya arasındaki farklar neler?
Alcune applicazioni o sottosistemi dello spazio di lavoro possono inviare delle notifiche riguardo a vari eventi. Qui puoi specificare su quali eventi vuoi ricevere delle notifiche, e come.
Altre informazioni
Portefeuille de KDE
Ici vous trouverez les paramètres de KWalletManager, l'application qui gère vos mots de passe et contrôle quelles applications peuvent y accéder. Gestionnaire des utilisateurs
Ajouter, supprimer ou modifier des utilisateurs sur votre ordinateur.
Plasma lader dig personliggøre alle aspekter af dit arbejdsområde.
Plasma-tema
Indstil temaet til skrivebordet Markører
Indstil musemarkørens udseende Splashskærm
Skift splashskærm
File Search

Configure how baloo index your filesystem Plasma Search

Configure Krunner, the launcher built into the Plasma desktop.
Before Baloo, Plasma used another file indexer: Nepomuk. If you are interested, you can look at the old Search Desktop page.
Il menu Raptor è un avviatore delle applicazioni per KDE 4 ideato da Nuno Pinheiro. Si tratta di un cambiamento radicale rispetto al tradizionale menu di avvio, è progettato per essere di facile utilizzo e graficamente ordinato. È possibile trovare maggiori informazioni sul sito di Raptor.
Nota del redattore:
Lo sviluppo appare in fase di stallo senza il raggiungimento di un rilascio.
Ajoutez des actions déclenchées en faisant glisser votre doigt depuis le bord de l'écran vers le centre de l'écran.
Paramètres de l'écran tactile Plus d'information
- Article du blog de Martin Flöser à propos de ce module.
- Rekonq/Manual/Introduction/zh-cn
介绍 Rekonq
最初基于 qtwebkit (目前基于 kdewebkit), rekonq 是一个使用 WebKit 渲染引擎 和各种 KDE 技术的轻量级浏览器,与 KDE 桌面无缝整合。其名字引用了基于 khtml 的KDE 默认浏览器Konqueror。
在Chakra中,rekonq已经取代了Konqueror成为默认浏览器,更多的发行版正在考虑相同的动作。当前的稳定版本是rekonq 1.0 (2012年7月)。
Le menu Raptor est un lanceur d'applications pour KDE 4 conçu par Nuno Pinheiro. C'est un changement radical par rapport au menu démarrer traditionnel, conçu pour être à la fois efficace et épuré. Plus d'informations peuvent être trouvées sur la page d'accueil du menu Raptor.
Note du rédacteur :
Le développement semble être au point mort et ne pas avoir atteint la publication.
Kiedy potrzebujesz interfejsu linii poleceń
Jakie są różnice między tymi dwoma plikami?
This setting module lets you configure KRunner.
You can activate or disable plugins and also access if available the plugin configuration.
More Information
- Read about all functionalities of Krunner in userbase.
- Tools/ca
Quan necessiteu una interfície per a la línia d'ordres
Quines són les diferències entre dos fitxers?
- Vejledning til et Engineering To Order-projek er en skridt-for-skridt gennemgang af opsætning og udførelse af et projekt.
- Vejledning til et Engineering To Order-projek: Planlægning
- Vejledning til et Engineering To Order-projek: Udførelse og kontrol
- Tools/it
Quando hai bisogno di un'interfaccia a riga di comando
Quali sono le differenze tra quei due file?
Cuando necesites una interfaz de línea de comandos
¿Cuáles son las diferencias entre esos dos archivos?
Fonts
Configure the font used by your system. Font Management
Manage the fonts installed on your computer.
Here you will find settings for KWalletManager, the application that manages your passwords and controls which applications get access to them.
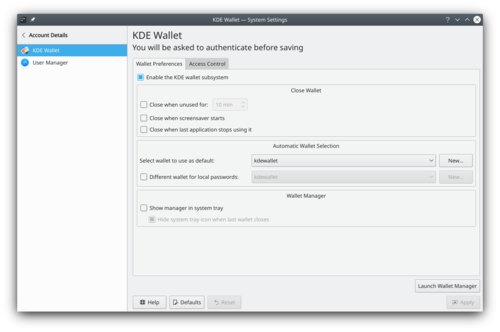
KWallet settings More information
Wenn Sie eine Kommandozeile benötigen
Was sind die Unterschiede zwischen diesen beiden Dateien?
Some applications and subsystems of your workspace can notify you about various events. Here you can specify which events you wish to be notified about, and how you want to be notified.
More Information
- Engineering To Order project tutorial is a step-by-step walk-through setting up and executing a project.
- Engineering To Order project tutorial: Planning
- Engineering To Order project tutorial: Executing and Controlling
- System Settings/Plasma Search/fr
Ce module de configuration vous permet de configurer KRunner.
Vous pouvez activer ou désactiver des plugins et également accéder si disponible à la configuration du plugin.
Plus d'information
- En savoir plus sur toutes les fonctionnalités de Krunner dans userbase.
- Tools/pt-br
Quando você precisa de uma interface de linha de comando
Quais são as diferenças entre estes dois arquivos?
- Kompare
- System Settings/Software Management{|class="tablecenter vertical-centered"
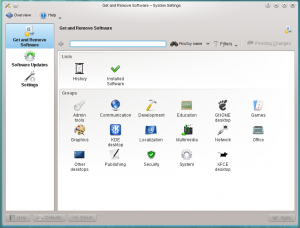
Installing, updating and removing software

Get and Remove Software

Software Updates

Settings
コマンドライン インターフェイスが必要なとき
2つのファイルの違いはなんですか?
Certaines applications et sous-systèmes de votre espace de travail peuvent vous informer de divers événements. Ici, vous pouvez spécifier les événements dont vous souhaitez être informé et comment vous souhaitez être informé.
Plus d'informations
Her finder du indstillingerne til KWalletManager, programmet som lader dig håndtere adgangskoder og kontrollere, hvilke programmer der kan tilgå dem.
KWallet indstillinger Mere information
KDE 4 installationer - Find KDE 4 software
Kan jeg bygge KDE's software fra kildekoden?
Du kan følge guiden i Techbase - Getting Started.
Hvordan bygger jeg KDE's software? Hvor går jeg hen, hvis jeg støder på problemer?
Guider til at bygge KDE kan findes i Techbase - Getting Started. Læs dem og følg dem nøje. Du kan få hjælp på de sædvanlige steder: IRC, postlister og forummer.
Filsøgning
Indstil hvordan Baloo indekserer dit filsystem Plasma-søgning
Indstil KRunner, Plasmas indbyggede programstarter.
Før Baloo kom til bruget Plasma et andet filindekseringsprogram: Nepomuk. Hvis du er interesseret kan du læse om det på den gamle side om Skrivebordssøgning.
Ici vous trouverez les paramètres de KWalletManager, l'application qui gère vos mots de passe et contrôle les applications qui y ont accès.
configuration de KWallet Plus d'information
Proposed for Deletion
This page has been proposed for deletion for the following reason:
Please use the discussion section of this page to voice your opinion on this.Unmaintained. Never released?
Raptor menu is an application launcher for KDE 4 designed by Nuno Pinheiro. It is a radical departure from the traditional start menu, designed to be both efficient and uncluttered. More information can be found at the Raptor menu homepage.Editor's note:
Development appears to have stalled without reaching release.
Цей модуль призначено для налаштовування загальних параметрів робочого простору Плазми.
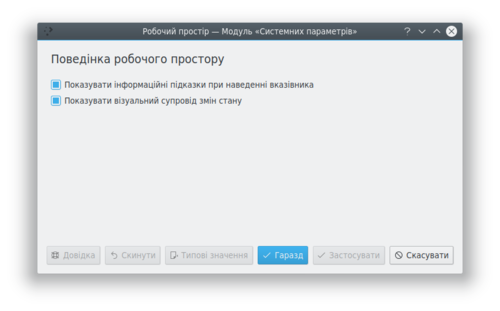
Параметри робочого простору Докладніші відомості
Plasma vous laisse customiser le thème de votre environnement de travail.
Plasma Theme
Configure the plasma theme. Thème du pointeur de la souris
Changer l'apparence du curseur de la souris. Splash Screen
Changer l'écran de démarrage
Шрифти
Налаштовування шрифту, який використовуватиметься в інтерфейсі вашої системи. Керування шрифтами
Керування шрифтами, які встановлено у вашій системі.
KDE 4-installaties - KDE 4-software verkrijgen
Kan ik KDE-software uit broncode maken?
U kunt de handleiding volgen in Techbase - Aan de slag.
How do I build KDE software? Where do I go if I encounter build problems?
Guides to building KDE can be found in Techbase - Getting Started. Please read and follow them very carefully. You can ask questions in the usual support channels such as IRC, mailing lists, or forums.
Device Actions
Configure which actions are available when a new device is connected to your machine. Removable Devices
Configure automatic handling of removable storage media. - Create Structure Definitions a tutorial that creates and installs a structure definition for an imaginary data structure.
- Set up Embedded Viewing of Raw Data for a given File Type, a tutorial that configures the system to show the raw data of files with a certain mimetype in Konqueror, KDevelop and other programs using the KPart system
- System Settings/Launch Feedback/uk
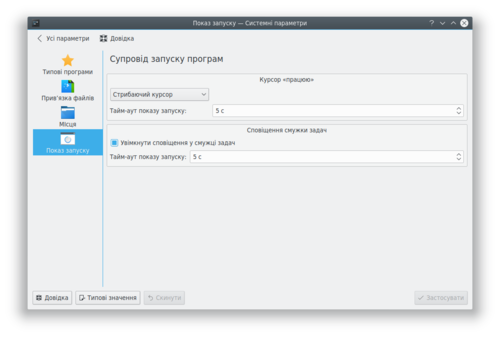
Параметри показу запуску програм За допомогою цього модуля ви зможете налаштувати візуальний супровід запуску програм.
Докладніші відомості
Managing the resources used by different KDE applications
This module is a configuration tool for managing the resources used by different KDE applications. It allows you to add, deleted or modify the resources for alarms, calendar, notes and contacts. You can find more details in the Handbook.
Sprog

Indstil det sprog du vil bruge Formater
Indstil de formater Plasma bruger til at vise valuta, tid, dato osv. Stavekontrol

Tilføj stavekontrol til Plasma Dato og klokkeslæt

Indstil datoen og tiden.
Installazioni KDE 4 - Ottenere il software di KDE 4
Posso compilare il software di KDE dal sorgente?
Puoi seguire la guida presente in Techbase - Per iniziare.
Come compilare il software KDE? Dove vado se ho problemi di compilazione?
Puoi trovare guide alla compilazione di KDE in Techbase - Per iniziare. Leggile e seguile molto attentamente. Puoi fare domande nei consueti canali di supporto come IRC, mailing list o forum.
Language
Configure the language that you want to use. Formats
Configure the format used by Plasma to display currency, time, date, etc. Spell Check
Add spell checking to plasma Date & Time
Configure the date and time.
Recherche de fichier
Configurer comment baloo indexe votre système de fichier. Recherche Plasma
Configurer Krunner, le lanceur intégré dans votre bureau Plasma.
Avant Baloo, Plasma utilisait un autre indexeur de fichiers: Nepomuk. Si vous êtes intéressé, vous pouvez voir l'ancienne page du Bureau de recherche .
- Task Oriented PlanSuggested Home page
- Welcome
- Common Tasks - What fits here - not things that are advanced or rarely met
Definition pages - e.g. how to find versions - not linked from front page, but linked from other pages (eg kde4-config --version, uname, etc.)
- Installing a new application
- Distro
- Other
- From additional repo (eg google or adobe)
- From distro-type binary
- From source?
- Installing a new application
- Installing hardware drivers
- Identifying what driver is needed
- Does the distro have that?
- If not...
- Installing hardware drivers
- Tutorials
- Getting More Help
- Applications
- Plan/Tutorials/fr
- Tutoriel sur la mise en place de la création d'un projet est un parcours étape par étape au travers de la configuration et de l'exécution d'un projet.
- Tutoriel sur la mise en place de la création d'un projet : tableau de bord
- Tutoriel sur la mise en place de la création d'un projet : exécution et supervision
- System Settings/Windows Decorations/uk
За допомогою цього модуля ви можете вибрати стиль кнопок та рамок навколо вікон.

Модуль обрамлення вікон Системних параметрів Додаткові відомості
This section help you configure the theme of your desktop. This change don't apply to application.
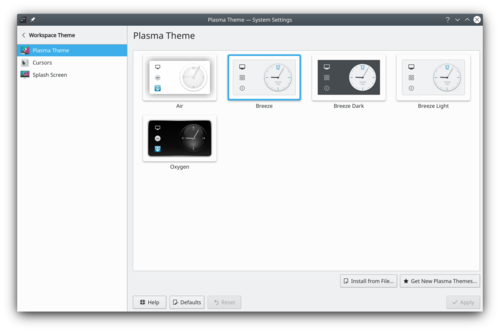
Desktop Theme settings window In the KDE Store, you can find more desktop themes.
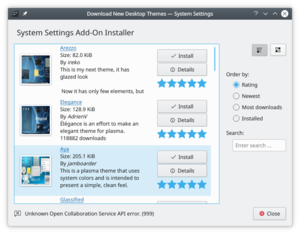
Desktop Theme store More information
- KDE official documentation
- Browse desktop theme on the KDE Store
- System Settings/Online Accounts/en
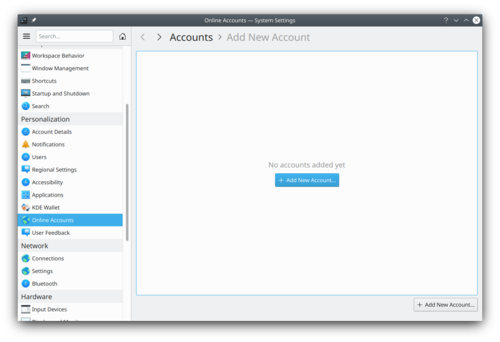
This setting module lets you connect online account with plasma to provide a better integration.
These accounts can be used by Telepathy, a KDE Instant Messaging application (IM).
More Information
- Telepathy (userbase)
- Okteta/Tutorials/da
- Lav strukturdefinitioner en vejledning, som laver og installerer en strukturdefinition for en imaginær datastruktur.
- Opsætning af indlejret visning af de rå data for en given filtype, en vejledning, som konfigurerer systemet til at vise de rå data for filer af en bestemt mimetype i Konqueror, KDevelop og andre programmer, som bruger KPart systemet
- Okteta/Tutorials/zh-cn
- 创建结构定义 是一个创建并安装假想数据结构的教程。
- 设置给定文件类型的原始数据内置视图,一个系统配置教程,通过文件的imetype 使用 Konqueror、KDevelop 或者其他使用KPart系统的程序打开原始数据。
Here you will find settings for KWalletManager, the application that manages your passwords and controls which applications get access to them.
KWallet settings More information
Dette indstillingsmodul lader dig forbinde online konti med Plasma for at opnå en bedre integration.
Disse konti kan bruges af Telepathy, et Instant Messaging-program fra KDE.
Mere information
- Telepathy (userbase)
- Plasma/HowTo/Index/zh-tw
Plasma HowTo
Plasma HowTo
Дії з пристроями
Налаштовування дій, які виконуватимуться після з'єднання нового пристрою з вашим комп'ютером. Портативні пристрої
Налаштовування автоматичної обробки портативних носіїв даних. Instal·lacions de KDE 4: Obtenir el programari de KDE 4
Puc compilar programari KDE des del codi font?
Podeu seguir les instruccions a Techbase: Getting Started.
Com puc compilar programari KDE? On puc anar si em trobo amb problemes de compilació?
Les instruccions per a compilar KDE es troben en Techbase: Getting Started. Si us plau, llegiu-les i seguiu-les amb molta cura. Podeu fer preguntes als canals d'ajuda habituals com IRC, llistes de correu, o fòrums.
Плазма надає вам змогу налаштувати засіб перевірки правопису, який працюватиме в усіх програмах, де використовується Sonnet.
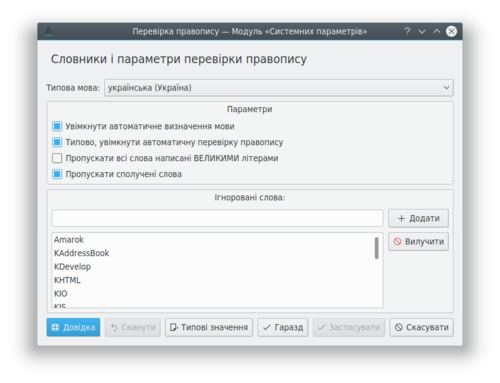
Докладніші відомості
Instalaciones de KDE 4 - Conseguir software de KDE 4
¿Puedo compilar software de KDE desde el código fuente?
Puedes seguir la guía Techbase - Para empezar.
¿Cómo compilo software de KDE? ¿Dónde puedo ir si encuentro problemas con la compilación?
Las guías para compilar KDE se encuentran en Techbase - Para empezar. Por favor léelas y síguelas con mucho cuidado. Puedes hacer preguntas en los canales de ayuda habituales como IRC, listas de correo, o foros.
KDE Wallet
Here you will find settings for KWalletManager, the application that manages your passwords and controls which applications gets access to them. User Manager
Add, remove or edit users on your computer.
In this section you can manage the settings for your mouse trackpad. Settings may vary based on hardware and drivers installed.
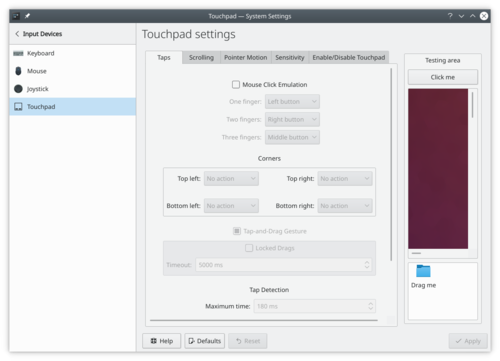
Configure taps 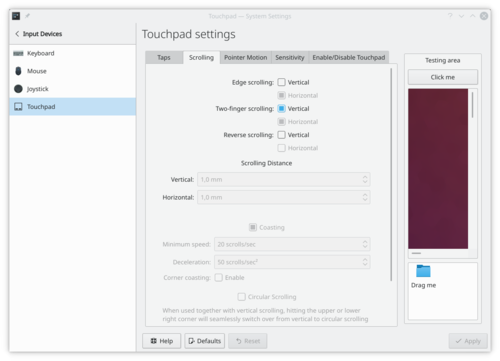
Configure scrolling 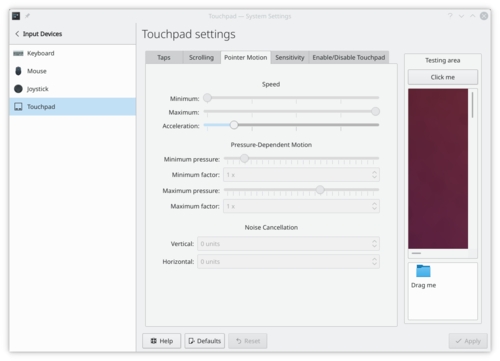
Configure pointer motion 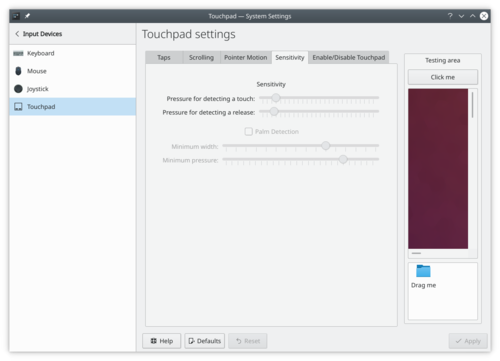
Configure sensitivity 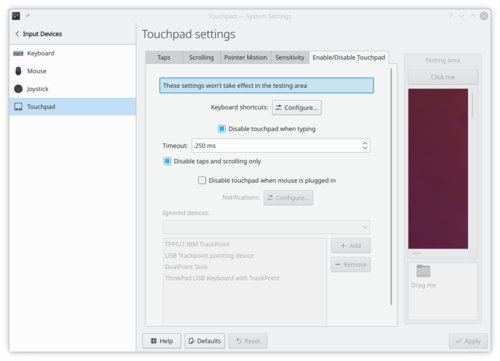
Enable/disable touchpad More Information
Lingua
Configura la lingua che vuoi usare. Formati
Configura il formato utilizzato da Plasma per visualizzare il denaro, l'ora, la data, ecc. Correttore ortografico
Aggiungi il controllo ortograsfico a Plasma Data e ora
Configura la data e l'ora.
Home » Applications » Graphics » Showfoto
Photo Editing Tutorials
Photo KDE Tutorial 1-1: Levels Adjust
Photo KDE Tutorial 1-2: Curves Adjust
Photo KDE Tutorial 1-3: White balance
Photo KDE Tutorial 1-4: Brightness/Contrast/Gamma + Hue/Saturation/Lightness
Photo KDE Tutorial 1-5: Perspective Adjustment
- Create Structure Definitions a tutorial that creates and installs a structure definition for an imaginary data structure.
Set up Embedded Viewing of Raw Data for a given File Type, Tutorial en inglés que configura el sistema para mostrar datos sin procesar de archivos con determinado tipo mime en "Konqueror", "Kdevelop", y otros programas que usan el sistema "Kpart".
This module lets you configure activities. Activities are a way to have multiple plasma setups, with each a different set of widgets and theme. Some activities can be private in this case, they don't track you. For example, don't track that recent document you opened.
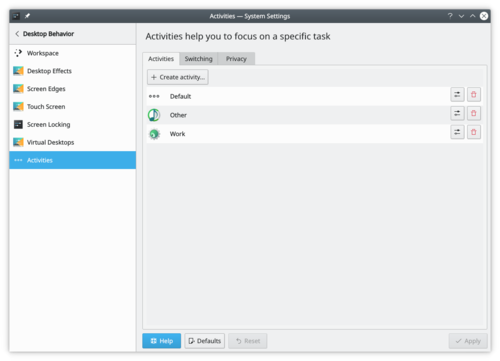
Activities settings More information
Yakuake 是一个基于 KDE Konsole 技术的下拉式终端模拟器。
特性
- 平滑从屏幕顶部下拉滚动
- 多标签界面
- 可设置大小和动画速度
- 支持皮肤
- 成熟的DCOP / D-Bus接口
Yakuake是KDE Extragear的一部分。
问题
快捷键 F12 有时会被桌面搜索程序占用。遇到这种情况,请改成Ctrl+Shift+F12。
Forskellige lande og sprog bruger forskellige formater for tal, tid, valuta og andre enheder.
I Danmark skriver man for eksempel en dato som "d/m yyyy", hvor man i USA bruger formatet "yyyy.mm.dd".
Plasma lader dig indstille præcis hvordan du vil have ting formater vist.
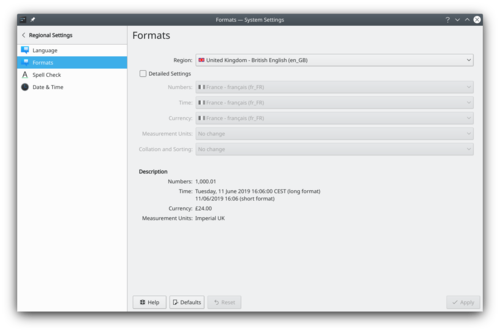
Mere information
LemonPOS: Squeeze, Lemon and login screens LemonPOS is point of sales application targeted for small and mid-size business. It uses MySQL database as backend and can have multiple terminals using the same database. It consists of two part, Lemon and Squeeze. Lemon is used as the actual point of sales while Squeeze is used to administrative tasks like inventory and reports.
More Information
- Create Structure Definitions a tutorial that creates and installs a structure definition for an imaginary data structure.
- Set up Embedded Viewing of Raw Data for a given File Type, a tutorial that configures the system to show the raw data of files with a certain mimetype in Konqueror, KDevelop and other programs using the KPart system
- Software from Source/fr
Installation de KDE 4 - Obtenir KDE 4
Puis compiler KDE à partir des sources ?
Vous pouvez suivre le guide de Techbase - Getting Started.
Comment compiler KDE ? Où dois-je aller si je rencontre un problème de compilation ?
Les guides pour compiler KDE peuvent être trouvé dans Techbase - Getting Started. Veuillez les lire et suivre avec attention. Vous pouvez posez des questions sur les canaux de support habituels tels que IRC, les listes de diffusion, ou les forums.
In this section you can manage the settings for your mouse. On the tab you can configure things like button handedness, and is single or double click opens icon.
On the tab you can change things like how mover cursor responds to physical movement of mouse.
On the tab you can enable moving mouse cursor with keyboard.
More Information
Dette modul lader dig indstille dit skrivebords tema. Indstillingerne her påvirker ikke programmer.
Indstillingsvindue til arbejdsområdets tema Du kan finde flere skrivebordstemaer i KDE Store.
Store til arbejdsområdets tema Mere information
- KDE official documentation
- Søg efter skrivebordstemaer i KDE Store
- Yakuake/zh-tw
Yakuake 是一個基於 KDE Konsole 技術的下拉式終端模擬器。
特性
- 平滑從屏幕頂部下拉滾動
- 多標籤界面
- 可設置大小和動畫速度
- 支持皮膚
- 成熟的 DCOP/D-Bus 介面
Yakuake 是KDE Extragear的一部分。
問題
快捷鍵 F12 有時會被桌面搜索程式占用。要是遇到這種情況,改成 Ctrl+Shift+F12。
Програми для роботи з командним рядком
Програми для встановлення відмінностей між двома файлами
LemonPOS: Squeeze, Lemon og loginskærme LemonPOS er et "point of sale"-program beregnet til små og middelstore forretninger. Den bygger på databasen MySQL og kan have flere terminaler forbundet til den samme database. Den består af to dele, Lemon og Squeeze. Lemon bruges til egentlig ekspedition, mens Squeeze bruges til administrative opgaver som lageropgørelse og rapporter.
Mere information
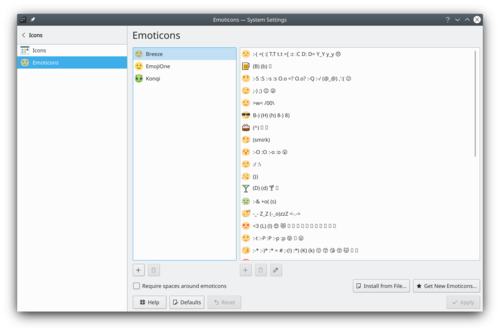
System settings emoticon theme Emoticons can be used in several KDE applications: Kopete, Konversation, KMail... This module offers you to easily manage your emoticons sets.
You can:
- add emoticons themes
- remove emoticons themes
- install an existing theme
- add, remove or edit emoticons within a theme
More information
Модуль для додавання дій, які виконуються у відповідь на проведення пальцем від краю екрана до його центру.
Параметри сенсорного екрана Докладніші відомості
- Допис у блозі Мартіна Фльосера щодо цього модуля.
- System Settings/Touchpad/da
I dette modul kan du håndtere indstillinger af trackpad'en for din mus. Indstillinger kan variere afhængigt af hardware og installerede drivere.
Indstil tryk Indstil rulning Indstil markørbevægelse Indstil følsomhed Aktivér/deaktivér touchpad Mere information
In diesem Abschnitt können Sie das Design Ihres Desktops konfigurieren. Diese Änderung gilt nicht für Anwendungen.
500px|center|Einstellungsfenster des Desktop-Themas
Im KDE Store können Sie weitere Desktop-Themen finden.
300px|center|Desktop Theme Store
Weitere Informationen
- Offizielle KDE-Dokumentation
- Durchsuchen des Desktop-Themas im KDE Store
- LemonPOS/zh-tw
LemonPOS: Squeeze, Lemon 和登入介面 LemonPOS 是銷售時點情報系統(point of sales)程式,目標群是小型和中型商業銷售。它的後台使用了 MySQL 數據庫,可以透過多個終端使用相同的數據庫。它有兩部分組成,Lemon 和 Squeeze.。Lemon 用來作為實際的銷售點,而 Squeeze 用作管理事務像是庫存和報表。
更多信息
*主頁:http://lemonpos.org/
KDE 4 installations - Getting KDE 4 software
Can I build KDE software from source?
You can follow the guide found in Techbase - Getting Started.
How do I build KDE software? Where do I go if I encounter build problems?
Guides to building KDE can be found in Techbase - Getting Started. Please read and follow them very carefully. You can ask questions in the usual support channels such as IRC, mailing lists, or forums.
- Eigene Strukturdefinitionen erstellen eine Anleitung zum Erstellen und Installieren einer Strukturdefinition für eine imaginäre Datenstruktur.
- Eingebette Ansicht für Rohdaten für ein bestimmtes Dateiformat (Englisch!), eine Anleitung zur Systemkonfiguration, um die Rohdaten einer Datei mit einem bestimmten MIME Typ in Konqueror, KDevelop und anderen Programmen durch das Benutzen des KPart Systems anzuzeigen
- LemonPOS/zh-cn
LemonPOS: Squeeze, Lemon 和登录界面 LemonPOS 是款销售时点情报系统(point of sales)程序,目标群是小型和中型的商业销售。它后台使用了 MySQL 数据库,可以通过多个终端使用相同的数据库。它有两部分组成,Lemon 和 Squeeze.。Lemon 用来作为实际的销售点,而 Squeeze 用作管理事务像是库存和报表。
更多信息
Langage
Configurer le langage que vous voulez utiliser. Formats
Configurer le format utilisé par Plasma pour afficher les devise, les heures, les dates, etc. Vérification orthographique
Ajouter un correcteur orthographique pour Plasma. Date et heure
Configurer la date et l'heure.
Not all countries and languages are using the same format to display numbers, time, currency and other units.
For example in France, you would write a date in this "dd/mm/yyyy" format and in the US, you would instead use the "yyyy.mm.dd" format.
Plasma let you configure exactly how you want to read these formats.
More Information
Introduktion til Rekonq
rekonq er en letvægts browser som bruger layout-motoren WebKit og diverse KDE-teknologier, sådan at den gnidningsfrit kan integreres i KDE's arbejdsflade; den blev oprindeligt baseret på qtwebkit og baseres nu på kdewebkit. Navnet refererer til den hæderkronede khtml-baserede Konqueror, som i øjeblikket er KDE's standardbrowser.
rekonq har allerede erstattet Konqueror som standardbrowser i Chakra, og flere distributioner har udtrykt tilsvarende hensigter for kommende udgivelser. Den aktuelle stabile udgave er rekonq 1.0 (juli 2012). Hjem » Programmer » Grafik » Showfoto
Vejledninger i fotoredigering
KDE fotointroduktion 1-1: Niveaujustering
KDE fotointroduktion 1-2 Kurvejustering
KDE fotointroduktion 1-3: Hvidbalance
KDE fotointroduktion 1-4: Lys/Kontrast/Gamma + Farvetone/Mætning/Lys
KDE fotointroduktion 1-5: Perspektivjustering
Yakuake is a drop-down terminal emulator based on KDE's Konsole technology.
Features
- Smoothly rolls down from the top of your screen
- Tabbed interface
- Configurable dimensions and animation speed
- Skinnable
- Sophisticated DCOP / D-Bus interface
Yakuake is part of KDE Extragear.
Problems
The F12 key is sometimes used by a desktop search application. If you meet this, change it to Ctrl+Shift+F12
You may already have noticed that Plasma offers multiple applications to access the web: Konqueror and KRunner (Falkon doesn't have this feature yet). You can add shortcuts so that when typing in KRunner or Konqueror, for example "dd:hello", you open a DuckDuckGo search with the input "hello".
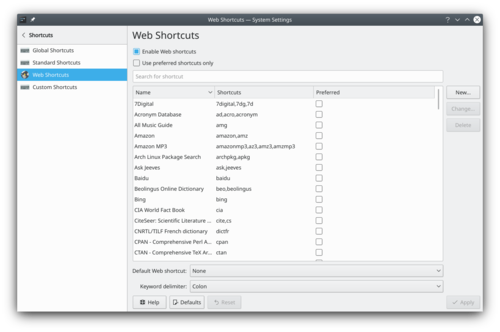
Web Shortcuts settings windows More Information
Introduction to rekonq
Based initially on qtwebkit (and currently or kdewebkit), rekonq is a lightweight browser designed to use the WebKit rendering engine in combination with various KDE technologies, allowing it to integrate seamlessly into the KDE desktop. The name is a reference to the venerable khtml-based Konqueror which is currently the default KDE web browser.
rekonq has already replaced Konqueror as the default browser in Chakra, with more distributions expressing similar intent for their future releases. The current stable release version is rekonq 1.0 (July 2012).
- Plan/Manual/Startup View==Startup View==
The Startup View is shown at startup and when is selected.
It has 3 sections for:
- Creation of new projects. See also Creating a Project and Managing Resources
- Opening existing projects. This section gives you the possibility to open an existing project file or one of the 10 most recent projects you have opened.
- The Help section gives you links to introductory pages, documentation and community forum.
Globale genveje

Indstil tastaturgenvejene. Standardgenveje
Indstil tastaturgenveje for standardhandlinger som find, afslut, fortryd osv. Webgenveje

Indstil genveje til hurtig søgning med Konqueror og KRunner Brugervalgte genveje
Indstil de brugervalgte genveje.
- Plan/Manual/Project Performance View==Project Performance View==
Description
The Project performance view is a project management chart where can be understood the actual situation of the project according to the Earned Value Method.

where:
- BCWS means Budgeted Cost Work Scheduled,
- BCWP means Budgeted Cost Work Performed,
- ACWP means Actual Cost Work Performed.
All these are considered as effort in hours and costs.
PI are the Performance Indexes, where:
- CPI is the Cost Performance Index,
- SPI is the Schedule Performance Index.
I dette modul kan du håndtere indstillingerne til din mus. I fanebladet kan du indstille ting som museknappernes håndethed og om ikoner åbnem med enkelt- eller dobbeltklik.
I fanebladet kan du ændre ting som hvordan musemarkøren reagerer på musens fysiske bevægelse.
I fanebladet kan du aktivere flytning af musemarkøren med tastaturet.
Mere information
Home » Applications » Graphics » Showfoto
Fotoğraf Düzenleme Öğreticileri
Photo KDE Öğretici 1-1: Seviye Ayarlama
Photo KDE Öğreticisi 1-2: Kıvrımları Ayarlama
Photo KDE Öğreticisi 1-3: Beyaz dengesi
Photo KDE Öğreticisi 1-4: Parlaklık/Karşıtlık/Gama + Ton/Doygunluk/Işık
Photo KDE Öğretici 1-5: Perspektif Ayarlama
Yakuake er en drop-ned terminalemulator baseret på KDE's Konsole teknologi.
Hovedpunkter
- Ruller glat ned fra toppen af din skærm
- Brugerflade med faneblade
- Konfigurerbar størrelse og animationshastighed
- Kan gives nyt udseende
- Sofistikeret DCOP / D-Bus interface
Yakuake indgår i KDE Extragear.
Problemer
Tasten F12 bruges undertiden af et skrivebordssøgeprogram. Omdefiner den til Ctrl + Shift + F12
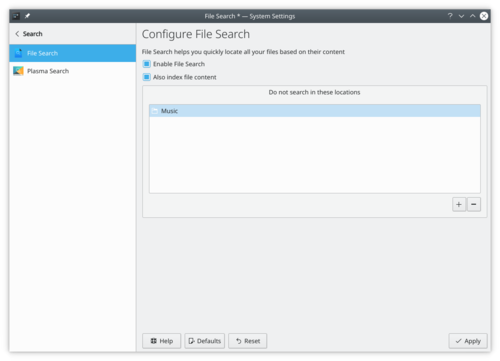
Setting plasma file search Baloo indexes all files and their metadata in your filesystem. This allows for fast search time when needed. And allows other applications like Elisa or Peruse to find your music/comic file faster.
More Information
- KDE official documentation
- Baloo (userbase wiki)
- Baloo (Arch Linux wiki)
- System Settings/Shortcuts/en
Global Shortcuts
Configure the keyboard shortcuts. Standard Shortcuts
Configure the keyboard shortcuts for standard action (e.g. find, quit, undo, ...) Web Shortcuts

Configure the shortcuts to quickly search in Konqueror and KRunner. Custom Shortcuts
Configure the custom shortcuts.
This section help you configure the theme of your desktop. This change don't apply to application.
Desktop Theme settings window In the KDE Store, you can find more desktop themes.
Desktop Theme store More information
- KDE official documentation
- Browse desktop theme on the KDE Store
- System Settings/Splash Screen/en
The splash screen is the small loading screen occurring just after a successful login. The splash screen is displayed during the time, plasma is loading.

Splash Screen Theme settings windows You can choose to remove it by selecting none, it can decrease the startup time.
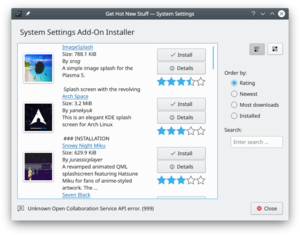
Splash Screen Theme store More information
- KDE official documentation
- Browse splash screen theme on the KDE Store
- Rekonq/Manual/Introduction/it
Introduzione a rekonq
Basato inizialmente su qtwebkit (e attualmente su kdewebkit), rekonq è un browser leggero progettato per utilizzare il motore di visualizzazione WebKit in combinazione con varie tecnologie KDE in modo da integrarsi perfettamente nel desktop KDE. Il nome è un richiamo al venerabile Konqueror basato su khtml che è attualmente il browser web predefinito di KDE.
rekonq ha già sostituito Konqueror, come browser predefinito, in Chakra. Inoltre altre distribuzioni hanno espresso simili intenti per i loro futuri rilasci. L'attuale rilascio stabile è rekonq 1.0 (luglio 2012).
This setting module lets you connect online account with plasma to provide a better integration.
These accounts can be used by Telepathy, a KDE Instant Messaging application (IM).
More Information
- Telepathy (userbase)
- System Settings/Language/en
The language settings, let you configure which language you want to use in Plasma.
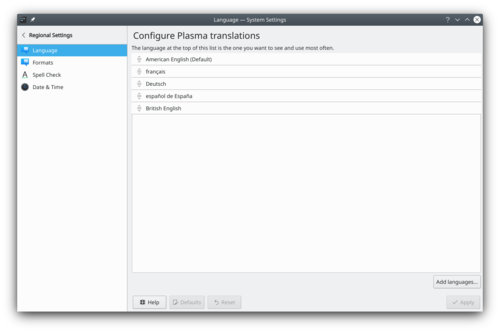
The language at the top is the default language used.
Not all applications are fully translated in all language. If you are fluent in one language, get involved and become a KDE translator.More Information
File Search
Configure how baloo index your filesystem Plasma Search
Configure Krunner, the launcher built into the Plasma desktop.
Before Baloo, Plasma used another file indexer: Nepomuk. If you are interested, you can look at the old Search Desktop page.
Systemindstillinger emotikon tema Emotikoner kan bruges i adskillige KDE-programmer, bl.a. Kopete, Konversation og KMail. Dette modul gør det let for dig at håndtere dine sæt af emotikoner.
Du kan:
- Tilføje emmotikon temaer
- fjerne emotikon temaer
- installere et eksisterende tema
- tilføje, fjerne og redigere emotikoner i et tema
Mere information
LemonPOS: schermate di Squeeze, Lemon e di accesso LemonPOS è un'applicazione punto di vendita (point of sale) mirata alle piccole e medie attività. Utilizza il database MySQL come backend e può avere terminali multipli utilizzando lo stesso database. Consiste di due parti: Lemon e Squeeze. Lemon è utilizzato come vero punto di vendita mentre Squeeze è usato per compiti amministrativi come l'inventario e i resoconti.
Maggiori informazioni
- Pagina principale: http://sourceforge.net/projects/lemonpos/
- LemonPOS/de
LemonPOS: Squeeze, Lemon und Loginbildschirm LemonPOS ist ein Verkaufsstellenprogramm abgestimmt für kleine und mittelgroße Unternehmen. Es verwendet MySQL Datenbank als Backend und kann von mehreren Stellen aus gleichzeitig verwendet werden. Es besteht aus zwei Teilen, Lemon und Squeeze. Lemon wird als Verkaufspunkt verwendet, während Squeeze für administrative Zwecke, wie z. B. Inventar oder Berichte, zuständig ist.
Weitere Informationen
- Homepage: http://sourceforge.net/projects/lemonpos/ (engl.)
- System Settings/Activities
This module lets you configure activities. Activities are a way to have multiple plasma setups, with each a different set of widgets and theme. Some activities can be private in this case, they don't track you. For example, don't track that recent document you opened.
Activities settings More information
Cette section vous aide à configurer le thème de votre bureau. Ce changement ne s'applique pas à l'application.
Fenêtre des paramètres du thème de bureau Dans la boutique KDE, vous pouvez trouver davantage de thèmes de bureau.
Magasin de thèmes de bureau Plus d'information
- KDE official documentation
- Browse desktop theme on the KDE Store
- System Settings/File Search/da
Indstillinger filsøgning Baloo indekserer alle filer og deres metadata i dit filsystem. Dette gør søgetiderne meget hurtigere, og det lader andre programmer som Elisa og Peruse finde din musik/dine tegneserier hurtigere.
Mere information
- KDE official documentation
- Baloo (userbase wiki)
- Baloo (Arch Linux wiki)
- System Settings/Web Shortcuts/da
Du har måske allerede bemærket, at Plasma har flere programmer, som kan forbinde dig til web'et: Konqueror og KRunner (Falkon har endnu ikke denne funktion). Du kan tilføje genveje, sådan at når du for eksempel skriver "dd:hello" i KRunner eller Konqueror, så starter du en DuckDuckGo-søgning på "hello".
Webgenveje indstillingsvindue Mere information
"'LemonPOS: Squeeze, Lemon e telas de login O '"LemonPOS' é um aplicativo de pontos de venda desenhado para pequenas e médias empresas. Ele utiliza o banco de dados MySQL como infraestrutura e pode ter vários terminais usando o mesmo banco de dados. É constituído de duas partes, Lemon" e Squeeze. O Lemon é usado como ponto de vendas de fato, enquanto o Squeeze é usado para tarefas administrativas, como inventários e relatórios.
Mais Informações
- Página Web: http://sourceforge.net/projects/lemonpos/
- Raptor/ru
Raptor — это меню запуска приложений для KDE 4, разработанное Nuno Pinheiro. Оно существенно отличается от традиционного меню запуска и нацелено на эффективность и лаконичность. Полную информацию можно найти на сайте меню Raptor.
Примечание редактора:
Разработка остановилась, ни одной официальной версии пока не было выпущено.
- Creare definizioni della struttura, una guida per creare e installare una definizione di struttura per una struttura immaginaria di dati.
- Imposta la visualizzazione integrata di dati grezzi per un certo tipo di file, una guida per configurare il sistema per mostrare i dati grezzi dei file con un certo tipo di file in Konqueror, KDevelop e altri programmi che utilizzando il sistema KPart.
- Stats== Top 10 contributors of the last week ==
Last 7 days (Top 10)
Rank Score Pages Changes Username 1 91 87 91 Realsixtyeighter (talk | contribs) 2 28 20 36 Claus chr (talk | contribs) 3 25 23 24 Kokaia (talk | contribs) 4 13 13 13 Alem (talk | contribs) 5 1 1 1 Brithnoth (talk | contribs) Top 20 contributors of last 10 years
Last 3,700 days (Top 20)
Rank Score Pages Changes Username 1 27,282 27,013 45,134 FuzzyBot (talk | contribs) 2 9,561 9,372 18,325 Yurchor (talk | contribs) 3 9,313 9,130 17,503 Claus chr (talk | contribs) 4 4,561 4,411 10,058 ChristianW (talk | contribs) 5 2,798 2,710 4,661 Ognarb (talk | contribs) 6 2,431 2,336 4,593 Ikoch (talk | contribs) 7 1,777 1,702 3,109 Abella (talk | contribs) 8 1,440 1,346 3,548 Smolyaninov (talk | contribs) 9 1,267 1,217 1,835 Dduca (talk | contribs) 10 1,054 991 1,994 Sauler (talk | contribs) 11 692 642 1,277 Ezequias Santos (talk | contribs) 12 627 590 935 Pzamponi (talk | contribs) 13 545 507 870 Joysriramsarkar (talk | contribs) 14 501 484 554 Junghee (talk | contribs) 15 475 433 874 GregKoval (talk | contribs) 16 466 420 957 Vgezer (talk | contribs) 17 432 400 657 André Marcelo Alvarenga (talk | contribs) 18 394 355 735 Dadu042 (talk | contribs) 19 358 324 607 S8321414 (talk | contribs) 20 345 317 518 Fredtantini (talk | contribs) Graphs
Edits over the past 4 days:
Daily Edits, for the past month:
Daily Edits, for the last 3 months:
Active translators:
New registrations, by month, over 1 year:
Widget Style

Widgets are the interface elements such as buttons, scroll bars, tabs and so on. Here you can choose and configure the widget style used for all KDE applications. You can also fine tune widget behaviour. Windows Decorations

This module allows you to select a style for the buttons and borders around windows. GNOME Application Style (GTK)

Configure the look of the GTK application
Splashskærmen er en lille skærm, som vises lige efter en succesfuldt login. Splashskærmen vises under den tid det tager at indslæse systemet. \
Splashskærmstema indstillingsvindue Du har mulighed for at fjerne denne skærm ved at vælge Ingen; dette kan mindste opstartstiden.
Splashskærmstema Store Mere information
- KDE official documentation
- Find splashskærmstemaer i KDE Store
- System Settings/Activities/da
Dette modul lader dig indstille aktiviteter. Aktiviteter er en måde at have forskellig opsætninger af Plasma, hver med sit eget tema og sæt af widgets. Nogle aktiviteter kan være private, hvilket betyder, at de ikke gemmer oplysninger om dig. For eksempel husker de ikke de dokumenter, som du senest har arbejdet med.
Indstilling af aktiviteter Mere information
Introdução ao rekonq
Baseado inicialmente no qtwebkit (e atualmente no kdewebkit), o rekonq é um navegador rápido desenhado para usar o motor de renderização do WebKit em combinação com várias tecnologias do KDE, o que lhe permite se integrar perfeitamente ambiente KDE. O nome é uma referência ao venerável Konqueror baseado em khtml, que é atualmente o navegador padrão do KDE.
O rekonq já substituiu o Konqueror como navegador padrão no Chakra, com mais distribuições expressando uma intenção similar para suas futuras versões. A versão estável atual do rekonq é a 1.0 (Julho de 2012).
Le module de configuration permet de connecter votre compte en ligne avec plasma pour fournir une meilleure intégration.
Ces comptes peuvent être utilisés par Telepathy, une application KDE IM (Instant Messaging) de messagerie instantanée.
Davantage d'information
- Telepathy (dans userbase)
- System Settings/Language/da
I sprogindstillingerne kan du angive, hvilket sprog du vil bruge i Plasma.
Det øverste sprog bruges som standard.
Nogle programmer er ikke fuldt oversat til alle sprog. Hvis du taler et sprog flydende, så engagér dig og bliv en oversætter for KDE.Mere information
Деякі програми і підсистеми вашого робочого простору можуть сповіщати вас про настання різних подій. За допомогою цього модуля параметрів ви можете налаштувати перелік і спосіб бажаних для вас сповіщень.
Додаткові відомості
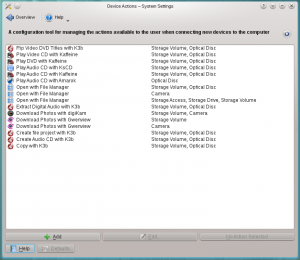
Configure the actions that are available, when a new device is connected Examples:
- Command to open an optical disk in Totem is:
/usr/bin/totem %d
In this settings module you can configure which options you are presented with, when a device is plugged in. See the Handbook for more.- Criar definições de estrutura um tutorial que cria e instala uma definição de estrutura para uma estrutura de dados imaginária.
- Configurar visualização embutida de dados em bruto para um determinado tipo de arquivo, um tutorial que configura o sistema para mostrar os dados brutos de arquivos com um determinado tipo MIME no Konqueror, KDevelop e outros programas que usam o sistema KPart
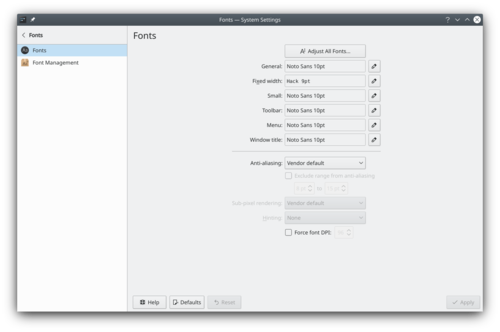
Fonts settings windows Plasma let you can configure the font used. By clicking on , you can configure all fonts categories at the same time. Alternately you can configure each font category separately.
You can also configure anti-aliasing. But it's recommended to understand that is anti-aliasing before trying to change this setting. Read for example this Wikipedia article.
More Information
Kontrolstil
Kontroller er brugerfladeelementer så som knapper, rullebjælker, faneblade og så videre. Her kan du vælge og indstille den kontrolstil, som bruges af alle KDE's programmer. Du kan også finindstille kontrollernes opførsel. Vinduesdekorationer
I dette modul kan du vælge en stil til knapper og rammer omkring vinduer. GNOME/GTK programstil
Indstil hvordan GTK-programmer ser ud
Home » Applications » Graphics » Showfoto
Tutoriales de edición de fotografías
Tutorial fotográfico en KDE 1-1 Ajuste de niveles
Tutorial fotográfico en KDE 1-2 Ajuste de curvas
Tutorial fotográfico en KDE 1-3: Balance de blancos
Tutorial fotográfico en KDE 1-4: Brillo/Contraste/Matiz + Gamma/Saturación/Luminosidad
Tutorial fotográfico en KDE 1-5: Ajuste de perspectivas
In this section you can manage the settings for your mouse. On the tab you can configure things like button handedness, and is single or double click opens icon.
On the tab you can change things like how mover cursor responds to physical movement of mouse.
On the tab you can enable moving mouse cursor with keyboard.
More Information
This module lets you configure the theme for GNOME/GTK Applications.
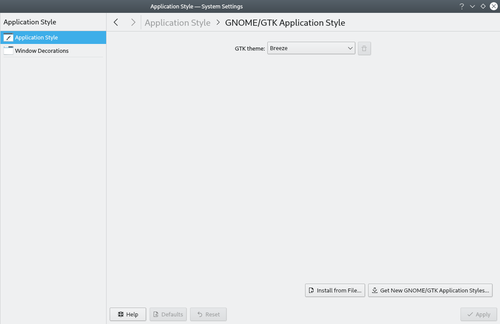
System settings GTK theme These settings only apply for GTK applications. Look at System Settings/Widget Style to configure the theme of Qt application. If you are interested in better integration for GTK app, look at the list of KDE themes with GTK ports.
More Information
Yakuake je vysouvací emulátor terminálu založený na technologii KDE Konsole.
Vlastnosti
- Hladce se vysune z vrchní strany obrazovky
- Karty
- Nastavitelné dimenze a rychlost animací
- Možnost změny vzhledu
- Sofistikované rozhraní DCOP / D-Bus
Yakuake je součástí KDE Extragear.
Problémy
Klávesa F12 je občas používána některou aplikací na vyhledávání. Pokud se s tím setkáte, změňte klávesovou zkratku na Ctrl+Shift+F12
This module configures when to lock your screen and define the appearance of the screen locker.
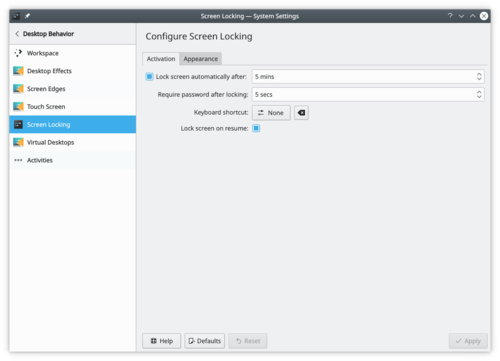
Screen Locking settings The lock screen is a security feature. After some time of inactivity, plasma doesn't let anybody access your computer without your password. But this feature isn't bulletproof, for example, if your computer is stolen, the screen locker can't protect your precious file. If you want more security, you should consider an encrypted hard drive.
More information
Plasma: Hvordan gør man
Home » Applications » Graphics » Showfoto
Tutoriels d'édition de photos
In this setting module, you can configure plasma virtual desktop feature. This feature lets you have many desktops with each containing a different set of windows that can be easily switched by the user. This feature is supported by each major operating system.
You can configure the number of virtual desktops and how to switch between them.

Virtual Desktop settings More information
Yakuake jest wysuwanym emulatorem terminala bazującym na technologii KDE Konsole.
Cechy
- Płynnie wysuwa się z góry ekranu
- Interfejs z systemem kart
- Konfiguracja wymiarów i prędkości animacji
- Możliwość dostosowania wyglądu
- Sophisticated DCOP / D-Bus interface
Yakuake jest częścią KDE Extragear.
Problemy
Klawisz F12 jest czasem używany przez aplikację do wyszukiwania. Jeżeli napotkasz ten problem, zmień skrót klawiszowy na Ctrl+Shift+F12
Ce module permet de configurer les activités. Les activités sont une manière d'avoir de multiples configurations plasma, avec chacun un ensemble différent de widgets et de thèmes. Certaines activités peuvent être privées, dans ce cas elles ne vous suivent pas. Par exemple, elle ne suivent pas ce document récent que vous avez ouvert.
Définition des activités Plus d'informations
Startseite » Anwendungen » Grafik » Showfoto
Fotobearbeitungsanleitungen
Foto KDE Anleitung 1-1: Tonwertkorrektur
Foto KDE Anleitung 1-2: Gradation
Foto KDE Anleitung 1-3: Weißabgleich
Foto KDE Anleitung 1-4: Leuchtstärke/Kontrast/Gamma + Farbschattierung/Sättigung/Helligkeit
Foto KDE Anleitung 1-5: Anpassung der Perspektive
Yakuake는 KDE의 Konsole 기술에 기반을 둔 드롭 다운 터미널 에뮬레이터입니다.
기능
- 화면 상단에서 부드럽게 펼쳐져 내려오기
- 탭 인터페이스
- 크기와 애니메이션 속도 설정
- 스킨
- D-Bus 인터페이스
Yakuake는 KDE Extragear의 일부입니다.
문제점
때때로 데스크톱 검색 프로그램에서 F12 키를 사용합니다. 단축키가 겹친다면 Ctrl+Shift+F12 등 다른 키로 변경하십시오

Sweeper 在共用的计算机上保护您的隐私 Sweeper 提供给你两大好处
- 它能释放磁盘空间
- 它能删除您在共用的计算机上的活动的证据
您同意的话它删除下列内容
- 已保存的剪贴板内容
- 最近的文档
- 最近使用的程序
- 运行命令历史
- 您的缩略图缓存
它也能清理您的web活动,如果需要,一并删除
- Cookies 和 cookie 规则
- Web 历史和缓存
- '收藏夹' 图标
- 表单补全条目
您能选择删除以上的任何一个或是全部。您自己掌控方便和隐私之间的平衡。
Dette modul lader dig indstille musemarkørens udseende.
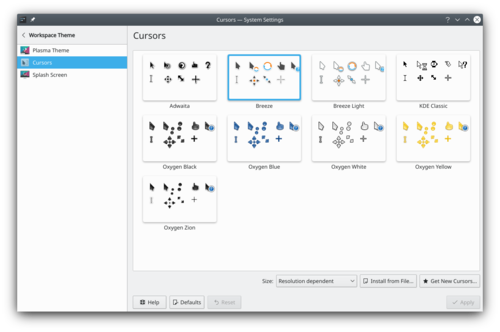
Markører indstillingsvindue Du kan også indstille markørens størrelse.
I KDE Store finder du flere markørtemaer.
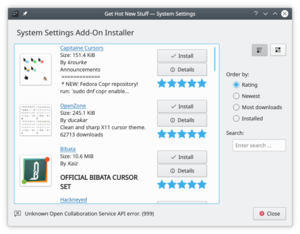
Markør Store Mere information
- KDE official documentation
- Find markørtemaer i KDE Store
- Lav dit eget musemarkør-tema Denne vejledning forklarer, hvordan man laver sit eget musemarkør-tema.
- Rekonq/Manual/Introduction
Introduction to rekonq
Based initially on qtwebkit (and currently or kdewebkit), rekonq is a lightweight browser designed to use the WebKit rendering engine in combination with various KDE technologies, allowing it to integrate seamlessly into the KDE desktop. The name is a reference to the venerable khtml-based Konqueror which is currently the default KDE web browser.
rekonq has already replaced Konqueror as the default browser in Chakra, with more distributions expressing similar intent for their future releases. The current stable release version is rekonq 1.0 (July 2012).
Yakuake è un emulatore di terminale a scomparsa basato sulla tecnologia KDE di Konsole.
Caratteristiche
- Scende dolcemente dal lato alto del tuo schermo
- Interfaccia a schede
- Dimensioni e velocità di animazione configurabili
- Tema personalizzabile
- Sofisticata interfaccia DCOP / D-Bus
Yakuake fa parte di KDE Extragear.
Problemi
Il tasto F12 è qualche volta utilizzato da un'applicazione di ricerca desktop. Se è questo il tuo caso, cambialo in Ctrl+Shift+F12
In this section you can manage the settings for your mouse trackpad. Settings may vary based on hardware and drivers installed.
Configure taps Configure scrolling Configure pointer motion Configure sensitivity Enable/disable touchpad More Information
За допомогою цього модуля параметрів можна налаштувати KRunner.
Ви можете увімкнути або вимкнути додатки, а також отримати доступ до налаштувань додатка, якщо такі передбачено.
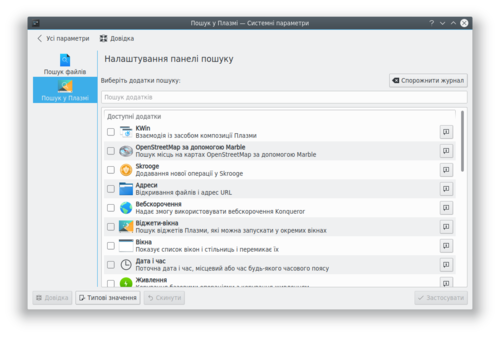
Докладніші відомості
- Ознайомтеся із усіма функціональними можливостями Krunner за допомогою userbase.
- Showfoto
Home » Applications » Graphics » Showfoto
Photo Editing Tutorials
Photo KDE Tutorial 1-1: Levels Adjust
Photo KDE Tutorial 1-2: Curves Adjust
Photo KDE Tutorial 1-3: White balance
Photo KDE Tutorial 1-4: Brightness/Contrast/Gamma + Hue/Saturation/Lightness
Photo KDE Tutorial 1-5: Perspective Adjustment
Сховище паролів KDE
За допомогою цього модуля ви зможете налаштувати KWalletManager, програму, яка керує вашими записами паролів та доступом програм до цих записів. Керування записами користувачів
Додавання, вилучення та редагування записів користувачів вашої системи.
Introducción a rekonq
Basado inicialmente en qtwebkit (y actualmente en kdewebkit), rekonq es un navegador ligero diseñado para usar el motor de renderizado WebKit en combinación con varias tecnologías de KDE, lo que le permite integrarse perfectamente en el escritorio KDE. El nombre es una referencia al venerable Konqueror basado en khtml, y que es el navegador web predeterminado de KDE.
rekonq ha reemplazado ya a Konqueror como navegador por defecto en Chakra, con más distribuciones expresando una intención similar para sus futuras versiones. La versión estable actual es rekonq 0.6.1 (July 2011).
Yakuake es una emulador de terminal deslizable basado en la tecnología Konsole de KDE.
Características
- Se desliza suavemente desde la parte superior de la pantalla.
- Interfaz con pestañas.
- Dimensión y velocidad de la animación configurable.
- Soporta temas visuales.
- Sofisticada interfaz DCOP / D-Bus.
Yakuake forma parte de KDE Extragear.
Problemas
La tecla F12 se usa a veces para una aplicación de busqueda en el escritorio. Si es el caso, cámbiala a Ctrl + Shift + F12
LemonPOS: Squeeze, Lemon ve giriş ekranları LemonPOS küçük ve orta ölçekli işletmelerin ihtiyaçlarını karşılamayı hedefleyen bir POS uygulamasıdır. Arkada MySQL çalışırken ve birden çok uçbirimden aynı veritabanına bağlanmaya olanak tanır. Lemon (Limon) ve Squeeze (Sıkma) adlı iki parçadan oluşur. Lemon POS için kullanılan parça, Squeeze ise envanter ve raporlama gibi yönetimsel ihtiyaçlar için kullanılan parçadır.
Daha çok bilgi için
- Proje ana sayfası: http://lemonpos.org/
Sweeper 在共用的電腦上保護您的隱私 Sweeper 提供給你兩大好處
- 它能釋放磁盤空間
- 它能刪除您在共用的計算機上的活動的證據
您同意的話它刪除下列內容
- 儲存的剪貼簿內容
- 最近的文件
- 最近使用的應用程序
- 執行命令歷史
- 您的縮略圖快取
它也能清理您的網頁活動,如果需要,一并刪除
- Cookies 和 cookie 政策
- 網頁歷史和快取
- "我的最愛"圖示
- 表單補全項目
您能選擇刪除以上的任何一個或是全部。您自己掌控方便和隱私之間的平衡。
You may already have noticed that Plasma offers multiple applications to access the web: Konqueror and KRunner (Falkon doesn't have this feature yet). You can add shortcuts so that when typing in KRunner or Konqueror, for example "dd:hello", you open a DuckDuckGo search with the input "hello".
Web Shortcuts settings windows More Information
Dans cette section, vous pouvez gérer les paramètres de votre souris trackpad. Les paramètres peuvent varier en fonction du matériel et des pilotes installés.
Configurer les tapes Configurer le défilement Configurer le mouvement du pointeur Configurer la sensibilité Activer/désactiver le pavé tactile Plus d'informations
Dette modul indstiller hvornår din skærm skal låses og bestemmer udseendet af skærmlåsen.
Indstillinger for skærmlås Skærmlåsen er en sikkerhedsfunktion. Efter en vis tids inaktivitet vil Plasma ikke lade nogen tilgå din computer uden en adgangskode. Men denne funktion er ikke skudsikker: Hvis for eksempel din computer bliver stjålet kan skærmlåsen ikke beskytte dine dyrebare filer. Hvis du ønsker højere sikkerhed skulle du overveje en krypteret harddisk.
Mere information
System settings emoticon theme Emoticons can be used in several KDE applications: Kopete, Konversation, KMail... This module offers you to easily manage your emoticons sets.
You can:
- add emoticons themes
- remove emoticons themes
- install an existing theme
- add, remove or edit emoticons within a theme
More information
Yakuake est un émulateur de terminal déroulant basé sur la technologie de Konsole de KDE.
Fonctionnalités
- Glisse en douceur depuis le haut de votre écran
- Interface avec onglets
- Dimensions et vitesse d'animation configurables
- Support de thèmes visuels
- Interface DCOP / D-Bus sophistiquée
Yakuake fait partie de KDE Extragear.
Problèmes
La touche F12 est parfois utilisé par application de recherche sur le bureau. Si c'est le cas, changez la pour Ctrl+Shift+F12
Dette modul lader dig indstille temaet, som bruges af GNOME/GTK-programmer.
Systemindstillinger GTK tema Disse indstillinger gælder kun for GTK-programmer. Læs Systemindstillinger/Kontrolstil om indstilling af temaet til Qt-programmer. Hvis de ønsker en bedre intergration af GTK-programmer, så se listen over KDE-temaer med GTK-versioner.
Mere information
Der er mange måder at læse tegneserier, og en af dem der er blevet mere almindelig i de senere år er at læse dem på computeren. Peruse blev skabt som en måde at gøre dette så let og behageligt som muligt og til ikke at være i vejen når du læser tegneserier. (Fra Peruses hjemmeside)
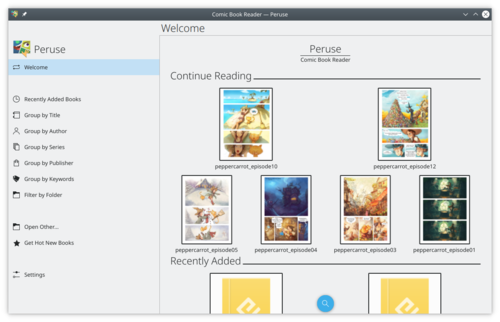
Peruse lader dig også lave tegneserier. Du kan redigere metadata og tilføje nye sider.
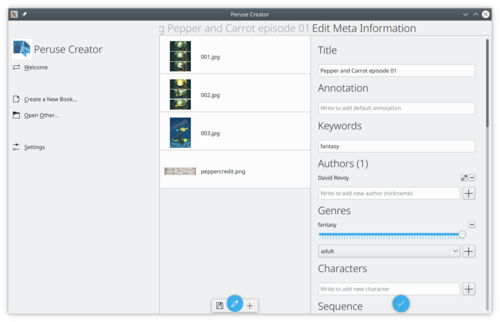
Yderligere information
O Yakuake é um emulador de terminal deslizável, baseado na tecnologia Konsole do KDE.
Funcionalidades
- Desliza suavemente a partir do topo da sua tela.
- Interface com abas.
- Dimensões e velocidade da animação configuráveis.
- Suporte a temas.
- Sofisticada interface DCOP/D-Bus.
O Yakuake é parte do KDE Extragear.
Problemas
Às vezes, a tecla F12 é usada por um aplicativo de pesquisa do ambiente de trabalho. Se for o caso, altere para a sequência Ctrl +Shift+F12
Home » Applications » Graphics » Showfoto
Guide alla modifica delle foto
Guida fotografica KDE 1-1: Regolare i Livelli
Guida fotografica KDE 1-2: Regolare le curve
Guida fotografica KDE 1-3: Bilanciamento del bianco
Guida fotografica KDE 1-4: Luminosità/Contrasto/Gamma + Colore/Saturazione/luminosità
Guida fotografica KDE 1-5: Regolare la prospettiva

Window Rules settings In the module you can specify even more detailed settings for individual windows based on their title or the application they belong to. These settings can also be accessed from the window context menu: Right click the window titlebar and select or
More Information
- Création de définitions de structure un tutoriel qui permet de créer et installer une définition de structure pour une structure de données imaginaires.
- Paramétrer un affichage intégré de données brutes pour un type de fichier donné, un tutoriel qui permet de configurer le système pour afficher les données brutes des fichiers selon leur type mime dans Konqueror, KDevelop et d'autres logiciels utilisant le système KPart.
Плазма надає вам змогу повністю налаштувати тему вашого робочого простору.
Тема Плазми
Налаштовування теми Плазми. Вказівники
Внесення змін до вигляду вказівника миші. Вікно вітання
Внесення змін до параметрів вікна вітання.
Setting plasma file search Baloo indexes all files and their metadata in your filesystem. This allows for fast search time when needed. And allows other applications like Elisa or Peruse to find your music/comic file faster.
More Information
- KDE official documentation
- Baloo (userbase wiki)
- Baloo (Arch Linux wiki)
- System Settings/Shortcuts/fr
Global Shortcuts
Configurer les raccourcis clavier. Raccourcis standard
Configurez les raccourcis clavier pour les actions standard (par exemple rechercher, quitter, annuler, ...) Raccourcis Web
Configurez les raccourcis pour effectuer une recherche rapide dans Konqueror et KRunner. Raccourcis personnalisés
Configurer les raccourcis personnalisés.
This section help you configure the look of the mouse cursor.
Mouse Cursor Theme settings windows You can also configure the cursor size.
In the KDE Store, you can find more mouse cursor theme.
Mouse Cursor Theme store More information
- KDE official documentation
- Browse mouse cursor theme on the KDE Store
- Create your own mouse cursor theme This tutorial explains how to create your own mouse cursor theme.
- Plasma/HowTo/Index
The Plasma HowTo's
Come fare per ... con Plasma
Not all countries and languages are using the same format to display numbers, time, currency and other units.
For example in France, you would write a date in this "dd/mm/yyyy" format and in the US, you would instead use the "yyyy.mm.dd" format.
Plasma let you configure exactly how you want to read these formats.
More Information
Le impostazioni sulla lingua ti permettono di configuare quale lingua vuoi usare in Plasma.
La lingua in cima è quella che viene utilizzata come predefinita.
Adesso tutte le applicazioni sono tradotte completamente in tutte le lingue, unisciti e diventa un traduttore per KDE.Altre informazioni
Vous avez peut-être remarqué mais Plasma possède plusieurs applications pour accéder à l'internet : Konqueror et KRunner (Falkon ne possède pas encore cette fonctionnalité). Vous pouvez ajouter un raccourci de sorte que dans KRunner ou Konqueror, par exemple lorsque l'on tape "dd:bonjour", vous ouvrez DuckDuckGo avec comme paramètre "bonjour".
Fenêtres de configuration des raccourcis web Informations supplémentaires
- Documentation officielle de KDE
- Konqueror/Web Shortcuts dans Userbase.
- System Settings/Display and Monitor
Configuration of your monitor

Size & Orientation
Here you can configure the physical characteristics of your screen.

Screen Saver
Here you can configure your screen saver.

Gamma
Here you can tweak the way your monitor displays colors. See the Handbook for more details.
Multiple Monitors
Yakuake és un emulador de terminal desplegable basat en KDE amb la tecnologia de Konsole.
Característiques
- Es desplega suaument des de la part superior de la pantalla
- Interfície amb pestanyes
- Configura la grandària i la velocitat de l'animació
- Facilitat per l'usuari
- Sofisticada interfície DCOP / D-Bus
Yakuake forma part de KDE Extragear.
Problemes
La tecla F12 és utilitzada de vegades per una aplicació de cerca a l'escriptori. Si es dóna aquest cas, canvieu a Ctrl + Majús. + F12.
Plasma let you fully customize your workspace theme.
Plasma Theme
Configure the plasma theme. Cursors
Change the look of the mouse cursor. Splash Screen
Change the splash screen.
Os HowTo's do Plasma
- Tutorial para o Plasma 4.5
- Tutorial para o Plasma 4.4
- Tutorial para o Plasma 4.3
- System Settings/Locations/en
System settings Location windows You can define a new path for directories containing personal files. It can be useful for example if your movie collection is in an external drive or you want this directory names in an other language.
More information
Proposed for Deletion
This page has been proposed for deletion for the following reason:
Please use the discussion section of this page to voice your opinion on this.Development has stopped. In 2012.
LemonPOS: Squeeze, Lemon and login screens LemonPOS is point of sales application targeted for small and mid-size business. It uses MySQL database as backend and can have multiple terminals using the same database. It consists of two part, Lemon and Squeeze. Lemon is used as the actual point of sales while Squeeze is used to administrative tasks like inventory and reports.
More Information
- Homepage: http://sourceforge.net/projects/lemonpos/
- Simon/HandbookThe handbooks of the application of the Simon suite are available as part of your installed program (depending on your distribution you might need to install the optional simon-doc package). You can also download them as printable manuals.
Print version
I dette indstillingsmodul kan du konfigurere Plasmas funktion for virtuelle skriveborde. Denne funktion lader dig have mange skriveborde, som hver har sit eget sæt af vinduer og som du let kan skifte imellem. Denne funktion understøttes af alle de vigtigste operativsystemer.
Du kan indstille antallet af virtuelle skriveborde og hvordan du skifter imellem dem.
Indstil virtuelle skriveborde Mere information
- KDEs officielle dokumentation
- Virtuelle skriveborde på Wikipedia
- LabPlot/CurveTracing
- Plan/Engineering To Order project tutorial/it
Introduzione generale
In questa guida passo-passo verrà spiegato un progetto Engineering To Order (ETO), tipico per aziende manifatturiere che lavorano con macchine o impianti di medie dimensioni.
Ci sono due fasi principali, la prima è relativa alla pianificazione mentre la seconda è legata all'esecuzione e al controllo.
Questa guida è stata scritta utilizzando KPlato versione 0.9.84 su un'installazione di KUbuntu 10.10 con KDE 4.5.1.
Ecco i due capitoli della guida:
Se hai domande chiedi nella pagina di discussione.
L'écran de démarrage est le petit écran de chargement qui apparaît juste après une connexion réussie. L'écran de démarrage s'affiche pendant le chargement du plasma.
Splash Screen Theme settings windows Vous pouvez choisir de le supprimer en n’en sélectionnant aucun, cela peut réduire le temps de démarrage.
Splash Screen Theme store Plus d'information
- KDE official documentation
- Browse splash screen theme on the KDE Store
- System Settings/Applications/da
Standardprogrammer
Angiv standardprogram til almindelige opgaver, så som webbrowsing, e-mail og filhåndtering. Filtilknytninger

Angiv standardprogrammer til at håndtere forskellige filtyper. Placeringer

Angiv stien til "XDG basis skrivebordsmapper" (så som Musik, Hentet, ...) Opstartsfeedback

Indstil animationen, som bruges når et program startes.
Yakuake ist ein Aufklapp-Terminal-Emulator, der auf KDEs Konsole-Technologie aufbaut.
Funktionen
- Rollt sanft aus dem oberen Bildschirmrand heraus
- Einzelne Reiter möglich
- Kofigurierbare Größe und Bewegungsgeschwindigkeit
- Verschiedene Desings sind möglich
- Hochentwickelte DCOP/D-Bus-Schnittstelle
Yakuake gehört zu KDE Extragear.
Bekannte Probleme
Die F12 Taste wird auch von einigen Arbeitsflächen-Suchfunktionen belegt. In diesem Fall ändere die Tastenkombination zu Strg+Umschalt+F12.
The splash screen is the small loading screen occurring just after a successful login. The splash screen is displayed during the time, plasma is loading.
Splash Screen Theme settings windows You can choose to remove it by selecting none, it can decrease the startup time.
Splash Screen Theme store More information
- KDE official documentation
- Browse splash screen theme on the KDE Store
- System Settings/Window Rules/da
Indstilling af vinduesregler I gruppen kan du indstille endnu flere detaljer for individuelle vinduer baseret på deres titel eller det program, de hører til. Du kan også nå disse indstillinger fra vinduernes kontekstmenu: Højreklik på vinduets titellinje og vælg eller
Mere information
Tous les pays et toutes les langues n'utilisent pas le même format pour afficher les nombres, l'heure, la devise et d'autres unités.
Par exemple, en France, vous écririez une date au format « jj/mm/aaaa » et aux États-Unis, vous utiliseriez plutôt le format « aaaa.mm.jj ».
Plasma vous permet de configurer exactement la manière dont vous souhaitez lire ces formats.
Plus d'information
Indstillingsvindue til skrifttyper Plasma lader dig indstille, hvilke skrifttyper der bruges. Ved at klikke på kan du indstille alle skrifttypekategorier på en gang. Du kan også indstille hver skrifttypekategori for sig.
Du kan også indstille anti-aliasing; men det anbefales, at du forstår hvad anti-aliasing er, før du prøver at ændre denne indstilling. Læs for eksempel denne artikel fra Wikipedia om anti-aliasing.
Mere information
- KDE official documentation.
- Simon/ScenariosScenarios are complete packages of one use case of Simon.
For example: If you want to control Firefox, just install the Firefox scenario.
Scenarios include your vocabulary, grammar, trainings texts and commands.
You can download and import scenarios through the manage scenarios dialog (Manage scenarios > Import > Download). You can also browse this repository online.
If you create new scenarios, please upload them through the upload feature from within Simon or directly on KDE Files (see above) to share them with other Simon users.
Next to scenarios, you need to train / create / get an acoustic model before Simon will recognize your voice. You might want to look at base models for more information.
Plasma Nasıl Yapılır
- Plasma 4.5 için NasılYapılır
- Plasma 4.4 için NasılYapılır
- Plasma 4.3 için NasılYapılır
- Plan/Tutorials/uk
Настанови з керування проектом, що виконується на замовлення є покроковим підручником з налаштовування та виконання проекту.
- Настанови з керування проектом, що виконується на замовлення: планування
- Настанови з керування проектом, що виконується на замовлення: виконання і контроль
- System Settings/Applications/en
Default Applications
Set the default applications for common tasks, such as browsing the web, writing email, or managing files. File Associations
Set the default applications handler for specific file type. Locations
Set the path for the "xdg base directories standard" (a.k.a Music, Download, ... directories) Launch Feedback
Configure the animation when starting an application.
The language settings, let you configure which language you want to use in Plasma.
The language at the top is the default language used.
Not all applications are fully translated in all language. If you are fluent in one language, get involved and become a KDE translator.More Information
Plasma FAQ
- FAQ for Plasma 5.10 or 5.9.90
- FAQ for Plasma 4.4
- FAQ for Plasma 4.3
- FAQ for Plasma 4.2
- FAQ for Plasma 4.1
- FAQ for Plasma 4.0
- Plasma/HowTo/Index/ca
Els «Com es fa» per a Plasma
Home » Applications » Graphics » Showfoto
Guies d'aprenentatge per a l'edició de fotografies
Guia d'aprenentatge KDE per a fotografia 1-1: Ajust de nivells
Guia d'aprenentatge KDE per a fotografia 1-2: Ajust de corbes
Guia d'aprenentatge KDE per a fotografia 1-3: Balanç de blancs
Guia d'aprenentatge KDE per a fotografia 1-4: Brillantor/Contrast/Gamma + To/Saturació/Lluminositat
Guia d'aprenentatge KDE per a fotografia 1-5: Arranjament de la perspectiva
¿Cómo hacer ... con Plasma?
- ¿Cómo hacer ... en Plasma 4.5?
- ¿Cómo hacer ... en Plasma 4.4?
- ¿Cómo hacer ... en Plasma 4.3?
- System Settings/Font
Fonts settings windows Plasma let you can configure the font used. By clicking on , you can configure all fonts categories at the same time. Alternately you can configure each font category separately.
You can also configure anti-aliasing. But it's recommended to understand that is anti-aliasing before trying to change this setting. Read for example this Wikipedia article.
More Information
This module lets you configure the theme for GNOME/GTK Applications.
System settings GTK theme These settings only apply for GTK applications. Look at System Settings/Widget Style to configure the theme of Qt application. If you are interested in better integration for GTK app, look at the list of KDE themes with GTK ports.
More Information
За допомогою цього модуля ви можете налаштувати параметри KWalletManager, програми, яка керує вашими записами паролів та тим, які програми отримуватимуть до них доступ.
Параметри KWallet Докладніші відомості
- Сторінка програми для керування паролями KDE
- Вікіпедія
- Підручник з KWallet
- System Settings/Window Rules/ca
Window Rules settings Al grup podeu especificar una configuració encara més detallada de les finestres individuals en base al seu títol o l'aplicació a la qual pertanyen. A aquests valors també s'hi pot accedir des del menú contextual de la finestra: Feu clic a la barra de títol i seleccioneu o
More Information
General Introduction
In this tutorial you will see an Engineering To Order project (ETO), typical for manufacturing companies working on medium machines or plants.
There are two main phases, the first is related to the planning while the second is related to the executing and controlling.
This tutorial is written using KPlato release 0.9.84 working on a KUbuntu installation 10.10 with KDE 4.5.1. And was updated for Plan release 3.1.0 working in Arch Linux.
Here are the two chapters of the tutorial.
If you have questions, please ask on the Discussion pages.
Widget Style
Les widgets sont les éléments de l'interface tels que les boutons, les barres de défilement, les onglets, etc. Ici, vous pouvez choisir et configurer le style de widget utilisé par toutes les applications. Vous pouvez également régler finement le comportement des widgets. Décorations des fenêtres
Ce module vous permet de sélectionner un style pour les boutons et les bordures autour des fenêtres. GNOME Application Style (GTK)
Configurer l'apparence de l'application GTK
This module configures when to lock your screen and define the appearance of the screen locker.
Screen Locking settings The lock screen is a security feature. After some time of inactivity, plasma doesn't let anybody access your computer without your password. But this feature isn't bulletproof, for example, if your computer is stolen, the screen locker can't protect your precious file. If you want more security, you should consider an encrypted hard drive.
More information
Fenêtre de configuration des polices Plasma vous permet de configurer la police utilisée. En cliquant sur , vous pouvez configurer toutes les catégories de polices en même temps. Il est également possible de configurer chaque catégorie de police séparément.
Vous pouvez également contrôler l'anti-aliasing. Mais avant d'essayer de modifier ceci il vaut mieux comprendre ce qu'est l'anti-aliasing. Lisez par exemple cet article Wikipedia.
Plus d'information
Les paramètres de langue vous permettent de configurer la langue que vous souhaitez utiliser dans Plasma.
La langue en haut est la langue utilisée par défaut.
Toutes les applications ne sont pas entièrement traduites dans toutes les langues. Si vous parlez couramment une langue, impliquez-vous et devenez un traducteur KDE.Plus d'information
Thème d'émoticône des paramètres système Les émoticônes peuvent être utilisées dans plusieurs applications KDE : Kopete, Konversation, KMail... Ce module vous propose de gérer facilement vos jeux d'émoticônes.
Vous pouvez :
- ajouter des thèmes d'émoticônes
- supprimer des thèmes d'émoticônes
- installer un thème existant
- ajouter, supprimer ou modifier des émoticônes dans un thème
Plus d'information
- Documentation officielle KDE
- Parcourir le thème des émoticônes dans la boutique KDE
- PvfViewer== Introduction ==
The pvfViewer application allows the opening of PC Stitch Pattern Viewer files that can be obtained from the PatternsOnline website. These files have a .pvf extension.
The application has had limited testing so far, but appears to work well with the small number of files tested. If you come across any that it will not open please let me know.
Manual
A User manual is installed with the application.
Screenshots
The Main Window Features
- Open multiple .pvf files concurrently using a tabbed interface
- Print pattern
- Export PDF
Download
Development code is available here
An example pattern is available here.
Plasma 常见问题
- Plasma/FAQ/4.5 -还没此版本的常见问题。
- Plasma 4.4 常见问题
- Plasma 4.3 常见问题
- Plasma 4.2 常见问题
- Plasma 4.1 常见问题
- Plasma 4.0 常见问题
- Parley/Manual/Existing collection==Open an Existing Collection==
Let's suppose your collection is already on your hard disk.
This is what the screen will look like the first time you start Parley:
Click on .In the file selection dialog, navigate to the directory containing the data file, and select it by clicking on it. Depending on your system the file either opens immediately, or you have to click <menucohice>OK</menuchoice>
Now, the file is loaded, and you move on to the Practice setup screen: see the following section for further details.- ← Start Page
- Claus chr/DPL/Test
- Vocabulary Practice →
పల్స్ఆడియో
The purpose of pulseaudio is to handle multiple incoming streams, so that if you receive an incoming message, for instance, your media player doesn't have to stop to let it through. When it works, it works well, but there are times when it might need a little more understanding to solve a problem. These references should help:
Phonon Problems
External Sound Cards
The PulseAudio wiki
The Perfect Setup
Setting up your speakersTutoriels de l'espace de travail Plasma
Dans cette section, vous pouvez gérer les paramètres de votre souris. Dans l'onglet , vous pouvez configurer des éléments tels que la manipulation des boutons et un simple ou double clic sur l'icône d'ouverture.
Dans l'onglet , vous pouvez modifier des éléments tels que la façon dont le curseur de déplacement répond au mouvement physique de la souris.
Dans l'onglet , vous pouvez activer le déplacement du curseur de la souris avec le clavier.
Plus d'informations
Systemindstillinger Placeringer-vinduet Du kan definere en ny sti til mapper, som indeholder personlige filer. Det kan for eksempel være nyttigt at have din samling af film på et eksternt drev; eller måske ønsker du at bruge andre navne på disse mapper.
Mere information
Yakuake, KDE'nin Konsole teknolojisine dayalı yukarıdan aşağı doğru açılan bir terminal emülatörüdür.
Özellikler
- Kolayca ekranın üstünden aşağıya doğru açılır
- Sekmeli arayüz
- Ayarlanabilir boyut ve animasyon hızı
- Değiştirilebilir temalar
- Gelişmiş DCOP / D-Bus arayüzü
Yakuake, KDE Extragear'ın bir parçasıdır.
Sorunlar
F12 tuşu bazen masaüstü arama uygulamaları tarafından kullanılabilmekte. Böyle bir durumla karşılaşırsanız bu kısayol için Ctrl+Shift+F12 tuşlarını ayarlayabilirsiniz.
In this setting module, you can configure plasma virtual desktop feature. This feature lets you have many desktops with each containing a different set of windows that can be easily switched by the user. This feature is supported by each major operating system.
You can configure the number of virtual desktops and how to switch between them.
Virtual Desktop settings More information
Yakuake is a drop-down terminal emulator based on KDE's Konsole technology.
ویژگیها
- Smoothly rolls down from the top of your screen
- Tabbed interface
- Configurable dimensions and animation speed
- Skinnable
- Sophisticated DCOP / D-Bus interface
Yakuake بخشی از اضافهافزار KDE است.
مشکلات
The F12 key is sometimes used by a desktop search application. If you meet this, change it to Ctrl+Shift+F12
Generel introduktion
I denne vejledning vil du se et Engineering To Order-projekt (ETO), som er typisk for produktionsvirksomheder med maskiner eller fabrikker af middelstørrelse.
Der er to hovedfaser, den første relateret til planlægning mens den anden er relateret til gennemførelse og kontrol.
Denne vejledning er skrevet under anvendelse af KPlato version 0.9.84 på en KUbuntu version 10.10 med KDE 4.5.1 og er blevet opdateret til Plan version 3.1.0 på Arch Linux.
Her er vejledningens to kapitler.
Hvis du har spørgsmål, så spørg på diskussionssiden.
PulseAudio
Formålet med pulseaudio er at håndtere indkommende strømme sådan, at hvis du for eksempel modtager en indkommende besked, så skal din medieafspiller ikke stoppe for at lade den komme igennem. Det virker for det meste godt, men en gang imellem skal der lidt mere forståelse til for at løse et problem. Disse referencer skulle kunne hjælpe dig:
Problemer med Phonon
Eksterne lydkort
PulseAudios wiki
Den perfekte opsætning
opsætning af højttalereМеню Raptor — програма для запуску програм для KDE 4, розроблена Нуно Піньєро (Nuno Pinheiro). Вона є радикально відмінною від традиційного меню запуску. Компонування графічних елементів програми є ефективним та незахаращеним. Докладніше про програму можна дізнатися з домашньої сторінки Raptor.
Зауваження редактора:
Здається, розробку програми призупинено. Робочої версії так і не було випущено.
YakuakeはKDEのKonsoleの技術を基にしたドロップダウン式のターミナルエミュレータです。
機能
- スクリーンの上端から滑らかに降りてきます
- タブ式インタフェース
- 設定可能なサイズとアニメーション速度
- スキン対応
- 洗練されたDCOP / D-Busインタフェース
YakuakeはKDE Extragearの一部です。
問題点
F12キーはデスクトップ検索アプリケーションに使われている場合があります。 その場合、Ctrl+Shift+F12に変更してください。
Практические советы по Plasma
- Практические советы по Plasma 4.5
- Практические советы по Plasma 4.4
- Практические советы по Plasma 4.3
- Plan/Manual/Task Performance View==Task Performance View==
On the task performance chart, we can analyze deeply each subtask or task with the same indexes as for the project performance view.
This is really useful in a long and complicated project.
On the left window, you can choose every single sub-task as well as an entire task, then on the right window will appear in the corresponding chart.
where:
- BCWS means Budgeted Cost Work Scheduled,
- BCWP means Budgeted Cost Work Performed,
- ACWP means Actual Cost Work Performed.
All these are considered as effort in hours and costs.
PI are the Performance Indexes, where:
- CPI is the Cost Performance Index,
- SPI is the Schedule Performance Index.
Window Rules settings In the module you can specify even more detailed settings for individual windows based on their title or the application they belong to. These settings can also be accessed from the window context menu: Right click the window titlebar and select or
More Information
Under Construction
This is a new page, currently under construction!
Manage your tasks with PlanWork
Features
PlanWork is a personal task manager for Plan projects.
PlanWork assists project members during execution of the tasks they have been assigned to. Data is tranferred between the project manager and the individual member as work packages sent by mail. A work package consists of the information the member needs to perform the task, like name and description, planned start- and finish time, planned effort and relevant documents.
Links
Paramétrage de la recherche de fichiers Plasma Baloo indexe tous les fichiers et leurs métadonnées dans votre système de fichiers. Cela permet un temps de recherche rapide lors de d'utilisation. Et cela permet à d'autres applications comme Elisa ou Peruse de trouver votre fichier de musique/bande dessinée plus rapidement.
Plus d'informations
- Documentation officielle de KDE
- Baloo (wiki userbase)
- Baloo (wiki Arch Linux)
- Sweeper/es
Sweeper protege tu privacidad en un equipo compartido Sweeper ofrece dos grandes ventajas
- Puede recuperar espacio en disco
- Puede eliminar evidencias de tus actividades en un ordenador compartido
Para hacer esto limpia, con tu consentimiento
- Contenido del portapapeles
- Documentos recientes
- Aplicaciones recientes
- Historial de órdenes ejecutadas
- Las miniaturas generadas
También limpia tu actividad en la web eliminando, si es necesario
- Cookies y la política de cookies
- Historial web y caché
- Iconos "Favoritos"
- Entradas para autocompletar formularios
Puedes elegir eliminar cualquiera o todas estas cosas. Tu decides el equilibrio entre comodidad y privacidad.
Ce module vous permet de configurer le thème des applications GNOME/GTK.
Thème GTK des paramètres système Ces paramètres s'appliquent uniquement aux applications GTK. Regardez System Settings/Widget Style pour configurer le thème de l'application Qt. Si vous êtes intéressé par une meilleure intégration pour l'application GTK, consultez la liste des thèmes KDE avec portages GTK.
Plus d'information
PulseAudio
El propòsit de pulseaudio és utilitzar múltiples fluxos d'entrada, de manera que si rebeu un missatge entrant, per exemple, el reproductor de medis no ha de parar per a deixar passar. Quan funciona, funciona bé, però hi ha moments en que podríeu necessitar una mica més de comprensió per a resoldre un problema. Aquestes referències poden ajudar:
Problemes de Phonon
Targetes de so externes
El wiki de PulseAudio
L'arranjament perfecte
Configuració dels altaveusPulseAudio
Le but de PulseAudio est de gérer plusieurs flux entrants, de sorte que si vous recevez un message entrant, par exemple, votre lecteur multimédia n'a pas à s'arrêter pour le laisser passer. Quand cela fonctionne, cela fonctionne bien, mais il y a des moments où il peut avoir besoin d'un peu plus de compréhension pour résoudre un problème. Ces références devraient aider:
Phonon Problems
External Sound Cards
The PulseAudio wiki
The Perfect Setup
Setting up your speakersPulseAudio
El propósito de pulseaudio es manejar varios flujos de entrada, de forma que si recibes un mensaje, por ejemplo, tu reproductor multimedia no tenga que parar para dejarle pasar. Cuando funciona, funciona bien, pero hay veces que puede ser necesario un poco más de conocimiento para resolver un problema. Las siguientes referencias deberían ayudar:
Problemas en Phonon
Tarjetas de sonido externas
Wiki de PulseAudio
La configuración perfecta
Configuración de los altavoces
System settings icon theme Plasma comes with a full set of icons in several sizes. These icons are being used all over Plasma: the desktop, the panel, the Dolphin file manager, in every toolbar of every Plasma application, etc. The icons control module offers you very flexible ways of customizing the way Plasma handles icons.
More information
- KDE official documentation
- Browse icon theme on the KDE Store
- Arch Linux wiki article about icon theme
- Icon theme specification (freedesktop.org)
- System Settings/Windows Management/en
Window Behavior

Here you can configure how your windows behave with respect to getting focus, receiving various kinds of mouse clicks, when being moved or opened. Task Switcher

Define how you want to switch between windows. KWin Script
Activate, deactivate and get new KWin scripts to customize even more how you interact with KWin. Window Rules
Configure specific settings for individual windows based on their title or the application they belong to.
PulseAudio
Lo scopo di PulseAudio è gestire più flussi in entrata in modo che se ricevi un messaggio in ingresso, per esempio, il tuo lettore multimediale non deve essere fermato per permettergli di arrivare. Quando funziona, funziona bene, ma a volte potrebbe essere necessario un po' più di approfondimento per risolvere un problema. Questi riferimenti dovrebbero aiutare:
Problemi con Phonon
Schede audio esterne
Wiki di PulseAudio
La configurazione perfetta
Impostare gli altoparlantiPulseAudio
O objetivo do pulseaudio é de lidar com múltiplos fluxos de entrada, de modo que se você receber uma mensagem de entrada, por exemplo, seu media player não tem que parar para deixar passar. Quando ele funciona, funciona bem, mas há vezes que pode ser necessário um pouco mais de conhecimento para resolver um problema. Essas referências devem ajudar:
Problemas em Phonon
Placas de som externas
Wiki do PulseAudio
A configuração perfeita
Configuração dos altofalantesSystem settings Location windows You can define a new path for directories containing personal files. It can be useful for example if your movie collection is in an external drive or you want this directory names in an other language.
More information
- KDE official documentation
- XDG Base Directory Specification
- Plan/Engineering To Order project tutorial/pt-br
Introdução Geral
Nesse tutorial você verá Aplicando para Solicitar projeto (ETO, do inglês), típicos para empresas industriais trabalhando com maquinário médio e plantas.
Existem duas fases principais, a primeira é relacionada com o planejamento enquanto a segunda é relacionada à execução e controle.
Esse tutorial foi escrito usando o KPlato versão 0.9.84 rodando no Kubuntu versão 10.10 com KDE 4.5.1. E foi atualizado para o Plan versão 3.1.0 rodando no Arch Linux.
Aqui estão as duas partes do tutorial.
Se você tem dúvidas, por favor pergunte nas páginas de Discussão.
PulseAudio
Der Zweck von pulseaudio ist es mehrere eingehende Datenströme zu handhaben, so dass, wenn Sie eine eingehende Nachricht erhalten, zum Beispiel, ihr Mediaplayer nicht aufhören muss, um diese durchzulassen. Wenn es funktioniert, dann funktioniert es gut, aber es gibt Zeiten da ist etwas mehr Verständnis notwendig, um ein Problem zu lösen. Die folgenden Referenzen sollten dabei helfen:
Phonon Probleme
Externe Soundkarten
Das PulseAudio Wiki
Das perfekte Setup
Lautsprecher einrichtenSystemindstillinger ikon-tema Plasma har et komplet sæt af ikoner i forskellige størrelser. Disse ikoner bruges overalt i Plasma: på skrivebordet, i paneler, i filmanageren Dolphin, i alle programmernes værktøjslinjer osv. Modulet Ikoner giver dig meget fleksible måder at tilpasse den måde, Plasma håndterer ikoner.
Mere information
- KDE official documentation
- Browse icon theme on the KDE Store
- Arch Linux wiki article about icon theme
- Icon theme specification (freedesktop.org)
- System Settings/Windows Management/fr
Window Behavior
Here you can configure how your windows behave with respect to getting focus, receiving various kinds of mouse clicks, when being moved or opened. Task Switcher
Define how you want to switch between windows. KWin Script
Activate, deactivate and get new KWin scripts to customize even more how you interact with KWin. Window Rules
Configure specific settings for individual windows based on their title or the application they belong to.
In the Screen Edges module you can choose between certain actions to be triggered when the mouse moves to one of the edges or corners of the screen. Each edge, and each corner can have its own action attached. You can also decide whether you want windows to be maximized when you drag them to the top edge of the screen, or to be tiled when you drag them to the sides of the screen. Finally you can set what happens to windows when you drag them across the screen edge.
System settings screen edge More information
PulseAudio
The purpose of pulseaudio is to handle multiple incoming streams, so that if you receive an incoming message, for instance, your media player doesn't have to stop to let it through. When it works, it works well, but there are times when it might need a little more understanding to solve a problem. These references should help:
Phonon Problems
External Sound Cards
The PulseAudio wiki
The Perfect Setup
Setting up your speakers
Font Management settings windows This configuration module allows you to manage the fonts installed in your system. You can add new fonts, delete existing one. You can also see how the font look.
You can use the group functionality, to sort the fonts in categories. By default, only 3 categories exists: All Fonts, Personal Fonts and System Fonts. The first time you create a new group, you also add a new 'Unclassified' group, where all fonts not categorized go.

New font group You can drag and drop a font to a group, to add them to the selected group.
More Information
- Створення визначень структур — настанови щодо створення і встановлення визначення уявної структури даних.
- Налаштування вбудованого перегляду необроблених даних для вказаного типу файлів — посібник з налаштування системи показу необроблених даних файлів з певним типом MIME у Konqueror, KDevelop та інших програмах, що використовують систему KPart.
- Plasma/FAQ/Index/da
Plasma FAQ'erne
- FAQ til Plasma 5.10 og 5.9.90
- FAQ til Plasma 4.4
- FAQ til Plasma 4.3
- FAQ til Plasma 4.2
- FAQ til Plasma 4.1
- FAQ til Plasma 4.0
- Sweeper
Sweeper protects your privacy on a shared computer Sweeper offers you two big advantages
- It can regain disk space
- It can remove evidence of your activities on a computer that is shared
To do this it removes, with your agreement
- Saved clipboard contents
- Recent Documents
- Recent Applications
- Run command history
- Your thumbnail cache
It also cleans up your web activity, removing, if required
- Cookies and cookie policy
- Web history and cache
- "Favourite" Icons
- Form completion entries
You can elect to remove any or all of these. You decide the balance between convenience and privacy.
The Plasma FAQ's
- FAQ for Plasma 5.10 or 5.9.90
- FAQ for Plasma 4.4
- FAQ for Plasma 4.3
- FAQ for Plasma 4.2
- FAQ for Plasma 4.1
- FAQ for Plasma 4.0
- System Settings/Desktop Session/en
In this System Settings module, you can configure Plasma's session manager and logout settings.

Desktop Session Settings Desktop Session allows you to choose how KDE should look when you log in:
- Restore the previous session
- Restore manually saved session
- Start with an empty session
More Information
Dans ce module de configuration, vous pouvez configurer les fonctionalités des bureaux virtuels plasma. Cette fonction permet d'avoir plusieurs bureaux avec un ensemble différent de fenêtres pour chacun et à l'utilisateur, de passer facilement d'un bureau à l'autre. Cette fonction est prise en charge par tous les systèmes d'exploitation majeurs.
Vous pouvez configurer le nombre de bureaux virtuels et la manière de passer de l'un à l'autre.
Configuration du nombre de bureaux virtuels Plus d'information
Default Applications
Imposta le applicazioni predefinite per le attività comuni, ad esempio la navigazione web, la scrittura di email, oppure la gestione dei file. File Associations
Imposta le applicazioni predefinite per la gestione di tipi di file specifici. Posizioni
Imposta il percorso per le "cartelle standard di base di xdg" (ad esempio le cartelle Musica, Scaricamenti...) Notifica di avvio
Configura l'animazione all'avvio di un'applicazione.
- Tutorials/Mousegestures for all Browsers (pl)Gesty myszy dla wszystkich przeglądarek
Gesty myszy dla wszystkich przeglądarek
Kliknij tu i ściągnij plik browsergestures.khotkeys.(wymaga KDE SC 4.3 lub nowszego)
Wsparcie dla:
- Konqueror
- Firefox
- Opera
- Arora
- Rekonq
- Chromium
- Dolphin
- Kontact
Następnie: Wejdź w Ustawienia systemowe -> Akcje klawiszowe -> Edytuj -> Importuj... ->Importuj plik browsergestures.khotkeys.
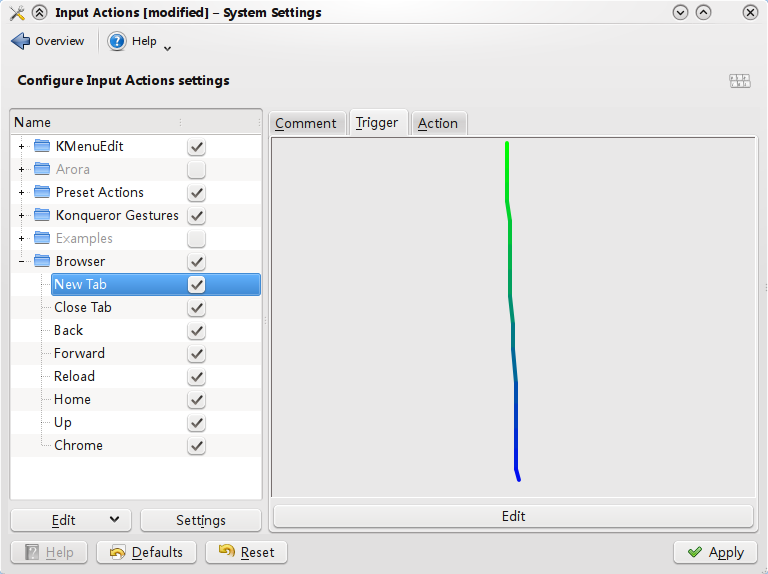 Kliknij "Ustawienia", zaznacz "Gesty", domyślny przycisk myszki jest ustawiony na "2" (kółko myszy), możesz wybrać "3" (prawy przycisk).
Ponieważ Opera obsługuje własne gesty, możesz ją usunąć w zakładce Warunki.
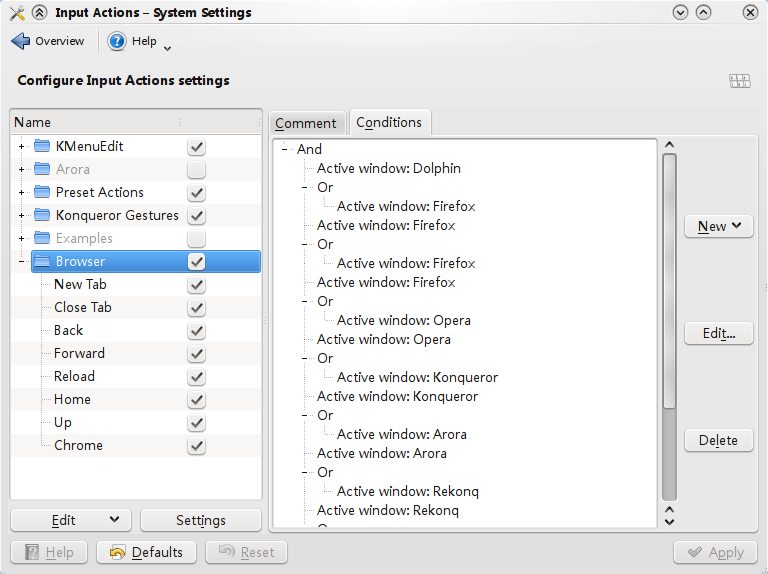
Sweeper protege sua privacidade em um computador compartilhado Sweeper oferece duas grandes vantagens
- Pode recuperar espaço em disco
- Pode eliminar evidências de suas atividades em um computador compartilhado
Para fazer isso, ele remove com o seu acordo:
- Conteúdo da área de transferência
- Documentos recentes
- Aplicativos recentes
- Histórico de ordens executadas
- As miniaturas geradas
Também limpa sua atividade no site eliminando, se necessário
- Cookies e política de cookies
- Histórico de site e cache
- Ícones "Favoritos"
- Entradas para autocompletar em formulários
Você pode escolher entre eliminar alguma ou todas as opções. Sua escolha é o equilíbrio entre comodidade e privacidade.
This section help you configure the look of the mouse cursor.
Mouse Cursor Theme settings windows You can also configure the cursor size.
In the KDE Store, you can find more mouse cursor theme.
Mouse Cursor Theme store More information
- KDE official documentation
- Browse mouse cursor theme on the KDE Store
- Create your own mouse cursor theme This tutorial explains how to create your own mouse cursor theme.
- System Settings/Screen Locking/fr
Ce module configure quand verrouiller votre écran et définit l'apparence de l'écran de verrouillage.
Paramètres de verrouillage de l'écran L'écran de verrouillage est une fonction de sécurité. Après un certain temps d'inactivité, Plasma ne permet à personne d'accéder à votre ordinateur sans votre mot de passe. Mais cette fonctionnalité n'est pas à l'épreuve des balles. Par exemple, si votre ordinateur est volé, l'écran de verrouillage ne peut pas protéger vos précieux fichiers. Si vous souhaitez plus de sécurité, vous devriez envisager un disque dur crypté.
Plus d'information
Vindueshåndtering
Her kan du indstille dine vinduer opførsel med hensyn til at få fokus og modtage forskellige slags museklik når de bliver flyttet eller åbnet. Opgaveskifter

Angiv hvordan du ønsker at kunne skifte imellem vinduer. KWin-scripts
Aktivér, deaktivér og hent nye KWin-scripts til yderligere at tilpasse hvordan du interagerer med KWin. Vinduesregler
Angiv specifikke indstillinger for individuelle vinduer baseret på deres titel eller det program de hører til.
Sweeper beskytter dit privatliv på en delt computer Sweeper giver dig to store fordele
- Den kan genvinde plads på dine harddiske
- Den kan fjerne spor af dine aktiviteter på en delt computer
For at opnå dette, fjerner den med dit samtykke
- Indhold af klippeborde
- Oversigten over nyligt anvendte dokumenter
- Oversigten over nyligt anvendte programmer
- Kør kommando-historikken
- Din miniature-cache
Den rydder også op efter dine webaktiviteter og fjerner om nødvendigt
- Cookies og cookie-politik
- Browserhistorik og cache
- Ikoner i Favoritter
- Data til formularfuldførelse
Du kan vælge at fjerne nogle af disse eller dem alle. Du bestemmer selv, hvordan du vægter privatliv i forhold til bekvemmelighed.
There are many ways to read comic books, and one of those that has become more common in recent years is on a computer. Peruse was created as a way to make exactly that as easy and pleasant as possible, and to simply get out of the way and let you read your comic books. One could say that it allows you to peruse your comic books at your leisure, but that would be a silly way of putting it - so, peruse your comic books at your leisure! (from the Peruse website)Peruse provides also a comic creator. You can edit metadata and add new pages.
More Information
In this section you can choose the general theme for your desktop environment.
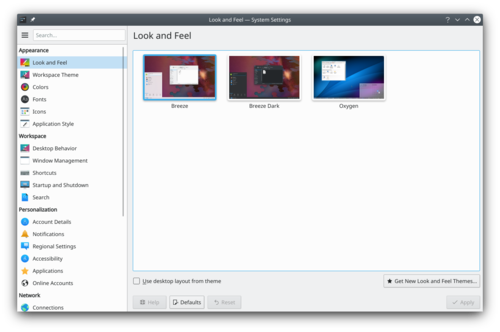
Look and Feel settings windows Before changing a theme, you can preview the selected theme.
Look and Feel preview In the KDE store, you can find more look and feel theme.

Look and Feel store All this change can be make from the terminal with the tool
lookandfeeltool. Typelookandfeeltool --helpfor more information.More Information
- Look and Feel theme can be created by the user, follow this tutorial for more information.
- Browse Look And Feel theme on the KDE Store
- Peruse/fr
There are many ways to read comic books, and one of those that has become more common in recent years is on a computer. Peruse was created as a way to make exactly that as easy and pleasant as possible, and to simply get out of the way and let you read your comic books. One could say that it allows you to peruse your comic books at your leisure, but that would be a silly way of putting it - so, peruse your comic books at your leisure! (from the Peruse website)Peruse provides also a comic creator. You can edit metadata and add new pages.
More Information
- Peruse website
- Phabricator projects
- Plan/Manual/Managing Resources==Managing Resources==
Description
You can create resources for a project using the Resource Editor and Work and Vacation Editor.
However, if you are going to use the same resources in many projects (which is often the case) it is more convenient to maintain resources in a separate file. The best way to do this is to create your resources file first and then set up Plan to always load this file when creating a new project.
If you are managing projects that use totally different resource pools you can create multiple resource files, but one project can only refer to one resource file.
You can select the resource file to use when creating a new project.
Plasma SSS'ları
- FAQ for Plasma 5.10 or 5.9.90
- FAQ for Plasma 4.4
- FAQ for Plasma 4.3
- FAQ for Plasma 4.2
- FAQ for Plasma 4.1
- FAQ for Plasma 4.0
- System Settings/Desktop Session/da
I dette systemindstillingsmodul kan du indstille Plasmas sessionshåndtering og logout-indstillinger.
Indstillinger for skrivebordssessioner Sessionshåndtering lader dig vælge hvordan KDE skal se ud, når du logger ind:
- Gendan forrige session
- Gendan en manuelt gemt session
- Start med en tom session
Mere information

QtiPlot analyzes and visualizes scientific data. Features
- Presents 2D and 3D data.
- Includes various data analysis functions like linear and non linear curve fitting.
- Rendering 3D using OpenGL using the Qwt3D libraries.
- Python scripting
- Various export formats (Bitmaps and Vector)
Screenshots
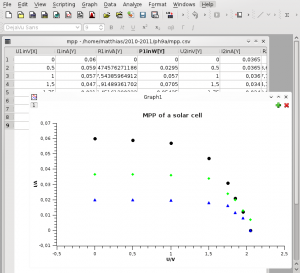

Simply plotting some data from a table. 3D plot of a surface with a singularity at the origin. Weblinks
Sweeper protegge la tua privacy su un computer condiviso con altri utenti Spazzino (Sweeper) ti offre due grandi vantaggi:
- può recuperare spazio su disco,
- rimuove le tracce della vostra attività da un computer condiviso.
Per fare questo rimuove, con il tuo consenso:
- contenuti salvati negli appunti,
- elenco dei documenti recenti,
- elenco delle applicazioni recenti,
- cronologia dei comandi eseguiti,
- le anteprime dei file visualizzati.
Elimina anche la tua attività web, rimuovendo, se richiesto:
- cookie e le politiche dei cookie,
- cronologia web e cache,
- icone dei "preferiti",
- voci di completamento di moduli.
È possibile scegliere di rimuovere uno o tutti questi elementi. Sei tu a decidere l'equilibrio tra comodità e privacy.
System settings Location windows Vous pouvez définir un nouveau chemin pour les répertoires contenant des fichiers personnels. Cela peut être utile par exemple si votre collection de films se trouve sur un lecteur externe ou si vous souhaitez que les noms de répertoire soient dans une autre langue.
{{Note|Pour un chemin plus spécifique (configuration, données d'application, ...), consultez la Spécification du répertoire de base XDG.} }
Plus d'information
- Documentation officielle de KDE
- Spécification des dossiers de base XDG Base
- System Settings/Plasma Theme/uk
За допомогою цього розділу ви можете налаштувати тему вашої стільниці. Внесені зміни не стосуватимуться окремих програм.
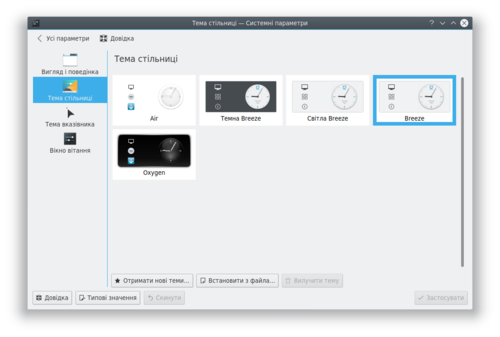
Вікно параметрів теми стільниці Додаткові теми стільниці можна знайти у Крамниці KDE.
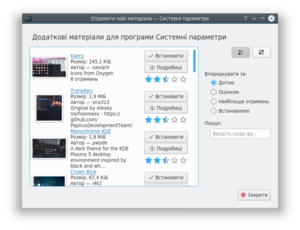
Крамниця тем стільниці Додаткові відомості
- Офіційна документація KDE
- Список тем стільниці у Крамниці KDE
- System Settings/Mouse Cursor Theme/fr
Cette section vous aide à configurer l'aspect du curseur de la souris.
Mouse Cursor Theme settings windows Vous pouvez aussi configurer la taille du pointeur.
Dans le 'KDE Store', vous pouvez trouver plus de thème pour le pointeur de la souris.
Mouse Cursor Theme store Plus d'information
- Documentation officielle de KDE (anglais)
- Parcourir les différents thèmes du pointeur de la souris dans le 'KDE Store' (anglais)
- Créer son propre thème de curseur de la souris Ce tutoriel explique comment créer son propre thème de curseur de la souris.
- Yakuake
Proposed for Deletion
This page has been proposed for deletion for the following reason:
Please use the discussion section of this page to voice your opinion on this.This is the wiki page for an app. The wiki page is very basic. Please read the manual of this app.
Yakuake is a drop-down terminal emulator based on KDE's Konsole technology.
Features
- Smoothly rolls down from the top of your screen
- Tabbed interface
- Configurable dimensions and animation speed
- Skinnable
- Sophisticated DCOP / D-Bus interface
Yakuake is part of KDE Extragear.
Problems
The F12 key is sometimes used by a desktop search application. If you meet this, change it to Ctrl+Shift+F12
Language
Configure the language that you want to use. Formats
Configure the format used by Plasma to display currency, time, date, etc. Spell Check
Add spell checking to plasma Date & Time
Configure the date and time.
Пошук файлів
Модуль налаштовування засобу індексування файлової системи baloo Пошук у Плазмі
Модуль для налаштовування KRunner, засобу запуску програм, вбудованого до стільниці Плазми.
До Baloo у Плазмі використовували інший засіб індексування файлів — Nepomuk. Якщо вам цікаво, можете ознайомитися зі старою сторінкою Стільничний пошук.
Her kan du ændre din adgangskode og det billede, som er knyttet til din konto. Du kan også redigere den personlige information, som er knyttet til din konto og du kan ændre den måde, som adgangskodefeltet på din loginskærm opfører sig.
For at ændre dit billede skal du klikke på boksen ved siden af dit brugernavn; denne boks viser dit nuværende billede. Der dukker nu et vindue op, hvor du kan vælge imellem forskellige billeder i galleriet eller klikke på for at finde et billede på din computer. Når du har valgt det ønskede billede, klikker du på .
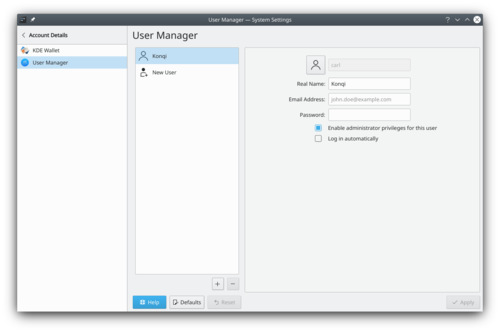
Brugerhåndtering Mere information
In this System Settings module, you can configure Plasma's session manager and logout settings.
Desktop Session Settings Desktop Session allows you to choose how KDE should look when you log in:
- Restaura la sessió anterior
- Restaura la sessió desada manualment
- Comença amb una sessió buida
More Information
System settings icon theme Plasma comes with a full set of icons in several sizes. These icons are being used all over Plasma: the desktop, the panel, the Dolphin file manager, in every toolbar of every Plasma application, etc. The icons control module offers you very flexible ways of customizing the way Plasma handles icons.
More information
- KDE official documentation
- Browse icon theme on the KDE Store
- Arch Linux wiki article about icon theme
- Icon theme specification (freedesktop.org)
- Plasma/FAQ/Index/it
Le Domande frequenti su Plasma
- FAQ for Plasma 5.10 or 5.9.90
- FAQ for Plasma 4.4
- FAQ for Plasma 4.3
- FAQ for Plasma 4.2
- FAQ for Plasma 4.1
- FAQ for Plasma 4.0
- System Settings/Connections/en
These settings are often used to connect to Wi-Fi or Ethernet networks, but provides also a lot more features, like creating Wi-Fi hotspot, setup a mobile broadband connection (if hardware is compatible) and connect to different VPN services.
Since Plasma 5.15, Plasma support Wireguard VPN tunnels, when the appropriate Network Manager plugin is installed.[1]
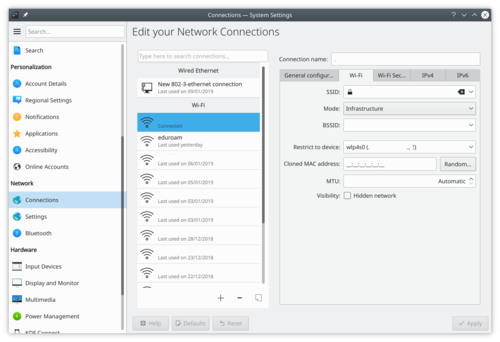
This KCM use NetworkManager as backend, a tool developed by RedHat.
More Information
References
Under Construction
This is a new page, currently under construction!
Devices that were reported to works
x86_64 with 32 bits UEFI support (Windows tablets)
Devices Wifi Touchscreen Dock Auto rotation HP Stream 8 Yes Yes Unknown Unknown Dell Venue 8 Pro Yes as Alpha6 Yes Unknown Unknown Wacom cintiq companion 2 Yes Yes Unknown Unknown ASUS Transformer T100TAL Yes Yes Yes No ACER ONE S1003 (N16H1) No Yes Yes No Source:
ARM based device
TODO
More Information
- Plasma Mobile homepage
- Plasma Mobile blog
- Plasma mobile developer documentation
- Plan/Engineering To Order project tutorial
General Introduction
In this tutorial you will see an Engineering To Order project (ETO), typical for manufacturing companies working on medium machines or plants.
There are two main phases, the first is related to the planning while the second is related to the executing and controlling.
This tutorial is written using KPlato release 0.9.84 working on a KUbuntu installation 10.10 with KDE 4.5.1. And was updated for Plan release 3.1.0 working in Arch Linux.
Here are the two chapters of the tutorial.
If you have questions, please ask on the Discussion pages.
The Plasma FAQ's
- FAQ for Plasma 5.10 or 5.9.90
- FAQ for Plasma 4.4
- FAQ for Plasma 4.3
- FAQ for Plasma 4.2
- FAQ for Plasma 4.1
- FAQ for Plasma 4.0
- Plasma/FAQ/Index/fr
Les FAQ Plasma
- FAQ pour Plasma 5.10 ou 5.9.90
- FAQ pour Plasma 4.4
- FAQ pour Plasma 4.3
- FAQ pour Plasma 4.2
- FAQ pour Plasma 4.1
- FAQ pour Plasma 4.0
- System Settings/User Manager/en
Here you can change your password and the image associated with your user account. You can also edit the personal information that is associated with your account, and you can change the way the password entry field on the login screen behaves.
In order to change your image, you just need to click on the box on the left side of your username, which should contain your current image. A face selection window will pop up. There you can choose between the different images available in the gallery, or click on to search for an image file in your computer. Once you have chosen your desired image, press .
User Manager More information
In the Screen Edges module you can choose between certain actions to be triggered when the mouse moves to one of the edges or corners of the screen. Each edge, and each corner can have its own action attached. You can also decide whether you want windows to be maximized when you drag them to the top edge of the screen, or to be tiled when you drag them to the sides of the screen. Finally you can set what happens to windows when you drag them across the screen edge.
System settings screen edge More information
- KDE official documentation
- Screen Edges in the community wiki (for KDE programmers)
- System Settings/Desktop Effects/zh-cn
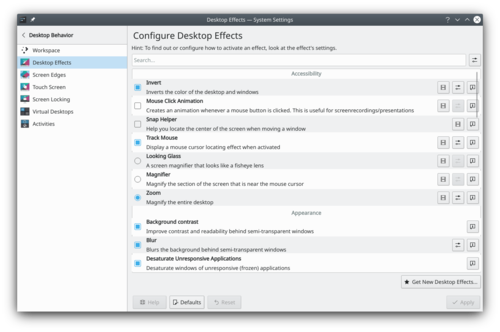
System settings desktop effect 桌面特效 模块用于配置工作空间的图形显示效果。
Desktop effects gives your workspace the look and feel of a truly modern system, but it comes at a price. Desktop effects requires modern graphics capabilities. If you are using an older machine, desktop effects may not be possible, or may make your system sluggish and unresponsive. In that case you can still use your Plasma workspace; just make sure to deactivate the desktop effects.
More information
- KDE official documentation
- Article about Desktop effects performance in userbase.
- Desktop Effect on the KDE Store
- Projects/Usability/HIG/Layout/Wizard
- System Settings/Screen Edges/da
I modulet Skærmkanter kan du vælge nogle handlinger, som kan udløses når musen flyttes til en af skærmens kanter eller hjærner. Hver kant og hvert hjørne kan tilknyttes sin egen handling. Du kan bestemme om du ønsker, at vinduer skal maksimeres når du trækker dem til skærmens øverste kant eller om de skal fliselægges, når du trækker dem til skærmens sider. Endelig kan du se hvad der sker, når du trækker dem ud over skærmkanten.
Systemindstillinger skærmkant Mere information
Window Rules settings Dans le module , vous pouvez spécifier des paramètres encore plus détaillés pour des fenêtres individuelles en fonction de leur titre ou de l'application à laquelle elles appartiennent. Ces paramètres sont également accessibles à partir du menu contextuel de la fenêtre : cliquez avec le bouton droit sur la barre de titre de la fenêtre et sélectionnez ou
Plus d'information
Widget Style
Widgets are the interface elements such as buttons, scroll bars, tabs and so on. Here you can choose and configure the widget style used for all KDE applications. You can also fine tune widget behaviour. Windows Decorations
This module allows you to select a style for the buttons and borders around windows. GNOME Application Style (GTK)
Configure the look of the GTK application
Las preguntas más frecuentes sobre Plasma
- FAQ for Plasma 5.10 or 5.9.90
- FAQ for Plasma 4.4
- FAQ for Plasma 4.3
- FAQ for Plasma 4.2
- FAQ for Plasma 4.1
- FAQ for Plasma 4.0
- System Settings/Applications/fr
Application par defaut
Régler les applications par défaut pour les tâches courantes, telles que la navigation sur le web, l'écriture de courriels, ou la gestion de fichiers. Associations de fichier
Définissez le gestionnaire d'applications par défaut pour un type de fichier spécifique. Emplacements
Définissez le chemin pour le "standard des répertoires de base xdg" (c'est-à-dire les répertoires Musique, Téléchargement, ...) Commentaires sur le lancement
Configurer l'animation au démarrage d'une application.
Les PMF de Plasma
- PMF per al Plasma 5.10 o 5.9.90
- PMF per al Plasma 4.4
- PMF per al Plasma 4.3
- PMF per al Plasma 4.2
- PMF per al Plasma 4.1
- PMF per al Plasma 4.0
- Sweeper/fr
Sweeper protège votre vie privée sur un ordinateur partagé Sweeper vous offre deux grands avantages
- Il peut récupérer de l'espace disque
- Il peut supprimer les traces de vos activités sur un ordinateur partagé
Pour ce faire, il supprime, avec votre accord
- les contenus enregistrés dans le presse-papiers
- les documents récents
- les applications récentes
- l'historique des commandes lancées
- votre cache des miniatures
Il nettoie aussi votre activité sur Internet, enlevant si nécessaire
- les cookies et leurs politiques
- le cache et l'historique Internet
- les icônes « favorites »
- la complétion sur les entrées de formulaires
Vous pouvez choisir de tout supprimer ou en supprimer seulement une partie. Vous décidez de l'équilibre entre confort et vie privée.
Arbejdsområde

Indstil arbejdsområdets opførsel Skrivebordseffekter

Indstil all KWin's skrivebordseffekter Skærmkanter
Indstil de handlinger der udløses, når du fører musemarkøren ud til skærmens kant. Touchskærm
Indstil hvilke handlinger, der skal udløses, når du swiper. Skærmlås

Indstil skærmlåsen Virtuelle skriveborde
Indstil de virtuelle skrivebordes egenskaber. Aktiviteter

Indstil aktiviteter
Comportamento delle finestre
Qui puoi configurare come la finestra si comporta rispetto all'ottenimento del fuoco, della ricezione dei vari clic del mouse, quando viene spostata o aperta. Selettore delle attività
Definisci come vuoi passare tra le finestre. Script di KWin
Attiva, disattiva oppure ottieni nuovi script per KWin, in modo da personalizzare sempre di più il modo di interagire con KWin. Regole delle finestre
Configura le impostazioni specifiche per le singole finestre in base al loro titolo o all'applicazione alla quale appartengono.
Home » Applications » Education » Test
Rocs is a Graph Theory IDE for everybody interested in designing and analyzing graph algorithms (e.g., lecturers, students, researchers). For all these users, Rocs provides an easy to use visual data structure editor and a powerful scripting engine to write and execute algorithms.
It is part of the KDE Education Project.
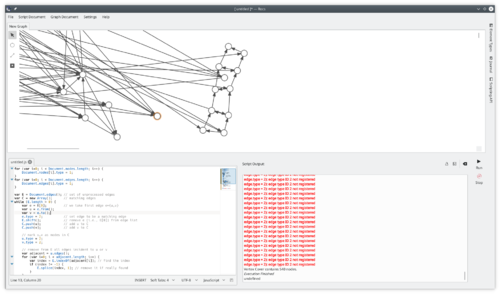
Features
- Canvas for graph drawing
- Automated graphs
- Oriented graphs
- IDE for graph related programming, using Javascript as it's main language, plus the graph library
- Nodes, graphs and edges are extensible from the scripting interface, so you can do anything you want.
- Qt Script debugging
Documentation

Minuet is a free and open source software for music education. Overview
Music education Free Software, thoughtfully designed to push your musical skills to the next level. Enhance your ability to recognize intervals, chords, rhythms, and scales while enjoying all the power of Free Software.
Features
- A Lot Of Exercises: Nearly 40 exercises regarding intervals, chords, and scales.
- Visualize of Music: Check your musical perception skills on piano keyboard.
- Highly Configurable: Adjustable playing settings, from beginners to pro.
- Extensible: Create your own exercises and adapt Minuet to your needs.
- Cross-Platform: Minuet now works on GNU/Linux and Android.
Useful links
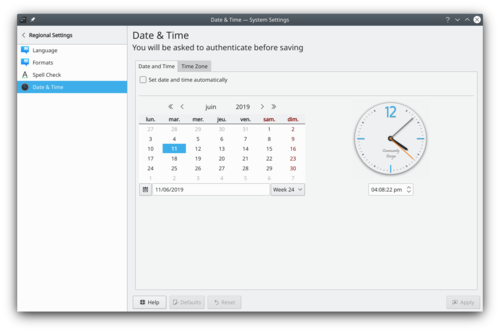
Setting the system date and time 这里的设置是系统级别的,所以需要 root 密码。 标签下面,可以勾选 选项,然后 列表选择公共的时间同步服务器,当然这个需要有互联网。
手动也行,取消 ,然后手动调。
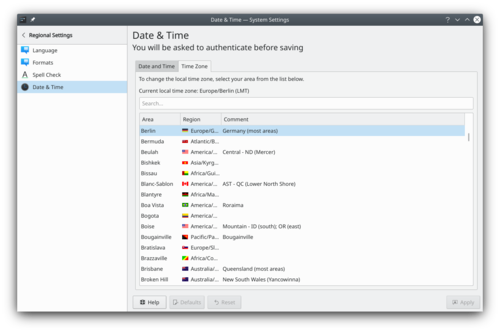
Setting the timezone 标签下,可以选择本地时区。
More Information
- KDE official documentation
- Change these settings from the command line (Arch Linux wiki)
- System Settings/Desktop Effects/en
System settings desktop effect The Desktop Effects module allows you to control what graphical effects you want to use for your workspace.
Desktop effects gives your workspace the look and feel of a truly modern system, but it comes at a price. Desktop effects requires modern graphics capabilities. If you are using an older machine, desktop effects may not be possible, or may make your system sluggish and unresponsive. In that case you can still use your Plasma workspace; just make sure to deactivate the desktop effects.
More information
- KDE official documentation
- Article about Desktop effects performance in userbase.
- Desktop Effect on the KDE Store
- System Settings/Icon Theme/fr
System settings icon theme Plasma est livré avec un ensemble complet d'icônes en plusieurs tailles. Ces icônes sont utilisées partout dans Plasma : le bureau, le panneau, le gestionnaire de fichiers Dolphin, dans chaque barre d'outils de chaque application Plasma, etc. Le module de contrôle des icônes vous offre des moyens très flexibles de personnaliser la façon dont Plasma gère les icônes.
Plus d'information
- KDE official documentation
- Browse icon theme on the KDE Store
- Arch Linux wiki article about icon theme
- Icon theme specification (freedesktop.org)
- System Settings/Font Management
Font Management settings windows This configuration module allows you to manage the fonts installed in your system. You can add new fonts, delete existing one. You can also see how the font look.
You can use the group functionality, to sort the fonts in categories. By default, only 3 categories exists: All Fonts, Personal Fonts and System Fonts. The first time you create a new group, you also add a new 'Unclassified' group, where all fonts not categorized go.
New font group You can drag and drop a font to a group, to add them to the selected group.
More Information
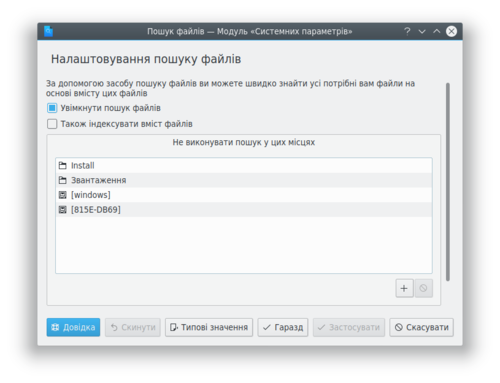
Налаштовування пошуку файлів у Плазмі Baloo індексує усі файли і метадані у вашій системі. Це забезпечує пришвидшення пошуку, якщо потрібно, і надає іншим програмам, подібним до Elisa або Peruse знаходити ваші файли музики або коміксів швидше.
Додаткові відомості
- Офіційна документація KDE
- Baloo (вікі userbase)
- Baloo (вікі Arch Linux)
- System Settings/Look And Feel/fr
Dans cette section, vous pouvez choisir le thème général de votre environnement de bureau.
Look and Feel settings windows Avant de modifier un thème, vous pouvez prévisualiser le thème sélectionné.
Look and Feel preview In the KDE store, you can find more look and feel theme.
Look and Feel store All this change can be make from the terminal with the tool
lookandfeeltool. Typelookandfeeltool --helpfor more information.Plus d'information
- Look and Feel theme can be created by the user, follow this tutorial for more information.
- Browse Look And Feel theme on the KDE Store
- System Settings/Connections/da
Disse indstillinger bruges ofte til at forbinde til et Wi-Fi- eller Ethernet-netværk, men har også mange andre funktioner, som at oprette et Wi-Fi-hotspot, opsætte en mobil bredbåndsforbindelse (hvis hardwaren er kompatibel) og forbinde til forskellige VPN-tjenester.
Siden version 5.15 har Plasma understøttet Wireguard VPN-tunneler, når det relevante plugin til Network Manager er installeret.[2]
Dette KCM bruger NetworkManager, et værktøj udviklet af RedHat.
Mere information
Referencer
Information
Your Team Leader is Yurchor
Remember that if you ask questions on the Discussion page others may benefit from it.
Ukrainian guides can be found on the following pages:Настанови щодо перекладу UserBase
Настанови щодо перекладу у Lokalize
Переклад категорій українською
I dette modul kan du vælge det generelle tema for dit skrivebordsmiljø.
Udseende og fremtoning: indstillingsvindue Før du ændrer et tema kan du få forhåndsvist det valgte tema.
Forhåndsvisning af udseende og fremtoning I KDE Store kan du finde flere temaer til udseende og fremtoning
Udseende og fremtoning i KDE store Alle disse indstillinger kan ændres fra konsollen med værktøjet
lookandfeeltool. Skrivlookandfeeltool --helpfor mere information.Mere information
- Du kan selv lave temaer til udseende og fremtoning. Følg denne vejledning for mere information.
- Browse temaer til udseende og fremtoning i KDE Store
- System Settings/Look And Feel/it
In questa sezione puoi scegliere il tema generale per l'ambiente desktop.
Look and Feel settings windows Prima di modificare un tema puoi ottenere un'anteprima di quello selezionato.
Look and Feel preview Puoi trovare altri temi sull'aspetto in KDE store.
Look and Feel store Tutte queste modifiche possono essere fatte nel terminale con lo strumento
lookandfeeltool. Digitalookandfeeltool --helpper altre informazioni.Altre informazioni
- Il tema dell'aspetto può essere creato dall'utente; per maggiori informazioni, segui questa esercitazione.
- Sfoglia il tema dell'aspetto nel KDE Store
- System Settings/Regional Settings/uk
Мова
Тут можна налаштувати мову, яка використовуватиметься для перекладу інтерфейсу. Формати
Тут можна налаштувати формат, який Плазма використовуватиме для показу валют, часу, дат тощо. Перевірка правопису
Тут можна визначити параметри перевірки правопису у Плазмі. Дата і час
Тут можна налаштувати параметри дати і часу.
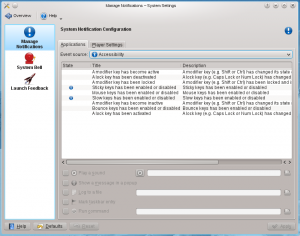
Configure the notifications you receive in your workspace

Manage Notifications
Some applications and subsystems of your workspace can notify you about various events. Here you can specify which events you wish to be notified about, and how you want to be notified.

System Bell
If you want to use the system bell instead of system notifications, here is the place to set that.
Launch Feedback
Choose what kind of feedback you want while an application is launching.
Встановлення KDE 4: як встановити програмне забезпечення KDE 4?
Чи можна зібрати програмне забезпечення KDE з початкових кодів?
Так, настанови зі збирання можна знайти Techbase тут.
Як зібрати програмне забезпечення KDE? Куди звертатися, якщо у вас виникнуть проблеми?
Настанови щодо збирання KDE можна знайти Techbase тут. Будь ласка, будьте уважні під час їхнього виконання. Питання можна задати у звичайних для цього місцях: канали IRC, списки листування та форуми.
In this System Settings module, you can configure Plasma's session manager and logout settings.
Desktop Session Settings Desktop Session allows you to choose how KDE should look when you log in:
- Restore the previous session
- Restore manually saved session
- Start with an empty session
More Information
There are many ways to read comic books, and one of those that has become more common in recent years is on a computer. Peruse was created as a way to make exactly that as easy and pleasant as possible, and to simply get out of the way and let you read your comic books. One could say that it allows you to peruse your comic books at your leisure, but that would be a silly way of putting it - so, peruse your comic books at your leisure! (from the Peruse website)Peruse provides also a comic creator. You can edit metadata and add new pages.
More Information


- Pages using DynamicPageList3 parser tag
- Amarok
- Draft
- Accessibility
- 辅助功能/zh-cn
- Accessibility/pt
- Tilgængelighed/da
- Office
- Kontor/da
- 접근성
- 教程/zh-cn
- 教學/zh-tw
- Xüsusi imkanlar
- Accessibilité/fr
- Improve
- Internet
- Configuration
- Advanced Users
- Escritório/pt-br
- Ufficio/it
- Amarok2.8
- Multimedia
- Tutorials
- Historic
- Grafik/da
- Fotografi/da
- Vejledning/da
- Xüsusi imkanlar/az
- Grafica/it
- Fotografia/it
- Guide/it
- Bureautique/fr
- Amarok2.8/pl
- Multimedia/pl
- Samouczki/pl
- Gràfics/ca
- Fotografia/ca
- Guies d'aprenentatge/ca
- 오피스
- Amarok/da
- Multimedia/da
- Internet/lb
- Astellungen/lb
- Fortgeschratte Benotzer/lb
- Internet/zh-cn
- Oficina/ca
- Amarok2.8/pt-br
- Multimídia/pt-br
- Tutoriais/pt-br
- Graphics
- Photography
- 網際網路/zh-tw
- 設定/zh-tw
- 高階用戶/zh-tw
- Internet/nl
- Multimedia/fr
- Tutoriels/fr
- Internet/da
- Leitfäden/de
- Büro/de
- Internet/cs
- Konfigurace/cs
- Pokročilí uživatelé/cs
- Tutoriales/es
- Internet/pl
- Konfiguracja/pl
- Użytkownicy Zaawansowani/pl
- Доступність/uk
- 자습서
- 인터넷
- Доступность/ru
- Internet/it
- Utilities
- File Management
- Офісні програми/uk
- İnternet/tr
- Internet/de
- 配置/zh-cn
- 高级用户/zh-cn
- Uddannelse/da
- Internet/fr
- 多媒體/zh-tw
- 多媒体/zh-cn
- Education
- Internet/ca
- Configuració/ca
- Usuaris avançats/ca
- 辦公/zh-tw
- Småprogrammer/da
- Filhåndtering/da
- 办公/zh-cn
- Éducation/fr
- Bildung/de
- Istruzione/it
- Educación
- Dienstprogramme/de
- Dateiverwaltung/de
- Spil/da
- Avancerede brugere/da
- Konfiguration/da
- Games
- Utilità/it
- Gestione file/it
- Amarok/uk
- Звук і відео/uk
- Підручники/uk
- Internet/pt-br
- Configuração/pt-br
- Usuários Avançados/pt-br
- Biuro/pl
- Utilitaires/fr
- Gestionnaire de fichiers/fr
- Educação/pt-br
- Jogos/pt-br
- Internet/es
- Gráficos/es
- Fotografía/es
- Графіка/uk
- Фотографія/uk
- Oficina/es
- Configuration/fr
- Utilisateurs avancés/fr
- Мультимедиа/ru
- 应用程序/zh-cn
- Çoklu Ortam/tr
- 應用程式/zh-tw
- Multimedia/it
- Amarok2.8/tr
- Öğreticiler/tr
- Grafik/de
- Fotografie/de
- Anleitungen/de
- 图形/zh-cn
- Jeux/fr
- Amarok/zh-cn
- Multimedia/es
- Configurazione/it
- Multimedia/ro
- Programmer/da
- Applications
- 入門/zh-tw
- Graphics/ja
- 圖形/zh-tw
- 入门/zh-cn
- Multimedia/de
- Toepassingen/nl
- Configuración/es
- Acessibilidade/pt
- Tutoriale/ro
- Internet/ro
- Configuraţie/ro
- Aplikace/cs
- Aplikacje/pl
- Dostępność/pl
- Primeiros pasos/gl
- Uygulamalar/tr
- Grafika/pl
- Aan de slag/nl
- Aplicativos/pt-br
- Programme/de
- Aplicaciones/es
- Początki/pl
- Getting Started
- Kom i gang/da
- 프로그램
- Začíname/sk
- Aplikasi/id
- Aplicativos/gl
- Multimedia/ja
- Getting Started/ar
- Öğreticiler
- Yapılandırma
- Primeiros passos/pt
- Інтернет/uk
- Applicazioni/it
- Primeiros Passos/pt-br
- Aplicacions/ca
- Alkuun pääseminen/fi
- Komma igång/sv
- 그래픽
- Per iniziare/it
- Grafikler
- Pentru început/ro
- Začínáme/cs
- অ্যাক্সেসযোগ্যতা
- Erste Schritte/de
- Applications/fr
- Para Empezar/es
- Multimédia/fr
- Gráficos/pt-br
- Getting Started/hu
- 시작하기
- Pour commencer/fr
- Com començar/ca
- Proposed deletion
- Amarok/gl
- Son e vídeo/gl
- Aprendizaxes/gl
- Graphismes/fr
- Memulai/id
- Başlarken/tr
- Dolphin
- Dolphin/da
- アプリケーション/ja
- Amarok/it
- Amarok/es
- Налаштування/uk
- Досвідченим користувачам/uk
- Kdenlive
- Plasma
- Under Construction
- Kopete
- Template
- Internet/zh-tw
- Kopete/da
- Kexi
- Kopete/de
- Kopete/fr
- Kopete/es
- Kopete/pt-br
- Kopete/it
- 游戏/zh-cn
- 遊戲/zh-tw
- Kopete/uk
- Giochi/it
- Juegos/es
- Spiele (de)
- Spelletjes/nl
- Ігри/uk
- Office/tr
- 开发/zh-cn
- KRunner/es
- Escritorio/es
- Kdenlive/uk
- KRunner/it
- Desktop/it
- Sviluppo/it
- 工具/zh-cn
- 系统/zh-cn
- 工具/zh-tw
- 系統/zh-tw
- Udvikling/da
- 開發/zh-tw
- Desarrollo/es
- Development
- 檔案管理/zh-tw
- 文件管理/zh-cn
- Pages with broken file links
- Security
- Entwicklung/de
- Bureau/fr
- Développement/fr
- İnternet
- Khipu1.0.0
- Utilidades/es
- Administración de Archivos/es
- Utilități/ro
- Gestionarea Fișierelor/ro
- Kexi/da
- Desenvolvimento/pt-br
- Desenvolupament/ca
- System/da
- Office/ja
- Utilitários/pt-br
- Gerenciamento de Arquivos/pt-br
- System
- 輔助功能/zh-tw
- Sistema/es
- Yardımcı Araçlar/tr
- Utilitats/ca
- Sistema/ca
- Internet/ja
- Sistema/it
- Kantoor/nl
- System/de
- Интернет/ru
- Dosya Yönetimi/tr
- Sistema/pt-br
- Development/ja
- Multimedia (de)
- Entwécklung/lb
- Уроци/bg
- Работа с файлове/bg
- Kexi/it
- KRunner/uk
- Стільниця/uk
- Administration/da
- Administrator/pl
- Amministrazione/it
- Administrateur/fr
- راهبر
- Système/fr
- Systeem/nl
- Sistem/id
- Skrivebord/da
- Desktop
- Ofis/tr
- Süßteem/ksh
- Система/uk
- Розробка/uk
- System/ja
- 桌面/zh-cn
- Escritorio/gl
- Sistema/gl
- Configuración/gl
- Alustamine/et
- Επιφάνεια εργασίας/el
- Σύστημα/el
- Διαμόρφωση/el
- Escriptori/ca
- Getting Started/ja
- Gevorderden/nl
- Utenti esperti/it
- Plasma/zh-tw
- Plasma/zh-cn
- Usuarios Avanzados/es
- Початок роботи/uk
- Arbeitsfläche/de
- Konfiguration/de
- Grafikler/tr
- Система/ru
- Nástroje/cs
- Systém/cs
- Plasma/da
- Narzędzia/pl
- System/pl
- 유틸리티
- 시스템
- 安全/zh-cn
- 安全/zh-tw
- Plasma/it
- Plasma/pt-br
- Plasma/ca
- Plasma/es
- System/te
- Multimedia/te
- Plasma/fr
- Araçlar/tr
- Sistem/tr
- تسهیلات/fa
- سامانه/fa
- Utilities/ja
- Plasma/ru
- Seguridad/es
- Multimèdia/ca
- Samouczki (pl)
- Internet (pl)
- Segurança/pt-br
- Sikkerhed/da
- Science
- Sicurezza/it
- Mobile
- Sécurité/fr
- Власний внесок/uk