Digikam/ChangeFormat/en: Difference between revisions
Updating to match new version of source page |
Updating to match new version of source page |
||
| Line 44: | Line 44: | ||
Finally you can choose whether you want to apply color management setting and choose your color space, whether Adobe RGB or sRGB. | Finally you can choose whether you want to apply color management setting and choose your color space, whether Adobe RGB or sRGB. | ||
Then select the output format and click | Then select the output format and click <menuchoice>Convert</menuchoice>. | ||
*Select from various output file formats such has PNG, JPEG, TIFF & PPM | *Select from various output file formats such has PNG, JPEG, TIFF & PPM | ||
Remember you can alter each and every one of those settings. When you are done applying your personal touches to the images just click <menuchoice>Convert</menuchoice> on the menu and '''digiKam''' will do the rest. | Remember you can alter each and every one of those settings. When you are done applying your personal touches to the images just click <menuchoice>Convert</menuchoice> on the menu and '''digiKam''' will do the rest. | ||
[[Category:Graphics]] | [[Category:Graphics]] | ||
[[Category:Photography]] | [[Category:Photography]] | ||
[[Category:Tutorials]] | [[Category:Tutorials]] | ||
Latest revision as of 14:21, 10 July 2011
Batch Convert Your RAW Files Using Digikam
Transcribed from Mohamed Malik's web posts, 21 February 2011 and 8 July 2011
Do you have a lot of RAW files that need to be converted?
If you do digiKam has got you covered and this saves a lot of time. As for me I don’t have time to process each and every image separately. Here is how to convert them seamlessly and easily.
Select the RAW files and go to and this wizard will pop-up:
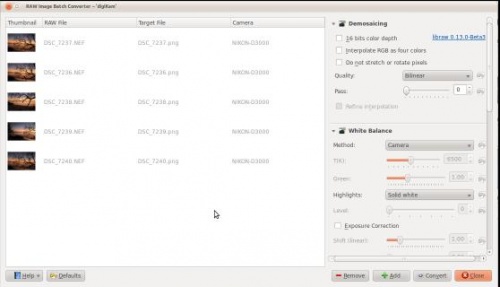
The wizard allows you to choose from the following settings:
Demosaicing - 8 bits or 16bits
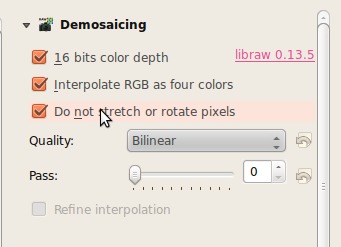
If you choose 16 bit per color depth, then you will only be able to save your files in PNG & TIFF formats. JPEG will only be available in 8 bit color depth.
White balance
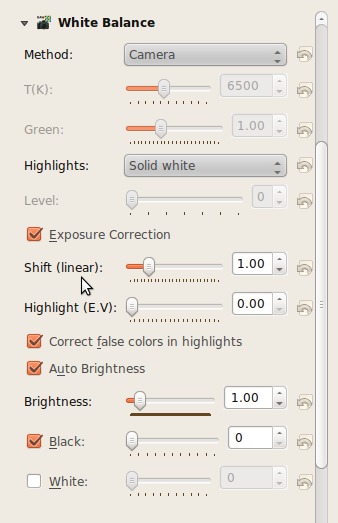
You can choose from the available white balance presets, select exposure correction and tweak a few other setting here.
Make corrections
- Exposure correction, brightness
- Noise reduction, chromatic aberration correction
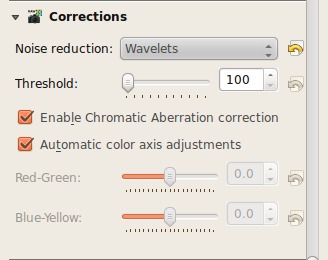
Specify the method of noise reduction and choose whether to apply Chromatic Aberration Correction.
Colour Manage and Save
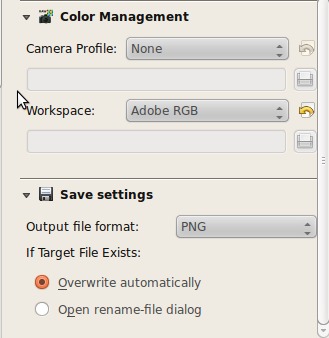
Finally you can choose whether you want to apply color management setting and choose your color space, whether Adobe RGB or sRGB.
Then select the output format and click .
- Select from various output file formats such has PNG, JPEG, TIFF & PPM
Remember you can alter each and every one of those settings. When you are done applying your personal touches to the images just click on the menu and digiKam will do the rest.
