Kaffeine/ru: Difference between revisions
Aspotashev (talk | contribs) Created page with "С Kaffeine возможно:" |
Updating to match new version of source page |
||
| (5 intermediate revisions by 2 users not shown) | |||
| Line 1: | Line 1: | ||
<languages /> | <languages /> | ||
{{MultiBreadCrumbs|1=Kaffeine}} | |||
{|class="tablecenter vertical-centered" | {|class="tablecenter vertical-centered" | ||
| Line 11: | Line 13: | ||
С Kaffeine возможно: | С Kaffeine возможно: | ||
* | * Проигрывать: | ||
** | ** Звуковые файлы | ||
** | ** Видеофайлы | ||
** | ** VCD | ||
** | ** DVD | ||
* | * Смотреть цифровое телевидение | ||
<div class="mw-translate-fuzzy"> | |||
[[Image:Kaffeine_dvd.png| 300px | thumb | center]] | [[Image:Kaffeine_dvd.png| 300px | thumb | center]] | ||
</div> | |||
If you have a working dvb-t card in your system, Kaffeine knows about | If you have a working dvb-t card in your system, Kaffeine knows about | ||
| Line 27: | Line 29: | ||
[[File:Kaffeine2.png|300px|center|thumb|A new device is added]] | |||
[[File:Kaffeinedvbt.png|300px|center|thumb|Configuring the device]] | |||
| Line 35: | Line 36: | ||
case, is to click the <menuchoice>start scan</menuchoice> button. | case, is to click the <menuchoice>start scan</menuchoice> button. | ||
[[File:Kaffeine1.png|300px|thumb|center|The Channel Scan Screen]] | |||
Add then the found/selected channels to the left (as in the screenshot | Add then the found/selected channels to the left (as in the screenshot | ||
| Line 46: | Line 43: | ||
The next screenshot shows the video and channel select window: | The next screenshot shows the video and channel select window: | ||
[[File:Kaffeine3.png|300px|thumb|center|Selecting the channel]] | |||
Recording is as simple as well: | Recording is as simple as well: | ||
[[Image:Kaffeine4.png|300px|center|thumb|Setting the recording time]] | |||
There's even a program guide: | There's even a program guide: | ||
[[Image:Kaffeine5.png|300px|thumb|center|The programming guide]] | |||
[[Special:myLanguage/Kaffeine-TV|This helpful tutorial]] gives another view of how to set up and use Kaffeine to watch digital TV. | [[Special:myLanguage/Kaffeine-TV|This helpful tutorial]] gives another view of how to set up and use Kaffeine to watch digital TV. | ||
=== | === Возможности === | ||
* | * Обзор файлов с поддержкой перетаскивания | ||
* | * Полная поддержка субтитров: автоматическая и ручная загрузка субтитров | ||
You will find the Project website [http://kaffeine.kde.org/ here] and you can ask questions on the IRC #kaffeine channel on irc.freenode.net | You will find the Project website [http://kaffeine.kde.org/ here] and you can ask questions on the IRC #kaffeine channel on irc.freenode.net | ||
[[Category: | [[Category:Мультимедиа/ru]] | ||
Latest revision as of 14:29, 6 September 2020
Home » Applications » Multimedia » Kaffeine
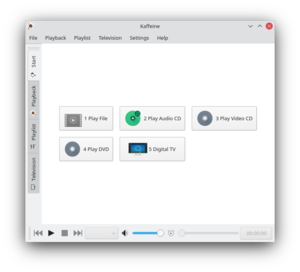 |
Kaffeine — это полноценный проигрыватель мультимедиа, который может удовлетворить все основные потребности. |
Возможности
С Kaffeine возможно:
- Проигрывать:
- Звуковые файлы
- Видеофайлы
- VCD
- DVD
- Смотреть цифровое телевидение
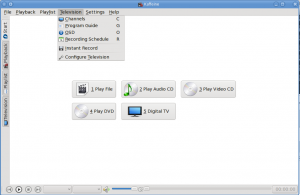
If you have a working dvb-t card in your system, Kaffeine knows about it and shows a button on the start tab "Digital TV". It shows as well a new configure option on top "Television".
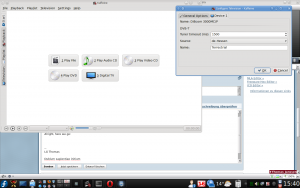
All you have to do, after you select your source, "hessen-de" in my
case, is to click the button.
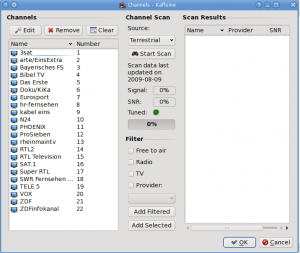
Add then the found/selected channels to the left (as in the screenshot already done) and you're ready to watch TV.
The next screenshot shows the video and channel select window:
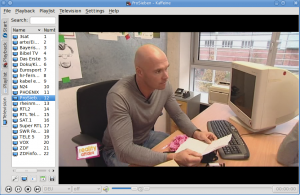
Recording is as simple as well:
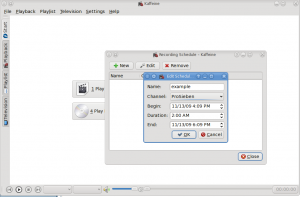
There's even a program guide:
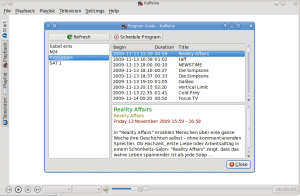
This helpful tutorial gives another view of how to set up and use Kaffeine to watch digital TV.
Возможности
- Обзор файлов с поддержкой перетаскивания
- Полная поддержка субтитров: автоматическая и ручная загрузка субтитров
You will find the Project website here and you can ask questions on the IRC #kaffeine channel on irc.freenode.net


