Plasma: Difference between revisions
| Line 70: | Line 70: | ||
'''Always Visible:''' Keeps the panel visible at all times, even when windows are maximised. | '''Always Visible:''' Keeps the panel visible at all times, even when windows are maximised. | ||
'''Auto Hide:''' Hides the panel off screen until | '''Auto Hide:''' Hides the panel off screen until the mouse is placed near the screen edge. | ||
'''Windows can cover:''' This allows windows to cover the panel and if maximised, will cover the panel. | '''Windows can cover:''' This allows windows to cover the panel and if maximised, will cover the panel. | ||
Revision as of 23:03, 15 February 2010
Template:I18n/Language Navigation Bar
An introduction: what Plasma is, and what it does
Plasma is the desktop interface for KDE 4 SC, including the application launcher (start menu), the desktop and the desktop panel (often referred to simply as the task bar, although that is only one component of the panel).
Plasma at a glance
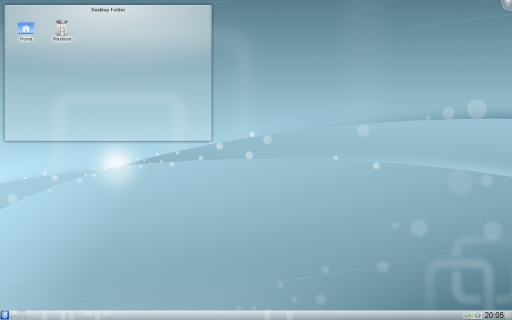
A typical Plasma desktop looks like this:

The three key components of a Plasma desktop are:
- The panel, better known as task bar, which provides room for the application launcher, the list of tasks (programs), clock and system tray;
- The desktop, the area where widgets and icons reside;
- The Plasma toolbox This is located at the top right of the screen. There is also one on the right of the panel.
Finding your way around Plasma
You can use Plasma as you would use the desktop of any other operating system, by accessing the application menu (K Menu), viewing the currently active programs on the taskbar, accessing icons on the system tray, and so on.
An important part of Plasma are the so-called widgets. Widgets are the individual units of the desktop and they include (although they are not limited to) the application menu, icons, the system tray, the clock... Widgets can exist on the desktop itself, or be inserted in the panel. Panels and desktops are actually special kinds of widgets, meant to contain other widgets (in Plasma terms, they are called "Containments").
How does that relate with desktop usage? Plasma has also some new features with respect to traditional desktop usage. We have already mentioned the "cashews": those are the way to start interacting and customizing Plasma. By clicking on them, a menu will pop up on the screen with a variety of choices: from there you can add widgets to your panel or desktop, resize, add or remove panels, and other operations.
Desktop and icons
As you may notice from the screenshot, there are no icons placed directly on the desktop. Instead, they are placed inside a container, better known as Folder View. Although there are a number of technical reasons for doing so, the Folder View can perfectly act as a desktop replacement (in fact, it shows the Desktop folder by default). You can drag icons over it, cut, copy, paste, rename files and also create new folders/files.
The main differences from the usual Desktop folder are essentially two:
- You can have more than one Folder View on the desktop itself;
- You can set Folder View to show also different folders (both local and on the network).
Aside from the Folder View, you can put on the desktop all kinds of widgets, such as weather reporting widgets, notes widgets, file watchers... There are no limits on what you can customize.
Widgets everywhere
In KDE SC 4.x Plasma supports not only widgets written specifically for Plasma (also known as Plasmoids) but also ones from other sources such as Google Gadgets and Dashboard Widgets from Mac OSX. Additional widgets can easily be found and installed through Get Hot New Stuff.
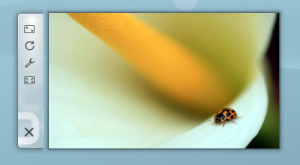
Widgets that are docked into the panel usually have an Options menu, while those on the desktop have the configuration options within the 'handle', the shaded area which pops up, sometimes right or sometimes left of the widget. Clicking and holding the mouse on the blank part of the handle will allow you to drag the widget to the desired position.

You have three tools on this handle. The top one is the re-sizer. Click and hold on the tool and you can drag the size.
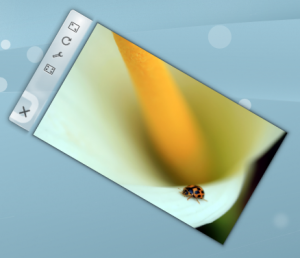
The second tool is a rotate tool. Again, click and hold the tool, while rotating to desired angle.

Finally, the wrench or spanner gives access to the controls applicable to that particular plasmoid.
Some of our favourite widgets are discussed on the Plasmoid page
Start menus etc.
Panels

By clicking on the toolbox at the right of the panel, you can put the panel into configure mode. This lets you configure the panel to fit your needs.
Panel Alignment: Allows you to set the alignment of the panel when not maximised.
Always Visible: Keeps the panel visible at all times, even when windows are maximised.
Auto Hide: Hides the panel off screen until the mouse is placed near the screen edge.
Windows can cover: This allows windows to cover the panel and if maximised, will cover the panel.
Windows go below: This allows windows got below the panel, even when maximised.
Maximise Panel: Makes the panel fit to the screen edges, if it has been resized.
Remove this panel: Removes the current panel.
Lock Widgets: Locks the panel and widgets in position.
Add Spacer: Allows you to add a spacer into the panel to separate panel items.
Add Widgets: This brings up an dialogue allowing you to add widgets into the panel or desktop.
Height: Allows the panel height to be adjusted.
Screen Edge: Allows you to drag the panel to any of the four edges of the screen.
The arrows on each edge just below the main settings allows you to set the panel size. Dragging the arrows makes the panel smaller. Dragging the centre arrow moves the panel's position.
Advanced usage
Special cases not covered here
Activities and the Zooming User Interface (ZUI)
KDE Plasma has brought a lot of new features to the modern linux desktop, however many people are only using a fraction of the desktop's full potential. One of the most useful and underused features is the plasma activities. The basic idea behind is that your desktop space is limited to how many widgets it can hold. A user will want to use a lot of widgets but doesn't want their desktop to be cluttered. The answer to this problem is activities; they allow you to specialize each desktop to whatever task you need to accomplish. To make a new activity you have to click on the cashew in the upper right hand corner, from there click zoom out. The desktop will zoom out then click add new activity under the small desktop. It will make a new desktop right next to it. Now go click the zoom in button under the new desktop. With this desktop you can add whatever widgets to this desktop and it will not affect the other desktop.
Activities and Virtual Desktops
Virtual desktops, the ability to have a separate sets of windows on separate desktops, can tie in with Activities. You can have a different activity on each virtual desktop. This can be configured by zooming out again and choosing "configure Plasma". Then select "use a different activity on each desktop" and zoom in again.
From Plasma Desktop 4.4 onwards this configuration setting can be found in systemsettings under Configure Plasma.
Use Cases
A user likes web comics so they add their favorite web comics via the comics widget. The user now has a full desktop activity dedicated to their favorite web comics. Now the user is happy with the web comics, but the user now has to go to work, so the user creates a activity with the folder view widgets set to the folders of the projects the user is currently working on. After work the user goes home and works on a side project of writing romance novels. The user always gains inspiration by looking at pictures of the user's significant other. The user now creates a new Activity but now puts pictures frame widgets with pictures of the user's significant other. The user also has a folder view of the romance novel project folder. Now no matter what the user is doing the user has a custom tailored activity to match it.
Go to this blog to read a few tips on using activities.
Further information
- The Plasma FAQ
- Plasma HowTo - short screencasts
- Glossary
- Some of our favourite plamoids - why not add yours?
- Here's how to install more plasmoids
| Back to the Introduction page |

