Archive:Kdenlive/Manual/Useful Information/Surround Sound: Difference between revisions
| Line 44: | Line 44: | ||
{{Note|LFE (Low Frequency Effects) is often referred to as "subwoofer channel", which is not quite correct. A surround sound speaker setup is perfectly valid without subwoofer, in this case the surround system will redirect the LFE channel to "large" speakers, usually the front speakers.}} | {{Note|LFE (Low Frequency Effects) is often referred to as "subwoofer channel", which is not quite correct. A surround sound speaker setup is perfectly valid without subwoofer, in this case the surround system will redirect the LFE channel to "large" speakers, usually the front speakers.}} | ||
The idea now is to split the | The idea now is to split the surround sound into four separate (stereo/mono) audio files that Kdenlive can handle: | ||
* Front (stereo) | * Front (stereo) | ||
| Line 58: | Line 58: | ||
Next, rename the tracks to "Front", "Center", "LFE" and "Surround" starting from the top, using <menuchoice>Name...</menuchoice> from the context menu of each track. | Next, rename the tracks to "Front", "Center", "LFE" and "Surround" starting from the top, using <menuchoice>Name...</menuchoice> from the context menu of each track. | ||
The | The tracks should now look like this: | ||
[[File:AudacityChannels2.jpg]] | [[File:AudacityChannels2.jpg]] | ||
After all this hard work, exporting the four | After all this hard work, exporting the four tracks to four separate audio files is easy with <menuchoice>File->Export Multiple...</menuchoice>. Use "WAV" as "Export format", the rest of the settings should be already okay: "Split files based on: Tracks" and "Name files: Using Label/Track name". | ||
The "Edit metadata" dialog might pop up for each track, it is fine to just say "OK". At the end there should be a confirmation dialog, and four audio files should have been exported: "Front.wav", "Center.wav", "LFE.wav" and "Surround.wav". | The "Edit metadata" dialog might pop up for each track, it is fine to just say "OK". At the end there should be a confirmation dialog, and four audio files should have been exported: "Front.wav", "Center.wav", "LFE.wav" and "Surround.wav". | ||
Revision as of 15:16, 22 August 2013
Editing Surround Sound with Kdenlive
At the time of writing, Kdenlive can only handle stereo (two channel) audio tracks. There is limited support for more than two channels, but in order to edit and create surround sound, some manual steps including external tools are required.
This guide is using a six-channel 5.1 surround sound as example.
External Tools Used Here
Creating New Surround Sound
PENDING
Editing Existing Surround Sound
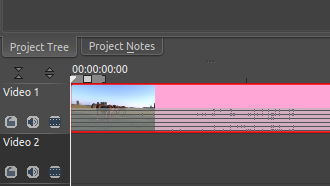
When adding a clip with more than two channels to a project, kdenlive creates an audio thumbnail that correctly shows all audio channels:
The clip can be edited and (audio) effects applied to it, and all appears to work just fine - but once rendering the project, it turns out that the audio track in the resulting video file is 2 channels (stereo) only.
The following steps provide a manual workaround for this issue.
Extract and Split the Audio Track
The first step is to extract the audio track from the video clip. This can be done in Kdenlive with from the context menu of the clip. This creates a WAV audio file in the same folder as where the video clip is located.
The extracted WAV audio file can then be opened in Audacity, it should show all 6 channels, these are:
- 1 - Front Left
- 2 - Front Right
- 3 - Center
- 4 - LFE
- 5 - Surround Left
- 6 - Surround Right
The idea now is to split the surround sound into four separate (stereo/mono) audio files that Kdenlive can handle:
- Front (stereo)
- Center (mono)
- LFE (mono)
- Surround (stereo)
First, Audacity needs to be configured to not always export to stereo audio files: In , under , select "Use custom mix (for example to export a 5.1 multichannel file)".
Now, in the first and the fifth track, click on the small triangle besides the name and select - you should end up with 4 tracks, two stereo and two mono.
Next, rename the tracks to "Front", "Center", "LFE" and "Surround" starting from the top, using from the context menu of each track.
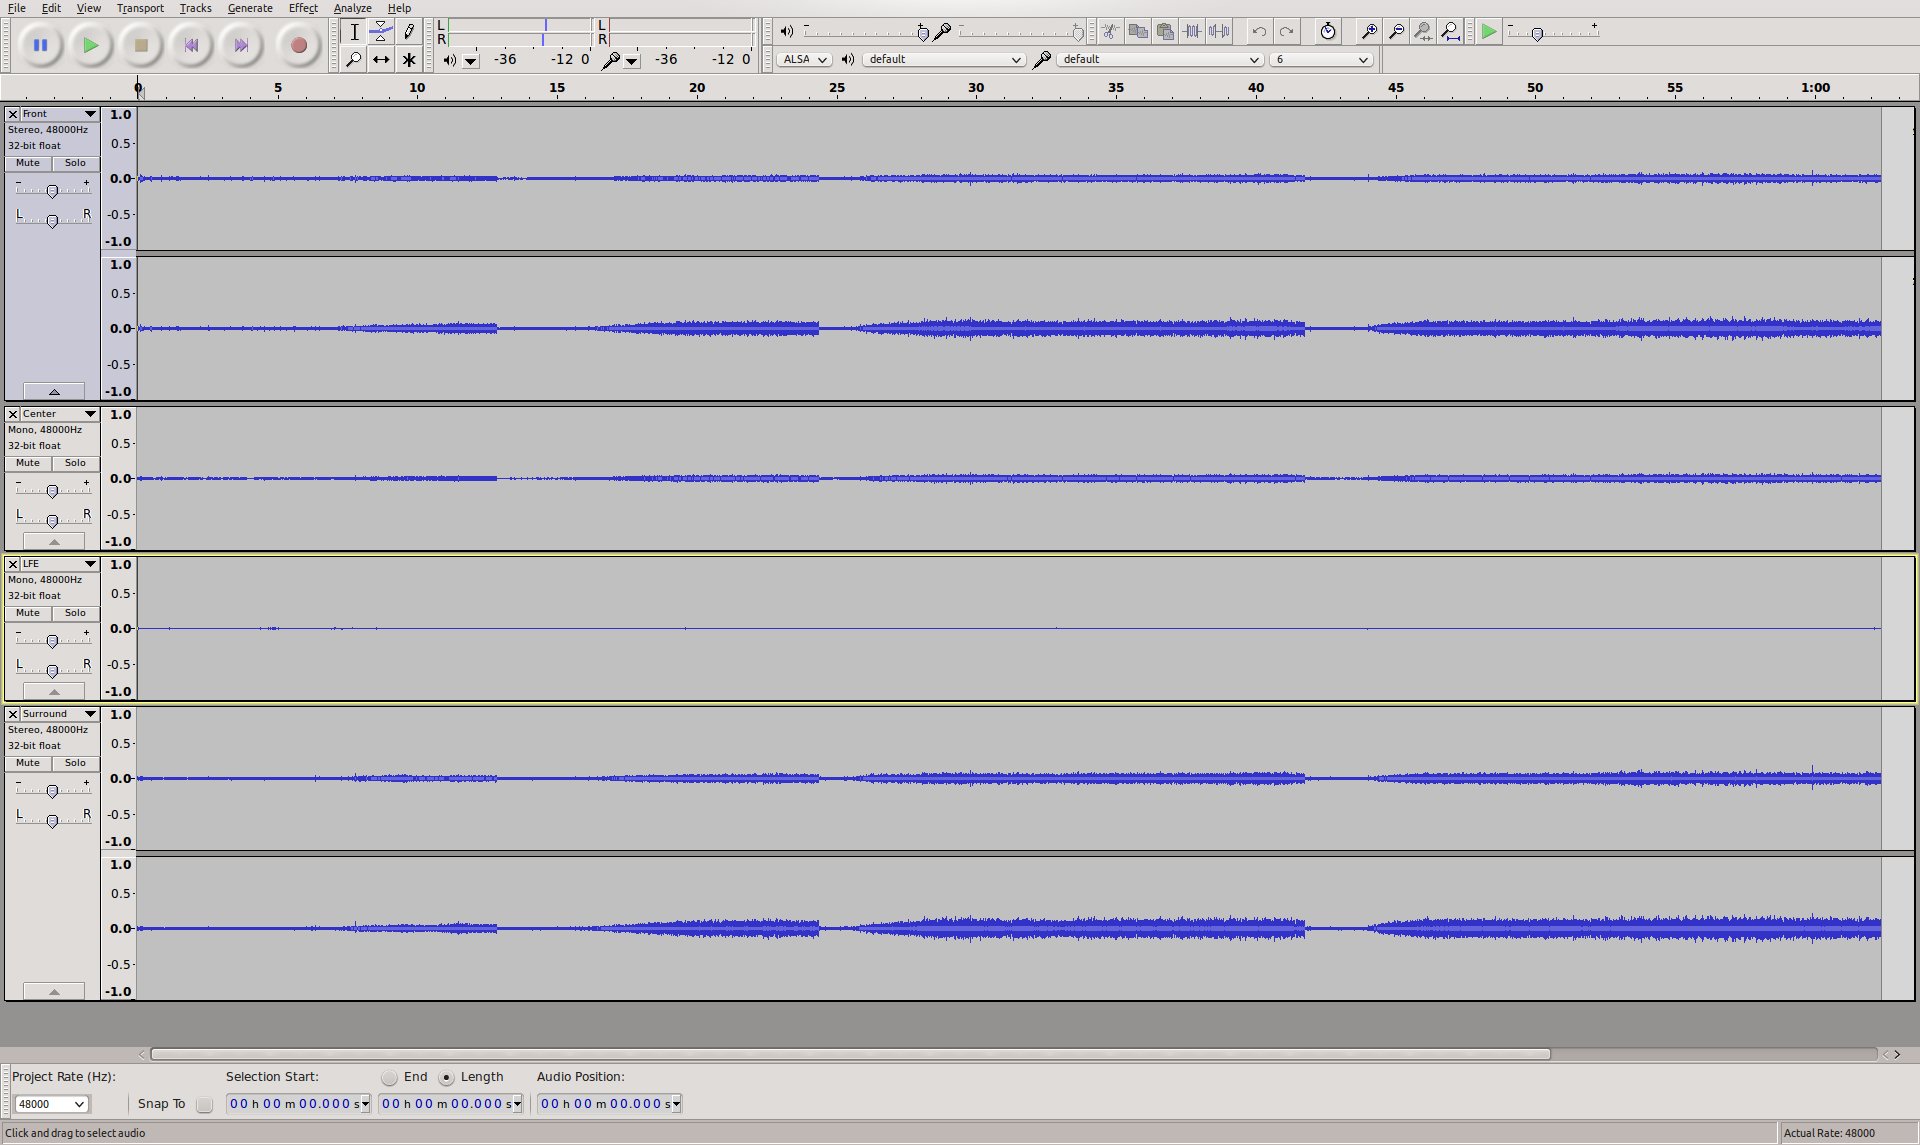
The tracks should now look like this:
After all this hard work, exporting the four tracks to four separate audio files is easy with . Use "WAV" as "Export format", the rest of the settings should be already okay: "Split files based on: Tracks" and "Name files: Using Label/Track name".
The "Edit metadata" dialog might pop up for each track, it is fine to just say "OK". At the end there should be a confirmation dialog, and four audio files should have been exported: "Front.wav", "Center.wav", "LFE.wav" and "Surround.wav".
Import Audio Tracks into Kdenlive
The previously created audio files can now be added to the Kdenlive project using .
SInce there are only two audio tracks in a project by default, it is necessary to add two more using before adding the four audio tracks to the timeline.
The next thing to do is to group the four audio tracks with the video clip by selecting all of them and then choosing .
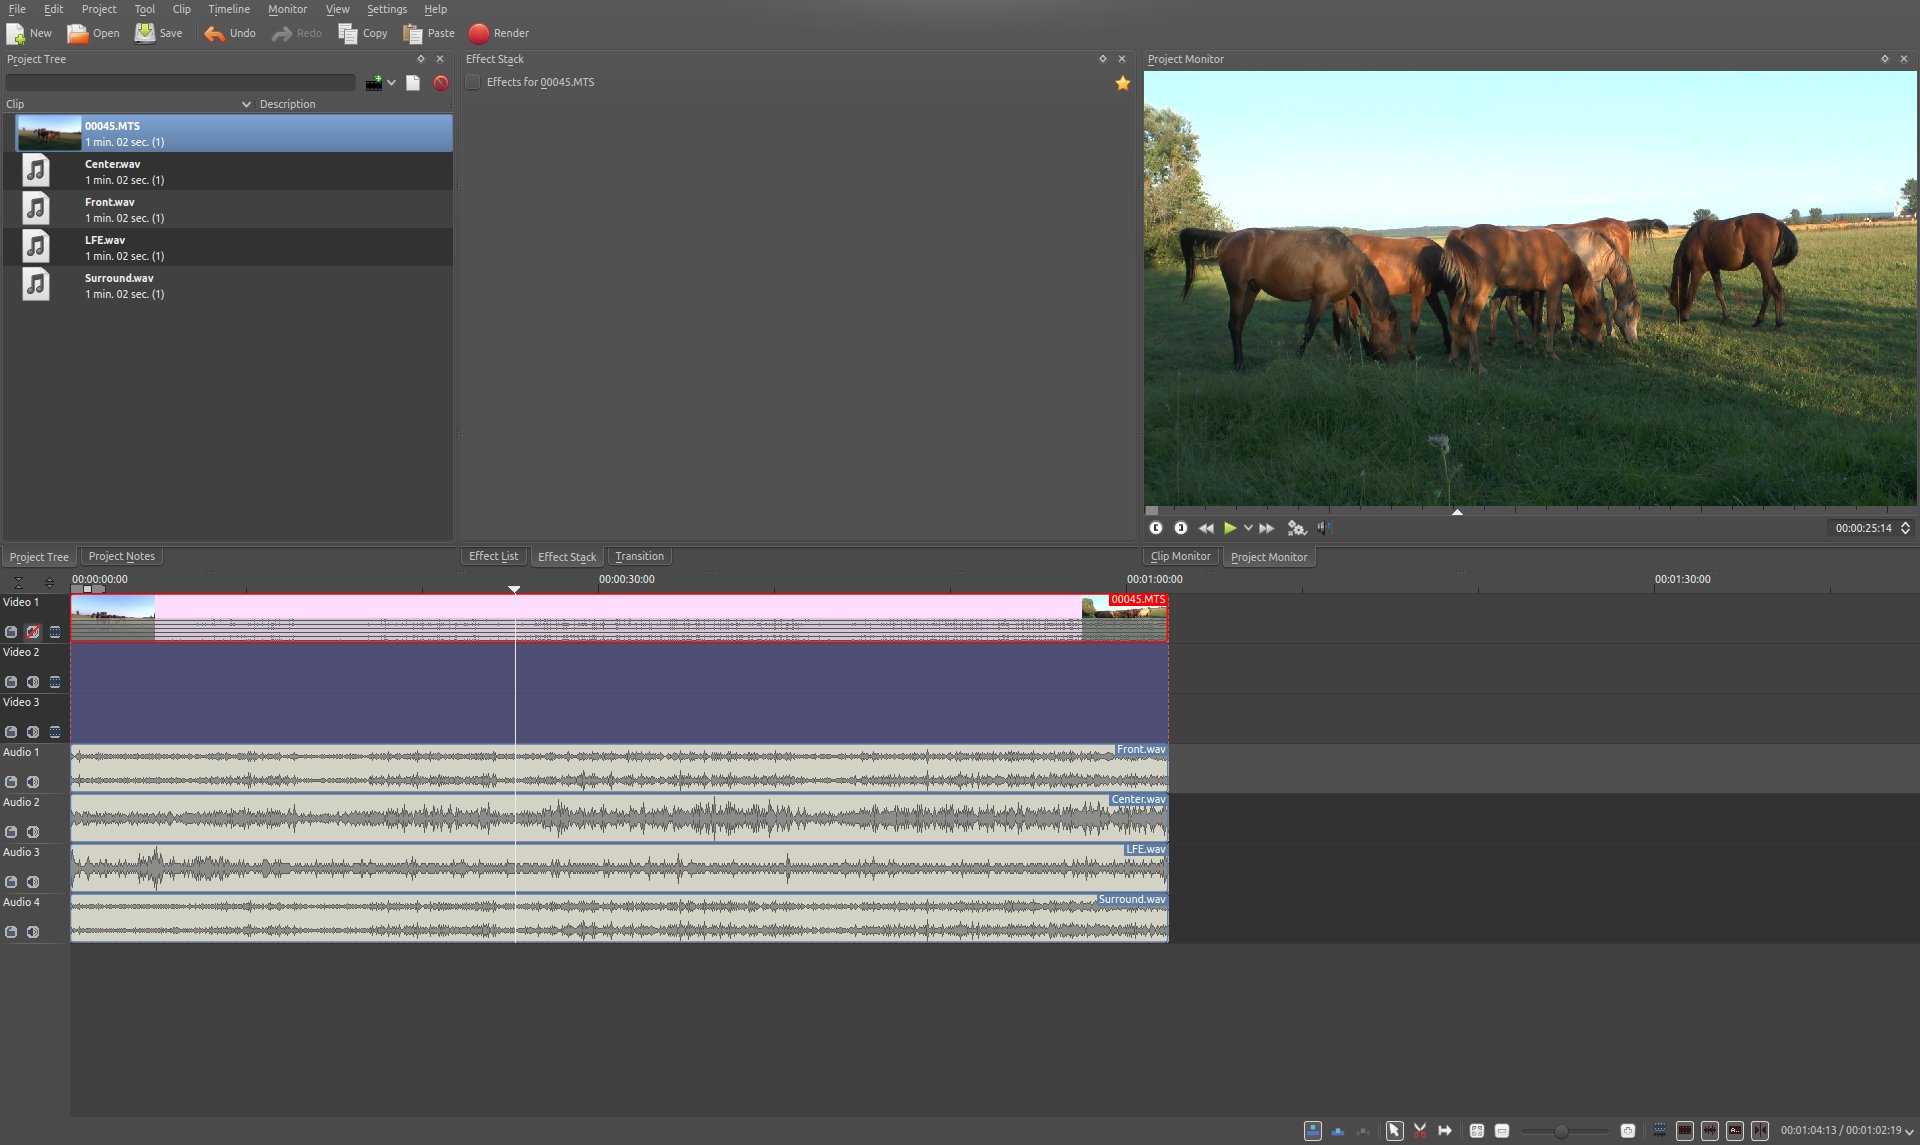
The Kdenlive project should now be ready for the usual editing, like cutting clips and adding effects, and should look something like this:
Rendering the Project
The pity now is, that it is still not possible to render the project with a surround sound audio track. Several manual steps are necessary to accomplish that.
First, the video track needs to be rendered without audio. This is simply done by rendering the project as it would normally be done, but without audio, by deselecting the "Export audio" checkbox.
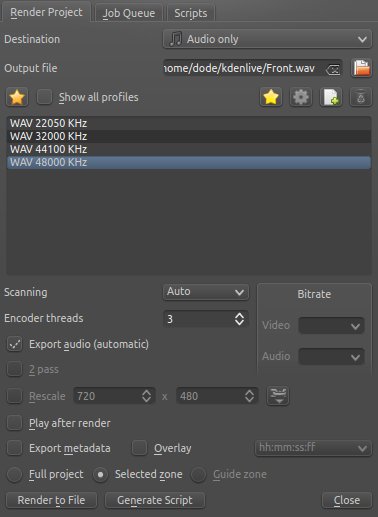
Then, each of the four surround sound audio tracks "Front.wav", "Center.wav", "LFE.wav" and "Surround.wav" need to be rendered into a separate audio file. For each of them, do the following:
- Mute all other audio tracks
- Enter a respective file name for "Output file"
- Select "Audio only" as "Destination"
- Select profile "WAV 48000 KHz"
- Check "Export audio"
Compose a Surround Sound Audio File
Now the separate audio tracks rendered by Kdenlive need to be "merged" into a single multichannel 5.1 surround sound audio file. This is again done in Audacity:
- Import "Front.wav", "Center.wav", "LFE.wav" and "Surround.wav" (in this order!) using
"Center" and "LFE" are now stereo, which is not what is needed. This can be fixed by selecting from the context menu of each track, and deleting one of the two resulting mono tracks.
Eventually, there should be four tracks in the Audacity project:
- Front (stereo)
- Center (mono)
- LFE (mono)
- Surround (stereo)
The project can now be exported into a 5.1 surround sound audio file:
- Select
- Provide a name for "Name:" and select "AC3 Files (FFmpeg)"
- Click "Options..." and choose "512 kbps" as "Bit Rate:"
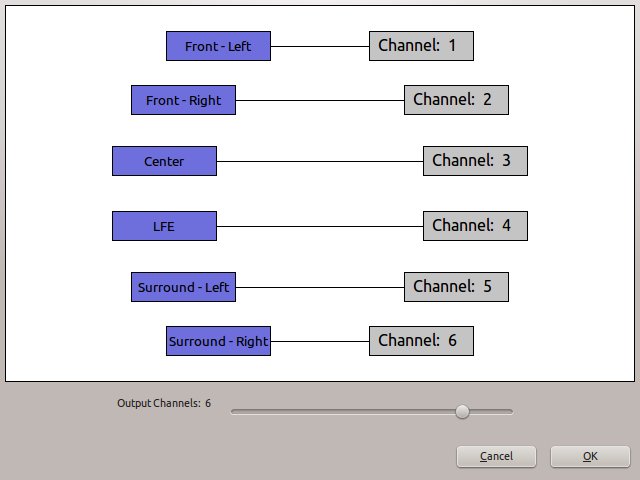
The "Advanced Mixing Options" dialog should show up. The number of "Output Channels" should be 6 and the channel mapping should already be correct:
The result of the export should be an *.ac3 file which is playable with i.e. VLC or Dragon Player.
Muxing Video and Audio Together
Since video and audio was rendered separately, both need to be multiplexed into a single file containing both the video and audio stream.
Assuming the video track was rendered to "Video.mkv" and the surround sound was exported to "5.1.ac3" the command to mux both to "Video-5.1.mkv" with avconv would be:
'"`UNIQ--syntaxhighlight-0000000C-QINU`"'
The result should be an MKV video containing a Dolby Digital 5.1 surround sound audio track.


