Kubuntu/Installation/pl: Difference between revisions
Created page with "===Przygotowanie=== Aby uzyskać najlepsze wyniki upewnij się, że: *Twój komputer ma wystarczającą przestrzeń dla '''Kubuntu''' i twoich danych - muzyki, obrazów, wideo..." |
Created page with "thumb|600px|center|Ekran przygotowania do zainstalowania <br clear=all>" |
||
| Line 25: | Line 25: | ||
* Twój komputer jest podłączony do Internetu, dzięki czemu będziesz mógł pobrać aktualizacje i zewnętrzne aplikacje podczas instalacji '''Kubuntu'''. | * Twój komputer jest podłączony do Internetu, dzięki czemu będziesz mógł pobrać aktualizacje i zewnętrzne aplikacje podczas instalacji '''Kubuntu'''. | ||
[[Image:kubuntu-13.04-installer_2=2.png|thumb|600px|center| | [[Image:kubuntu-13.04-installer_2=2.png|thumb|600px|center|Ekran przygotowania do zainstalowania]] | ||
<br clear=all> | <br clear=all> | ||
Revision as of 14:56, 23 January 2014
Jest wiele dobrych powodów aby zainstalować Kubuntu! Niektóre z nich to:
- Kubuntu czyni twój PC bardziej przyjaznym.
- Kubuntu to system operacyjny tworzony przez przyjazny zespół ekspertów. Znajdziemy w nim wszystkie aplikacje potrzebne do: przeglądania sieci, zestaw biurowy, aplikacje multimedialne, komunikatory i wiele innych. Aby przejrzeć listę
dołączonego oprogramowania zajrzyj na stronę Software.
- Kubuntu jest wolną, otwarto-źródłową alternatywą dla Windows i Mac OSX.
- Jest łatwy w instalacji obok, lub zamiast Windows.
Proces Instalacji
Po pierwsze musisz pobrać Kubuntu. Zajrzyj na stronę Pobierz Kubuntu
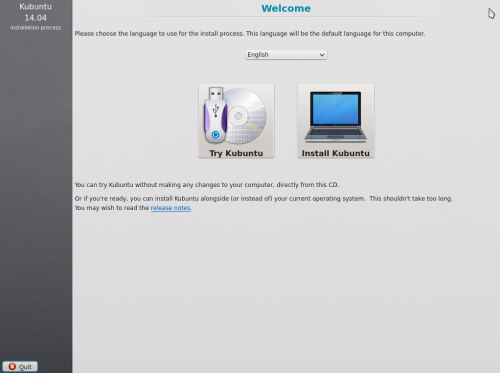
Kiedy instalator rozpocznie pracę, zobaczysz następujące opcje:
- Wypróbuj Kubuntu bez wprowadzania zmian w komputerze
- Zainstaluj Kubuntu na twoim komputerze.
Przygotowanie
Aby uzyskać najlepsze wyniki upewnij się, że:
- Twój komputer ma wystarczającą przestrzeń dla Kubuntu i twoich danych - muzyki, obrazów, wideo i dokumentów.
- Twój komputer jest podłączony do Internetu, dzięki czemu będziesz mógł pobrać aktualizacje i zewnętrzne aplikacje podczas instalacji Kubuntu.
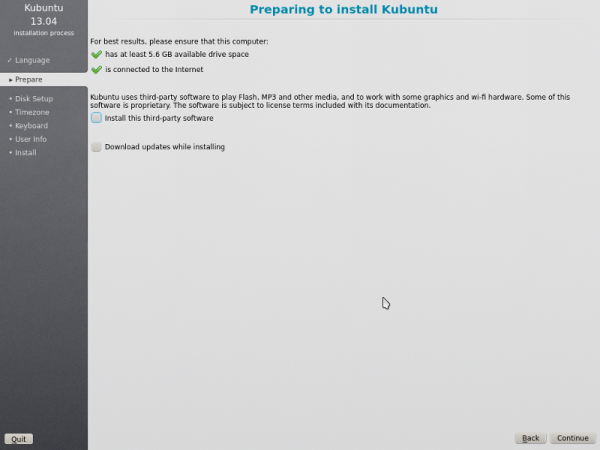
includes software that either does not follow the Open Source model or the Ubuntu Philosophy, but is safe for use on your system.
will ensure that you have the latest bug and security fixes included and applied once the installation is complete.
Disk Setup
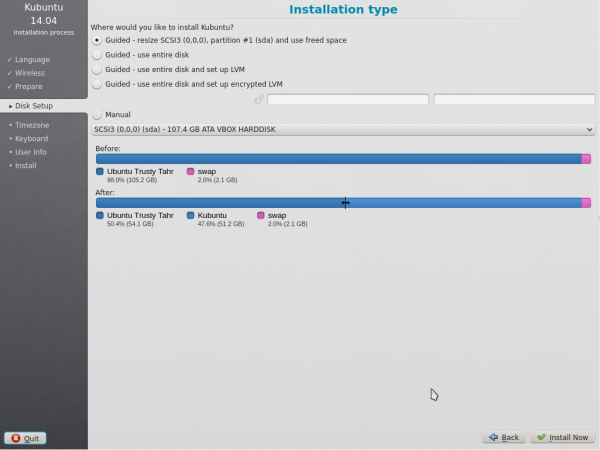
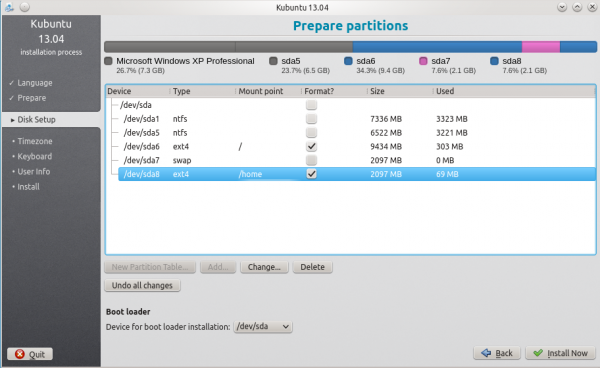
This is where you choose how to organize your hard drive. This step is the most complicated and consequential in the entire install process, so take your time.
The following sections are some possible installation scenarios you might choose. Each of these choices points to a page or series of pages with more details. For each option (except Manual), the installer asks which hard drive to use. After choosing, you will see a before and after layout on that hard drive.
Resize
This will resize the partitions for you and install Kubuntu on the free space. With this option you can create what is called a dual-boot and choose which OS to boot into at startup.
Use entire disk
In this scenario the installer will create two(2) partitions on your hard drive. One(1) for the root, home, and everything else and one(1) for the swap.
Use entire disk and set up LVM
More about LVM
Use entire disk and set up encrypted LVM
More about encrypted file systems
Manual
When using to set up your system as you would like it, keep these thoughts in mind:
- The root ( / ) directory needs at least 25 GBs of space.
- The home ( /home ) directory needs as much space as you will need for your files, music, pictures and documents. So it is best to use the remaining space for the home partition, unless you have going to dual boot.
- Swap space of at least half of the available RAM is recommended. For instance, with 8 GBs, make the swap with at least 4 GBs.
For more detailed information regarding the Disk Setup of a linux system you can check the DiskSpace page.
Timezone
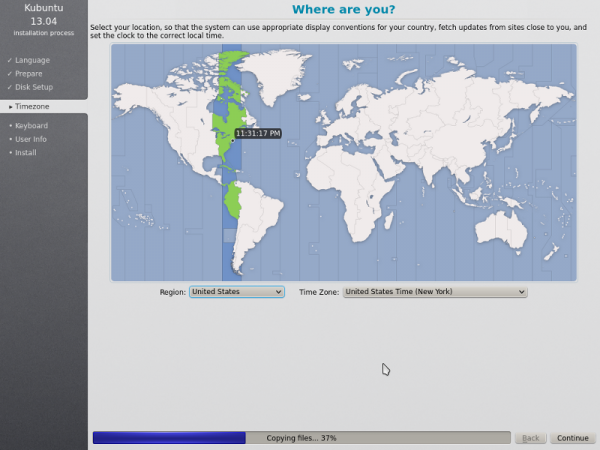
During this step you get to pick the Region where you live and then the Timezone of the location in that Region. An example would be that I live in New York, so my Region is North America and my Timezone is New York.
Keyboard
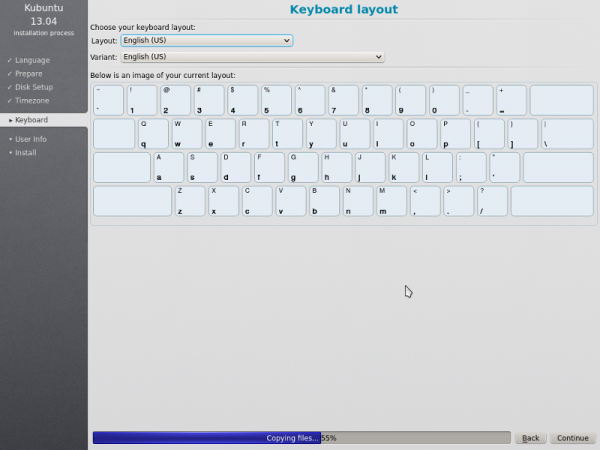
This is the step that will set up your keyboard's language and, if the language has it, a different version of the language. For example, there is a Cherokee American English setting as well as different setups with special keys used in certain countries; in Kubuntu we try to make the system easy for everyone!
User Info
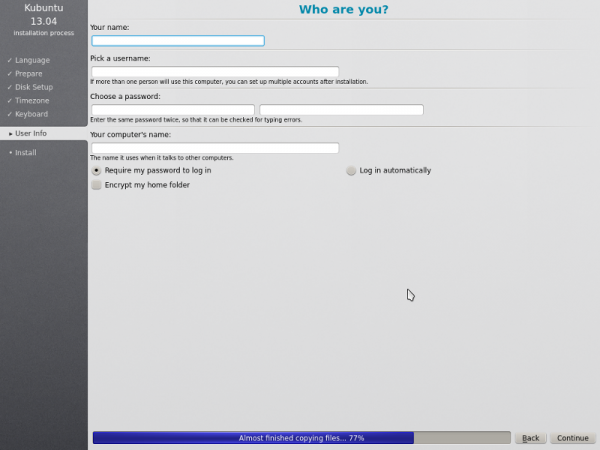
At this step of the installation you will be putting in user information like your name, username, and password. The password will be your key to logging into your new installation as well as installing new software, updating your system, and more, so keep it written down somewhere!
