Showfoto/Brightness/ro
Tutorial Foto KDE 1-4: Luminozitate/Contrast/Gamma + Nuanţă/Saturaţie/Lumină
Unai Garro - Summer 2008
Am început deja aceste serii de tutoriale ceva timp în urmă, şi toate au rezolvat problemele cu lumina.Am folosit unelte precum niveluri, curbe, sau ajustarea balansului de alb.
De data asta am vrut să abordez alt tip de probleme, dar cred ca problemele de lumină ar fi mai degrabă incomplete dacă nu aş fi adresat ajustările contrast, luminozitate şi culori.Probabil eşti deja familiarizat cu acestea, dar eu cred că merită să fie incluse.
Deci haideţi să începem.Fixează culorile! ![]()
Urmăreşte:
Mai mult de câteva ori, noi facem o fotografie a unui peisaj superb, şi visăm la minunatul rezultat ce îl vom avea de îndată ce ajungem acasă.În zilele noastre, camerele digitale ne ajută să previzualizăm rezultatul pe LCD, dar de obicei nu par a fi de încredere, aşa că ajungem să vedem rezultatele de îndată ce suntem acasă.
Aşa că ajungem acasă cu superba noastră fotografie, şi găsim,dezgustaţi, că nu are culorile pe care le-am aşteptat să le aibă.Ce putem face? Folosim din nou Showfoto sau Krita,desigur!
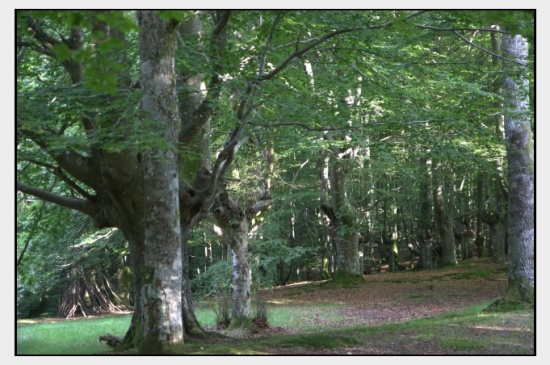
Să vedem următoarea fotografie ca probă:
|
Când am făcut această fotografie, ochii mei vedeau tot felul de culori verzi puternice, şi frunze roşii în pământ.Dar cumva apartul de fotografiat nu a captat tot acel contrast pentru mine.Dar ce este contrastul? Este doar diferenţele de culori găsite în interiorul unei imagini, diferenţa dintre un pixel/regiune şi ambiantul.Cu cât are mai mult contrast imaginea, cu atât mai clară ni se va părea.
În schimb această imagine este albicioasă, plată, lipsită de contrast.De ce? Deoarece nu acoperă întreaga histrogramă.
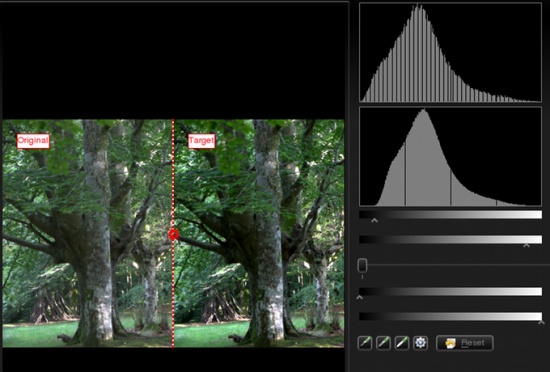
"Ahhhhhh..." vei spune acum.... "Ştiu asta! Pot fixa acest lucru folosind ! Am învăţat despre acest lucru în primul tutorial!".Da, şi asta e ceea ce vom încerca mai întâi.Deschide imaginea din Showfoto, şi ajustează nivelurile:
|
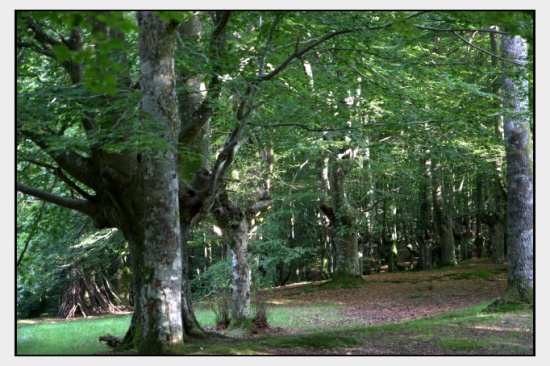
Rezultatul e următoarea imagine:
|
Nu rău,nu-i aşa?Dar totuşi,am avut o altă fotografie în minte.Frunzele erau mai verzi,era mai mult contrast (ca nişte umbre întunecate), şi frunzele de pe pământ erau mai roşii.Deci putem fixa acest lucru?Da,am putea folosi pentru a îmbunătăţi umbre de exemplu.Dar îţi voi arăta câteva unelte noi ce pot obţine rezultate similare,în acest caz:
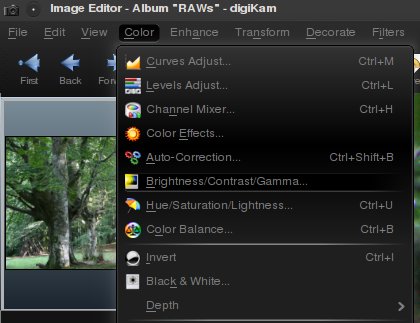
În Showfoto, du-te în meniul :
|
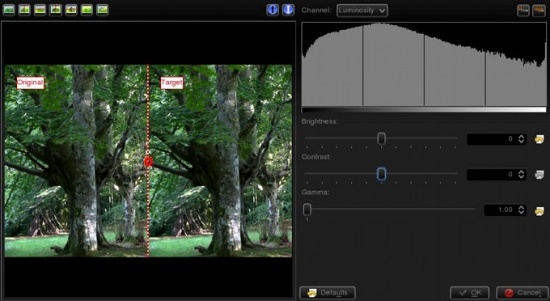
Vei primi un dialog uşor de utilizat cu următoarele controale:
|
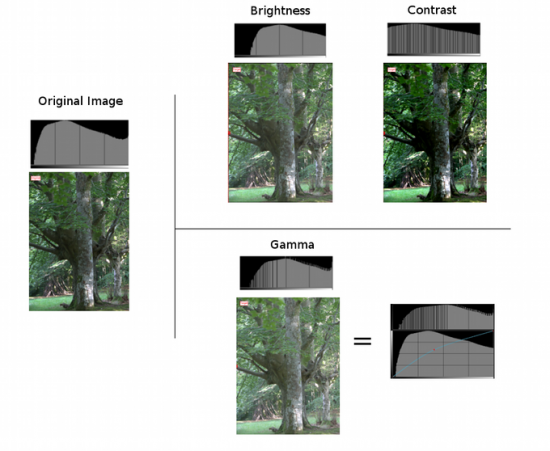
Primul slider controlează luminozitatea/întunericul din imagine.Cel de-al doilea slider creşte sau reduce ,şi uhm... Ce e ? Uită-te la urmatoarea imagine:
|
Fotografia şi histograma din stânga sunt cele ale imaginii originale.În partea dreaptă,cele trei fotografii arată rezultatul creşterii luminozităţii,contrastului şi a gamei respective. Dupa cum poţi vedea,atunci când se utilizează controlul luminozităţii,mută întreaga histogramă spre dreapta.Umrele vor dispârea şi devin gri deschise.Rezultatul nu este foarte plăcut,deoarece este mai puţin contrastat.Acest lucru se poate fixa ajustând contrastul. În ieşirea , poţi vedea cum histograma s-a mărit.Asta înseamna că fiecare culoare a fost separată în continuare una de cealaltă ,şi astfel creşte diferenţta culorii (contrast).În acest caz ieşirea este mult mai plăcută decât imaginea originală.Imaginea nu mai este plată,este mai contrastată, iar umbrele sunt clare în contrast.
În acest moment ar fi trebuit să observi ceva important .Ambele controale de contrast şi luminozitate pot tăia histograma şi pot cauza pierderi de informaţie! Acum uită-te la ajustarea gama.Am extins chiar mai mult decât prima unealtă,şi totuşi, imaginea nu a fost tăiată.Ce a facut unealta gama?
The control is like adjusting the curves tool upwards in the middle (see the figure). It affects mostly to the middle gray levels. Blacks will remain black and whites will remain white. (unlike control where blacks become gray). It compresses the histogram in the right part by compressing highlights, but shadows are expanded and thus causes to extend contrast there.
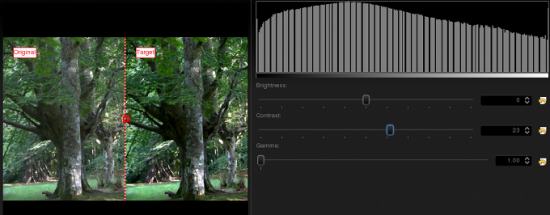
Given that this tool can clip the histogram, to avoid it as much as I can, I will change the order. Instead of doing then , I will do then . It's usually best adjusting levels after all other light adjustments have been done. So I did the following adjustment to the image:
|
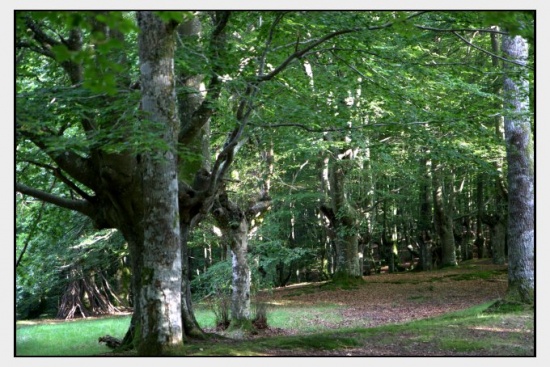
I could have pushed contrast even further, but I prefer natural looking photos. Then, afterwards, even if it wasn't much needed due to the clipping, I adjusted levels a bit. This is what I got:
|
The result is similar to the previous one, but a bit more contrasty. Still, I'm missing colors here, something is missing? Of course, lets open the option from the menu:
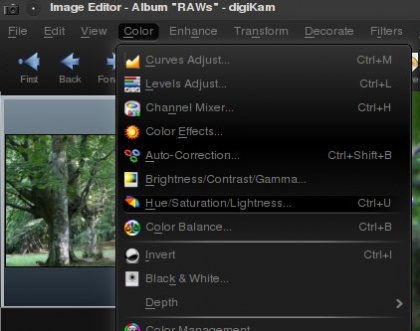
|
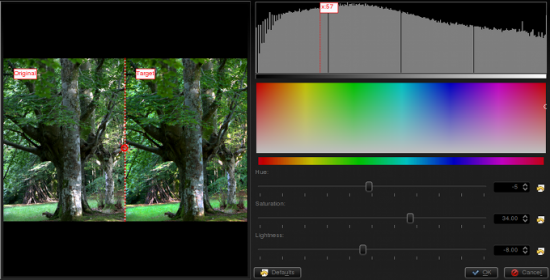
|
It will open a dialog where Showfoto permits adjusting the colors of the image. The control can make colors stronger or weaker. The control permits altering colors towards another one (brighter colors to darker green, or even to yellow...), and finally, can make colors brighter or darker. When the image is lightened up, it causes moving the histogram's dark part upwards and compressing the whole of it on the right, thus blacks dissappear and contrast can be reduced easily thanks to the compression.
In my adjustment, I pushed saturation up to 34, reduced lightness a bit, and retouched the greens by altering the hue slightly. This is what I got finally:
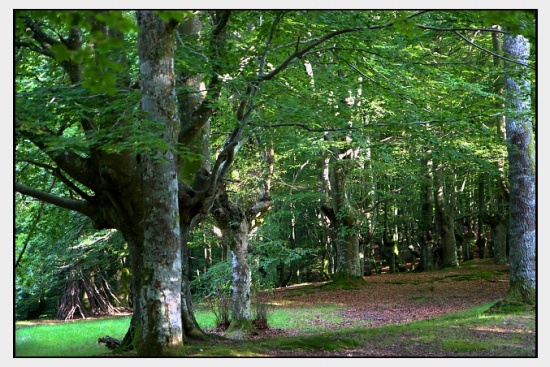
|
Now yes, I'm happy with the result. That's what my eyes saw!!!!!
Thanks for reading this tutorial and I hope you found it useful. Cya on the next tutorial!
Notes:

