Archive:Kdenlive/Manual/Projects and Files/Clips
Proxy clips

Proxy clips are one of the most useful invention for editing if you are not working on a ultra high-end machine. The trick is that the original clips are replaced by clips with lower resolution clips with a less complex codec. Video decoding, e.g. of H.264 clips, requires a lot of computing power, but computing power is required for rendering effects in real-time. If it is not available, replay will stutter. Proxy clips will require nearly no computing power at all, which allows fluent replay.
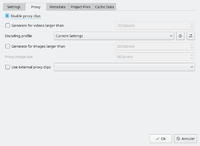
Proxy clips need to be enabled for a project in the Project Settings ().

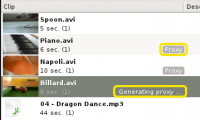
As soon as proxy clips are enabled, they can be generated for specific project clips in the Project Tree widget via the context menu . Clicking it again disables the proxy for this clip.
When rendering to the output file, you can chose whether to use the proxy clips as well. It is by default disabled, but for a quick rendering preview it is useful.

