Showfoto/Brightness/bg
Фото KDE урок 1-4: Brightness/Contrast/Gamma + Hue/Saturation/Lightness
Унай Гарро - Лято 2008
Започнах тази поредица от уроци преди известно време и всички имаха за цел да покрият решенията на леки проблеми. Досега сме използвали инструменти като levels, curves или white balance adjustment.
Този път ми се искаше да се занимаем с друг тип проблеми, но реших, че решението на леките проблеми няма да е цялостно, ако не боравим с контраста, яркостта и настройките на цветовете. Възможно е да сте запознати с тези настройки, но все пак смятам, че трябва да бъдат прегледани по- обстойно.
Нека започнем с настройка на цветовете! ![]()
Следвайте описаните стъпки :
Много често се случва да заснемем красив пейзаж, с наситени цветове, след което нямаме търпение да се приберем и да видим зашеметяващата снимка. Често, обаче, резултатът можем да видим само вкъщи, тъй като това, което модерните апарати, с LCD дисплеи, показват е неточно.
Така че се прибирате вкъщи, отваряте снимката и с ужас виждате, че цветовете, които сте видели на живо са бледи или изкривени на снимката. Какво можете да направите по въпроса? Ще използвате Showfoto или Krita, разбира се!
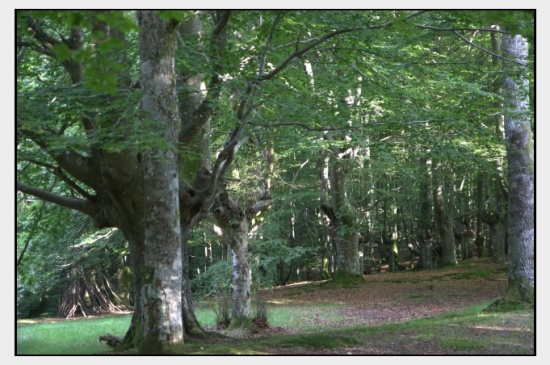
Нека разгледаме следната снимка, например:
|
На живо, този пейзаж е с наситени зелени цветове и ярки червени листа, покриващи земята. За сжъжаление, фотоапаратът не е успял да улови красотата на контраста. Но какво всъщност е контрастът? Той е просто разликата в цветовете в дадена снимка, разликата между област от пиксели и околността. Колкото по- контрастно е дадено изображение, толкова по- ясно е за окото.
За съжаление, тази снимка е бледа, лишена от обем и контраст. Защо? Защото не покрива цялата хистограма.
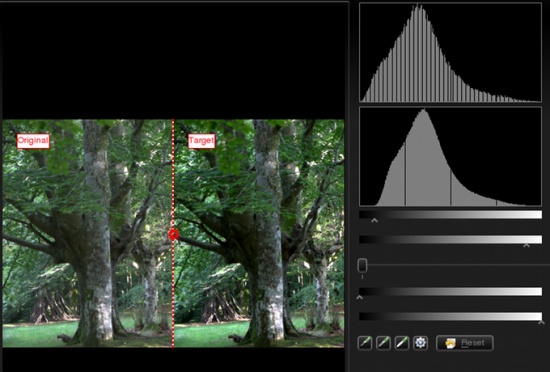
Първата ви реакция е да използвате (нива на цветовете), за да се опитате да се справите с проблема. Точно това ще направим. Отворете снимката в Showfoto и настройте нивата на цветовете:
|

|
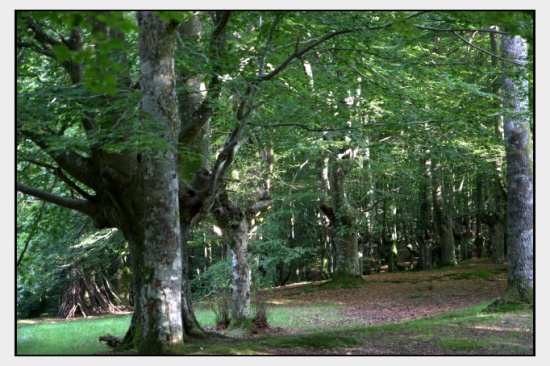
Ето и резултата:
|
Не е зле, нали? И все пак, цветовете и контрастът не са точно такива, каквито са били на живо. Можем да решим този проблем, използвайки , за да наситим сенките, например. В този случай, обаче, ще ви покажа няколко нови инструмента, с които можете да постигнете желания ефект.
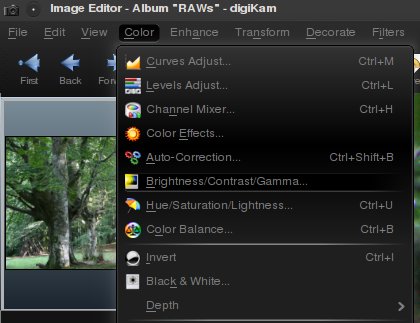
В Showfoto, отидете на менюто -> :
|
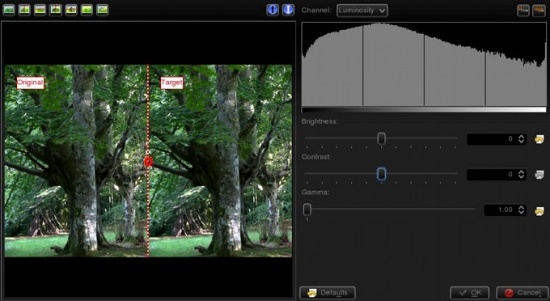
Ще се появи, лесен за ползване, диалогов прозорец със следните възможности за настройване.
|
The first slider controls the brightness/darkness of the image. The second slider increases or reduces , and uhm... what's ? Look at the following image:
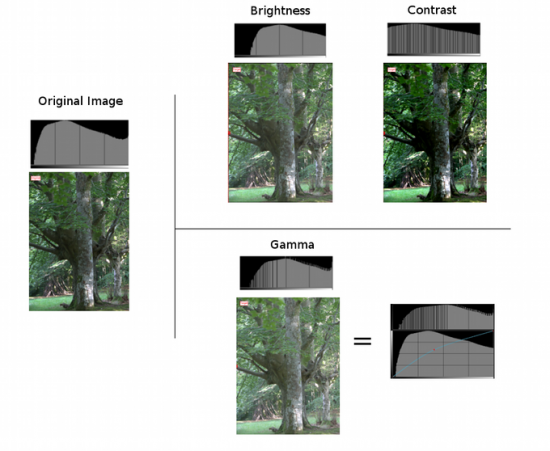
|
The photo and histogram on the left are those of the original image. In the right hand, the three photos show the result of increasing brightness, contrast, and gamma respectively. As you can see, when using the brightness control, it moves the whole histogram to the right. Shadows will disappear and become light grays. The result isn't very pleasing, as it is less contrasty. This could be fixed by adjusting contrast. In the output, you can see that the histogram has been expanded. This means that each color has been separated further from each other, and thus increase color difference (contrast). The output is much more pleasing than the original image in this case. The image is no more flat, it's much more contrasty, and shadows are clear dark contrasted.
At this point you should have noticed something important. Both contrast and brightness controls can clip the histogram and cause information loss! Now look at the gamma adjustment. I pushed even further than the first tool, and still, the image wasn't clipped. What did the gamma tool do?
The control is like adjusting the curves tool upwards in the middle (see the figure). It affects mostly to the middle gray levels. Blacks will remain black and whites will remain white. (unlike control where blacks become gray). It compresses the histogram in the right part by compressing highlights, but shadows are expanded and thus causes to extend contrast there.
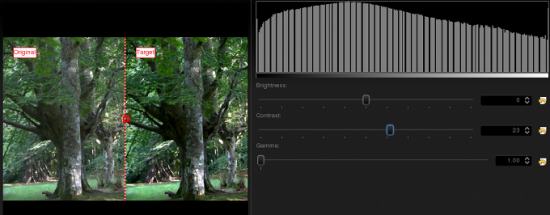
Given that this tool can clip the histogram, to avoid it as much as I can, I will change the order. Instead of doing then , I will do then . It's usually best adjusting levels after all other light adjustments have been done. So I did the following adjustment to the image:
|
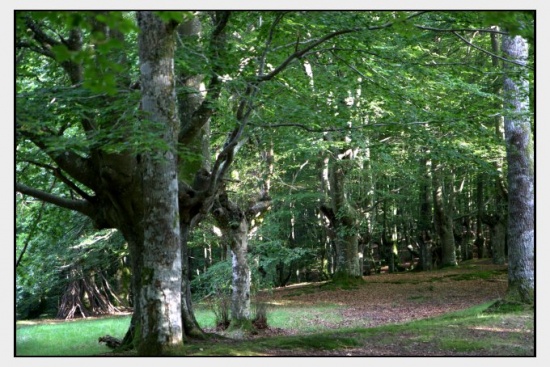
I could have pushed contrast even further, but I prefer natural looking photos. Then, afterwards, even if it wasn't much needed due to the clipping, I adjusted levels a bit. This is what I got:
|
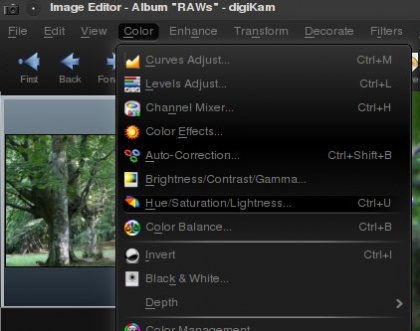
The result is similar to the previous one, but a bit more contrasty. Still, I'm missing colors here, something is missing? Of course, lets open the option from the menu:
|
|
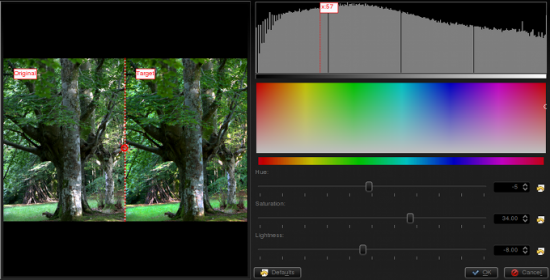
It will open a dialog where Showfoto permits adjusting the colors of the image. The control can make colors stronger or weaker. The control permits altering colors towards another one (brighter colors to darker green, or even to yellow...), and finally, can make colors brighter or darker. When the image is lightened up, it causes moving the histogram's dark part upwards and compressing the whole of it on the right, thus blacks dissappear and contrast can be reduced easily thanks to the compression.
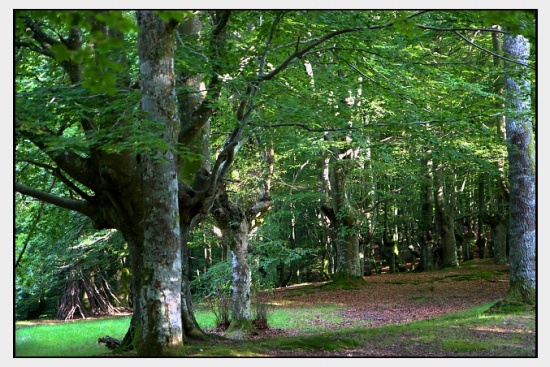
In my adjustment, I pushed saturation up to 34, reduced lightness a bit, and retouched the greens by altering the hue slightly. This is what I got finally:
|
Now yes, I'm happy with the result. That's what my eyes saw!!!!!
Thanks for reading this tutorial and I hope you found it useful. Cya on the next tutorial!
Notes:

