digiKam/Використання проби кольорів
Використання проби кольорів у digiKam
Створено на основі допису у блозі Дмітрія Попова (Dmitri Popov), 21 травня 2012 року
Soft proofing is a technique which allows you to see what the photo will look like when printed using a specific printer and photo media (paper, canvas, etc.) without actually printing the photo. Many professional photo processing applications support soft proofing, and digiKam is no exception.
To make this feature work in digiKam, you need to specify color profiles for your display and the output device (e.g., printer). But before you do that, you need to obtain the ICC color profile for your specific printer and print media. Say, you are using an Epson 9880 printer to print photos on the IJMF professional glossy photo paper from Diamond Jet. Grab the appropriate ICC profile from the company’s Resources page. Create the ~/icc directory and move the obtained .icc file into it. In digiKam, choose , switch to the section, and click on the tab. Select the desired color profile from the drop-down list (the default sRGB IEC61966-2.1 color profile is a good choice in most cases). Next, in the section, specify the path to the ~/icc directory. Press to save the changes and close the dialog window, then restart digiKam.

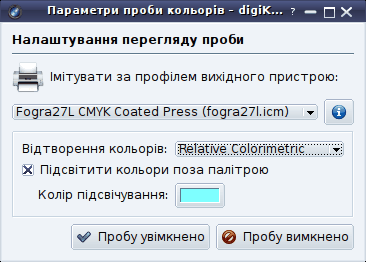
To enable soft proofing, open the photo you want for editing and choose . Select the downloaded .icc color profile from the drop-down list, then select the desired item from the drop-down list. This should generally be Relative Colorimetric, but if your printer supports only a limited gamut you may want to try the Perceptual rendering intent instead. Enable then the option and select the highlighting color you want. Finally, enable soft proofing by pressing the button, and you should see the photo exactly as it would appear in print.
