Kdenlive/Підручник/Проекти і файли/Кліпи
Проміжні кліпи

Проміжні кліпи один з найкорисніших винаходів для редагування, якщо ви працюєте за не дуже потужним комп’ютером. Програма замінює початкові версії кліпів на кліпи з меншою роздільною здатністю та простішим для обробки кодеком. Декодування відео, наприклад декодування кліпів у форматі H.264, потребує значних обчислювальних потужностей для обробки ефектів у режимі реального часу. Якщо потужностей не вистачатиме, відтворення «затинатиметься». Для обробки проміжних кліпів обчислювальні потужності майже непотрібні, тобто відтворення відбувається абсолютно плавно.
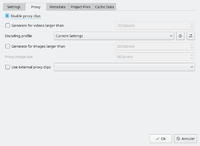
Proxy clips can be enabled / disabled for the current project in the Project Settings ().
To enable proxy clips by default for new projects, go to .

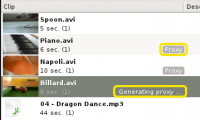
As soon as proxy clips are enabled, they can be generated for specific project clips in the Project Tree widget via the context menu . Clicking it again disables the proxy for this clip.
When rendering to the output file, you can chose whether to use the proxy clips as well. It is by default disabled, but for a quick rendering preview it is useful.

