Draft:Appname/Manual
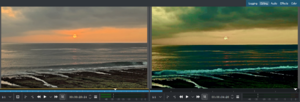
Before and after applying LUT

Simple steps:
1 FREE LUTS – For our example, we rely on the files that can be downloaded from the address: goo.gl/OeIFkr
2 SEVEN CUBE FILES – Download the zip file, just extract it into a folder: each of the files, which is then a simple text file, represents a Look Up Table. Those examples were developed inspired by famous films (whose titles are parodied in the file name).
3.Once package is downloaded and unpacked, open effects menu in the right corner of the program window.

4. Then you need to find the LUT effect to apply. There are several, the majority of which are maintained only for backwards compatibility but not for any result. The right one is Apply LUT, in the section Color correction.

5. BALANCING – Adjusting color, for example col 3-point balance, you need to insert the effect above that of the LUT. This allows you to correct the image before it reaches the LUT, then obtaining homogeneous results with other clips.

6.Manually adjust the clip
In addition to the LUT, other effects can be used to manually correct the colors

1 CHANGE OF SHADES – This allows, for example, to color the background in blue and the actor in orange, widely used in classic Hollywood postproduction setup. A faster but less detailed alternative is Hue shift, which shifts all shades towards red or blue.

2.SATURATION – After changing the coloration of the image, with one of the two effects that is presented, this allows saturate the color differently depending on the brightness by drawing a curve on the canal saturation.


