Kaption: Difference between revisions
Appearance
Pipesmoker (talk | contribs) |
Thiagosueto (talk | contribs) Propose deletion |
||
| (One intermediate revision by one other user not shown) | |||
| Line 1: | Line 1: | ||
{{Proposed_deletion|reason=Never came into fruition? }} | |||
{|class="vertical-centered" | {|class="vertical-centered" | ||
|[[Image:Kaption_Editor.png|300px]] | |[[Image:Kaption_Editor.png|300px]] | ||
| Line 41: | Line 43: | ||
* [[KSnapshot]] - Another KDE screen capturing tool | * [[KSnapshot]] - Another KDE screen capturing tool | ||
[[Category: | [[Category:Utilities]] | ||
Latest revision as of 19:51, 25 February 2024

|
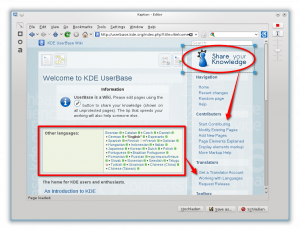
Kaption captures a screen region to draw arrows, boxes and text
on it. You can save or upload the result then. |
You can add several types of shapes and captions to points out important sections of the screenie.
Kaption is going to become the default application to prepare screenies for KDE UserBase Wiki.
Features
- Screen capture
- Ability to draw arrows, boxes, ellipses and text on the captured region
- Ability to choose color, size and font of your drawings
- FTP/SFTP Upload with clipboard support for custom code. Custom code? It can be a web site pointing to the ftp directory where the image has been uploaded. When the upload finish Kaption will copy the code into the clipboard so you can share the screenshot quickly with anybody
Usage
After you started Kaption you will get a new sys tray icon. Hovering over it explains, that you have to click on it to start capturing a screenie.

Getting Kaption
You can get Kaption from KDE-Apps.org here...
Follow the install instructions on that page.
Hints & Tips
Weblinks
See Also
- KSnapshot - Another KDE screen capturing tool


