Digikam/Faded Effect/ca: Difference between revisions
Appearance
Created page with "== Simular un efecte d'esvaïment a digiKam == Transcrit des de l'article d'en Dmitri Popov, el 18 d'abril de 2012" |
Created page with "Category:Gràfics/ca Category:Fotografia/ca Category:Guies d'aprenentatge/ca" |
||
| Line 13: | Line 13: | ||
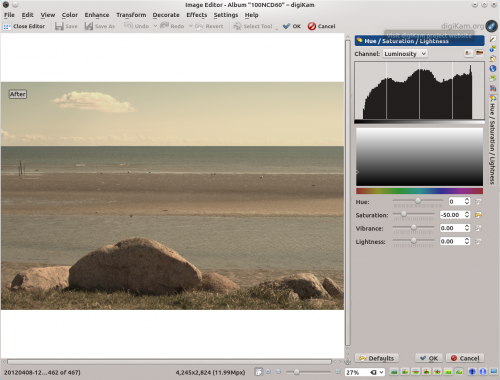
Open the photo for editing and choose <menuchoice>Color -> White Balance</menuchoice>. Adjust exposure compensation to slightly overexpose the photo and set the color temperature to 12000 to add a strong golden tint to the photo. Press <menuchoice>OK</menuchoice> to apply the modifications. Choose then <menuchoice>Color -> Hues/Saturation/Lightness</menuchoice> and set <menuchoice>Saturation</menuchoice> to -50. Press <menuchoice>OK</menuchoice>, and you are done. The described technique works particularly well with skin tones, so it’s suitable for use with portrait photos. | Open the photo for editing and choose <menuchoice>Color -> White Balance</menuchoice>. Adjust exposure compensation to slightly overexpose the photo and set the color temperature to 12000 to add a strong golden tint to the photo. Press <menuchoice>OK</menuchoice> to apply the modifications. Choose then <menuchoice>Color -> Hues/Saturation/Lightness</menuchoice> and set <menuchoice>Saturation</menuchoice> to -50. Press <menuchoice>OK</menuchoice>, and you are done. The described technique works particularly well with skin tones, so it’s suitable for use with portrait photos. | ||
[[Category: | [[Category:Gràfics/ca]] | ||
[[Category: | [[Category:Fotografia/ca]] | ||
[[Category: | [[Category:Guies d'aprenentatge/ca]] | ||
Revision as of 14:56, 30 May 2012
Simular un efecte d'esvaïment a digiKam
Transcrit des de l'article d'en Dmitri Popov, el 18 d'abril de 2012
Sometimes the best way to spice up a photo is to make it look faded, and digiKam makes it supremely easy to achieve this effect.

Open the photo for editing and choose . Adjust exposure compensation to slightly overexpose the photo and set the color temperature to 12000 to add a strong golden tint to the photo. Press to apply the modifications. Choose then and set to -50. Press , and you are done. The described technique works particularly well with skin tones, so it’s suitable for use with portrait photos.
