Archive:Kdenlive/Manual/Timeline/Right Click Menu: Difference between revisions
Appearance
No edit summary |
No edit summary |
||
| Line 23: | Line 23: | ||
{{Prevnext2 | {{Prevnext2 | ||
| prevpage=Special:MyLanguage/Kdenlive/Manual/Timeline/ | | prevpage=Special:MyLanguage/Kdenlive/Manual/Timeline/Guides | nextpage=Special:MyLanguage/Kdenlive/Manual/Transitions | ||
| prevtext= | | prevtext=Guides | nexttext=Transitions | ||
| index=Special:MyLanguage/Kdenlive/Manual | indextext=Back to menu | | index=Special:MyLanguage/Kdenlive/Manual | indextext=Back to menu | ||
}} | }} | ||
[[Category:Kdenlive]] | [[Category:Kdenlive]] | ||
Revision as of 06:56, 27 October 2012
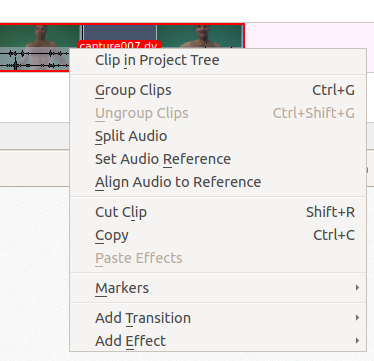
Clip in Timeline - Right Click Menu
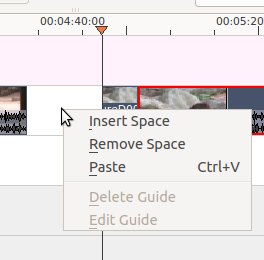
This is the context menu that appears when you right click on a clip in the timeline. A different menu appears if you click in empty space in the timeline.
Clip in Project Tree - will cause the selected clip to be highlighted in the project tree.
Set Audio reference and Align audio to reference are used to align two clips on different tracks in the timeline base on the audio in the tracks. This is usefull if two cameras recorded the same scene simultaneously. Kdenlive can use the allmost identicle audio track to align the two clips.
To use this feature
- Select the clip that you would like to align *to*.
- right click. select "Set Audio reference"
- Select all clips you would like aligned
- right click and Select "Align audio to reference"
A different menu appears if you click in empty space in the timeline.


