Archive:Kdenlive/Manual/Capturing/el: Difference between revisions
Created page with "*Κάντε κλικ στο κουμπί «Σύνδεση»" |
Created page with "*Κάντε κλικ στο κουμπί καταγραφής &mdash σημειώστε ότι αλλάζει σε γκρίζο όσο καταγράφετε" |
||
| Line 25: | Line 25: | ||
*Κάντε κλικ στο κουμπί «Σύνδεση» | *Κάντε κλικ στο κουμπί «Σύνδεση» | ||
* | *Κάντε κλικ στο κουμπί καταγραφής &mdash σημειώστε ότι αλλάζει σε γκρίζο όσο καταγράφετε | ||
* Click the Record button again to stop capture. Or click the stop button. | * Click the Record button again to stop capture. Or click the stop button. | ||
Revision as of 13:08, 5 May 2020
Καταγραφή βίντεου
Το Kdenlive παρέχει λειτουργία καταγραφής εικόνας από εξωτερικές συσκευές, πχ Firewire, FFmpeg, Screen Grab και Blackmagic.
Ρυθμίζετε την καταγραφή βίντεο από τις (περισσότερα εδώ).
Ορίζετε τον προορισμό των καταγραφών σας χρησιμοποιώντας τις (περισσότερα εδώ).
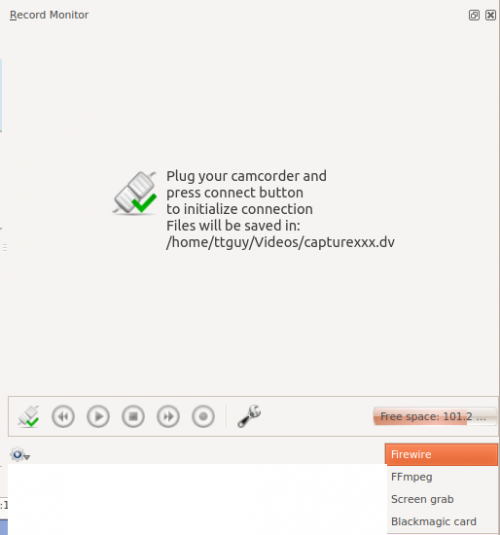
Για να ξεκινήσετε μια εγγραφή βίντεο επιλέγετε Record Monitor και διαλέγετε τη συσκευή καταγραφής από το μενού κάτω δεξιά.
Firewire
Αυτή η επιλογή δεν είναι διαθέσιμη στις πρόσφατες εκδόσεις του Kdenlive. Χρησιμοποιήστε το dvgrab απευθείας από το τερματικό για να καταγράψετε βίντεο μέσω firewire.
Καταγράφει βίντεο από πηγές συνδεδεμένες μέσω firewire (γνωστό και ως IEEE 1394 Σειριακός Δίαυλος Υψηλής Ταχύτητας) κάρτας και καλωδίου. Χρησιμοποιεί το πρόγραμμα dvgrab και ρυθμίσεις αυτού μπορούν να προσαρμοστούν με κλικ πάνω στο εικονίδιο ή επιλέγοντας . Βλέπε Διαμόρφωση καταγραφής Firewire.
Για να εκτελέσετε μια καταγραφή:
- Συνδέστε τη συσκευή σας στη κάρτα firewire και ανοίξτε την στη λειτουργία αναπαραγωγής
- Κάντε κλικ στο κουμπί «Σύνδεση»
- Κάντε κλικ στο κουμπί καταγραφής &mdash σημειώστε ότι αλλάζει σε γκρίζο όσο καταγράφετε
- Click the Record button again to stop capture. Or click the stop button.
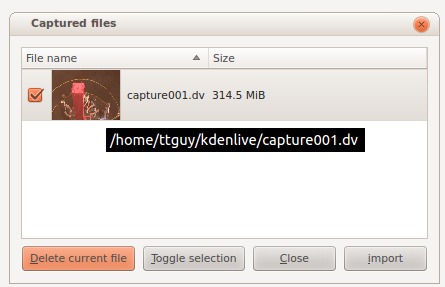
- In the Captured Files dialog, click the import button to have the captured files automatically imported into the project bin.
FFmpeg
I believe this captures video from an installed Web Cam using Video4Linux2.
Screen Grab
This captures video of the PC screen. In version 0.9.2 it uses recordMyDesktop to do the capture. There is an open defect with this functionality in ver 0.9.2 — See bug tracker ID 2643.
In version 0.9.3, the screen grab is done by the ffmpeg functionality instead. For screen capture to work in ver 0.9.3, the version of ffmpeg installed needs to have been compiled with the --enable-x11grab option. Ubuntu comes with an ffmpeg version compiled with this option.
To check on your linux distro, type ffmpeg -version in a terminal and look for --enable-x11grab in the reported configuration info. [1]
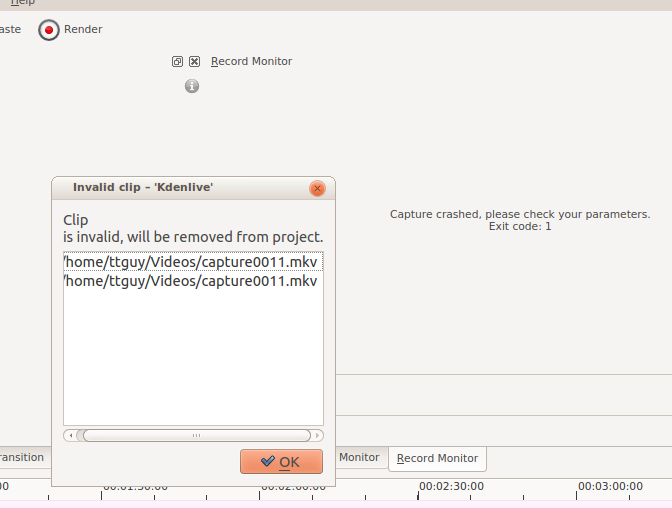
If you are capturing the screen and using the X246 with audio settings and you get a crash as shown in the screen shot ...
... then consider creating a profile for audio capture where -acodec pcm_s16le is replaced by -acodec libvorbis -b 320k. See Configure Kdenlive.
Blackmagic
This is for capturing from Blackmagics decklink video capture cards (AFAIK). Not sure how stable this code is at the moment. See defect 2130.
Footnotes
- ↑ There are now two branches of ffmpeg: a Libav branch and an ffmpeg.org branch. The ffmpeg version from the latter branch reports the configuration when you run with
ffmpeg -version. The Libav version does not. So this method to check for the--enable-x11grabdoes not work if you have the Libav version of ffmpeg.


