Konversation/Configuring SASL authentication: Difference between revisions
Appearance
No edit summary |
No edit summary |
||
| Line 18: | Line 18: | ||
# Fill the <menuchoice>Add Server</menuchoice> dialog window as shown in the next screenshot. As the purpose of this guide is to ultimately configure a secure authentication method, note that we have chosen to enable SSL to also use a secure transport between us and the server, logically complementing the choice of authentication. (You can learn more about Freenode's servers and the ports they listen on [http://freenode.net/irc_servers.shtml here].) Clicking the "Ok" button will add the server and take you back to the <menuchoice>New Network</menuchoice> dialog window. | # Fill the <menuchoice>Add Server</menuchoice> dialog window as shown in the next screenshot. As the purpose of this guide is to ultimately configure a secure authentication method, note that we have chosen to enable SSL to also use a secure transport between us and the server, logically complementing the choice of authentication. (You can learn more about Freenode's servers and the ports they listen on [http://freenode.net/irc_servers.shtml here].) Clicking the "Ok" button will add the server and take you back to the <menuchoice>New Network</menuchoice> dialog window. | ||
[[Image:Authconfig04.png]] | |||
# Back in the <menuchoice>New Network</menuchoice> dialog window, notice the newly-added server in the <menuchoice>Servers</menuchoice> list for the network. Now click the "Edit..." button next to the drop-down selection labeled <menuchoice>Identity</menuchoice> to open the <menuchoice>Identities</menuchoice> dialog window: | |||
[[Image:Authconfig04.png]] | [[Image:Authconfig04.png]] | ||
Revision as of 18:55, 10 June 2012
This document will guide you through configuring SASL authentication for an IRC network, using the Freenode network as an example. Note: Support for SASL authentication is a new feature in Konversation v1.5, which has not yet been released. If you'd like to test SASL authentication prior to the release, have a look at our instructions for downloading the latest source code.
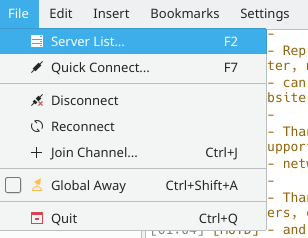
- Let's start by adding the network to the . (If you have already added the desired network to the server list, you can skip to step X.) Open the dialog window by pressing the F2 key or by clicking in the application menu:
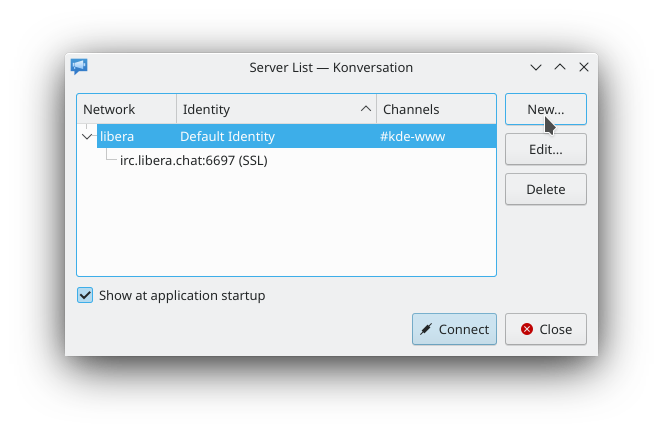
- In the dialog window, click the button in the upper-right of the window to open the dialog window:
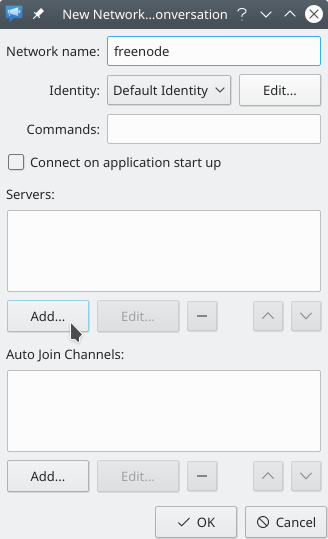
- In the dialog window, give the network a name by filling in the field. Then click the button below the list labeled to open the dialog window:
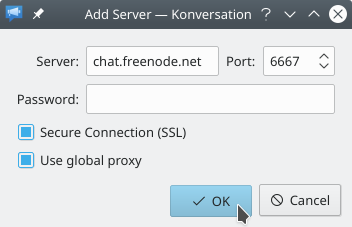
- Fill the dialog window as shown in the next screenshot. As the purpose of this guide is to ultimately configure a secure authentication method, note that we have chosen to enable SSL to also use a secure transport between us and the server, logically complementing the choice of authentication. (You can learn more about Freenode's servers and the ports they listen on here.) Clicking the "Ok" button will add the server and take you back to the dialog window.
- Back in the dialog window, notice the newly-added server in the list for the network. Now click the "Edit..." button next to the drop-down selection labeled to open the dialog window:


