Archive:Kdenlive/Manual/Tutorials/Split Screen How To: Difference between revisions
| Line 10: | Line 10: | ||
To create this effect you need 4 video tracks on the time line. Add extra tracks to the time line from the [[Special:MyLanguage/Kdenlive/Manual/Project_Menu/Tracks|Project>Tracks>Insert Track]] menu. | To create this effect you need 4 video tracks on the time line. Add extra tracks to the time line from the [[Special:MyLanguage/Kdenlive/Manual/Project_Menu/Tracks|Project>Tracks>Insert Track]] menu. | ||
You create a project/timeline like that shown in Figure 1. | You create a project/timeline like that shown in Figure 1 and described in detail below. | ||
[[File:Kdenlive 4pip overview.png|frame| | [[File:Kdenlive 4pip overview.png|frame|400|left|Figure 1. - Time Line Setup]] | ||
<br clear=all> | <br clear=all> | ||
| Line 18: | Line 18: | ||
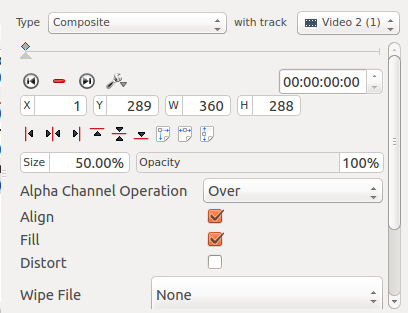
<br>There is a composite transition between Video 1 and Video 2. (See Figure 2). This transition has a sizing and positioning effect as part of it that causes the Video on Video Track 1 to be scaled down 50% and be positioned in the bottom left corner. | <br>There is a composite transition between Video 1 and Video 2. (See Figure 2). This transition has a sizing and positioning effect as part of it that causes the Video on Video Track 1 to be scaled down 50% and be positioned in the bottom left corner. | ||
[[File:Kdenlive 4pip transition1.png|frame| | [[File:Kdenlive 4pip transition1.png|frame|200|left|Figure 2. - Transition 1]] | ||
<br clear=all> | <br clear=all> | ||
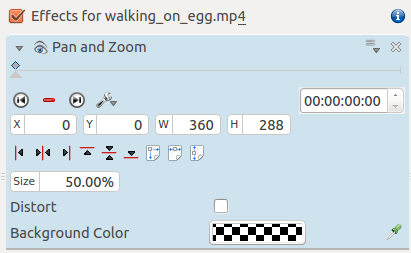
Video 2 (appears top left in result) has a pan and zoom effect added to it (See Figure 3). This effect has a sizing and positioning effect as part of it that causes the Video on Video Track 2 to be scaled down 50% and be positioned in the top left corner. | Video 2 (appears top left in result) has a pan and zoom effect added to it (See Figure 3). This effect has a sizing and positioning effect as part of it that causes the Video on Video Track 2 to be scaled down 50% and be positioned in the top left corner. | ||
[[File:Kdenlive 4pip vid2 pan and zoom.png|frame| | [[File:Kdenlive 4pip vid2 pan and zoom.png|frame|200|left|Figure 3 - Effect on Video 2]] | ||
<br clear=all> | <br clear=all> | ||
There is a standard composite transition between Video track 2 and Video track 3 - see Figure 4. | There is a standard composite transition between Video track 2 and Video track 3 - see Figure 4. | ||
[[File:Kdenlive 4pip transition2.png|frame| | [[File:Kdenlive 4pip transition2.png|frame|200|left|Figure 4 - Transition between Video 2 and Video 3]] | ||
<br clear=all> | <br clear=all> | ||
Video 3 (appears top right in result) has a pan and zoom effect added to it (See Figure 5). This effect has a sizing and positioning effect as part of it that causes the Video on Video Track 3 to be scaled down 50% and be positioned in the top right corner. | Video 3 (appears top right in result) has a pan and zoom effect added to it (See Figure 5). This effect has a sizing and positioning effect as part of it that causes the Video on Video Track 3 to be scaled down 50% and be positioned in the top right corner. | ||
[[File:Kdenlive 4pip vid3 pan and zoom.png|frame| | [[File:Kdenlive 4pip vid3 pan and zoom.png|frame|200|left|Figure 5 - Effect on Video 3]] | ||
<br clear=all> | |||
There is a standard composite transition between Video track 3 and Video track 4 - see Figure 6. | |||
[[File:Kdenlve 4pip transition3.png|frame|200|left|Figure 6 - Transition between Video 3 and Video 4]] | |||
<br clear=all> | |||
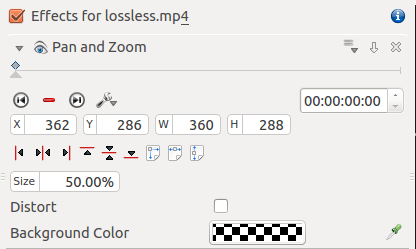
Video 4 (appears bottom right in result) has a pan and zoom effect added to it (See Figure 7). This effect has a sizing and positioning effect as part of it that causes the Video on Video Track 4 to be scaled down 50% and be positioned in the bottom right corner. | |||
[[File:Kdenlive 4pip vid4 pan and zoom.png|frame|200|left|Figure 7 - Effect on Video 4]] | |||
Revision as of 04:30, 16 August 2015
How To Do Split Screen Effect
This effect is also known as picture in picture effect or PIP.
In this example we will see how to have 4 screens playing at once in the video.
To create this effect you need 4 video tracks on the time line. Add extra tracks to the time line from the Project>Tracks>Insert Track menu.
You create a project/timeline like that shown in Figure 1 and described in detail below.
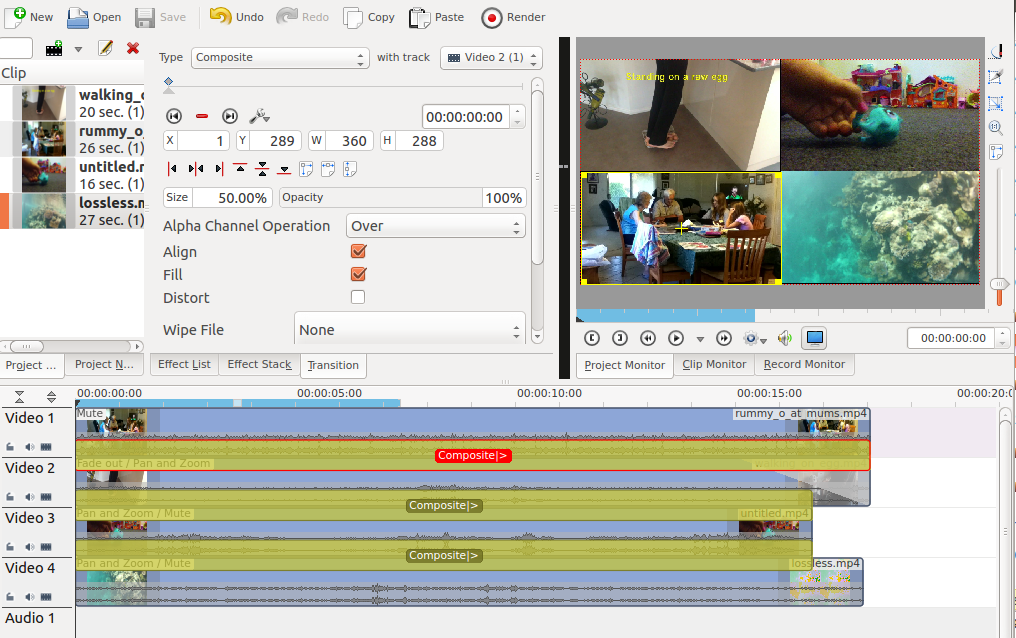
Video 1 (appears in bottom left in the result) has no effects added to it.
There is a composite transition between Video 1 and Video 2. (See Figure 2). This transition has a sizing and positioning effect as part of it that causes the Video on Video Track 1 to be scaled down 50% and be positioned in the bottom left corner.
Video 2 (appears top left in result) has a pan and zoom effect added to it (See Figure 3). This effect has a sizing and positioning effect as part of it that causes the Video on Video Track 2 to be scaled down 50% and be positioned in the top left corner.
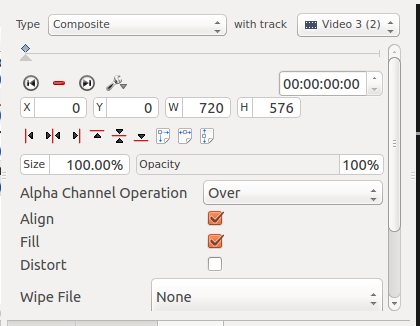
There is a standard composite transition between Video track 2 and Video track 3 - see Figure 4.
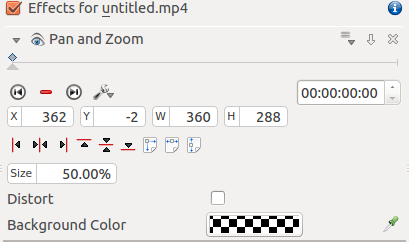
Video 3 (appears top right in result) has a pan and zoom effect added to it (See Figure 5). This effect has a sizing and positioning effect as part of it that causes the Video on Video Track 3 to be scaled down 50% and be positioned in the top right corner.
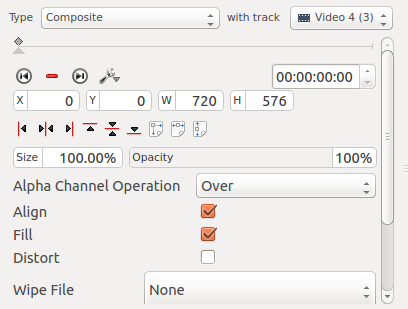
There is a standard composite transition between Video track 3 and Video track 4 - see Figure 6.
Video 4 (appears bottom right in result) has a pan and zoom effect added to it (See Figure 7). This effect has a sizing and positioning effect as part of it that causes the Video on Video Track 4 to be scaled down 50% and be positioned in the bottom right corner.
