Archive:Kdenlive/Manual/Effects/Blur and hide/Auto Mask/uk: Difference between revisions
Created page with "==== Як застосувати автоматичне маскування ==== Ознайомтеся із відео, наведеним нижче, щоб дізнати..." |
Created page with "==== Стеження за рухом ====" |
||
| Line 13: | Line 13: | ||
{{#ev:youtube|ZD0WOsX6B5A}} | {{#ev:youtube|ZD0WOsX6B5A}} | ||
==== | ==== Стеження за рухом ==== | ||
The Auto Mask effect can also be used to track motion of an object and use it later as keyframes for an effect / transition. | The Auto Mask effect can also be used to track motion of an object and use it later as keyframes for an effect / transition. | ||
Revision as of 12:08, 22 July 2019
Автоматичне маскування
Цим ефектом можна скористатися для маскування облич людей. Він використовує оцінку руху для стеження за суб'єктами і маскування облич. Це фільтр MLT autotrack_rectangle
Демонстрація
Як застосувати автоматичне маскування
Ознайомтеся із відео, наведеним нижче, щоб дізнатися про те, як застосувати цей ефект. Попередження: робота ефекту не є 100% надійною.
Стеження за рухом
The Auto Mask effect can also be used to track motion of an object and use it later as keyframes for an effect / transition.
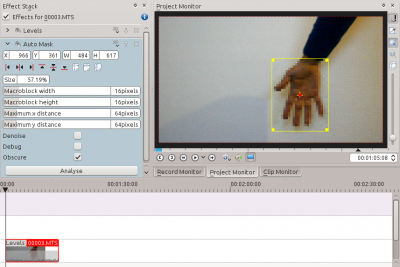
To use this feature, first add the clip you want to analyse in timeline, and add the "Auto Mask" effect to it - Figure 1.

Go to the first frame where your object is visible, and adjust the yellow rectangle so that is surrounds the object, like the hand in Figure 1.
Then click on the button in the effect options. This will start an analysis of the clip (you can follow its progress in the Project Tree view).

When the job is finished, the motion tracking data is stored in the clip properties. To use this data, you can for example add a title clip and affine transition over the clip you just analysed, like in the screenshot in Figure 2..

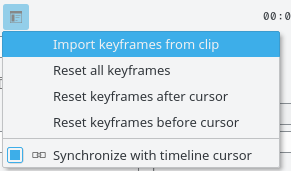
Next step is to import the motion data in the transition. To do this, first select the clip you have analysed, then select the transition using the CTRL key so that both items are selected. Finally, go in the transitions's Options menu ![]() and select . You can now delete the "Auto Mask" effect from the clip in timeline and play the project to see your title clip following the object.
and select . You can now delete the "Auto Mask" effect from the clip in timeline and play the project to see your title clip following the object.

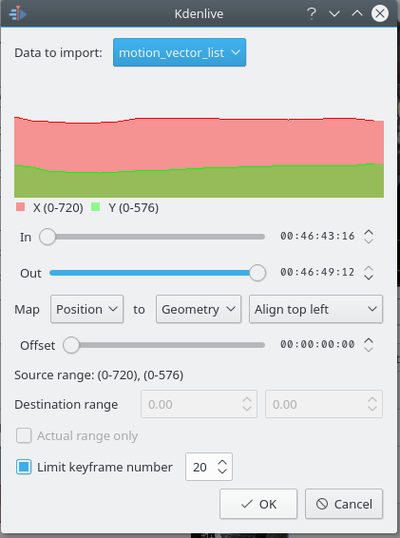
Checking the Limit keyframes number checkbox In the "Import Keyframes" dialog (Figure 4) will cause Kdenlive to only import every nth frame (where n is the number selected in the combo box). This is a useful feature if you want to manually edit the keyframes that are imported because it allows you limit the number of key frames you will need to manually edit. If this check box is not checked then you import a key frame for every frame that is in the source clip.
Deleting Motion Tracking Data
The motion tracking data is saved with the clip properties. You can view this data from the clip properties Analysis tab - Figure 5. Delete the data using button 1


