Kdenlive/Руководство/Монтажный стол
Монтажный стол (Timeline)

Панель монтажного стола (Timeline) является центральной частью Kdenlive. Она состоит из четырех частей (см. снимок экрана).
- 1 - Track resizing icon. These 2 icons allow you to increase
 or decrease
  the height of the tracks. They allow the track height to be adjusted to half the default height or double the default height. The default height of tracks can be configured in Kdenlive's Settings dialog.
- 2 - Timeline ruler. This shows the time in frames or in hh:mm:ss notation. The area highlighted in green is called the selection zone, and is useful if you want to render only a part of your project. Left clicking in the timeline ruler will move the timeline cursor and seek to that position. The Timeline ruler context menu allows you to manage Guides.
- 3 - "'заголовок дорожки"'. На этой панели будут показаны параметры дорожки (трека). Сверху будет показано название дорожки (Video 2 на снимке окна). Это название может быть изменено простым щелчком левой кнопкой мыши на ней. Ниже будет показано значки (предотвращать добавлению или изъятию клипов), . С помощью щелчка правой кнопкой мыши на заголовке дорожки вы можете получить доступ к контекстному меню управления дорожками.
- 4 - Сам трек, то есть где вы непосредственно размещаете ваши клипы
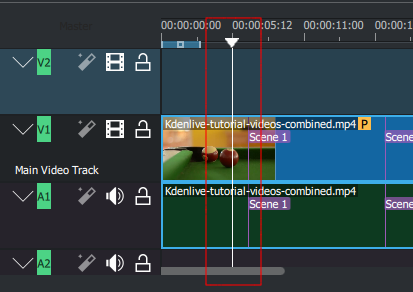
Timeline Cursor/Position Caret/Playhead

This indicates the position we are displaying in the Project Monitor. You can scroll the position by dragging the Timeline cursor (a.k.a Position Caret or Playhead).
Beginning with version 0.9.4, dragging the timeline cursor will play the audio of the clip (a.k.a. Audio Scrubbing). This feature only works if you have checked in Settings -> Configure Kdenlive -> Playback.
Дорожки (треки)
The timeline is made of tracks. There are two kind of tracks: audio and video. The number of tracks is defined when creating a new project in the Project Settings Dialog. Adding a clip in timeline can be achieved by dragging it from the Project Bin or the Clip Monitor.
Смотри так же
