Kopete/Jabber/Adding friends/da: Difference between revisions
(Importing a new version from external source) |
(Importing a new version from external source) |
||
| Line 1: | Line 1: | ||
<languages /> | <languages /> | ||
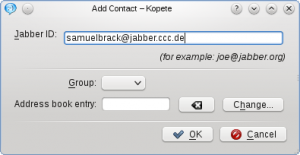
Efter dit første login er '''Kopetes''' vindue helt tomt. Din server kan have tilføjet en standardkontakt, som måske sender en velkomstbesked, men der er ingen rigtige kontakter på din "roster" (det er det, man kalder en kontaktliste i Jabber-sammenhænge). Første skridt i at tilføje kontakter til Jabber er selvfølgelig at bede dem om deres Jabber-ID. Når du har fået et, så kan du umiddelbart føje det til '''Kopete'''. Du kan enten <menuchoice>Tilføj -> ditJID@eksempel.org</menuchoice> eller <menuchoice>Fil -> Tilføj kontakt -> ditJID@eksempel.org</menuchoice>. Et nyt vindue dukker op, hvor du angiver det <menuchoice>Jabber-ID</menuchoice>, som du vil føje til din roster. Du skal bare skrive den ind og så klikke på <menuchoice>OK</menuchoice>. Tilvalget <menuchoice>Gruppe</menuchoice> bruges, hvis du har oprettet grupper af kontakter (fx "familje" og "arbejde"). Du kan etablere en forbindelse til [[Special:myLanguage/KAddressBook|KAddressBook]] med <menuchoice>Adressebogsindgang</menuchoice>, sådan at du kan udveksle information så som profilbilleder mellem de to programmer. | |||
Revision as of 06:25, 15 December 2010
Efter dit første login er Kopetes vindue helt tomt. Din server kan have tilføjet en standardkontakt, som måske sender en velkomstbesked, men der er ingen rigtige kontakter på din "roster" (det er det, man kalder en kontaktliste i Jabber-sammenhænge). Første skridt i at tilføje kontakter til Jabber er selvfølgelig at bede dem om deres Jabber-ID. Når du har fået et, så kan du umiddelbart føje det til Kopete. Du kan enten eller . Et nyt vindue dukker op, hvor du angiver det , som du vil føje til din roster. Du skal bare skrive den ind og så klikke på . Tilvalget bruges, hvis du har oprettet grupper af kontakter (fx "familje" og "arbejde"). Du kan etablere en forbindelse til KAddressBook med , sådan at du kan udveksle information så som profilbilleder mellem de to programmer.

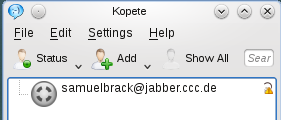
Now you've added your first friend to your roster. But before you can start writing messages to him or her, your contact has to authorize your request. Until this happens, the contact appears with a small yellow exclamation mark on the right side of his contact field.

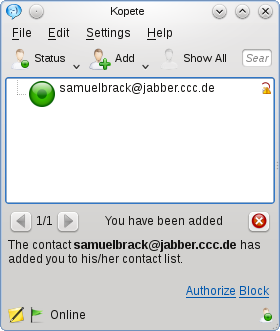
When your friend authorized your request or added you to his or her roster, its icon will appear colored when online. The exact meanings of the different icons (Online, Away etc.) can be seen at where you can set them yourself, too. You receive a notification when you are authorized.
Normally, your friend will put you also to his or her contact list, so you have to authorize this request by yourself, too. Kopete notifies about that at the bottom with a green flag and the description of the request. Click on to accept. The notification area can be closed by clicking on the cross on the upper-right side of the area.

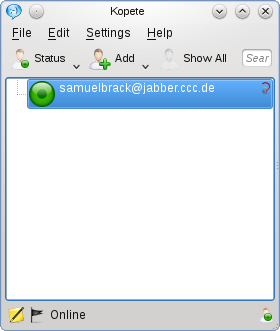
After that procedure you should see a contact list like in the next image.

You successfully added your first contact to your roster now.
- ← Return to index
- Kopete/Jabber/Adding friends/da
- Page 6 - Messaging and sending files →
