Showfoto/Levels Adjust/bg: Difference between revisions
Manol.Denev (talk | contribs) (Created page with "Защо е тъмна? Нека отворим снимката в '''Showfoto''' (редакторът на '''DigiKam'''):") |
Manol.Denev (talk | contribs) (Created page with "Горе, вдясно, можете да видите ''хистограмата'' на изображението (в момента е избрана линейната хис...") |
||
| Line 21: | Line 21: | ||
|} | |} | ||
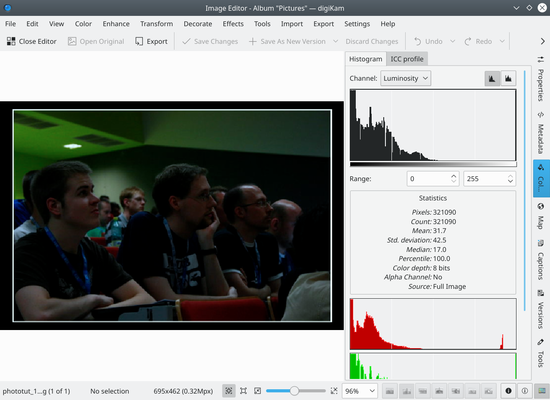
Горе, вдясно, можете да видите ''хистограмата'' на изображението (в момента е избрана линейната хистограма- <menuchoice>Linear</menuchoice>). | |||
А какво точно е хистограмта? Тя е брояч на пиксели. Тя брои колко пиксела има за всяко сиво ниво и показва резултатите под формата на графика. В лявата част са ситуирани тъмните/ черните цветове, а в дясната- светлите и ярките цветове. | |||
You can see that our image has the histogram concentrated on the left part. Thus, it's mostly black. The right part of the histogram isn't used at all, as shown in the figure. Why did this happen? Just because the camera failed exposing the image properly, or was inappropriately configured. | You can see that our image has the histogram concentrated on the left part. Thus, it's mostly black. The right part of the histogram isn't used at all, as shown in the figure. Why did this happen? Just because the camera failed exposing the image properly, or was inappropriately configured. | ||
Revision as of 18:22, 2 January 2011
Фото KDE Урок 1-1 - Настройки с "Levels"
Унай Гарро (uga) - Лято 2008
Този метод е може би най- разпространеният и прост начин да настроите дадена снимка. Толкова е опростен и ефективен, че ще ви се прииска да го прилагате на всичките си снимки, така че внимавайте в урока и се забавлявайте!
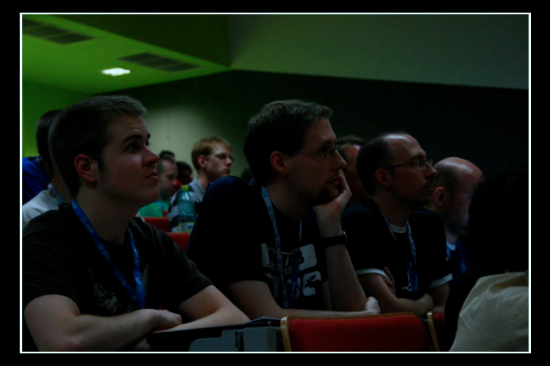
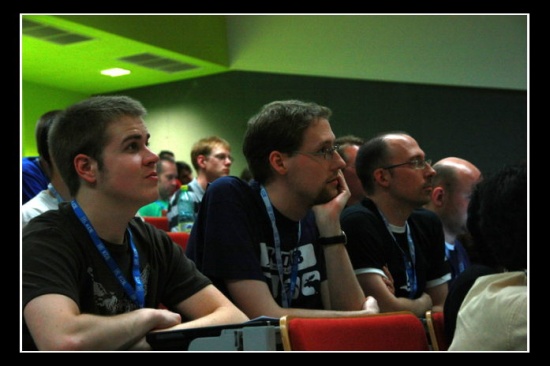
Нека разгледаме снимката от Академия 2008, предоставена ни от Себастиан Кюглер:
|
Ясно се вижда, че снимката е тъмна. Може би е заснета по време на презентация и залата е била тъмна. Все пак, това не оправдава лошата снимка. ![]()
Защо е тъмна? Нека отворим снимката в Showfoto (редакторът на DigiKam):
|
Горе, вдясно, можете да видите хистограмата на изображението (в момента е избрана линейната хистограма- ). А какво точно е хистограмта? Тя е брояч на пиксели. Тя брои колко пиксела има за всяко сиво ниво и показва резултатите под формата на графика. В лявата част са ситуирани тъмните/ черните цветове, а в дясната- светлите и ярките цветове.
You can see that our image has the histogram concentrated on the left part. Thus, it's mostly black. The right part of the histogram isn't used at all, as shown in the figure. Why did this happen? Just because the camera failed exposing the image properly, or was inappropriately configured.
If a photo is visually pleasing, usually (not always), it covers most of the histogram, from black, to white.
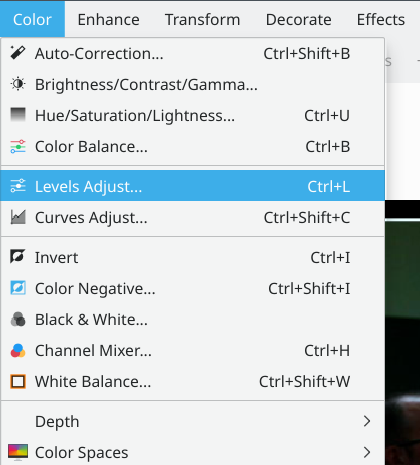
So, is there a way to fix this, then? Of course there is, and it's a very easy one. Select the menu :
|
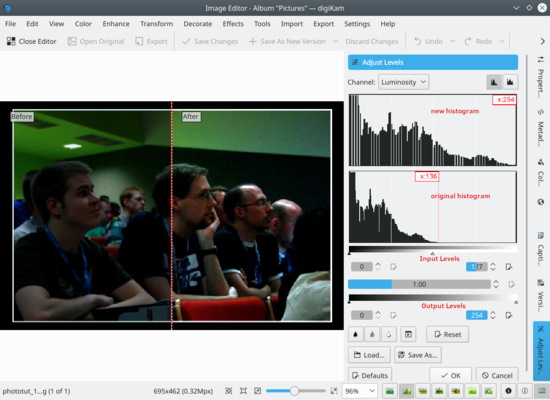
You will see a new popup showing a tool to adjust the histogram output. There are several parts in it. On the top right, there are two histograms. The first one is the output/new histogram, and the second (bottom) one is the input/original histogram.
|
As you can see, I have adjusted the output histogram to cover it all, see? So how have I done this? Very simple:
There are 4 sliders in this tool. The first two sliders mark the beginning and end of the part of the histogram that I am interested in. I have moved them to match the full histogram of our original image.
The other two sliders mark the range of the histogram we want as output. We want the histogram to cover from black to white, so just move the sliders to the left corner and to the right corner.
Press , et voilà, your nice photo is fixed. Congrats ![]()
|

