Plasma/TweakingPlasma: Difference between revisions
Created page with '{{Template:I18n/Language Navigation Bar|Tutorials/TweakingPlasma}} == A Windows Vista-like sidebar with clock and news == Once again, the proof that KDE can do at least the sam...' |
m Add a small warning outdated information |
||
| (27 intermediate revisions by 8 users not shown) | |||
| Line 1: | Line 1: | ||
<languages /> | |||
{{Warning|Content on this page is outdated and may not work with recent versions of the software.}} | |||
<span id="A Windows Vista-like sidebar with clock and news"></span><translate> | |||
== | == Change the audio output when connecting new devices == <!--T:29--> | ||
<!--T:30--> | |||
If you want audio to automatically switch to HDMI when plugging in a new device, do the following: | |||
* Open the volume system settings module | |||
* go to the advanced tab | |||
* check "Automatically switch all running streams when a new output becomes available" | |||
== A Windows Vista-like sidebar with clock and news == <!--T:2--> | |||
<!--T:3--> | |||
Once again, the proof that KDE software can do at least as much as Windows... | |||
=== Creating panel === <!--T:4--> | |||
<!--T:5--> | |||
* Right-click on the desktop | * Right-click on the desktop | ||
* Click on | * Click on <menuchoice>Add panel</menuchoice> | ||
* Click on the | * Click on the <menuchoice>Toolbox</menuchoice> of this panel | ||
* Drag and drop the panel to a side of the screen clicking and holding on | * ''Drag and drop'' the panel to a side of the screen clicking and holding on <menuchoice>Screen edge</menuchoice> | ||
* Configure the height and width as you wish, but keep quite wide to be able to display the widgets in it | * Configure the height and width as you wish, but keep quite wide to be able to display the widgets in it | ||
=== Add widgets === <!--T:6--> | |||
<!--T:27--> | |||
* Still in the panel click <menuchoice>Add widgets</menuchoice> | |||
* Add the <menuchoice>Analog Clock</menuchoice> widget and the <menuchoice>News</menuchoice> or <menuchoice>RSSNow</menuchoice> widget | |||
=== Hide the panel === <!--T:28--> | |||
=== Hide the panel === | |||
* Click on | <!--T:8--> | ||
* Click on the | * Click on <menuchoice>More settings</menuchoice> | ||
* Click on the <menuchoice>Auto-hide</menuchoice> option | |||
<!--T:9--> | |||
You're done! | You're done! | ||
=== Result === | === Result === <!--T:10--> | ||
<!--T:11--> | |||
[[File:Windowssidebar.jpeg|500px|center|thumb]] | |||
</translate><span id="Using Multiple Plasma Themes"><translate> | |||
== Using Multiple Plasma Themes == <!--T:13--> | |||
<!--T:14--> | |||
The Plasma workspace allows users to create customized themes whose widgets can be themed using multiple themes. For example, it is possible to have the Taskbar be themed using Oxygen, to have the clock be themed using Aya, and much more customization, allowing you to pick the best plasma themes for each object. | |||
<!--T:15--> | |||
[[File:Plasma-multiple-themes.png|500px|center]] | |||
=== Set up "(Customized)" Theme === <!--T:16--> | |||
<!--T:17--> | |||
Navigate to the <menuchoice>Desktop Theme Details</menuchoice> configuration dialog via either [[Special:myLanguage/Plasma/Krunner|Krunner]] or the [[Special:myLanguage/System_Settings|System Settings]] Dialog: | |||
<!--T:18--> | |||
[[File:Krunner-desktop-theme-details.png|center|500px|thumb]] | |||
<!--T:19--> | |||
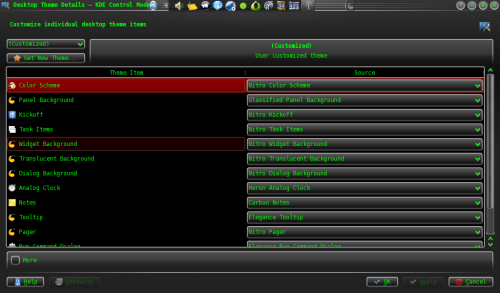
Here you can choose what theme is used for different objects in the '''Plasma workspace'''. Configure them to your pleasure (it often helps to test each individual '''plasma''' element by applying the entire theme to your desktop first) and press <menuchoice>Apply</menuchoice>. | |||
<!--T:20--> | |||
[[File:Desktop-theme-details-dialog.png|500px|center|thumb]] | |||
=== Apply "(Customized)" Theme === <!--T:21--> | |||
<!--T:22--> | |||
[[File:Desktop-settings-rightclick.png|500px|center|thumb]] | |||
<!--T:23--> | |||
At this point, the workspace settings dialog should list a '''Plasma''' theme entitled (Customized). This is the theme mashup that you have created. Select it and hit <menuchoice>Apply</menuchoice>. | |||
<!--T:24--> | |||
[[File:Desktop-config-customized.png|500px|center|thumb]] | |||
<!--T:25--> | |||
[[Category:Tutorials]] | |||
[[Category:Desktop]] | |||
[[Category:System]] | |||
</translate> | |||
Latest revision as of 16:23, 17 April 2019
Change the audio output when connecting new devices
If you want audio to automatically switch to HDMI when plugging in a new device, do the following:
- Open the volume system settings module
- go to the advanced tab
- check "Automatically switch all running streams when a new output becomes available"
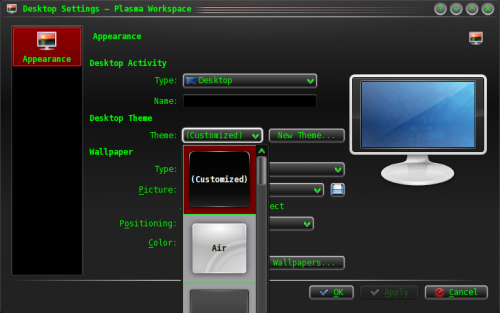
A Windows Vista-like sidebar with clock and news
Once again, the proof that KDE software can do at least as much as Windows...
Creating panel
- Right-click on the desktop
- Click on
- Click on the of this panel
- Drag and drop the panel to a side of the screen clicking and holding on
- Configure the height and width as you wish, but keep quite wide to be able to display the widgets in it
Add widgets
- Still in the panel click
- Add the widget and the or widget
Hide the panel
- Click on
- Click on the option
You're done!
Result
Using Multiple Plasma Themes
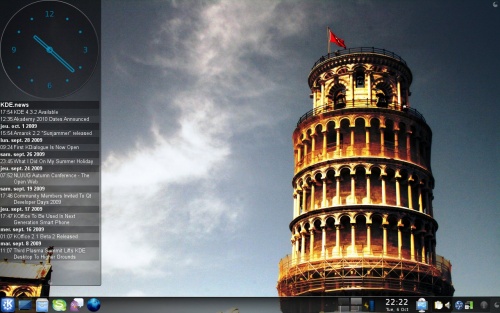
The Plasma workspace allows users to create customized themes whose widgets can be themed using multiple themes. For example, it is possible to have the Taskbar be themed using Oxygen, to have the clock be themed using Aya, and much more customization, allowing you to pick the best plasma themes for each object.
Set up "(Customized)" Theme
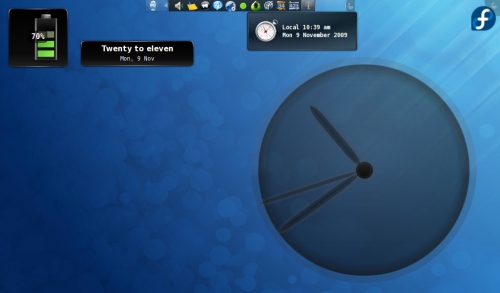
Navigate to the configuration dialog via either Krunner or the System Settings Dialog:
Here you can choose what theme is used for different objects in the Plasma workspace. Configure them to your pleasure (it often helps to test each individual plasma element by applying the entire theme to your desktop first) and press .
Apply "(Customized)" Theme
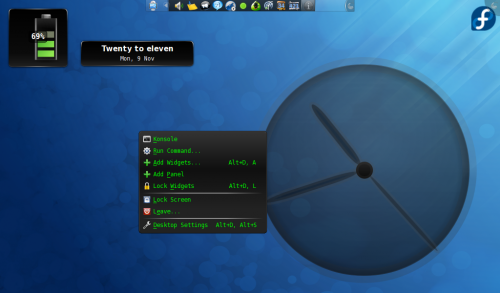
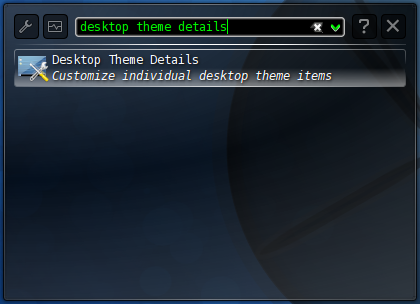
At this point, the workspace settings dialog should list a Plasma theme entitled (Customized). This is the theme mashup that you have created. Select it and hit .
