User:SamiZhan/a Beginners' Guide for KDE Software/Manage your files and achieves with Dolphin and Ark/File managing: Difference between revisions
No edit summary |
No edit summary |
||
| Line 34: | Line 34: | ||
[[File:Manage-dolphin-noted-10.png]] | [[File:Manage-dolphin-noted-10.png]] | ||
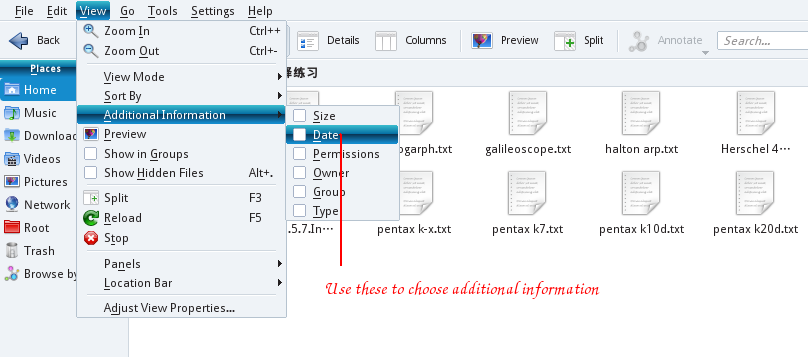
There is also a function to display some more information under the icon. Click "View --> Additional Information" to choose what to show. | |||
[[File:Manage-dolphin-noted-20.png]] | |||
The result is: | |||
[[File:Manage-dolphin-noted-11.png]] | |||
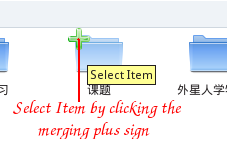
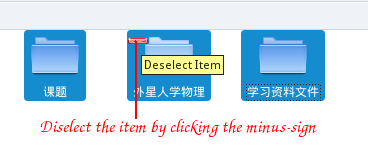
To select or deselect a file , hover the mouse cursor on the icon and then click the plus sign or the minus sign. I this case , there is no need for you to press the "Ctrl" button any more. | |||
[[File:Manage-dolphin-noted-12.png]] [[File:Manage-dolphin-noted-13.png]] | |||
===The Details View Mode=== | |||
The Details View Mode is just always the same as which in the MS Windows. You can see some details of the file easily in this mode. To switch to this mode , click the button "Details" | |||
[[File:Manage-dolphin-noted-8.png]] | |||
[[File:Manage-dolphin-noted-9.png]] | |||
Revision as of 13:04, 25 January 2011
Get familiar with dolphin
Dolphin is the default file manager of the KDE Software Complication. In this chapter , we'll show you how to use Dolphin to do common file managing tasks.
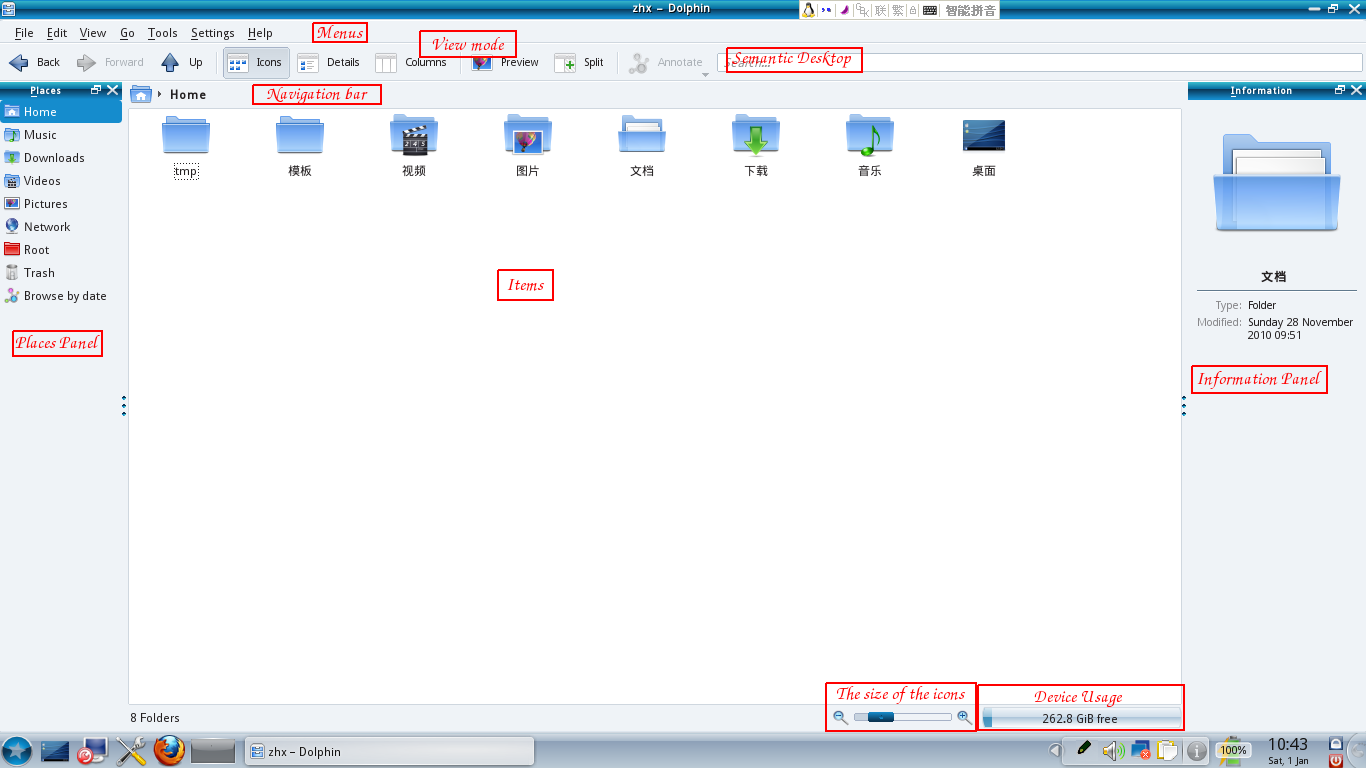
The UI of Dolphin:
- Navigation bar: The navigation bar is quite different from the ones in MS Windows. You can use the navigation in a fast and precise way. And we'll tell you how to use it in the next section.
- View mode:There are many view modes provided. The differences among them and the way to use them will be told in the third section.
- Places panels:There is a new concept of bookmarks in KDE SC4 called places. You can open them in the current folder view just by clicking them.
- Information panels:This panel displays a preview or an icon of the currently selected file/folder or of the file/folder below the mouse cursor. You may also use this panel to rate the files if you open the semantic desktop.
- The size of the icons:Just use this to change the size of the icons.
There is a new concept to use the navigation bar in a faster and more precise way: therefore a breadcrumb navigation bar is used. Instead of displaying the complete path only the navigation points starting from one of the places are displayed as buttons. Just click one of them , you can go back to this folder quickly. In this way , you can reach a parent folder from a sub folder in an easy way.
![]() Between these buttons which represent a folder there is a small arrow.Click the arrow , and you will see all the subdirectories on the same level. Then , you can switch to the folder by click it.
Between these buttons which represent a folder there is a small arrow.Click the arrow , and you will see all the subdirectories on the same level. Then , you can switch to the folder by click it.
 Of course , if you want to edit the location , just click at the end of all the buttons. When you are finished , you can click the hook-like button.
View mode
Icon view
Icon View is the default mode , If you are not using it , you can click the button "Icons" to switch to the Icon View mode. In this mode , each file and folder is represented by an icon.
You can sort the icons by date , name , size or something else. Click "View-->Sort By-->Date" to sort the icons by date.
There is also a function to display some more information under the icon. Click "View --> Additional Information" to choose what to show.
The result is:
To select or deselect a file , hover the mouse cursor on the icon and then click the plus sign or the minus sign. I this case , there is no need for you to press the "Ctrl" button any more.
The Details View Mode
The Details View Mode is just always the same as which in the MS Windows. You can see some details of the file easily in this mode. To switch to this mode , click the button "Details"


