Plan/Engineering To Order project tutorial/planning/da: Difference between revisions
Importing a new version from external source |
Importing a new version from external source |
||
| Line 93: | Line 93: | ||
Klik på emnet <menuchoice>Omkostningsanalysestruktur</menuchoice> i venstre side af vinduet lige under emnet arbejde og ferie, som du valgte før. | Klik på emnet <menuchoice>Omkostningsanalysestruktur</menuchoice> i venstre side af vinduet lige under emnet arbejde og ferie, som du valgte før. | ||
Som det er nødvendigt for styring af omkonsninger, deler vi omkostningerne ind på følgende måde | |||
[[Image:cbs1.png|center|800px]] | [[Image:cbs1.png|center|800px]] | ||
Revision as of 16:12, 4 January 2011
Planlægningsfasen
Første gang
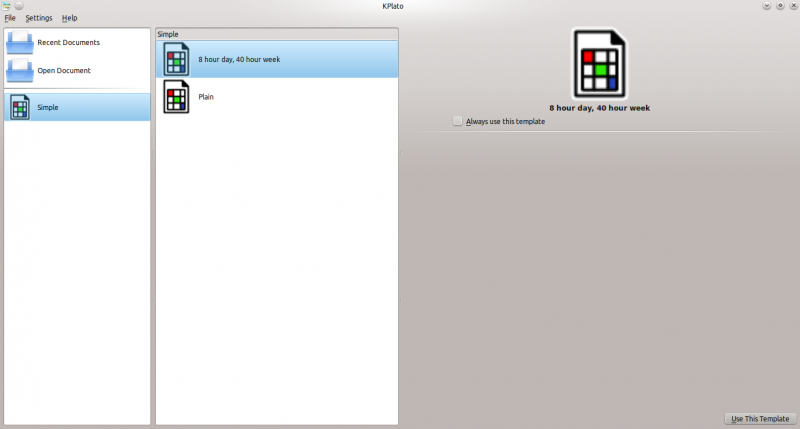
Når du starter programmet første gang dukker følgende vindue op.
Vi vælger skabelonen til at begynde med.
Indstilling af hovedprojektet
Nu giver vi projektet et navn og en leder og angiver anden generel information. For at gøre dette klikker du på ikonet i værktøjslinjen, hvorved følgende dialog dukker op.
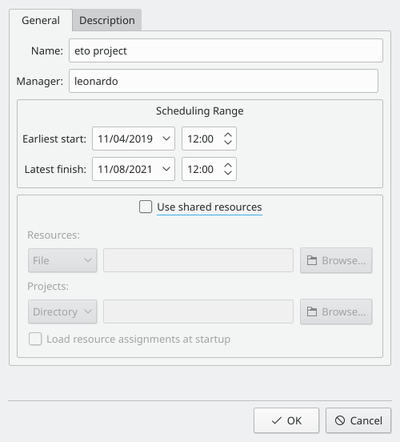
I denne dialog kan vi skrive projektets navn, vælge en leder fra en liste, som allerede findes i systemet (hvis du har KDE og Kontact) eller skrive et nyt navn, hvis det passer dig bedre.
Tidsfristerne Tidligste start og seneste afslutning bruges til at planlægge projektet. Vi ønsker at planlægge forud, så vi sætter den tidligste start til det tidspunkt, hvor projektet skal starte og den seneste afslutning til det tidspunkt, hvor projektet skal være færdigt. Hvis projektet ikke kan planlægges til at afslutte før dette tidspunkt, så får du en planlægnings-advarsel.
Nederst i dialogen kan du skrive en kommentar om projektet. Disse data vil blive brugt til rapporten og til andre generelle formål under arbejdet.
Indstilling af valuta
Vi kan vælge at arbejde med forskelige valutaer. Antag, at vi vil regne i €. For at gøre dette skal du vælge menuen , hvorved nedenstående dialog dukker op.
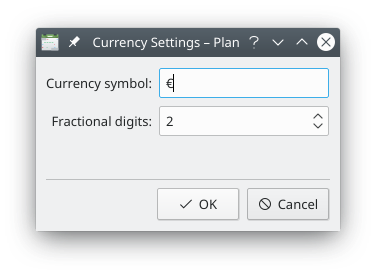
Ret valutasymbolet til € og klik så på , da de andre tilvalg er, som de skal være.
Arbejdskalender
Vælg øverst i feltet til venstre i hovedvinduet i gruppen . Du ser nu følgende:
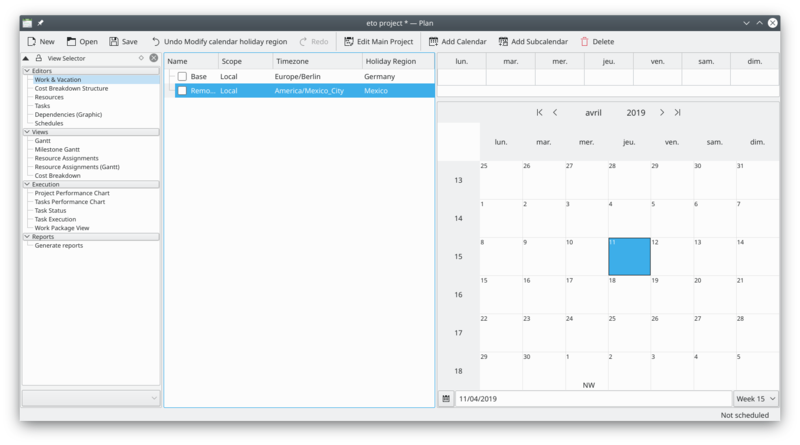
I det midterste felt kan kan vi tilføje forskellige kalendere for forskellige tidszoner og arbejdsuger. Til højre er det en månedskalender, og i dens øverste del er der en indstilling af de daglige arbejdstimerne for ugedagene, typisk 8 timer fra mandag til fredag og ingen arbejde lørdag og søndag.
Lad os tilføje en ny kalender til senere brug ved at klikke på ikonet . Give den navnet
Installation
og vælg tidszonen i dropned-feltet.

Vælg nu den nye kalender og definér den relative arbejdsuge.
Oven over kalenderen er der nogle felter, som repræsenterer en typisk arbejdsuge.

Højreklik i det tomme felt under Man.; der dukker nu en menu op, hvor du kan vælge mellem , og .
Klik på ; så vil følgende dialog dukke op.
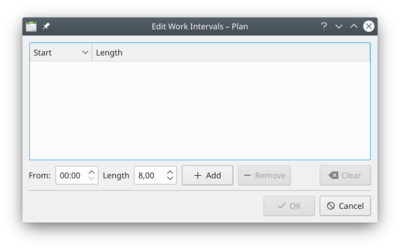
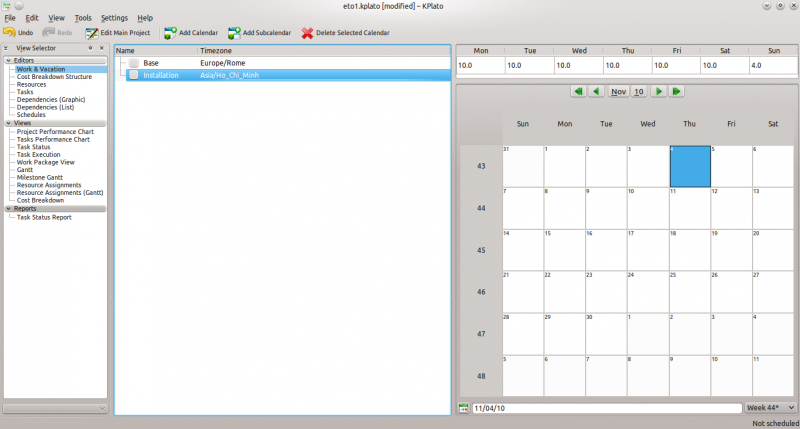
Vi tilføjer typiske arbejdstimer for arbejde med installation. 10 timer om dagen fra mandag til lørdag og 4 timer om søndagen. Om nødvendigt kan vi også vælge at indsætte tid til pauser.
Angiv at der arbejdes fra 7:00 og at længden er 10:00 (timer); klik så og derefter .
Gentag dette for de andre dage frem til lørdag, men du for søndag indsætter 4 timer startende fra 8 om morgenen.
Du kan også vælge dage eller ugedage ved at bruge Shift + Venstre museknap eller Ctrl + Venstre museknap.
Du kan også højreklikke på en dato i kalenderen og anføre de samme oplysninger om arbejds- og fritid. Dette er særligt nødvendigt, når du skal operere med andre helligdage end dine egne!
Når du er færdig skulle din kalender se sådan ud:
Omkostningsanalysestruktur
Her definerer du, hvilke omkostningscentre du vil bruge i projektet. Der kan være forskellige grupper og undergrupper.
Klik på emnet i venstre side af vinduet lige under emnet arbejde og ferie, som du valgte før.
Som det er nødvendigt for styring af omkonsninger, deler vi omkostningerne ind på følgende måde
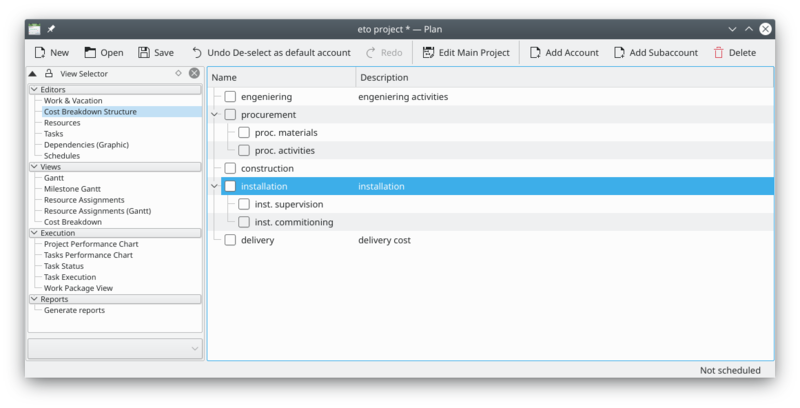
Play with the and icons to reach the full tree! This is a personal approach for a complete ETO project due to my experience.
For example you can have a "direct employee" account to manage the cost for your employee, or to have an idea about the cost of your suppliers using a dedicated account as soon as you insert their work.
Resources
So, now it's time to define our team and the material!!
You can access to the resources window clicking on the item on the left side of the window, just under the cost breakdown structure item pressed before.
The resources are organized as resource groups and resources. So, first we insert the team group as resource group clicking on the "Add Resource group" icon for each item as below.
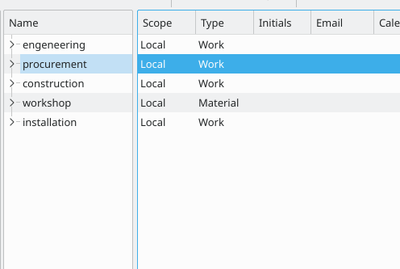
As soon as you complete the group it's time to insert the people and the materials!
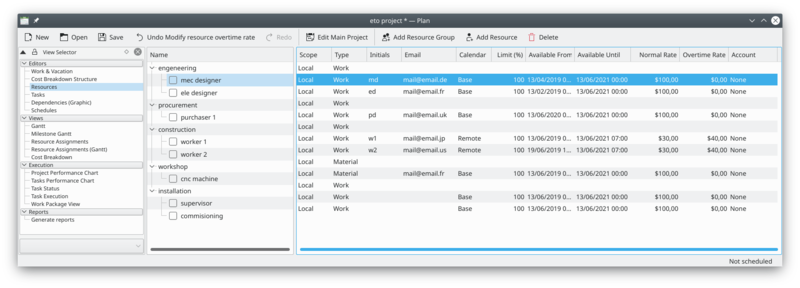
Work Resources
Now it's time to edit each single resource for the purpose to define it. Right click on the resource name to open the resource setting window.
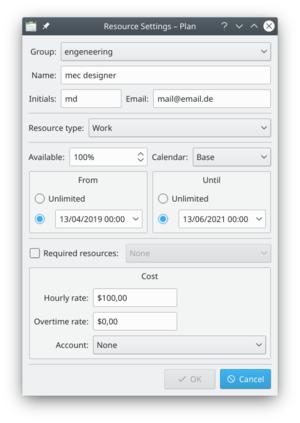
Therefore we add the initials and the email address, switch the calendar to , insert the cost as per need. The account is set to "none" as in this case we do not charge the cost to a specific cost account.
Remember that for the installation resources there will be a different calendar, the "installation", that we inserted before!
Material Resources
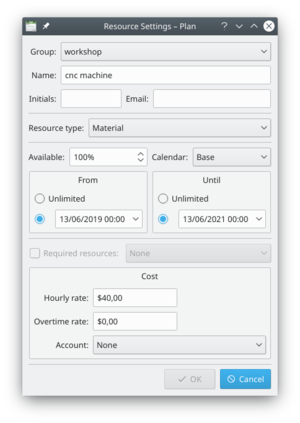
We decided to add the workshop machines to consider some costs as well as their use.
For this purpose in the resource we add the workshop as a material and a CNC machine as well as assembly tools package.
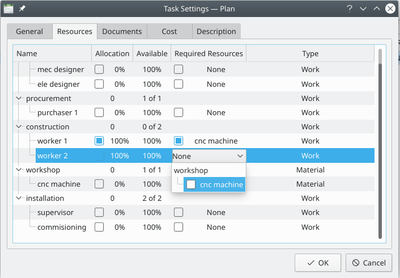
Calendar preference
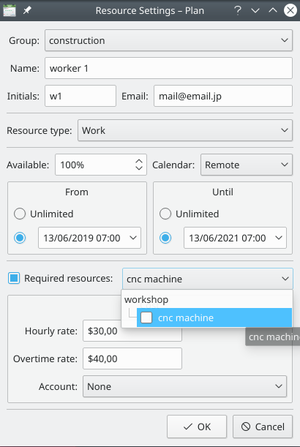
One other interesting thing to note is that we use different calendars for different resources.
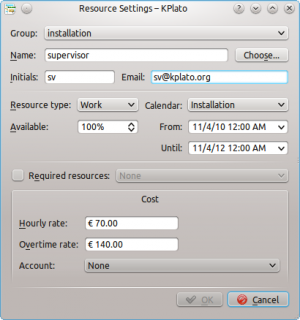
The calendar on the task has the precedence on the resource's calendar. The availability date for a resource largely depend if this resource is available only for a period of time. In this case we need to be sure that all the resources are available from the beginning to the end of the job.
Overtime rate is not yet implemented.
Task
Now it's tasks time !!!!
You can access the task window clicking on the "task" item on the left side of the window, just under the resource item you pressed before.
We have to insert the following items:
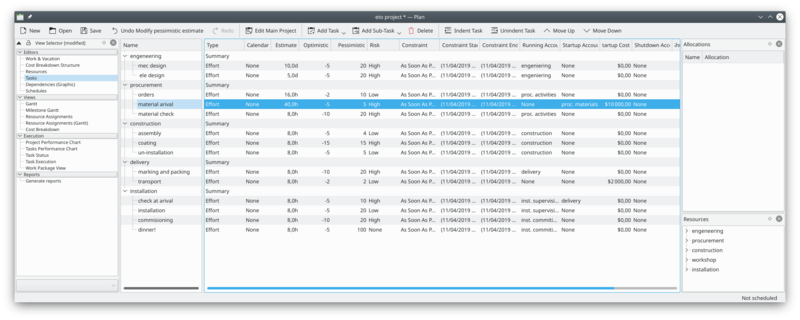
As we inserted the each name, we can edit each item right clicking the name. The following will appear on the first task:
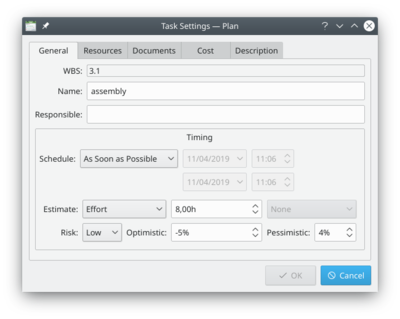
There are five tabs: General, Resources, Documents, Cost, Description.
On the General tab insert the name of the task, you can choose a responsible person if needed, then define the timing and the risk associated to the task. The schedule type is typical for planning, "as soon as possible" is the most used. Other kind of type, generate a need to compile the date and time on the right of the drop-down menu.
The estimate is the time required to complete the task, can be in different units: h (hours), d (days), w (weeks) and M (months).
The risk level as well as the optimistic and pessimistic timing will impact the calculation of the total project considering the PERT technique. In this case -5% and 20% are the value as well as the risk is considered "High".
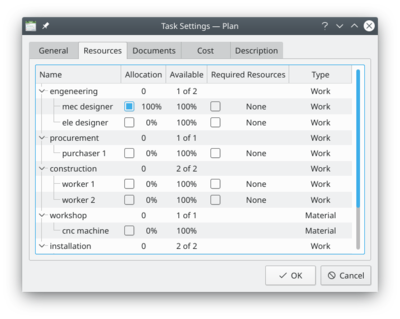
On the Resource tab, we choose the desired resource to be used as well as it's availability in % and eventual resources associated.
In the Document tab we can link documents pertaining to the task. Not used for our tutorial.
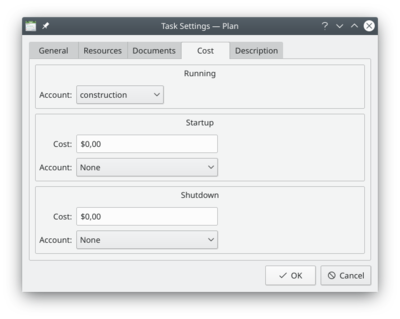
The fourth tab is the Cost tab. Here we can associate the running cost of the task to an account previously defined into the "Cost breakdown structure".
We can also choose to add startup and shutdown cost for the task, that can be associated to different account.
The last tab is the Description tab where we can insert our comments, mainly the list of the deliverables related to the task.
Dependencies
Now it's time to prioritize the activities! Let's click on the item on the left side of the main window.
So this is what should appear as soon as you open the right window.
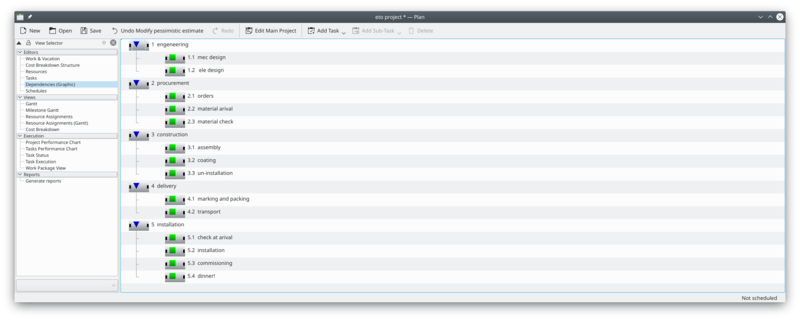
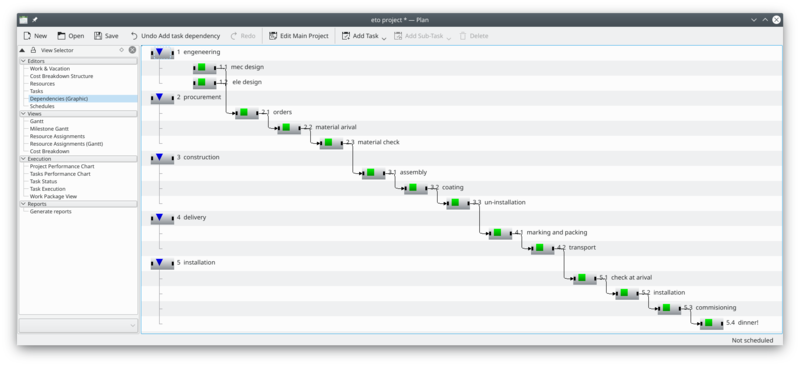
Let's start to give priority at the tasks in order to obtain a full list of dependencies. This can be done graphically with the mouse, clicking at the right or left side of the task and then drag the relative arrow to the desired position of the other task. It should be better to connect only the tasks and not the summary. The result should be like below.
Schedule
Wow, now it's time for schedule and prepare the baseline for the project!
Clicking on the left menu on the will bring you to the schedule activities!
Now we create a new schedule clicking on the button at the top of the window, then we choose a for the distribution type and then we click on button. As soon as the calculation is finished, press on button on the top of the window. The result will be like this:
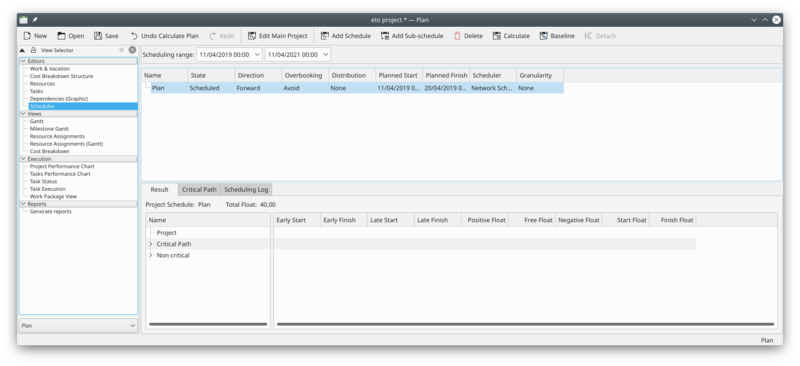
Here, for reference, is a copy from the KPlato manual of the field's definitions in the schedule
| Column | Description |
| Name | The name of the schedule. |
| State | The schedules state. Shows a progress bar during scheduling. |
| Direction | The scheduling direction.
If direction is Forward, the project is scheduled starting at the projects earliest start time specified in the main project dialog. If direction is Backward, the project is scheduled starting at the projects latest finish time specified in the main project dialog." |
| Overbooking | Controls resource overbooking when scheduling.
If overbooking is allowed, a resource may be booked (on working days) to work more than it is available. This can happen if the resource is allocated to multiple tasks or are booked on other projects. If overbooking is to be avoided, resources will not be booked more than they are available. On resource conflict, tasks will be delayed until the resource is available. |
| Distribution | The distribution to be used during scheduling.
If distribution is 'None', the tasks estimate is used as is during scheduling. If distribution is 'PERT', the estimate (E) used is calculated based on the entered optimistic- (O), pessimistic-(P) and most likely (M) estimate. The formula used for this is: E = (O + 4 * M + P) / 6. |
| Planned Start | The scheduled start time. |
| Planned Finish | The scheduled finish time. |
| Scheduler | The scheduler used for calculating the project schedule.
The default built-in scheduler is the Network Scheduler. Other schedulers presently available is RCPS if libRCPS is installed on your system. RCPS is a genetics based resource constrained project scheduler |
So now we have finished our planning activities for the project!!!


