Kexi/Tutorials/Reports/Kexi Reports for Beginners/uk: Difference between revisions
Created page with "Якщо ви перемкнетеся до режиму даних, програма надасть вам змогу вибрати одну з декількох дій, зо..." |
Created page with "На панелі <menuchoice>Дизайн запиту</menuchoice> виберіть бажану таблицю зі спадного списку і натисніть кно..." |
||
| Line 15: | Line 15: | ||
На панелі <menuchoice>Дизайн запиту</menuchoice> виберіть бажану таблицю зі спадного списку і натисніть кнопку <menuchoice>Вставити</menuchoice>. Буде показано панель з вибраною таблицею і списком назв полів. Двічі клацніть на кожному з полів, яке ви бажаєте використати у запиті. | |||
Revision as of 17:40, 19 July 2011
← Назад до підручників зі звітів
← Назад до підручників
Це настанови базового рівня для початківців з створення звітів у Kexi 2.2 та новіших версіях.
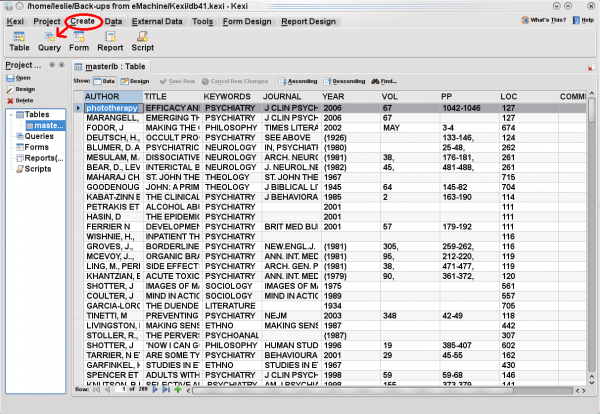
Почнемо роботу з таблиці з назвою masterlb показаної у форматі даних. У нашому прикладі у таблиці будуть поля з назвами author, title, keywords тощо. Перш, ніж створювати звіт, ми створимо запит.
Виберіть команду на вкладці головної панелі інструментів.
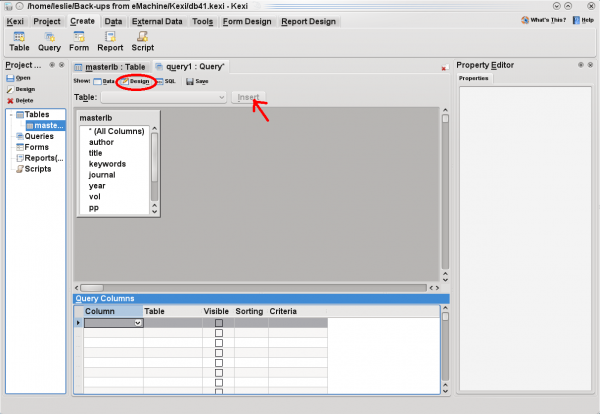
На панелі виберіть бажану таблицю зі спадного списку і натисніть кнопку . Буде показано панель з вибраною таблицею і списком назв полів. Двічі клацніть на кожному з полів, яке ви бажаєте використати у запиті.
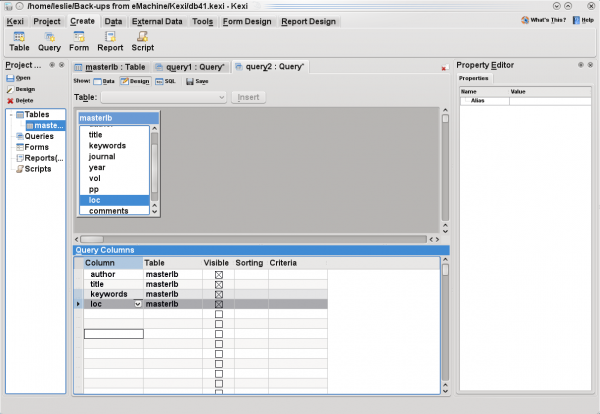
Стовпчики запиту буде автоматично заповнено даними вибраних полів і назвою таблиці, як це показано далі.
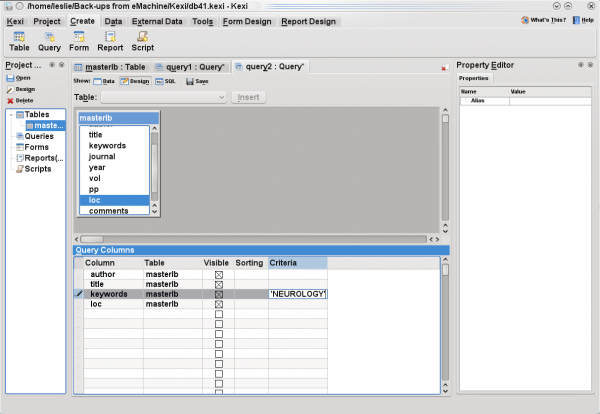
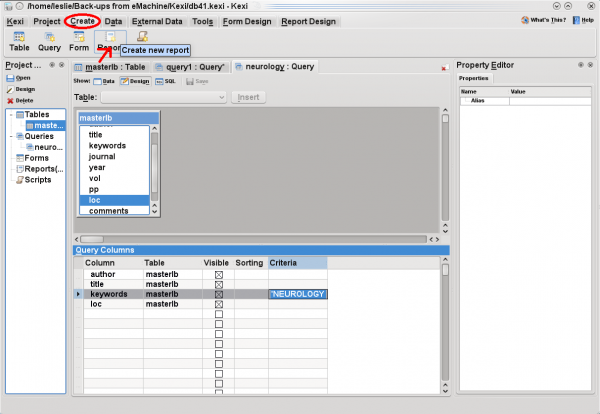
Let's suppose that, for your report, you want all the records matching NEUROLOGY in the field keywords. Under on the line,type in
'NEUROLOGY'
(Enclose the name in single quotes.)
Now, select the button to save your query. You will be asked for name of the saved query; enter
neurology
. In the screen shot below, the name of this new query is displayed under category in the far left pane.
Next, to create new report that will display data defined by the query, select the command from the tab of the main toolbar.
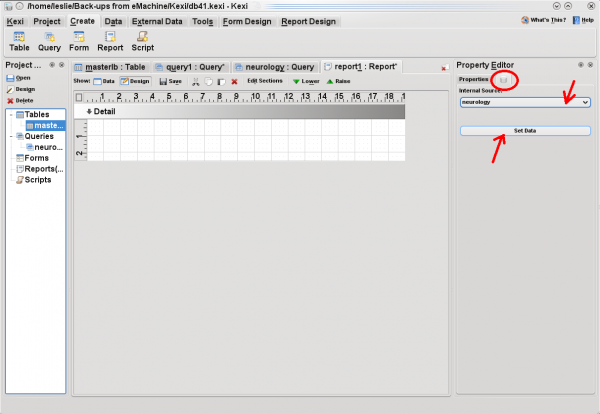
Click on the tab with database icon, to the right of . You will then be able to select an internal source for your report. The new query will be among the choices. Select it, and press the button.
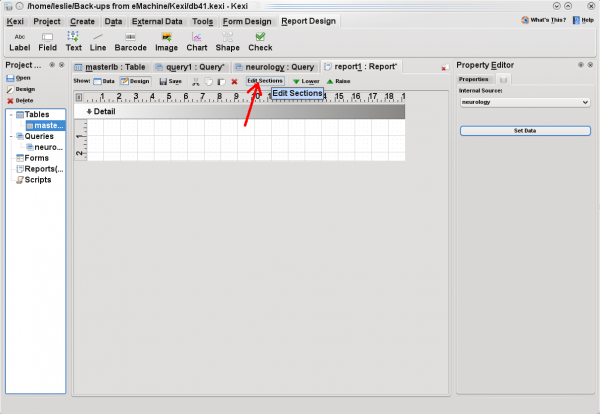
At this point, before entering your data, you may wish to click button to create a header and other format options:
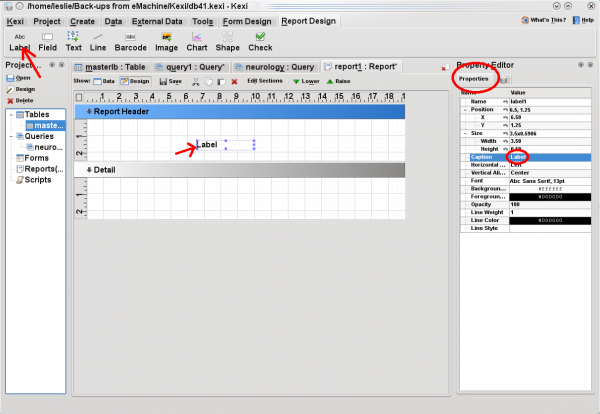
You may wish to put a label in your header. To do so, click on command from the tab of the main toolbar
and then click in the area.
Notice that in the you can enter your own to replace the word Label. You have many options for formatting the size, position, font, etc.
To enter fields into the body of your report, click on command in the tab of the main toolbar and then click in the section. In the , pressing on the property combo box displays a list of the fields provided by your query. For each field you create in the section, select desired field from the list. This binds the fields on your report to your data.
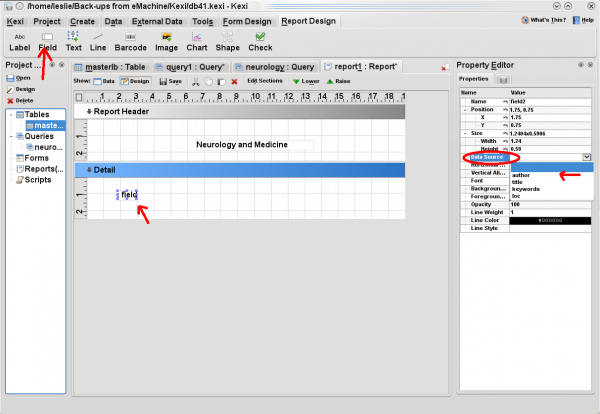
Again, there are many formatting options. Save your report using the button. Before you switch to data mode, if you have set the data for the first time, you may have to close and re-open the report [this may be a bug that will be fixed in later versions].
Якщо ви перемкнетеся до режиму даних, програма надасть вам змогу вибрати одну з декількох дій, зокрема дію . Ваш надрукований звіт має виглядати чудово!
Автор невідомий. Текст адаптовано і редаговано jstaniek.

