Digikam/Facebook/ca: Difference between revisions
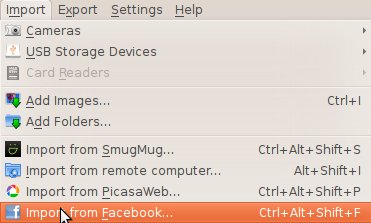
Created page with "Aneu a <menuchoice>Importa</menuchoice> i seleccioneu <menuchoice>Importa des de Facebook</menuchoice>. Veure la següent captura de pantalla!" |
Created page with "Quan hi premeu, s'us demanarà que inicieu una sessió al vostre compte de Facebook o qualsevol enllaç al vostre compte de Facebook amb '''digiKam'''. S'obrirà el navegador web..." |
||
| Line 11: | Line 11: | ||
Quan hi premeu, s'us demanarà que inicieu una sessió al vostre compte de Facebook o qualsevol enllaç al vostre compte de Facebook amb '''digiKam'''. S'obrirà el navegador web i obtindreu els permisos per entrar. A continuació, us donarà la benvinguda amb aquesta finestra. | |||
Revision as of 23:54, 25 February 2012
Com descarregar àlbums de Facebook utilitzant digiKam
Transcrit des de l'article d'en Mohamed Malik, el 15 de febrer de 2011
Necessiteu descarregar els vostres àlbums de Facebook o dels vostres amics? No voleu desar cada imatge individualment. Bé, en aquest cas digiKam ho té tot cobert. És fàcil i ràpid. Aquí us expliquem com fer-ho.
Aneu a i seleccioneu . Veure la següent captura de pantalla!

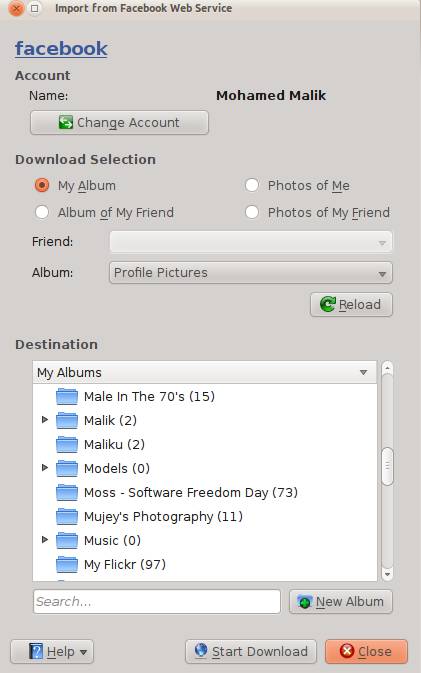
Quan hi premeu, s'us demanarà que inicieu una sessió al vostre compte de Facebook o qualsevol enllaç al vostre compte de Facebook amb digiKam. S'obrirà el navegador web i obtindreu els permisos per entrar. A continuació, us donarà la benvinguda amb aquesta finestra.

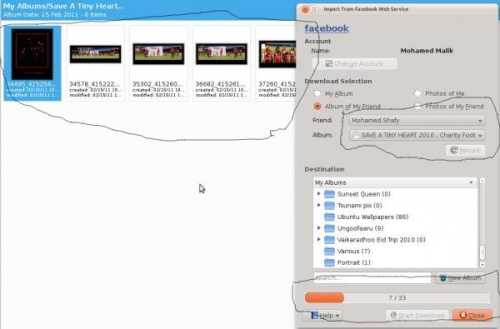
Here you can choose to download your own album or your friend's album. If you choose your album then when you click the menu named you will see all the albums uploaded by you. If you choose to download a friend's album, then choose the name of your friend and then select the album you want to download. As you can see on the screenshot you need to specify where you want to download the photos. Select the location on your albums, select and give it a name. Then press . It will download the pictures that you have selected.

Com pujar imatges a Facebook utilitzant digiKam
Now let us learn how to upload pictures to Facebook using digiKam.
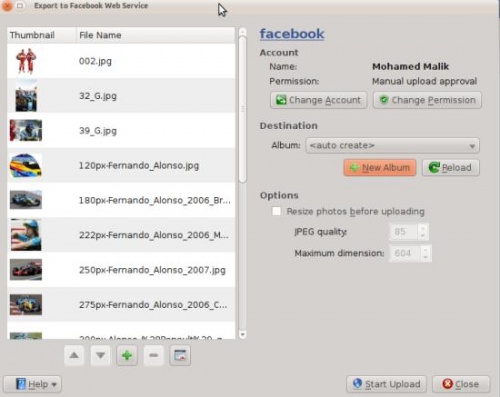
It is simple. Select the images that you want to upload and and you will be greeted with a new window where you will be asked to log on to Facebook. Follow the on-screen instructions and you will see this window.

As you can see the process is very easy and straight forward. You can create a new album give it a name. And choose to resize the pictures into the size that you prefer and can even alter the JPG quality settings. When you are done just press .
