Working with GMail/da: Difference between revisions
Importing a new version from external source |
Importing a new version from external source |
||
| Line 52: | Line 52: | ||
Gå så til fanebladet <menuchoice>Avanceret</menuchoice> og sørg for at den er forbundet til port 993 med radioknappen <menuchoice>SSL/TLS</menuchoice> aktiv. Ifølge '''KMails''' dokumentation anbefales DIGEST-MD5-kryptering, men det understøttes indtil videre ikke af Googles IMAP-server, så ''du skal vælge klar tekst''. | Gå så til fanebladet <menuchoice>Avanceret</menuchoice> og sørg for at den er forbundet til port 993 med radioknappen <menuchoice>SSL/TLS</menuchoice> aktiv. Ifølge '''KMails''' dokumentation anbefales DIGEST-MD5-kryptering, men det understøttes indtil videre ikke af Googles IMAP-server, så ''du skal vælge klar tekst''. | ||
Klik på <menuchoice>O..k.</menuchoice>. Nu dukker endnu et vindue fra '''KDE Wallet''' op; for nemheds skyld kan du vælge tilvalget <menuchoice>Altid</menuchoice>. | |||
To check your emails, find the Inbox of your newly setup account, in this case, ''Gmail Incoming'', and press <keycap>F5</keycap> to refresh and download new emails from the server. | To check your emails, find the Inbox of your newly setup account, in this case, ''Gmail Incoming'', and press <keycap>F5</keycap> to refresh and download new emails from the server. | ||
Revision as of 13:40, 20 October 2012
Introduktion
Denne vejledning hjælper dig med at opsætte videresendelse via IMAP fra en GMail konto til KMail, som kan tilgås fra Kontact.
Videresendelse af indkommende mail (IMAP forbindelse)
Først skal du åbne Kontact. Du kan starte det ved blot at skrive dets navn i søgelinjen. Når Kontakt er startet klikker på i den lodrette navigationslinje til venstre. Dette fører dig til KMail-delen af Kontact. For at opsætte indstillingerne for fremsendelse skal du gå til: .
Først skal du oprette en identitet, sådan at du kan adskille forskellige forskellige konti, hvis du får mere end en.
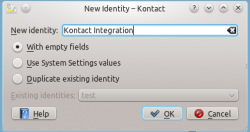 |
Opsætning af en ny identitet i Kmail. | 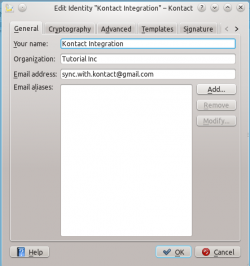 |
Konfiguration af den nye identitet. |
Gå dernæst til gruppen i navigationslisten til venstre. Her kan du konfigurere konti til indkommende og udgående e-mail.
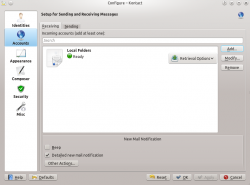
Opsætning af indkommende e-mail:
Klik på , sørg for, at er valgt og klik . Herefter dukker to vinduer op med mulighed for integration med tjenesten KDE Wallet. For nemheds skyld kan du vælge tilvalget .
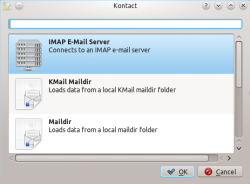 |
Tilføj dennye IMAP-konto. | 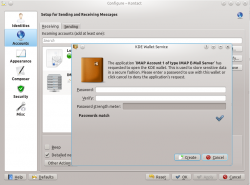 |
Indstilling af KDE Wallet.
|
Nu er det tid til at konfigurere den indkommende forbindelse. Giv din konto et navn; det kan være hvad som helst. Som angiver du imap.gmail.com. Dit brugernavn er din e-mail-konto; som eksempel er min konto [email protected]. I skriver du adgangskoden til din Gmail-konto.
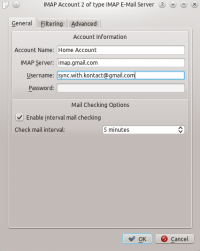
Gå så til fanebladet og sørg for at den er forbundet til port 993 med radioknappen aktiv. Ifølge KMails dokumentation anbefales DIGEST-MD5-kryptering, men det understøttes indtil videre ikke af Googles IMAP-server, så du skal vælge klar tekst.
Klik på . Nu dukker endnu et vindue fra KDE Wallet op; for nemheds skyld kan du vælge tilvalget .
To check your emails, find the Inbox of your newly setup account, in this case, Gmail Incoming, and press F5 to refresh and download new emails from the server.
Outgoing Mail Setup (SMTP Connection)
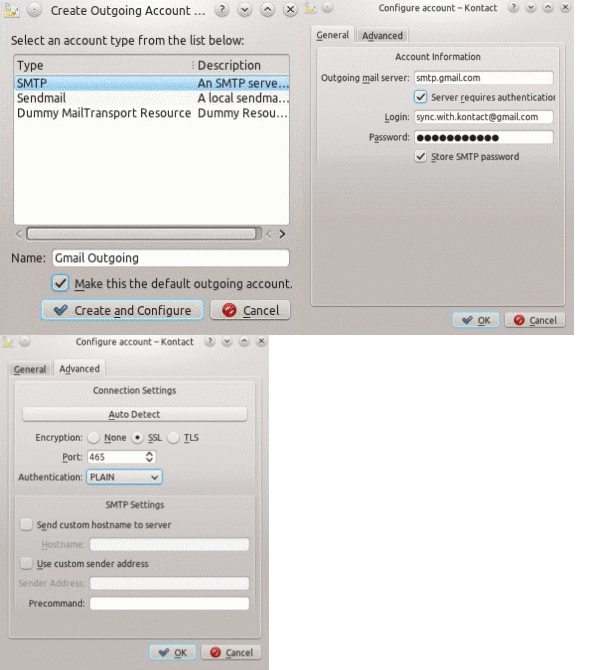
To setup an outgoing connection, similar steps must be taken to add the new connection, which is treated as a new account by Kmail. Open up the Kmail Configuration window, and go to the area in the left navigation bar. Instead of using the , which was used to setup the incoming (IMAP) connection switch to the tab now.
Now, click on Add... and select the option and click . Afterwards, a Configure Account window will appear. The following details are needed by Kontact.
Outgoing mail server: smtp.gmail.com (Check the button)
Login: Your Gmail account. Here. it's "[email protected]"
Password: Your Gmail password.
For convenience, check the option. Now, go to the of the window and enter the following information.
Encryption: SSL
Port: 465
Authentication: PLAIN
When sending your first email from Kontact, you will need to save the information in KDE Wallet once so it won’t have to be used later.
GIF Animation
Congratulations, now you can fully send and receive mail through Kontact!
