Digikam/Simpel RAW-behandling
Simpel RAW-behandling i digiKam
For this project, we’ll use a photo of the famous Sagrada Familia cathedral in Barcelona, Spain (you can download the RAW file from https://www.box.com/s/cq3uknqt54o3usf1jg3r). The photo was taken with a Canon PowerShot S90 camera, and the RAW file exhibits several obvious flaws, including visible barrel distortion, underexposed areas, and noise. In other words, this particular RAW file is perfect for tweaking in digiKam.
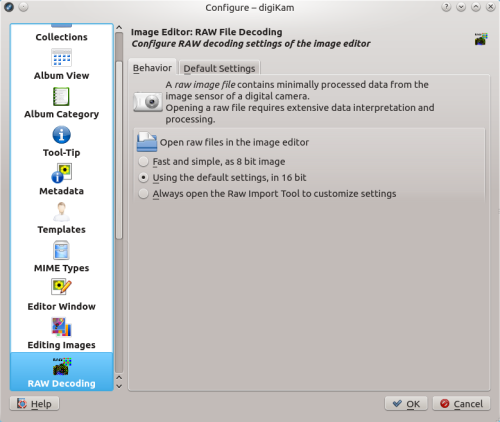
Before you start, make sure that digiKam is set to open RAW files in the 16-bit mode using the default settings. To do this, choose and switch to the section. Enable the option and press . Open then the RAW file for editing using the F4 key (or choose ).
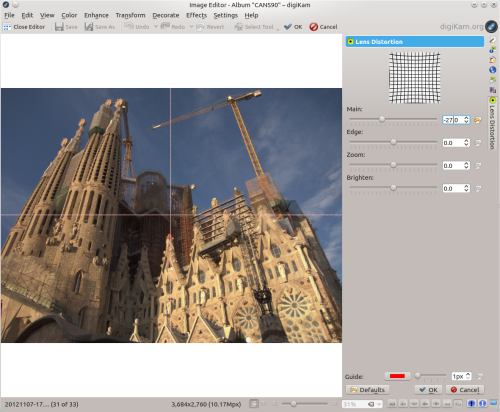
The first order of business is to fix the lens distortion. Since the LenFun library used by digiKam for automatic lens correction doesn’t have a lens profile for Canon PowerShot S90, you have to fix lens distortion manually. Choose , then use the slider to set the correction value. Alternatively, you can enter the exact value in the field next to the slider. For this particular file, the -27 value should do the trick. Check the preview image to make sure that the distortion is properly corrected, and press to apply the correction.
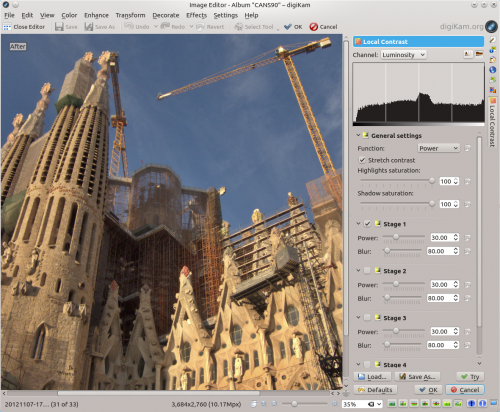
Although the Canon PowerShot S90 did a respectable job of producing a well-exposed image, the photo still has slightly underexposed areas. The easiest way to fix this problem is to use the Local Contrast tool (). The default values should do the trick, but feel free to experiment with different settings. But don’t try to push them too far, as the final result may look unnatural. Also, before you start modifying the default settings, save them as a preset using the button. Later, you can restore the original settings from the preset using the button.
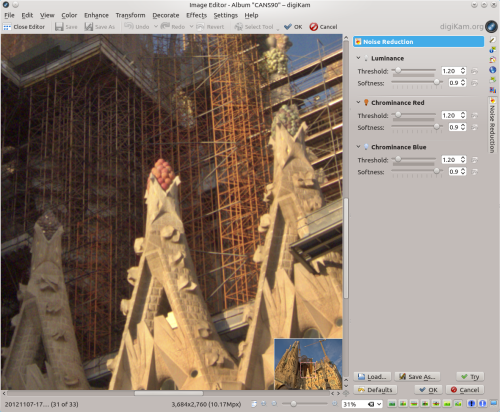
Next stop is the Noise Reduction tool (). While the default noise reduction settings work fine in most situations, you might want to adjust them to achieve even better results. When experimenting with different noise reduction settings, it’s a good idea to switch to the 100% crop, which gives you a much better view of the noise reduction effect. To do this, select from the drop-down list. You can then use the scrollbars to view the desired part of the photo. Alternatively, you can use the button in the lower-right corner of the preview window to display a thumbnail of the photo and pan by dragging the red square to the desired area in the image. To preview the noise reduction result, use the button.
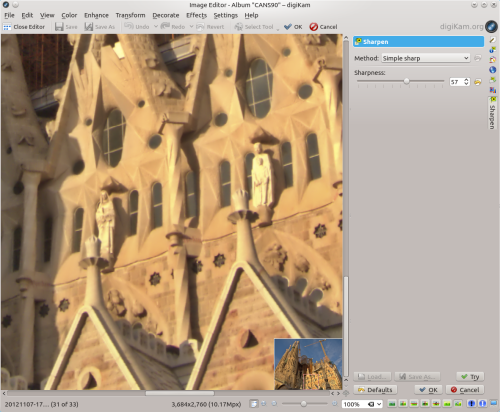
Finally, the photo could use some sharpening, so choose , adjust the sharpness level using the , and press to preview the result. Again, you might want to switch to the 100% crop for a better preview.
