Værktøjskasse
Tilføj et indledende skærmbillede og en beskrivelse
Overalt, hvor det er muligt starter vi et programs startside med dette. Koden til at opnå dette er
{|class="tablecenter vertical-centered"
|[[Image:DitSkærmbillede.png|250px|thumb]]
|Din beskrivende tekst
|}
Formattér din tekst
Brug overskrifter
Overskrifter bliver automatisk en del af sidens indholdsfortegnelse, så de skal være strukturerede. Deres placering i hierarkiet styres af antallet af "="-tegn i hver ende af overskriften. Undgå overskrifter med kun et "="-tegn i hver ende — de angiver sidenavne og det automatisk dannede sidenavn bør bruges. Dine hovedoverskrifter skal se sådan ud: '== Hovedafsnit ==', det næste niveau ser sådan ud: '=== Underadsnit ===' og så videre.
Brug fed skrift og kursiv
Apostroffer bruges til at angive fed og kursiveret skrift.
Brug '''fed skrift''' til at angive fed skrift og ''kursiv'' til at angive kursiv.
For at siker nem og nøjagtig oversættelse beder vi dig om at følge de typografiske retningslinjer.
Tilføj kodestumper
Vi har skabeloner, som hjælper med at vise kodestumper korrekt. Eksempler på deres anvendelse i forskellige situationer findes på siden med typografiske retningslinjer.
Hvis du har problemer med at få 'pipe'-tegnet "|" vist, så se forklaringen her: typografiske retningslinjer.
Tilføj indrykning
- ":" kan bruges til indrykning og flere indrykningsniveauer blev brugt på nogle gamle sider. Dette bruges ikke mere og giver nogle problemer, så multipel indrykning bliver fjernet, når vi støder på det. Et enkelt ":" indrykker med fire tegn.
Formattering af datoer
Datoer i et rent numerisk format giver anledning til forvirring på grund af de forskellige regionale standarder, der er i brug. Skriv datoer på denne måde:
18 Mar 2011
med måneden enten skrevet helt ud eller forkortet og året med alle fire cifre. Dagen kan være et enkelt eller to cifre.
Punktopstillinger
Tegnet "*" bruges til punktopstillinger. "**" giver ekstra ekstra indrykningsniveau:
* Mandler<!--}}-->

* Nødder
** Cashewer

* Rosiner
giver
- Mandler
- Nødder
- Cashewer
- Rosiner
Nummererede lister
Nummererede lister laves på samme måde med "#":
# Sift
# Mix
## Stir thoroughly
# Bake
produces
- Sift
- Mix
- Stir thoroughly
- Bake
Combining Bulleted Lists and Enumerations
You can have an enumerated sublist in a bulleted list and vice versa, like this:
* Nuts
*# Cashew
*# Crazy
* Other things
produces
- Nuts
- Cashew
- Crazy
- Other things
while
# Nuts
#* Cashew
#* Crazy
# Other things
produces
- Nuts
- Cashew
- Crazy
- Other things
Itemizations
Itemizations are produced using ; and : alternatively. They are best for giving short descriptions for a group of related objects.
;Animals
: They move around and devour other creatures.

;Plants
: They have roots and feed upon ground water and sun.
produces
- Animals
- They move around and devour other creatures.
- Plants
- They have roots and feed upon ground water and sun.
Add a Link
There are two kinds of links to learn, internal ones, to another userbase page, and external URL links.
For an internal link the format [[PageLayout]], where you want to display the name of the page, does work, but it is not ideal, particularly for translation to docbook and for localisation. It is better to use the form [[Special:myLanguage/PageLayout|Page Layout]], because that allows translators to link correctly even though the page name is localised. The result is that it directs to the correctly translated page, if one exists. You often need to include the link in a sentence, so in that case you would use
[[Special:myLanguage/PageLayout|this page]]
which displays
External links are slightly different so
[http://techbase.kde.org/Schedules our road map]
displays
our road map, which would take you straight to the techbase page.
One last thing to note - when you preview your page, all links are live. This gives you two benefits. You can check (by hovering) that your links are set up as you expected, and you can use a red link to create a new page.
Illustrate Your Text
Add a single image, centered
[[Image:KMail-kde4.png|250px|center]]
Note that you can change the position of the image, but the default is left. The size of the image depends on the circumstances, but for screenshots I recommend no less than 250px and no more than 500px.
Make the Image Clickable, and Add a Caption
Where you need to show more detail, create a moderately sized image, clickable, so that the full-size can be seen. Simply add the parameter '|thumb' within the image parentheses.
A caption can also be added as a parameter, but will only show if '|thumb' is present.
Use Tables to Precisely Place Multiple Images
{|class="tablecenter" style="border: 1px solid grey;"
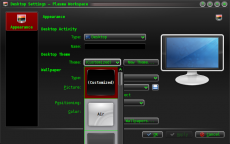
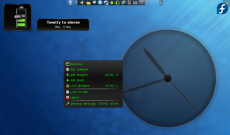
|[[Image:Desktop-config-customized.png|230px|center]]||[[Image:Desktop-settings-rightclick.png|230px|center]]
|-
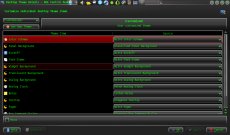
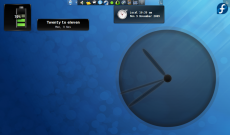
|[[Image:Desktop-theme-details-dialog.png|230px|center]]||[[Image:Plasma-multiple-themes.png|230px|center]]
|}
displays
 |
 |
 |
 |
Note that all the parameters for one image are contained within [[...]], and cells are separated by '||'. To start a new line, insert '|-' on an otherwise-empty line, then '|' at the start of the next one.
Add Notes and Warnings
Where a note or warning is relevant within your text, use these templates:
{{Info|This is general information}} displays
{{Note|Some important information at this point}} displays
{{Tip|A helpful piece of advice, something to remember}}displays
{{Warning|Take care - this is a dangerous thing to do}} displays
Where the strongest possible warning is needed, the Remember box can be used, but please use sparingly.
{{Remember|1=This is for things that definitely must not be forgotten}}
You can also change the heading:
KDE3 and KDE SC 4 Versions of Applications
By default, KDE SC 4 is assumed. If the KDE SC 4 version is not yet ready for release, or where only a KDE 3 version exists, it may be necessary to document the KDE3 version. In this case you should add an icon {{KDE3}}
which displays
![]() Should you be writing about a KDE3 version and KDE SC 4 version on the same page, use icons for both - {{KDE4}} which displays
Should you be writing about a KDE3 version and KDE SC 4 version on the same page, use icons for both - {{KDE4}} which displays
![]()
Other Useful Templates
Inserting GUI Icons
The best way to refer to icons in the GUI is to display it in the text. This can be done with a template like this: {{Icon|list-add}}. This will display the ![]() icon.
icon.
For this to work, the icon image must have been uploaded to the wiki. See Update an Image for an explanation on how to upload images. The .png files can usually be found here: usr/share/icons/oxygen. If possible use the 16x16 icon. The file name should have an Icon- prefix as in Icon-list-add.png — apart from the prefix the filename should exactly match the usual name. Note, that when using the template you should neither write the Icon- prefix nor the .png file type extension.
The ![]() icon can also be written as
icon can also be written as {{Plus}}, and the ![]() icon as
icon as {{Minus}}. You can also use {{Configure}} to get the ![]() icon, and
icon, and {{Exit}} gets you the ![]() icon.
icon.
Community Applications
The final consideration concerns those applications which are not distributed as core KDE applications. These need to be indicated by an icon, placing {{Community-app}}
at the end of your sentence or line, just as you would to denote a footnote in general writing. You then need to add {{Community-app-footnote}} which will create a footnote, like this:
![]() Support for this application can be found from the project's home page
Support for this application can be found from the project's home page
Making Major Edits to Existing Pages
If a page is likely to be open for editing for some time there is a danger of conflicts - someone else may edit at the same time, and saving your edit will cancel out theirs, or vice versa. The way to avoid that is to make a temporary entry, directly under the language bar, using {{Being_Edited}} which will display
Don't forget to remove it when you have finished!
Adding a New Complex Page
If you need to be able to work on a page for quite some time, over several days, for instance, you may like to use the Construction template - {{Construction}}, which displays
Links to Pages in the Neighbourhood
You can add links to a preceding or a following page using the following templates as described here:
{{Prevnext|Previous Pagename|Following Pagename|The page before this page|This page you should read later}}
For first pages with no preceeding page or last pages with no following page use this:
{{Next|Following Pagename|This page you should read later}}
- Toolbox/da
- This page you should read later →
{{Prev|Previous Pagename|The page before this page}}
- ← The page before this page
- Toolbox/da
Adding a List of Sub-Pages
{{Input|1=== Subpages of {{FULLPAGENAME}} == {{Special:PrefixIndex/{{FULLPAGENAME}}/}}
is very useful when you want to list subpages with active links, such as
Subpages of Toolbox/da
It does, however, also list all "other-language" pages, so use with discretion.


