সরঞ্জামবাক্স
একটি পরিচায়ক স্ক্রিনশট এবং বিবরণ যোগ করুন
যখনই সম্ভব আমরা এটি দিয়ে একটি অ্যাপ্লিকেশনের শীর্ষ-স্তরের পৃষ্ঠা শুরু করি। এটা অর্জন করার জন্য কোড
{|class="tablecenter vertical-centered"
|[[Image:YourScreenshot.png|250px|thumb]]
|আপনার বর্ণনামূলক পাঠ্য
|}
আপনার পাঠ্য ফরম্যাট করুন
শিরোনাম ব্যবহার করুন
প্রতিটি শিরোনাম দুটি বা ততোধিক '=' অক্ষর দিয়ে শুরু এবং শেষ হয়ে নিজস্ব লাইনে চলে। একবার একটি পৃষ্ঠায় মুষ্টিমেয় বেশি শিরোনাম থাকলে তারা স্বয়ংক্রিয়ভাবে বিষয়বস্তুর সারণী তৈরি করে, তাই সেগুলি ব্যবহার করুন। '=' অক্ষরের সংখ্যা সূচিপত্রে তাদের স্তর নির্ধারণ করে, এইভাবে আপনার শিরোনাম হওয়া উচিত '==প্রধান বিভাগের নাম==', '===উপবিভাগের নাম===', '====উপ-উপ-শিরোনাম====', ইত্যাদি। একক '=' ব্যবহার করা এড়িয়ে চলুন, কারণ এটি একটি পৃষ্ঠার শিরোনাম নির্দেশ করে এবং প্রতিটি উইকি পৃষ্ঠার নাম থেকে ইতিমধ্যে একটি তৈরি হয়ে আছে; উদাহরণস্বরূপ, এই পৃষ্ঠার শিরোনাম "Toolbox/bn" এটির পৃষ্ঠা শিরোনাম হিসাবে উপস্থিত হয়৷
গাঢ় এবং বাঁকা ব্যবহার করুন
বোল্ড এবং বাঁকানো হরফ লিখতে ব্লিপস ব্যবহার করা হয়।
Use '''bold text''' to specify bold text and ''italic text'' to specify italic text.
In order to ensure we get easy and accurate translations, please adhere to the typographical guidelines.
Add a Code Snippet
We have templates to assist in correctly displaying code snippets. Examples of use in various situations are available on the typographical guideline page
If you have problems displaying pipe characters in your code snippet, please see the explanation and markup detailed on Typographical Guidelines
Add Indents
- ":" is used for an indent, and was used in multiples in some old pages. This is deprecated, and causes some problems, so the multiples will be removed as they are found. A single ":" indents by four characters.
Format Dates
Dates in a purely numerical format cause confusion, due to differences in expectations of geographical zones. Please format dates as
18 Mar 2011
with the month either spelled out completely or in abbreviated form, and the year in 4-digit format. The day may be single or double-digit.
Bulleted Lists
* is the symbol to use for bulletted lists. ** gives a second level:
* Almonds

* Nuts
** Cashews

* Raisins
produces
- Almonds
- Nuts
- Cashews
- Raisins
Enumerations
Enumerations are produced in the same way, using '#'.
# Sift
# Mix
## Stir thoroughly
# Bake
produces
- Sift
- Mix
- Stir thoroughly
- Bake
For more details see wikimedia on lists.
Combining Bulleted Lists and Enumerations
You can have an enumerated sublist in a bulleted list and vice versa, like this:
* Nuts
*# Cashew
*# Crazy
* Other things
produces
- Nuts
- Cashew
- Crazy
- Other things
while
# Nuts
#* Cashew
#* Crazy
# Other things
produces
- Nuts
- Cashew
- Crazy
- Other things
To get each bullet and each sub bullet in its own translation unit you can enter something like this:
* First bullet </translate >
<translate >
** First sub bullet </translate >
<translate >
** Another sub bullet<br /><br />This one consists of two paragraphs </translate >
<translate >
* The next main bullet </translate >
<translate >
** And so on
This displays like this:
- First bullet
- First sub bullet
- Another sub bullet
This one consists of two paragraphs
- The next main bullet
- And so on
The same method should apply to the other kinds of lists.
If on the other hand you need to have more sections in the same item, you can do something like this to have each section in a translation unit of its own:
* First bullet </translate >
<translate >
* Second bullet, first section. </translate><br /><br /> <translate > Second section of the
second bullet. This section has a translation unit of its own </translate >
<translate >
* And so on
This displays like this:
- First bullet
- Second bullet, first section.
Second section of the second bullet. This section has a translation unit of its own - And so on
Itemizations
Itemizations are produced using ; and : alternatively. They are best for giving short descriptions for a group of related objects.
;Animals
: They move around and devour other creatures.

;Plants
: They have roots and feed upon ground water and sun.
produces
- Animals
- They move around and devour other creatures.
- Plants
- They have roots and feed upon ground water and sun.
Add a Link
There are three kinds of links to learn, internal ones, to another userbase page, internal links to a section of a userbase page, and external URL links.
For an internal link the format [[PageLayout]], where you want to display the name of the page, does work, but it is not ideal, particularly for translation to docbook and for localisation. It is better to use the form [[Special:myLanguage/PageLayout|Page Layout]], because that allows translators to link correctly even though the page name is localised. The result is that it directs to the correctly translated page, if one exists. You often need to include the link in a sentence, so in that case you would use
[[Special:myLanguage/PageLayout|this page]]
which displays
Internal links to subsections of a page use character '#' (hash) and should look like this
[[Special:myLanguage/Tasks_and_Tools#Working_with_Languages|...]]
With this kind of link it is very important, that the page you link to declares the reference anchor. If the anchor contains space characters, replace them by character '_' (underscore) when calling the reference. If the reference is found, the section will be automatically displayed by your browser (if it manages anchors). If it is not the case, you will have to go down through the page to find the referenced section. External links are given as the URL and a text separated by a space and delimited by single square brackets as in
[https://en.wikipedia.org/wiki/KDE KDE's Wikipedia page]
which gives KDE's Wikipedia page.
Anchor declaration
Anchor declaration must be done immediatly BEFORE the referenced section, and followed by a blank line separating the anchor and its headline. In the following example just copy in the ID value, the title of associated section. It should look like this:
</translate><span id="Working with Languages"></span> <translate>
If the page containing the section that you link to is not yet marked up for translation, you should omit the </translate > and <translate > tags.
External links are slightly different so
[http://techbase.kde.org/Schedules our road map]
displays
our road map, which would take you straight to the techbase page.
One last thing to note - when you preview your page, all links are live. This gives you two benefits. You can check (by hovering) that your links are set up as you expected, and you can use a red link to create a new page.
Make an application list
If you want to make a list of applications like the ones in the subpages of Applications, you should use the AppItem template. Simply enter
{|
{{AppItem|System Settings/Locale|Preferences-desktop-locale.png|
Settings for localized handling of numbers, dates, etc}}A short text.
A few more short lines about the app. This is optional.
|-
{{AppItem|System Settings/Shortcuts and Gestures|Preferences-desktop-keyboard.png|
Shortcuts and Gestures}}Another short text. If you do not type <keycap>Enter</keycap> between the texts
you get one section no matter how long the text is.
|}
This gives the following display:
Settings for localized handling of numbers, dates, etc | |
| A short text.
A few more short lines about the app. This is optional. | |
Shortcuts and Gestures | |
| Another short text. If you do not type Enter between the texts you get one section no matter how long the text is. | |
Note, that you should not prepend "Special:myLanguage" to the page name - the template takes care of that. Also note, that you must give a title, even if the title is the same as the page name.
Footnotes
Footnotes are rarely used in our pages, but if you need them you can place a <ref>text</ref> in the source where the footnote mark should appear. There has to be one <references /> somewhere in the source as well, usually towards the end of the page. This is where the text added by the <ref> tags will appear. For more info see the Wikipedia help page.
Illustrate Your Text
Add a single image, centered
[[File:KMail-kde4.png|250px|center]]
Note that you can change the position of the image, but the default is left. The size of the image depends on the circumstances, but for screenshots I recommend no less than 250px and no more than 500px.
Also note that Image: and File: are synonyms.
So that [[Image:KMail-kde4.png]] is the same as [[File:KMail-kde4.png]]. However Image: is deprecated, so prefer File: in new content.
see mediawiki for more info.
Make the Image Clickable and Add a Caption
Where you need to show more detail, create a moderately sized image, clickable, so that the full-size can be seen. Simply add the parameter '|thumb' within the image parentheses.
A caption can also be added as a parameter, but will only show if '|thumb' is present.
Example:
[[File:file_name.png|thumb|this will be the caption]]
Add a caption without a thumbnail
Captions also appear on images marked up with the frame syntax.
Example:
[[File:image.png|frame|left|this will be the caption]]
Prevent text from flowing around image
Sometimes you might not want the text to flow down the sides of your image. You can prevent this by adding a <br clear=all> tag between the file tag and the text in question.
Example:
[[File:image.png]]
<br clear=all>
This text would normally flow down the sides of the image but now it will be found under the image
Use Tables to Precisely Place Multiple Images
{|class="tablecenter" style="border: 1px solid grey;"
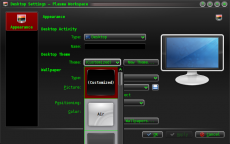
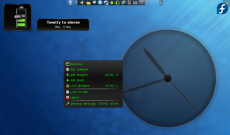
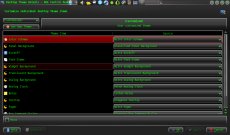
|[[Image:Desktop-config-customized.png|230px|center]]||[[Image:Desktop-settings-rightclick.png|230px|center]]
|-
|[[Image:Desktop-theme-details-dialog.png|230px|center]]||[[Image:Plasma-multiple-themes.png|230px|center]]
|}
displays
 |
 |
 |
 |
Note that all the parameters for one image are contained within [[...]], and cells are separated by '||'. To start a new line, insert '|-' on an otherwise-empty line, then '|' at the start of the next one.
For more details on Table formating see mediawiki
Embed a Video
As of July 2012 the MediaWiki EmbedVideo extension has been installed on userbase.kde. This means you can embed videos from various video hosting sites into the page content and have them display in line.
EmbedVideo parser function expects to be called in any of the following ways:
{{#ev:service|id}}
{{#ev:service|id|width}}
{{#ev:service|id|width|align}}
{{#ev:service|id|width|align|desc}}
{{#evp:service|id|desc}}
{{#evp:service|id|desc|align}}
{{#evp:service|id|desc|align|width}}
Where:
service is the name of a video sharing service (See "service name" in the list below)
id is the id of the video to include
width (optional) is the width in pixels of the viewing area (height will be determined automatically)
align (optional) is an alignment (float) attribute. May be "left" or "right".
desc (optional) is a short description to display beneath the video when it is aligned
For example, to include the famous "evolution of dance" YouTube video, you'd enter:
{{#ev:youtube|dMH0bHeiRNg}}
And if you wanted scaled down to thumbnail size, on the right with a short description, you could use:
{{#ev:youtube|dMH0bHeiRNg|100|right|This is an embedded video!}}
As of version 1.0, EmbedVideo supports embedding video content from the following services:
| Site | Service Name |
|---|---|
| Dailymotion | dailymotion |
| Div Share | divshare |
| Edutopia | edutopia |
| FunnyOrDie | funnyordie |
| Google Video | googlevideo |
| Interia | interia or interiavideo |
| Revver | revver |
| sevenload | sevenload |
| TeacherTube | teachertube |
| YouTube | youtube and youtubehd |
| Vimeo | vimeo |
Add Notes and Warnings
Where a note or warning is relevant within your text, use these templates:
{{Info|This is general information}} displays
{{Note|Some important information at this point}} displays
{{Tip|A helpful piece of advice, something to remember}}displays
{{Warning|Take care - this is a dangerous thing to do}} displays
Where the strongest possible warning is needed, the Remember box can be used, but please use sparingly.
{{Remember|1=This is for things that definitely must not be forgotten}}
You can also change the heading:
Page Redirection
You can make a page to redirect to another page automatically by using:
#REDIRECT [[Pagename]]
KDE3 and KDE SC 4 Versions of Applications
By default, KDE SC 4 is assumed. If the KDE SC 4 version is not yet ready for release, or where only a KDE 3 version exists, it may be necessary to document the KDE3 version. In this case you should add the template {{KDE3}}
which displays
![]() Should you be writing about a KDE3 version and KDE SC 4 version on the same page, use icons for both — {{KDE4}} which displays
Should you be writing about a KDE3 version and KDE SC 4 version on the same page, use icons for both — {{KDE4}} which displays
![]()
Other Useful Templates
Inserting GUI Icons
The best way to refer to icons in the GUI is to display it in the text. This can be done with a template like this: {{Icon|list-add}}. This will display the ![]() icon.
icon.
For this to work, the icon image must have been uploaded to the wiki. See Update an Image for an explanation on how to upload images. The .png files can usually be found here: usr/share/icons/oxygen. If possible use the 16x16 icon. The file name should have an Icon- prefix as in Icon-list-add.png — apart from the prefix the filename should exactly match the usual name. Note, that when using the template you should neither write the Icon- prefix nor the .png file type extension.
The ![]() icon can also be written as
icon can also be written as {{Plus}}, and the ![]() icon as
icon as {{Minus}}. You can also use {{Configure}} to get the ![]() icon, and
icon, and {{Exit}} gets you the ![]() icon.
icon.
Community Applications
The final consideration concerns those applications which are not distributed as core KDE applications. These need to be indicated by an icon, placing {{Community-app}}
at the end of your sentence or line, just as you would to denote a footnote in general writing. You then need to add {{Community-app-footnote}} which will create a footnote, like this:
![]() Support for this application can be found from the project's home page
Support for this application can be found from the project's home page
Making Major Edits to Existing Pages
If a page is likely to be open for editing for some time there is a danger of conflicts - someone else may edit at the same time, and saving your edit will cancel out theirs, or vice versa. The way to avoid that is to make a temporary entry, directly under the language bar, using {{Being_Edited}} which will display
Don't forget to remove it when you have finished!
Adding a New Complex Page
If you need to be able to work on a page for quite some time, over several days, for instance, you may like to use the Construction template - {{Construction}}, which displays
Links to Pages in the Neighbourhood
You can add links to a preceding or a following page using the following templates as described here:
{{Prevnext2|prevpage=Previous Pagename|nextpage=Following Pagename|prevtext=The page before this page|nexttext=This page you should read later|index=Index page|indextext=Back to Menu}}
All six arguments are optional. For first pages with no preceeding page or last pages with no following page use this:
{{Prevnext2|nextpage=Following Pagename|nexttext=This page you should read later}}
- Toolbox/bn
- This page you should read later →
{{Prevnext2|prevpage=Previous Pagename|prevtext=The page before this page}}
- ← The page before this page
- Toolbox/bn
If you don't specify an indexname the name of the current page will be displayed.
Links to bugs
You can link directly to a bug in Bugzilla by using this template:
{{Bug|123456}}
Please do not forget to add the <s> and </s> to strike through a bug that is closed.
Adding a List of Sub-Pages
== Subpages of {{FULLPAGENAME}} ==
{{Special:PrefixIndex/{{FULLPAGENAME}}/}}
is very useful when you want to list subpages with active links, such as
Subpages of Toolbox/bn
It does, however, also list all "other-language" pages, so use with discretion.


