Showfoto/Luminosità
Guida fotografica KDE 1-4: Luminosità/contrasto/gamma + tonalità/saturazione/luminosità
Unai Garro - estate 2008
Ho iniziato questa serie di guide già da qualche tempo e tutte riguardano problemi di luce. Abbiamo utilizzato strumenti come i livelli, le curve o il bilanciamento del bianco.
Volevo affrontare un altro tipo di problemi questa volta, ma penso che i problemi di luce sarebbero piuttosto incompleti se non trattassi la regolazione del contrasto, della luminosità e dei colori. È possibile che tu già conosca queste cose, ma penso che meritino di essere trattati.
Dunque iniziamo. Sistemiamo i colori! ![]()
Introduzione:
Spesso scattiamo una fotografia di un paesaggio meraviglioso e sogniamo di ottenere un degno risultato una volta che siamo a casa. Al giorno d'oggi le fotocamere digitali ci aiutano visualizzando il risultato sullo schermo LCD, ma di solito non sono troppo affidabili, dunque finiamo per vedere il reale risultato solo quando siamo a casa.
Dunque arriviamo a casa con la nostra stupenda fotografia e scopriamo, disgustati, che non ha i colori che ci aspetteremmo. Che fare? Utilizziamo di nuovo Showfoto o Krita naturalmente!
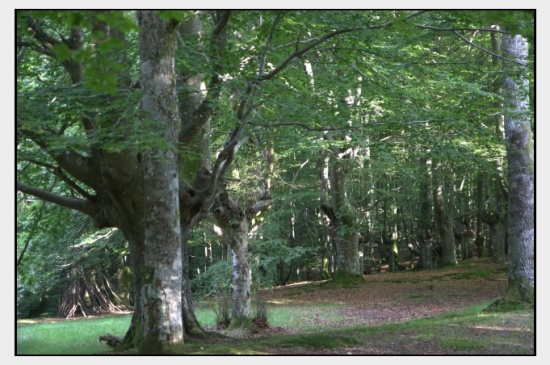
Vediamo la seguente fotografia come campione di prova:
|
Quando ho scattato questa foto i miei occhi stavano vedendo tutta la gamma del colore verde ben carico e le foglie rossastre sul suolo. Ma in qualche modo la macchina fotografica non ha catturato tutto quel contrasto per me. Ma che cos'è il contrasto? È semplicemente la differenza di colore visibile in un'immagine, la differenza tra un pixel/regione e quello che lo circonda. Maggiore è il contrasto di un'immagine, più chiara appare all'occhio.
Questa immagine invece è biancastra, piatta, manca di contrasto. Perché? Perché non copre l'intero istogramma.
"Ahhhhhh..." dirai ora... "Lo so! Posso sistemarla utilizzando i ! L'ho imparato nella prima guida!". Sì ed è quello che proveremo a fare inizialmente. Apri l'immagine in Showfoto e regola i livelli:
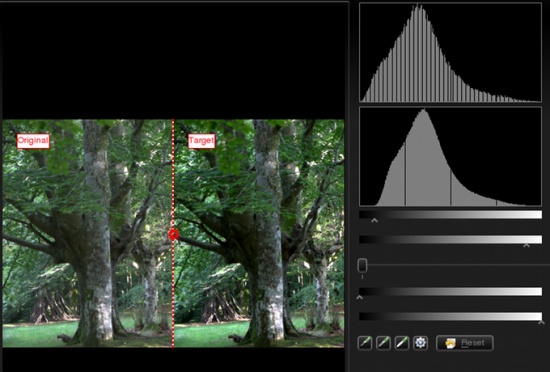
|
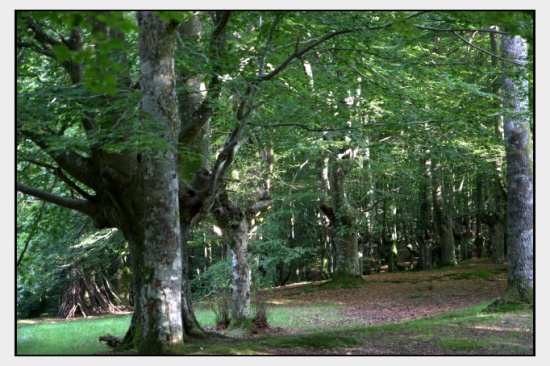
Il risultato è l'immagine seguente:
|
Not bad, is it? But still, I had a different photo in my mind. Leaves were greener, there was more contrast (like darker shadows), and the leaves on the floor were more reddish. So can we fix this? Yes, we could use the to improve shadows for example. But I will show you some new tools that can achieve similar results in this case:
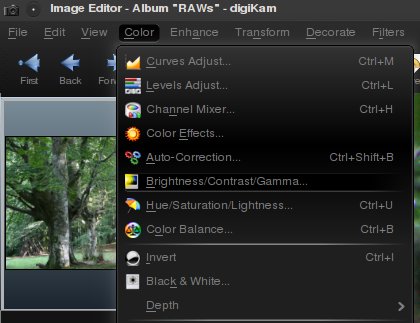
In Showfoto, go to the menu :
|
You will get a very easy to use dialog with the following controls:
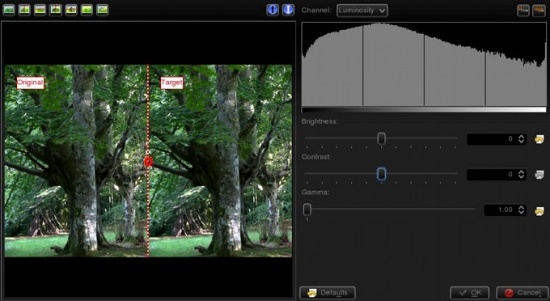
|
The first slider controls the brightness/darkness of the image. The second slider increases or reduces , and uhm... what's ? Look at the following image:
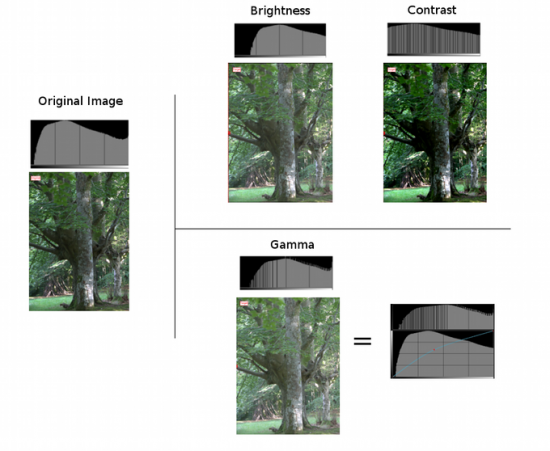
|
The photo and histogram on the left are those of the original image. In the right hand, the three photos show the result of increasing brightness, contrast, and gamma respectively. As you can see, when using the brightness control, it moves the whole histogram to the right. Shadows will dissappear and become light grays. The result isn't very pleasing, as it is less contrasty. This could be fixed by adjusting contrast. In the output, you can see that the histogram has been expanded. This means that each color has been separated further from each other, and thus increase color difference (contrast). The output is much more pleasing than the original image in this case. The image is no more flat, it's much more contrasty, and shadows are clear dark contrasted.
At this point you should have noticed something important. Both contrast and brightness controls can clip the histogram and cause information loss!' Now look at the gamma adjustment. I pushed even further than the first tool, and still, the image wasn't clipped. What did the gamma tool do?
The control is like adjusting the curves tool upwards in the middle (see the figure). It affects mostly to the middle gray levels. Blacks will remain black and whites will remain white. (unlike control where blacks become gray). It compresses the histogram in the right part by compressing highlights, but shadows are expanded and thus causes to extend contrast there.
Given that this tool can clip the histogram, to avoid it as much as I can, I will change the order. Instead of doing then , I will do then . It's usually best adjusting levels after all other light adjustments have been done. So I did the following adjustment to the image:
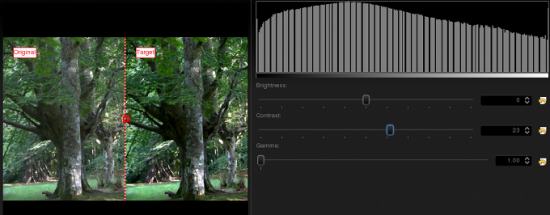
|
I could have pushed contrast even further, but I prefer natural looking photos. Then, afterwards, even if it wasn't much needed due to the clipping, I adjusted levels a bit. This is what I got:
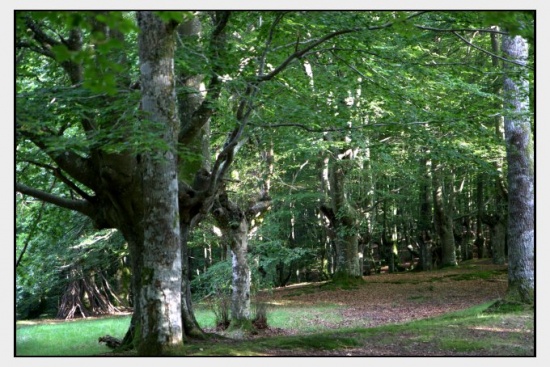
|
The result is similar to the previous one, but a bit more contrasty. Still, I'm missing colors here, something is missing? Of course, lets open the option from the menu:
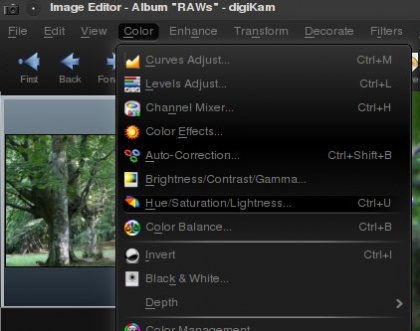
|
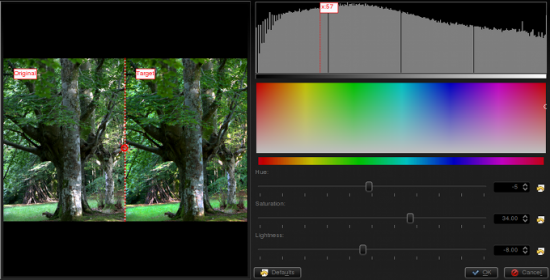
|
It will open a dialog where Showfoto permits adjusting the colors of the image. The control can make colors stronger or weaker. The control permits altering colors towards another one (brighter colors to darker green, or even to yellow...), and finally, can make colors brighter or darker. When the image is lightened up, it causes moving the histogram's dark part upwards and compressing the whole of it on the right, thus blacks dissappear and contrast can be reduced easily thanks to the compression.
In my adjustment, I pushed saturation up to 34, reduced lightness a bit, and retouched the greens by altering the hue slightly. This is what I got finally:
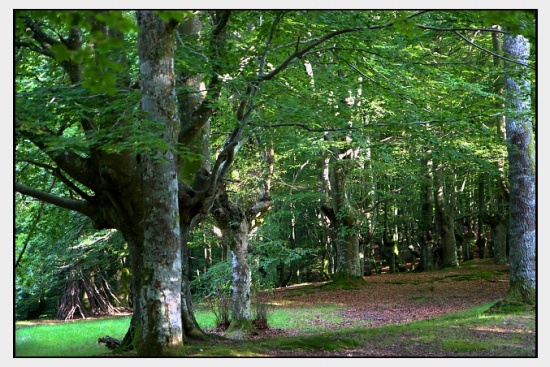
|
Now yes, I'm happy with the result. That's what my eyes saw!!!!!
Thanks for reading this tutorial and I hope you found it useful. Cya on the next tutorial!
Notes:

