Kopete/Jabber/Udfyld data for din konto i Kopete
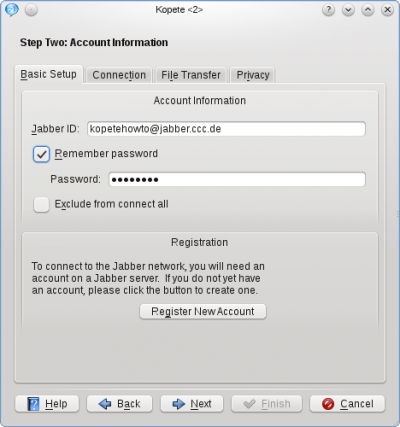
Nu har du en konto på en Jabber-server og Kopete går til Trin nummer to: Konto-information. Kopete indfører automatisk dit Jabber-ID og din adgangskode i de respektive felter. Hvis du vil have Kopete til at huske din adgangskode, sådan at du ikke skal skrive den, hver gang du forbinder til din server, så markér .
Hvis du ønsker at bruge en eksisterende konto på Google Talk eller Facebook chat i Kopete (disse er faktisk også Jabber-servere), så brug din GMail-adresse eller data for din facebook-konto (forklaret her) til at forbinde til disse servere.
Du kan eventuelt markere . Dette afholder Kopete fra at forbinde til denne server, når du forbinder til alle dine Kopete-konti (da Kopete er en multimessenger, som understøtter mange andre protokoller som ICQ eller MSN). Hvis du markerer dette tilvalg, så skal du efterfølgende udtrykkeligt vælge at gå online for denne konto, hver gang du vil forbinde til din server.
Dit Kopete skulle nu se sådan ud:

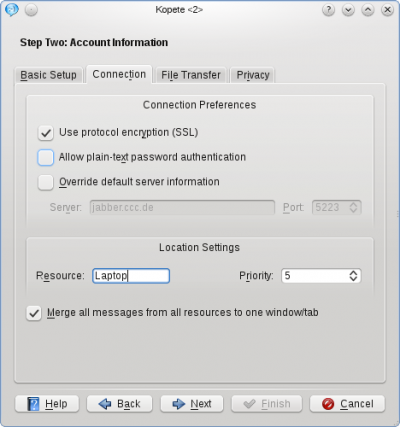
Klik på fanebladet for at aktivere flere tilvalg. Især bør du markere og fravælg af sikkerhedshensyn.
Tilvalget skulle være OK, hvis du er på et normalt hjemmenetværk uden særlige indstillinger af en firewall.
Afsnittet Lokalitetsindstillinger er en anden af Jabbers specialiteter: Du kan indstille såkaldte "Ressourcer" til identificere, hvor du chatter fra. Hvis du for eksempel logger ind på Jabber fra din mobiltelefon og din notebook samtidigt (ja, det kan du godt), så forklarer ressourcen dine kontakter, hvor du er. Du kan for eksempel kalde den "Notebook" eller "Android" afhængigt af, hvilken enhed, du installerer Kopete på. Husk, at dine ressourcer kan ses af dine chat-partnere (de vil blive føjet til JID'en således: [email protected]/Notebook), så du bør overveje, hvor meget du vil offentliggøre, når du vælger navnet på din resource.
In our example, the will be set to Laptop. The priority is mainly useful when you handle multiple devices and tells your partner's client which of your devices being online at the moment (e.g. your mobile phone or your laptop) to contact in this case. The highest priority number of your resources being online receives the message.

The next Tab, , is normally not affected when setting up a Jabber account in a normal network.
Finally, there are some privacy configurations in the tab , they are mostly self-explanatory. The option (read here what PGP means) is not recommended, because there exists a method to do this with the built-in OTR, which will be explained later in this tutorial.
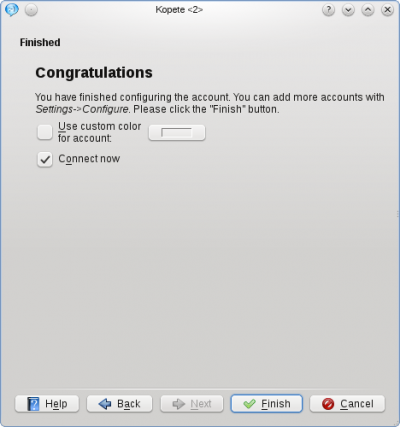
At this point you can click again and your account is configured now. You can choose an optional color for your account and when you feel ready to connect the very first time to your Jabber server, the checkbox has to be ticked.

Now you can finish the configuration.
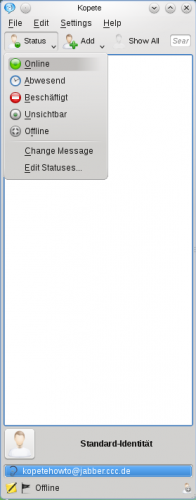
Otherwise you can manually connect to the server by clicking in the Kopete main window or by right-clicking the Kopete symbol in your tray and selecting . If you chose the option earlier, you will have to log in by right-clicking on the Kopete tray icon and selecting .

- ← Return to index
- Kopete/Jabber/Fill in your account data in Kopete/da
- Page 5 - Adding friends →
