Digikam/Bugs
Dealing with Bugs in digiKam
Transcribed from Dmitri Popov's blog, 10 April 2013
Bugs are inevitable in complex software, and digiKam is no exception. So what should you do when you’ve discovered a bug in your favorite photo management application? As a non-programmer, the best thing you can do is to file the bug with the KDE bug tracking system (digiKam is managed as part of the KDE project). Submitting bugs can be considered a tedious task, but this greatly helps the developers to improve digiKam, and the KDE bug tracking system makes it relatively easy to file bugs and issues.
First of all, you have to create an account with the bug tracking system. To do this, point your browser to https://bugs.kde.org, press the button, and create a new account. Once you’ve done that, log in to the system using the specified credentials. Before you submit the bug, it’s important to make sure that it hasn’t already been filed in the system. Click the link, select from the drop-down list, enter the keywords that best describe the bug in the Words field, and press . Check the list of the matching results for entries similar to your bug.

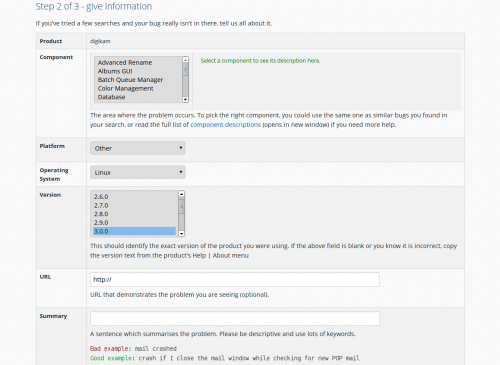
If the bug doesn’t appear in the search results, you can submit it to the system. Click the link at the top and select from the list of KDE projects. Since you’ve already checked for similar bugs, you can skip Step 1 and go directly to Step 2. The fields in the bug filing form contain brief descriptions and examples, which make it easier to provide the relevant data. It’s important to give as much information as possible, as this helps developers to reproduce, identify, and ultimately fix the bug. Double-check the entered information, and hit the button. You can view all your filed bugs using the link in the section.
