Kdenlive/Manual/Línea de tiempo
Línea de tiempo

La línea de tiempo es la parte principal de Kdenlive. Está compuesta por cuatro áreas diferentes (véase la captura de pantalla).
- 1 - Iconos para redimensionamiento de la pista. Estos dos iconos permiten aumentar o disminuir la altura de las pistas; permiten que dicho tamaño se ajuste desde la mitad hasta el doble de la altura predefinida. La altura predefinida para las pistas se pueden configurar en la ventana Configuración de Kdenlive.
- 2 - Timeline ruler. This shows the time in frames or in hh:mm:ss notation. The area highlighted in green is called the selection zone, and is useful if you want to render only a part of your project. Left clicking in the timeline ruler will move the timeline cursor and seek to that position. The Timeline ruler context menu allows you to manage Guides.
- 3 - Track header. This box shows some options for a track. First is the track name (Video 2 in the screenshot). That name can be changed by simply clicking in it. Below are icons to (prevent adding / removing clips), , and from this track. Right clicking in the track header will give you a context menu allowing to manage (add / delete) tracks.
- 4 - The track itself, this is where you can drop your clips.
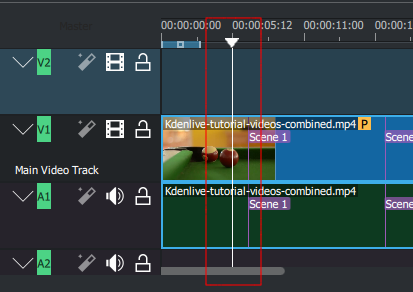
Timeline Cursor/Position Caret/Playhead

This indicates the position we are displaying in the Project Monitor. You can scroll the position by dragging the Timeline cursor (a.k.a Position Caret or Playhead).
Beginning with version 0.9.4, dragging the timeline cursor will play the audio of the clip (a.k.a. Audio Scrubbing). This feature only works if you have checked in Settings>Configure_Kdenlive>Playback.
Tracks
The timeline is made of tracks. There are two kind of tracks: audio and video. The number of tracks is defined when creating a new project in the Project Settings Dialog. Adding a clip in timeline can be achieved by dragging it from the Project Tree or the Clip Monitor.
See also
