KMail/Postfach-Assistent
Appearance
Postfach-Assistent

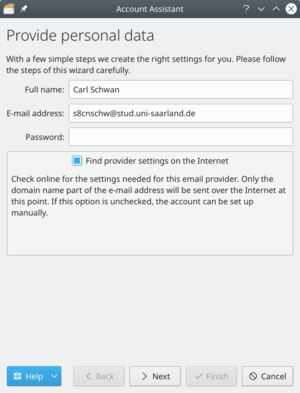
Bei ihrem ersten Start von KMail werden Sie von dem Postfach-Assistenten begrüßt.
Der Assistent führt Sie durch den Prozess der Erstellung eines neuen E-Mail-Postfachs. Die folgenden Schritte hängen stark davon ab wie viel der Assistent automatisch ermitteln kann. Unten folgt ein Überblick über die Schritte, die ihnen bei der Verwendung des Postfach-Assistenten begegnen können.
- Persönliche Daten angeben ist der erste Schritt des Assistenten. Er fragt die wesentlichen Informationen für das Postfach ab: , und das . Standardmäßig ist der Harken bei gesetzt. Der Assistent wird also versuchen die benötigten Informationen zum Einrichten direkt vom Server des E-Mail-Anbieters zu erhalten. Entfernen Sie den Harken, wenn Sie ein fortgeschrittener Nutzer sind und Sie die erweiterten Einstellungen selbst vornehmen möchten. Klicken Sie auf den -Knopf, wenn Sie fertig sind.
- Select Account Type screen will be next if the wizard cannot determine your account type. Select your account type from the list (if you do not know, you will need to contact your email provider). If your account type is not listed, click the button. Once your account type has been selected, click the button, and you will be presented with the Personal Settings screen.
- Provide personal data screen will show again with the server details it found if the wizard was successful at determining the account type. Click the button, and it will set up the account. Click the to complete the wizard and close the window.
- Personal Settings screen will show if you had to enter your account type. Verify that your information is correct on this page. Select if you want your messages available when you do not have an Internet connection (IMAP only). Click the button once finished.
Your account will then be set up, and you can click the button to complete the wizard and close the window.

