Archive:Kdenlive/Manual/Projects and Files/Clips/da: Difference between revisions
(Importing a new version from external source) |
(Importing a new version from external source) |
||
| Line 58: | Line 58: | ||
Du kan nu trække denne video ind i tidslinjen. | Du kan nu trække denne video ind i tidslinjen. | ||
=== Stop | === Stop-motion === | ||
See [[Special:myLanguage/Kdenlive/Manual/Project Menu/Stop Motion Capture|Stop Motion Capture]] | See [[Special:myLanguage/Kdenlive/Manual/Project Menu/Stop Motion Capture|Stop Motion Capture]] | ||
Revision as of 18:23, 16 July 2012
Klip (Video, Audio og billeder)
Knappen ![]() (Tiføj klip) frembringer en dialog til at tilføje klip, hvor du kan vælge video-, audio- og stilbilledklip, som skal føjes til projekttræet.
(Tiføj klip) frembringer en dialog til at tilføje klip, hvor du kan vælge video-, audio- og stilbilledklip, som skal føjes til projekttræet.
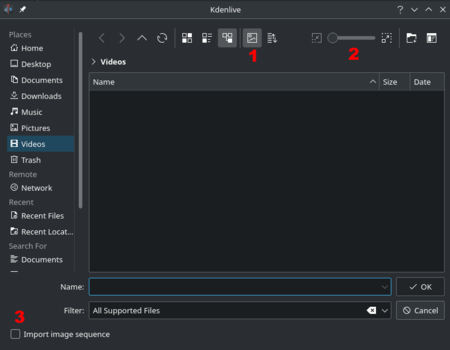
Knappen ![]() (mærket 1) slår forhåndsvisning af filer til og fra. Skyderen (mærket 2) ændrer størrelsen af miniaturerne. Afkrydsningsfeltet (mærket 3) gør det muligt at importere en sekvens af bileder, som kan bruges til at lave en stopmotion-animation. Afkrydsningsfeltet (mærket 4) er til ???
(mærket 1) slår forhåndsvisning af filer til og fra. Skyderen (mærket 2) ændrer størrelsen af miniaturerne. Afkrydsningsfeltet (mærket 3) gør det muligt at importere en sekvens af bileder, som kan bruges til at lave en stopmotion-animation. Afkrydsningsfeltet (mærket 4) er til ???
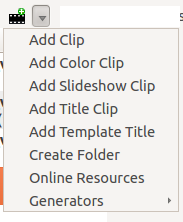
Du kan tilføje andre typer klip ved at vælge en kliptype i menu, som dukker op, når du klikker på drop-ned-knappen ved siden af knappen ![]() .
.
Farveklip =
Farveklip er billeder af en enkelt farve, som kan føjes til projekttræet. De kan bruges som en baggrund for titler.
Tilføj farveklip ved at vælge fra drop-ned-knappen ved siden af knappen ![]() .
.
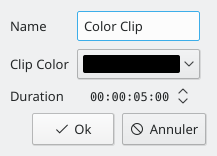
Dette frembringer dialogen Farveklip, hvorfra du kan vælge en farve og varighed.
Når du klikker på , så føjes klippet til projekttræet. Klippet kan så trækkes ud på tidslinjen. Farveklippets varighed kan også justeres på tidslinjen.
Titelklip
Se Titler
Diasshow-klip
Diasshow-klip er klip, som laves ud fra en række af stillbilleder. Funktionen kan bruges til at lave animationer fra en samling af stillbilleder eller til at lave et diasshow. Til det første formål bruges en kort framevarighed; til den andet en lang framevarighed.
For at lave et diassdhow vælger du fra drop-ned-knappen ved siden af knappen ![]() .
.
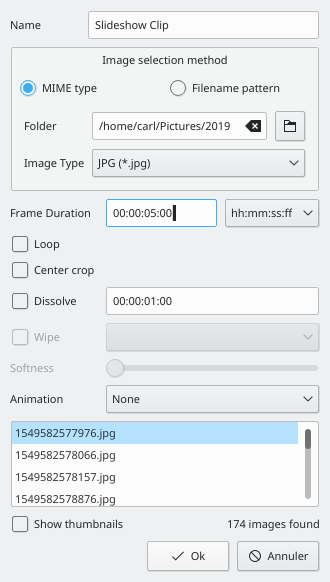
I dialogen Diasshow-klip vælger du under Metode til valg af billeder.
Navigér til den mappe, hvor billederne til dit diasshow ligger og vælg det første billede i diasshowet. De efterfølgende billeder vil blive valgt på grundlag af filnavns-algoritme, som bestemmer, hvad det næste billeds filnavn skal være.
Hvis for eksempel det første billede er100_1697.jpg, så vil det næste være 100_1698.jpg osv.
Vælg en passende framevarighed – dette definerer, hvor lang tid hvert billede vil blive vist.
Klik så på . En videofil bestående af alle billederne i mappen fra det første billede, som du valgte vil blive føjet til projekttræet.
Du kan nu trække denne video ind i tidslinjen.
Stop-motion
Proxy clips
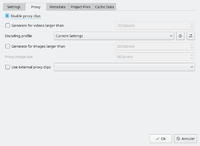
Proxy clips are one of the most useful inventions for editing if you are not working on a ultra high-end machine. The trick is that the original clips are replaced by clips with lower resolution clips, with a less complex codec. Video decoding, e.g. of H.264 clips, requires a lot of computing power, but computing power is required for rendering effects in real-time. If insufficient is available, replay will stutter. Proxy clips will require hardly any computing power at all, which allows fluent replay.
Proxy clips can be enabled / disabled for the current project in the Project Settings ().
To enable proxy clips by default for new projects, go to . See also Project Settings page
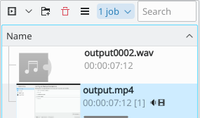
As soon as proxy clips are enabled, they can be generated for specific project clips in the Project Tree widget via the context menu . After you select for a clip a job will start to create a proxy clip. You can tell the progress of this job by looking at the little gray progress bar that appears at the bottom of the clip in the Project Tree - see picture. Clicking again disables the proxy for this clip.

Once the proxy clip creation has completed the proxy clip will appear with a P icon in the Project Tree.
When rendering to the output file, you can choose whether to use the proxy clips as well. It is by default disabled, but for a quick rendering preview it is useful.
Clip Properties
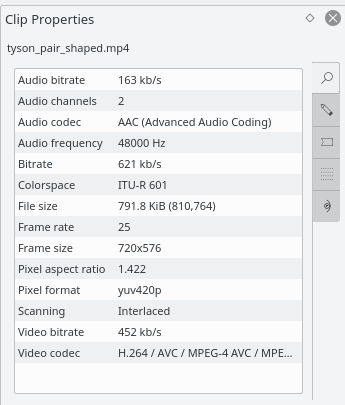
You can display and edit clip properties by selecting a clip in the project tree and choosing from the menu or from the right-click menu.
Video Properties
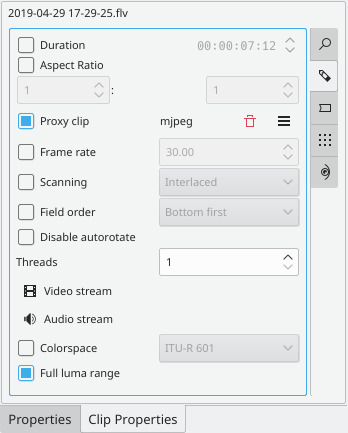
Advanced Properties
The advanced properties tab displays... well ... the advanced properties of the clip. You can edit the advanced properties here. For example you can use Force aspect ratio to tell a clip that seems to have forgotten it was 16:9 ratio that it really is 16:9 ratio.
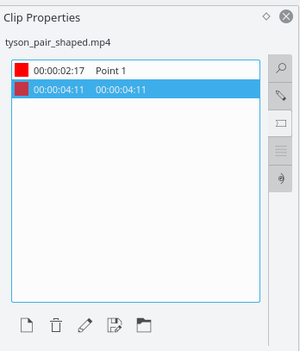
Markers
You can use the tab to add markers for certain points in the source file that are important.
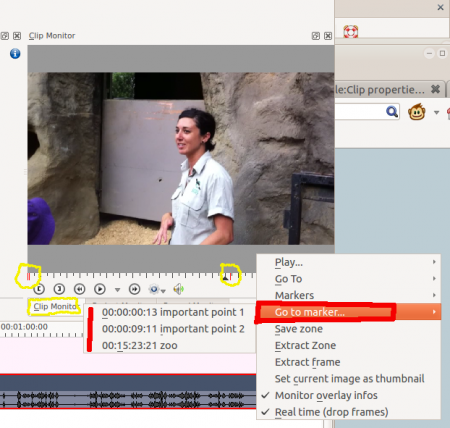
Once markers are put in your clip you can access them in the clip monitor under (see picture.) Also note how the markers appear as red vertical lines in the clip monitor (see yellow highlighted regions in the picture.)


