Kopete/Jabber/Messaging and sending files/es: Difference between revisions
(Created page with "Alternativamente, puedes crear tu propia sala de chat escribiendo su nombre en la línea <menuchoice>Sala</menuchoice>. Luego pulsa <keycap>Enter</keycap> o haz clic en <menuchoi...") |
(Created page with "Después de crear la sala de chat, verás un nuevo campo en la ventana de tu '''Kopete''' con el JID '''''[email protected]'''''. Trátalo como un contacto norma...") |
||
| Line 25: | Line 25: | ||
Alternativamente, puedes crear tu propia sala de chat escribiendo su nombre en la línea <menuchoice>Sala</menuchoice>. Luego pulsa <keycap>Enter</keycap> o haz clic en <menuchoice>Unirse</menuchoice> para unirte. | Alternativamente, puedes crear tu propia sala de chat escribiendo su nombre en la línea <menuchoice>Sala</menuchoice>. Luego pulsa <keycap>Enter</keycap> o haz clic en <menuchoice>Unirse</menuchoice> para unirte. | ||
Después de crear la sala de chat, verás un nuevo campo en la ventana de tu '''Kopete''' con el JID '''''nombredelasala@jabber.ejemplo.org'''''. Trátalo como un contacto normal, es decir, haz clic en este JID para chatear, etc. | |||
At this point you have set up a working Jabber client and are in principle able to chat with your contacts. But for a better experience of '''Kopete''', you are able to configure the application for your best needs. A set of [[Special:myLanguage/Kopete/Jabber/Useful_configuration_hints|Useful configuration hints]] is the content of the next page in this tutorial. | At this point you have set up a working Jabber client and are in principle able to chat with your contacts. But for a better experience of '''Kopete''', you are able to configure the application for your best needs. A set of [[Special:myLanguage/Kopete/Jabber/Useful_configuration_hints|Useful configuration hints]] is the content of the next page in this tutorial. | ||
Revision as of 23:24, 27 December 2010
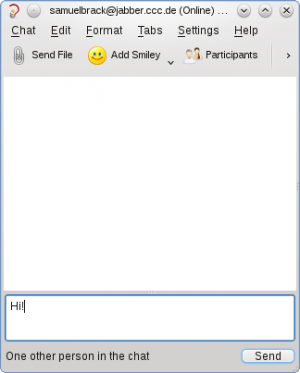
Puedes inciar una conversación con un contacto haciendo clic en el nombre. Una nueva ventana se abrirá y podrás escribir mensajes en el pequeño campo de la parte inferior, donde aparece el cursor. Cuando quieras enviar el texto, pulsa Enter o el botón . Tú y tu pareja podéis comunicaros ahora a través de Jabber.

Transferencia de archivos
Para transferir archivos a traves de Jabber haz clic en y selecciona el archivo que quieras enviar en la ventana emergente. Serás informado cuando se complete la transacción o si hay algún fallo por alguna razón.
Grupos de charla
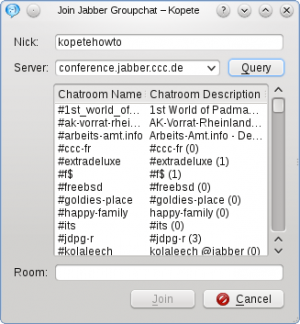
Jabber no solo es capaz de comunicarse con una persona. Puedes usar grupos de charla para hacer debates al estilo IRC, donde muchas personas pueden hablar entre sí. Para usar los grupos de charla, tienes que hacer clic con el botón derecho en el icono de Kopete en la barra de tareas, y seleccionar , donde "tuJID" se refiere a tu propio Jabber ID. Aparecerá una nueva ventana donde podrás unirte a una sala de chat.

Haz clic en para mostrar una lista de las salas de chat existentes en tu servidor Jabber. Selecciona una y pulsa la tecla Enter para entrar a esa sala.
Alternativamente, puedes crear tu propia sala de chat escribiendo su nombre en la línea . Luego pulsa Enter o haz clic en para unirte.
Después de crear la sala de chat, verás un nuevo campo en la ventana de tu Kopete con el JID [email protected]. Trátalo como un contacto normal, es decir, haz clic en este JID para chatear, etc.
At this point you have set up a working Jabber client and are in principle able to chat with your contacts. But for a better experience of Kopete, you are able to configure the application for your best needs. A set of Useful configuration hints is the content of the next page in this tutorial.
- ← Return to index
- Kopete/Jabber/Messaging and sending files/es
- Page 7 - Useful configuration hints →

