KPackageKit/it: Difference between revisions
Created page with "Fai clic per ingrandire" |
Created page with "Supponiamo, però, che hai bisogno di suggerimenti per sapere i pacchetti giusti. Questa volta sceglieresti <menuchoice>Trova per descrizione</menuchoice>. Per esempio digitando ..." |
||
| Line 22: | Line 22: | ||
{{Note_(it)|Le ricerche sono lente dato che deve essere interrogato il database dei pacchetti, sia il tuo locale che quello di ogni repository. Lo troverai lento mentre fa il lavoro<!--?-->.}} | {{Note_(it)|Le ricerche sono lente dato che deve essere interrogato il database dei pacchetti, sia il tuo locale che quello di ogni repository. Lo troverai lento mentre fa il lavoro<!--?-->.}} | ||
Supponiamo, però, che hai bisogno di suggerimenti per sapere i pacchetti giusti. Questa volta sceglieresti <menuchoice>Trova per descrizione</menuchoice>. Per esempio digitando "flaac" come termine di ricerca e poi selezionando <menuchoice>Trova per descrizione</menuchoice>, ti verrebbero presentati tutti i pacchetti collegati all'utilizzo dei file flaac. I pacchetti installati mostrano una X grigia (che utilizzerai se hai bisogno di rimuovere qualcosa) e quelli disponibili una freccia grigia verso il basso. | |||
So - you have a list of suitable files. Click on one of them and a panel opens giving you a description of the file. (Enlarge the image above to see this, then use your browser's <menuchoice>Back</menuchoice> button to return here.) There are three other options to display - a list of files included in the package, a list of dependencies (which will be automatically handled if you choose to install) | So - you have a list of suitable files. Click on one of them and a panel opens giving you a description of the file. (Enlarge the image above to see this, then use your browser's <menuchoice>Back</menuchoice> button to return here.) There are three other options to display - a list of files included in the package, a list of dependencies (which will be automatically handled if you choose to install) | ||
Revision as of 17:07, 12 December 2010
 |
Uno strumento grafico per gestire i tuoi pacchetti |
Funzioni
- Gestisce l'installazione e la disinstallazione dei pacchetti
- Gestisce l'aggiornamento dei pacchetti
- Può effettuare ricerche sulla base del nome del pacchetto, della descrizione o dei nomi dei file inclusi
- Supporta filtri per pacchetti
- installati o disponibili
- liberi o non liberi
- per utente finale o sviluppo
- grafici o solo testo
- Consente la visualizzazione in gruppi di pacchetti
Installare i pacchetti
Se conosci il nome del pacchetto, puoi semplicemente digitarlo nella barra di ricerca: in modo predefinito i pacchetti vengono trovati sulla base del nome.
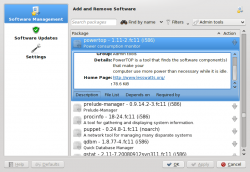
Supponiamo, però, che hai bisogno di suggerimenti per sapere i pacchetti giusti. Questa volta sceglieresti . Per esempio digitando "flaac" come termine di ricerca e poi selezionando , ti verrebbero presentati tutti i pacchetti collegati all'utilizzo dei file flaac. I pacchetti installati mostrano una X grigia (che utilizzerai se hai bisogno di rimuovere qualcosa) e quelli disponibili una freccia grigia verso il basso.
So - you have a list of suitable files. Click on one of them and a panel opens giving you a description of the file. (Enlarge the image above to see this, then use your browser's button to return here.) There are three other options to display - a list of files included in the package, a list of dependencies (which will be automatically handled if you choose to install)
and a list of applications that depend upon the package you choose.
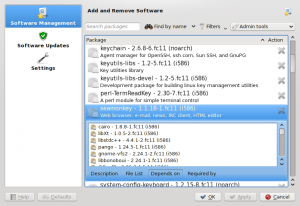
Having found the application that is best for you, click on the down-arrow and you will see both the package icon and the action icon become active. Click OK, and your package will be installed.
Updating your packages
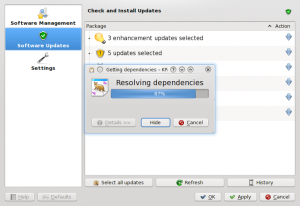
The second section lists any packages for which updates are available. As before, the repos and your installation are queried, so there is a delay. When the list is created, it is presented in groups.
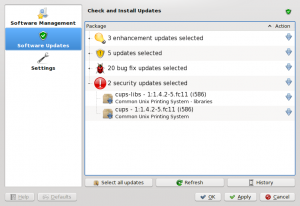
Again, dependencies are resolved when you agree to the download.
Configuration Options
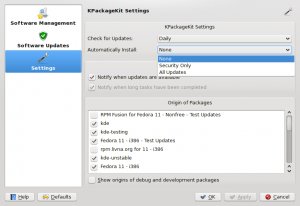
The third and final section of KPackageKit is the page. Here you can set the frequency of checking for updates, according to your need. The default is , but for an ultra-secure site you could choose Hourly, and for a lightly used one you can have or frequency.
Next is whether you want updates to be installed automatically. A nice touch is to be able to say that security updates should be automatically installed, but no other packages.
The next choice is whether you want the tray icon to notify you of available updates, and whether it should tell you when large jobs are finished.
The final section lists all the repos you have set up. Here you can enable or disable individual repos.
The Tray Icon
Finally, the tray icon can give you some information while your install or upgrade is progressing.

Here you can see the progress of your batch of updates or installs. A simple hover over the icon gives you a percentage reading of the job.

![40px]](/images.userbase/c/c1/Note-box-icon.png)