Kexi/Tutorials/Reports/Kexi Reports for Beginners/da: Difference between revisions
Importing a new version from external source |
Importing a new version from external source |
||
| Line 33: | Line 33: | ||
Klik nu på knappen <menuchoice>Save</menuchoice> for at gemme din forespørgsel. Du vil blive spurgt om et navn til den gemte forespørgsel; skriv {{Input|1=neurology}}. I skærmbilledet nedenfor bliver forespørgslens navn vist i kategorien <menuchoice>Queries</menuchoice> i feltet længst til venstre. | |||
Next, to create new report that will display data defined by the query, select the <menuchoice>Report</menuchoice> command from the <menuchoice>Create</menuchoice> tab of the main toolbar. | Next, to create new report that will display data defined by the query, select the <menuchoice>Report</menuchoice> command from the <menuchoice>Create</menuchoice> tab of the main toolbar. | ||
Revision as of 11:23, 19 July 2011
← Tilbage til Vejledninger/Rapporter
← Tilbage til vejledninger
Dette er en grundlæggende vejledning for begyndere i at lave rapporter i Kexi 2.2 eller nyere.
Vi begynder med en tabel ved navn masterlb vist i dataformat. I dette eksempel hedder felterne author, title, keywords og så videre. Før vi kan lave en rapport, skal vi lave en forespørgsel.
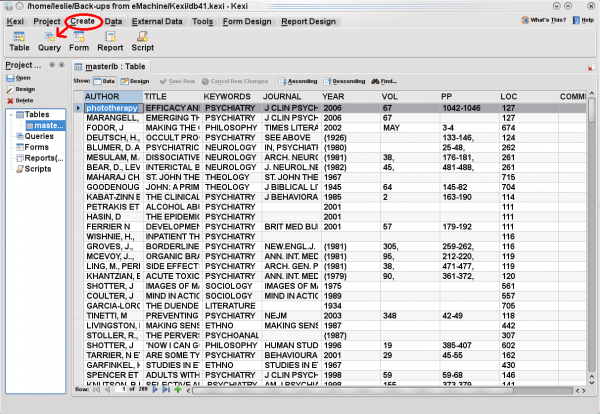
Vælg kommandoen i hovedværktøjslinjens faneblad .
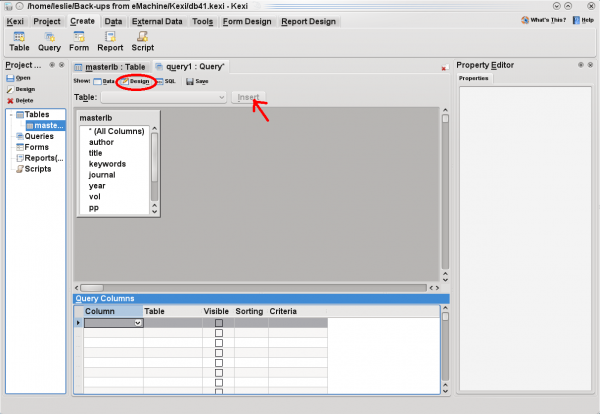
I -visningen vælger du den ønskede tabel fra komboboksen og klikker på knappen . En boks, som repræsenterer den valgte tabel dukker op med en liste af feltnavne. Dobbeltklik på hvert felt du vil have med i din forespørgsel.
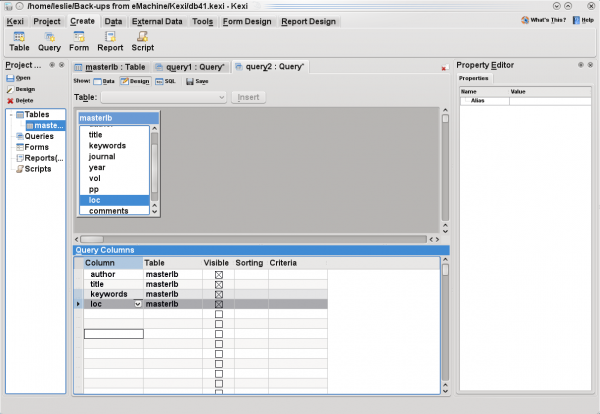
Søjlerne i forespørgslen bliver automatisk udfyldt med de felter, du valgte og med tabellens navn, som vist herunder.
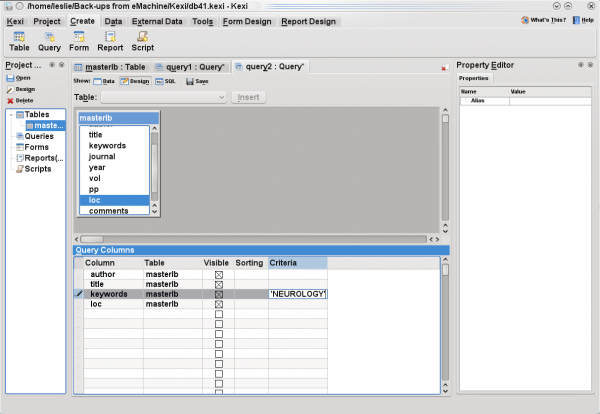
Lad os sige, at du vil have alle de dataposter, hvis felt keywords matcher NEUROLOGY med i din rapport. Under i linjen skriver du
'NEUROLOGY'
(Omgiv navnet med enkelte anførselstegn.)
Klik nu på knappen for at gemme din forespørgsel. Du vil blive spurgt om et navn til den gemte forespørgsel; skriv
neurology
. I skærmbilledet nedenfor bliver forespørgslens navn vist i kategorien i feltet længst til venstre.
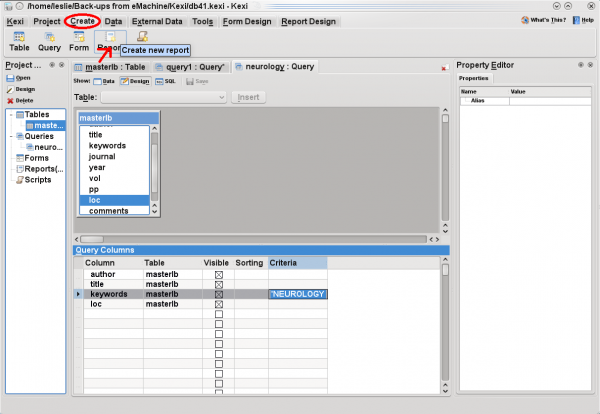
Next, to create new report that will display data defined by the query, select the command from the tab of the main toolbar.
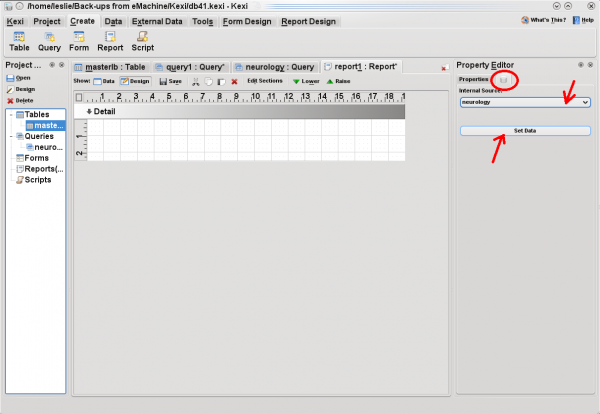
Click on the tab with database icon, to the right of . You will then be able to select an internal source for your report. The new query will be among the choices. Select it, and press the button.
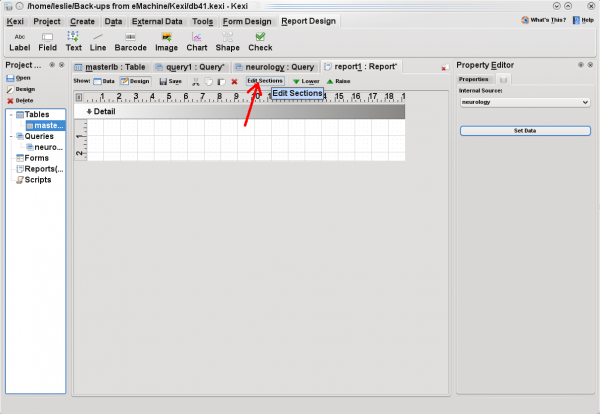
At this point, before entering your data, you may wish to click button to create a header and other format options:
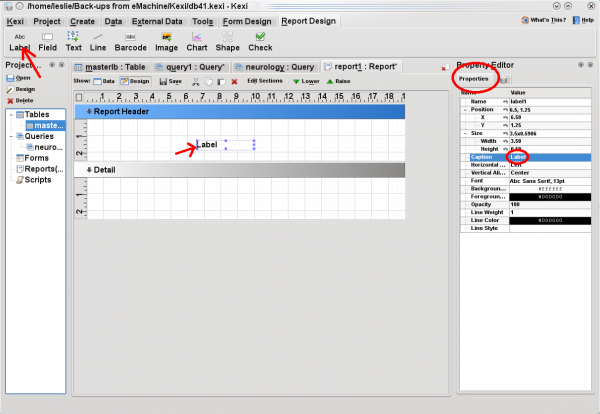
You may wish to put a label in your header. To do so, click on command from the tab of the main toolbar
and then click in the area.
Notice that in the you can enter your own to replace the word Label. You have many options for formatting the size, position, font, etc.
To enter fields into the body of your report, click on command in the tab of the main toolbar and then click in the section. In the , pressing on the property combo box displays a list of the fields provided by your query. For each field you create in the section, select desired field from the list. This binds the fields on your report to your data.
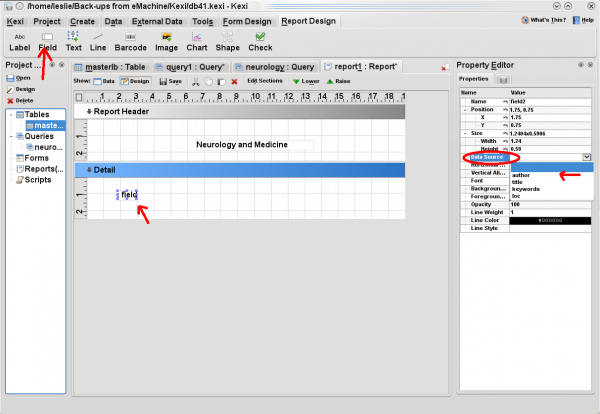
Again, there are many formatting options. Save your report using the button. Before you switch to data mode, if you have set the data for the first time, you may have to close and re-open the report [this may be a bug that will be fixed in later versions].
When you switch to data mode, you have several options, including command. Your printed report should look great!
Author undisclosed. Text adopted and edited by jstaniek.

