Archive:Kdenlive/Manual/Projects and Files/Clips/ru: Difference between revisions
Created page with "См. Титры" |
Created page with "Слайд-шоу - это клипы, созданные из серии неподвижных изображений. Эта функция может быть исполь..." |
||
| Line 40: | Line 40: | ||
=== Слайдшоу === | === Слайдшоу === | ||
Слайд-шоу - это клипы, созданные из серии неподвижных изображений. Эта функция может быть использована, чтобы сделать анимацию из коллекции фотографий или для создания слайд-шоу из фотографий. . | |||
To create a slide show clip choose <menuchoice>Add Slide Show Clip</menuchoice> from the <menuchoice>Add Clip</menuchoice> drop down list. | To create a slide show clip choose <menuchoice>Add Slide Show Clip</menuchoice> from the <menuchoice>Add Clip</menuchoice> drop down list. | ||
Revision as of 14:23, 26 October 2012
Клипы (Видео, Аудио и Изображения)
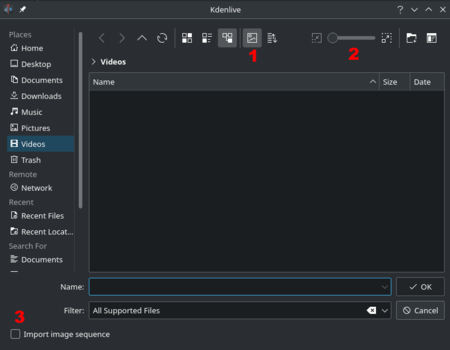
Кнопка ![]() (Добавить клип) вызывает диалог добавления клипа в котором вы можете выбрать видео, аудио клипы или фото для добавления в дерево проекта.
(Добавить клип) вызывает диалог добавления клипа в котором вы можете выбрать видео, аудио клипы или фото для добавления в дерево проекта.
Кнопка ![]() номер 1 включает/отключает предпросмотр файла. Слайдер номер 2 регулирует размер значков предварительного просмотра . Чекбокс номер 3 позволяет импортировать ряда изображений, которые могут быть использованы для покадровой анимации . Чекбокс номер 4 - для ???
номер 1 включает/отключает предпросмотр файла. Слайдер номер 2 регулирует размер значков предварительного просмотра . Чекбокс номер 3 позволяет импортировать ряда изображений, которые могут быть использованы для покадровой анимации . Чекбокс номер 4 - для ???
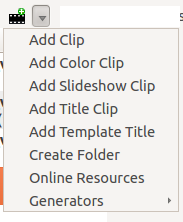
Вы можете добавить другие типы клипов, выбрав тип клипа в выпадающем меню рядом с кнопкой ![]() .
.
Цветовые клипы
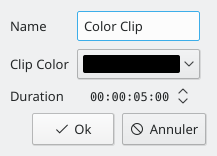
Цветовые клипы - это изображения одного цвета, которые могут быть добавлены в дерево проекта. Они могут быть полезны, для создания фона, например для титров названия.
Для добавления Цветового клипа, выберите из выпадающего списка рядом с кнопкой ![]() .
.
Это вызовет диалог ветовой клип, в котором вы можете выбрать цвет и продолжительность.
Нажатие
=== Клипы титров ===
См. [[Special:myLanguage/Kdenlive/Manual/Titles|Титры]]
=== Слайдшоу ===
Слайд-шоу - это клипы, созданные из серии неподвижных изображений. Эта функция может быть использована, чтобы сделать анимацию из коллекции фотографий или для создания слайд-шоу из фотографий. .
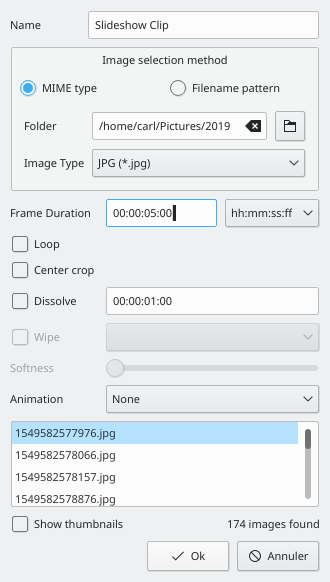
To create a slide show clip choose <menuchoice>Add Slide Show Clip from the drop down list.
From the Slideshow clip dialog choose as Image selection method.
Browse to the location of the images that go to make up your slideshow and select the first image that will make up the slideshow. The subsequent images that are to be used in the slide show will be selected based on some sort of filename algorithm that predicts what the next image file name should be.
For example if the first image is 100_1697.jpg then the next will be 100_1698.jpg, etc.
Select an appropriate frame duration - this defines how long each image will appear for.
Then hit . A video file made up of all the images in the folder from where you selected the first frame file from will be added to the project tree.
You can then drag this video to the timeline.
Создать каталог
see Create Folder
Online Resources
see Project Menu - Online Resources
Стоп кадр
Прокси клипы
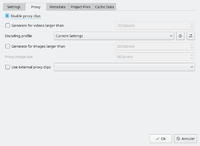
Proxy clips are one of the most useful inventions for editing if you are not working on a ultra high-end machine. The trick is that the original clips are replaced by clips with lower resolution clips, with a less complex codec. Video decoding, e.g. of H.264 clips, requires a lot of computing power, but computing power is required for rendering effects in real-time. If insufficient is available, replay will stutter. Proxy clips will require hardly any computing power at all, which allows fluent replay.
Proxy clips can be enabled / disabled for the current project in the Project Settings ().
To enable proxy clips by default for new projects, go to . See also Project Settings page
As soon as proxy clips are enabled, they can be generated for specific project clips in the Project Tree widget via the context menu . After you select for a clip a job will start to create a proxy clip. You can tell the progress of this job by looking at the little gray progress bar that appears at the bottom of the clip in the Project Tree - see picture. Clicking again disables the proxy for this clip.

Once the proxy clip creation has completed the proxy clip will appear with a P icon in the Project Tree.
When rendering to the output file, you can choose whether to use the proxy clips as well. It is by default disabled, but for a quick rendering preview it is useful.
Свойства клипа
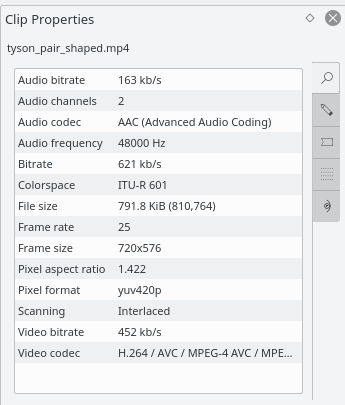
You can display and edit clip properties by selecting a clip in the project tree and choosing from the menu or from the right-click menu.
Свойства видео
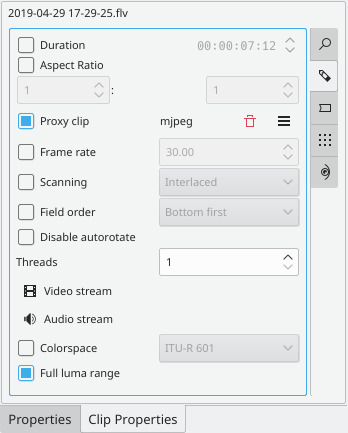
Дополнительные свойства
The tab displays... well ... the advanced properties of the clip. You can edit the advanced properties here. For example you can use Force aspect ratio to tell a clip that seems to have forgotten it was 16:9 ratio that it really is 16:9 ratio.
См. Полный яркостный диапазон для подробностей о значении этого параметра
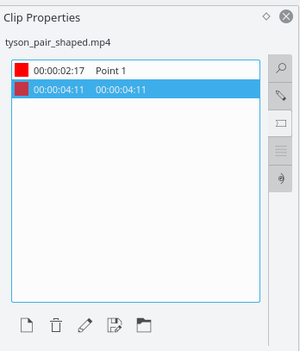
Маркеры
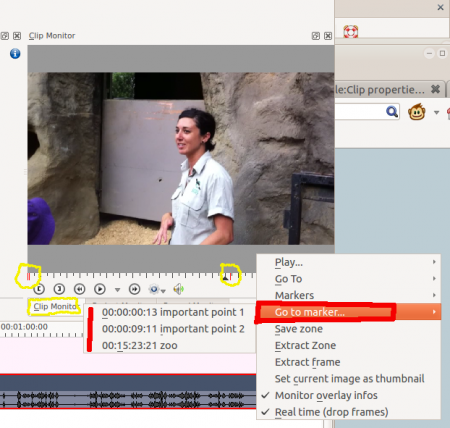
You can use the tab to add markers for certain points in the source file that are important. However, it is probably eaiser to add markers to your clips via the clip monitor because using it allows you preview the file at the location where you are adding the marker.
Once markers are put in your clip you can access them in the clip monitor by right clicking and selecting (see picture.) Also note how the markers appear as red vertical lines in the clip monitor (see yellow highlighted regions in the picture.) You can turn on the display of the marker comments in the time line too - See Show Marker Comments
Markers can also be added to clips on the timeline. Right click the Clip and choose . Markers added this way also appear in the clip in the project tree.
Генераторы
Обратный отсчет
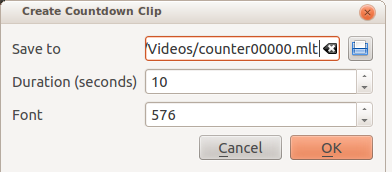
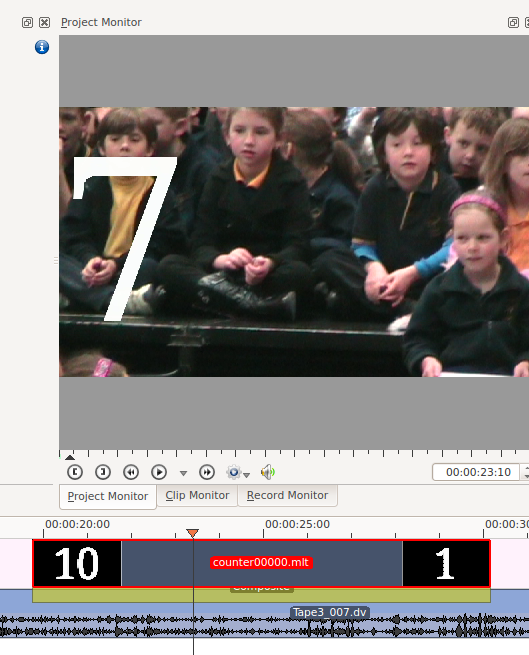
Это создает клип таймера обратного отсчета, которые можно добавить на Линию времени (Timeline).
The font number in the dialog is a font size in pixels. However Kdenlive displays the font in a zoomed in fashion and thus lower numbers appear to be lower quality. See the pic below which is a font number 10 compared to the screen shot above which is font number 576.
It appears that you need a pan and zoom effect to make the font of the countdown smaller
Шум
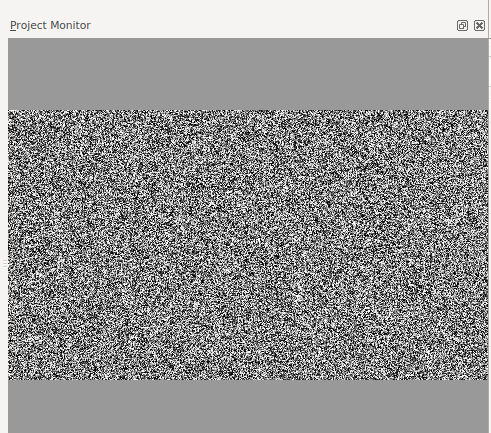
Создаёт видеоклип шум - как "снег" с шумом из аналогового телевизора .


