Amarok/QuickStartGuide/TheAmarokWindow: Difference between revisions
Appearance
Marked this version for translation |
→Using the Amarok window to manage and play your music: clarified first step |
||
| Line 30: | Line 30: | ||
<!--T:12--> | <!--T:12--> | ||
# Create a playlist by selecting some of the | # Create a playlist by selecting some of the tracks in your collection, which you will find listed in the ''Media Sources'' pane, and send your music to the ''Playlist'' pane. | ||
# Play the music in your playlist, using the ''Playlist | # Play the music in your playlist, using the ''Playlist'' pane and/or the ''Toolbar''. | ||
<!--T:14--> | <!--T:14--> | ||
Revision as of 20:23, 8 October 2010
The Amarok window
The Amarok window is the default user interface designed to let you rediscover your music. In addition, it is also designed to give you as much visual information about your music as possible. While many users will find the default layout suitable for their needs, the layout is fully customizable if you prefer another layout.
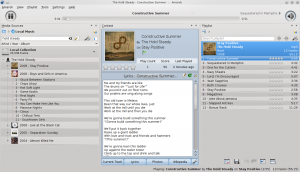
Default layout of the Amarok window
Upon installation, Amarok will look like this:

The Amarok window has four main components:
- right under the top-level menus is the Toolbar that lies above three panes:
- your Media Sources (music collection and other media) in the left pane,
- the Context pane in the center, and
- the Playlist in the right-hand pane
Using the Amarok window to manage and play your music
Playing music using Amarok usually takes two steps:
- Create a playlist by selecting some of the tracks in your collection, which you will find listed in the Media Sources pane, and send your music to the Playlist pane.
- Play the music in your playlist, using the Playlist pane and/or the Toolbar.
Additionally, you may wish to transfer some of your music to a mobile music player, such as an iPod. The next sections will help you with these tasks.
