Working with Google Calendar/da: Difference between revisions
Importing a new version from external source |
Importing a new version from external source |
||
| Line 12: | Line 12: | ||
For at synkronisere Google Calendar med '''Kontact''' går du først til '''Kontacts''' <menuchoice>Kalender</menuchoice>-område ved at vælge det i navigationsfeltet til venstre. Åbn så konfigurationsdialogen ved at vælge menuen <menuchoice>Indstillinger -> Indstil kalender</menuchoice>. | For at synkronisere Google Calendar med '''Kontact''' går du først til '''Kontacts''' <menuchoice>Kalender</menuchoice>-område ved at vælge det i navigationsfeltet til venstre. Åbn så konfigurationsdialogen ved at vælge menuen <menuchoice>Indstillinger -> Indstil kalender</menuchoice>. | ||
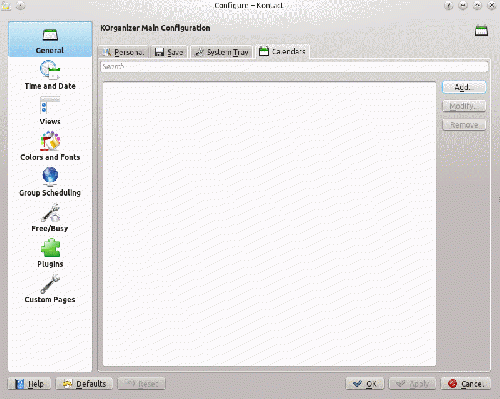
Vælg fanebladet <menuchoice>Kalendere</menuchoice> i gruppen <menuchoice>Generelt</menuchoice> for at gøre klar til at tilføje Google-kalenderen. Vælg<menuchoice>Ressource til DAV-groupware</menuchoice> (du skal måske først oprette denne kalenderressource ved at klikke på <menuchoice>Tilføj...</menuchoice> og vælge den i listen). Der dukker nu en ny dialog op, hvor du bliver bedt om at angive dine akkreditiver til login på groupware-serveren'''; klik på <menuchoice>Annullér</menuchoice>. | |||
Another window will appear, and here you can enter the location of your Google Calendar resource. In the ''Server Configuration'' area, click on <menuchoice>Add</menuchoice>. Now, this opens the last window. Here, ensure that ''CalDAV'' is selected as the Remote calendar access protocol. | Another window will appear, and here you can enter the location of your Google Calendar resource. In the ''Server Configuration'' area, click on <menuchoice>Add</menuchoice>. Now, this opens the last window. Here, ensure that ''CalDAV'' is selected as the Remote calendar access protocol. | ||
Revision as of 11:06, 13 October 2012
Introduktion
Der er forskellige måder at synkronisere Google Calendar med kalenderen i kdepim. Hvis du for eksempel allerede har integreret med Google Contacts ved hjælp af |denne guide, så er biblioteket libgcal0 allerede installeret, men metoden herunder er et mere effektivt alternativ til at bruge Akonadi-forbindelsen.
Integration af Google Calendar med Kontact
For at synkronisere Google Calendar med Kontact går du først til Kontacts -område ved at vælge det i navigationsfeltet til venstre. Åbn så konfigurationsdialogen ved at vælge menuen .
Vælg fanebladet i gruppen for at gøre klar til at tilføje Google-kalenderen. Vælg (du skal måske først oprette denne kalenderressource ved at klikke på og vælge den i listen). Der dukker nu en ny dialog op, hvor du bliver bedt om at angive dine akkreditiver til login på groupware-serveren; klik på .
Another window will appear, and here you can enter the location of your Google Calendar resource. In the Server Configuration area, click on . Now, this opens the last window. Here, ensure that CalDAV is selected as the Remote calendar access protocol.
The remote URL takes the form: https://www.google.com/calendar/dav/GoogleCalendarID/events/
For your main calendar, the GoogleCalendarID is your Google account (Gmail address). The Username is also your Google account while the Password field is your Google account password.
After this information is entered, pressing the button will enable Kontact to sync with Google to discover your calendar. Your calendar should display in the Discovered Collections window below.
Press and allow KDE Wallet integration as Always for convenience. To add additional calendars, simply click the button to follow the same procedure as above.
Press to finish adding the Google Calendar and then it should start to synchronize with Kontact. In the calendars list below, check the box beside your Gmail address to enable the display of a calendar. To refresh events, simply press F5.
Animated GIF Tutorial

Congratulations, you have successfully setup Google Calendar Integration with Kontact!


